www.morsona.com
[ 24 ]
[ 25 ]
internal parts
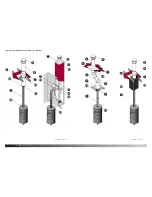
The flame-path equipment - consisting of firebricks/vermiculite liners, bottom and front grates,
ceramic glass, baffle plate assembly, pilot air assembly and chimney connector collar are the main
components that are subjected to the rigors and heat of the fire; as a result it should be expected that
these parts will need to be replaced from time to time as a matter of routine.
NOTe: The flame-path equipment, the ceramic rope and the paint finish are not covered by the
Morsø manufacturers warranty.
Replacement parts can be purchased through your approved Morsø dealer. We recommend that all
damaged or distorted parts be replaced as soon as possible to avoid collateral damage.
Should the baffle plate assembly become distorted from overheating, the combustion system will no
longer function properly and the heater’s efficiency will be severely compromised. Replace it as soon as
possible.
removing the baffle assembly
if the baffle is damaged or warped due to overheating, it is vital to replace it at once.
First, carefully remove the vermiculite liners from the internal sides of the combustion chamber
(firebox). Then, loosening the 3 x M6 allen screws that secure the baffle assembly in place; these
are located along the internal back wall of the firebox. The baffle can now be carefully lifted and
removed from the stove through the door.
The new baffle should be fitted and fastened before the side bricks are replaced. Ensure that all parts
are fitted correctly before lighting up the stove.
Door rope gasket
The ceramic rope gasket around the perimeter of the door(s) may harden over a period of time. It
should be checked for air-tightness at least once every year.
To check for air-tightness simply run a lit incense stick around the perimeter of the door when the
stove is in operation; if the fine trail of smoke is drawn into the stove at any point, the gasket needs
replacing. Alternatively, close the door(s) onto a slither of paper; if the paper can be easily removed with
little force, it’s time to change your door gasket.
Genuine Morsø door rope gasket kits (inc’ adhesive) are available from your approved Morsø dealer.
Cleaning the Heater and the Chimney Connector
It is recommended that the area above the baffle plate assembly and around the chimney connector
collar is inspected once a month for any soot or debris collection. If soot or debris is allowed to accu-
mulate in this area, it could adversely affect the chimney draft and general operation. Typical symptoms
of blockage are poor and sluggish draft, smoke spillage when opening the door, dirty glass and dirty
firebox liners.
In any case the chimney should be inspected at least once every year, preferably in the summer to
ensure that other blockages such as birds nest have not occurred.
Ash disposal
The level of ash-removal is dependent upon the level of use, the type of wood burned and the strength
of chimney draft. A 1” ash bed should be maintained during general and excess ash should be removed
when necessary.
Where the heater is equipped with an ash pan, excess ash should be emptied regularly. A full ash pan
allowed to build up underneath the bottom grate could trap heat and lead to premature failure of the
grate/pilot air assembly.
Ceramic glass replacement
Ceramic glass cannot be recycled because it has a higher melting point than ordinary glass.
If ceramic glass is mixed with ordinary glass, the recycled material is spoiled and the recycling process
may be halted. Ensure the heater’s glass does not end up with ordinary recycled waste. It should be
presented separately to your local recycling center as ceramic glass.
Revisions
Rev.
Sign.:
Title:
Drawing no.:
1:5
Glasmontering 7600 NA
Glass mounting 7600 NA
Morsø 7600
RSV
01.03.2010
A4
Assembly
128,21 kg
Date of print: 01-03-2010
U:\udv\Tegninger\7600\7600 Assembly.SLDASM
7600-119 a
-
Itemno.:
This drawing is Morsø Jernstøberi A/S' property and must not be sold, lended or copied without any written authorization from the company.
Material:
Weight:
Model no.
Drawingtype:
Location of file:
Scale:
Format:
Released:
Construction:
Date:
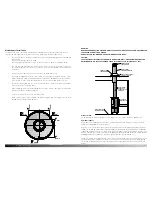
replacement procedure
1. Detach the door from the body (See door removal section) and place face-down on a protective,
non-abrasive surface.
2. Unscrew the screws that hold the glass clips. If the stove has been used for a number of years the
screws may be tough to remove. DO NOT FORCE THEM. If the screws are tight, try applying heat
(blow-torch) directly onto the screw head.
In the event that a screw does sheers off remove the remaining thread by drilling down its center
with 1/8 inch high speed steel drill bit. Smaller drill bits may be successful, but do not use a larger
bit. Make sure the bit stays away from the edge of the screw thread as this may damage the thread
in the door casting.
3. Remove the old ceramic gasket material and clean the surface beneath with wire wool or emery
paper to remove any loose particles.
4. Place the new gasket material in position around the perimeter of the window area, making sure to
pinch it in such a way that all four sides make a continuous seal. Leave no gaps.
5. Place the new ceramic glass in position onto the new gasket and fasten by hand using new screws.
6. Finally, give each of the screws an extra half turn or so, just enough that the glass is held tight and
will not dislodge when cleaning. IMPORTANT! Do not over-tighten the screws as this may put
excessive pressure on the glass, resulting in cracking. To reduce the risks of accidental breakage
avoid striking the glass, slamming the door or closing it onto a protruding log.


