background image

MAINTENANCE AND STORAGE
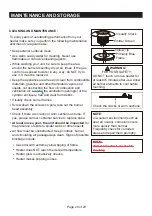
NOTE:

Wait until heater is cool before 
covering.

Turn the control knob to "OFF" position.

 Turn LP cylinder to "OFF" position.

Store heater upright in an area sheltered from direct
contact with inclement weather (such as rain, sleet, hail,
snow, dust and debris).

If desired, cover heater to protect exterior surfaces and 
to help prevent build up in air passages. 

Spiders and insects can nest in burner or orifices. This 
dangerous condition can damage heater and render it 
unsafe for use. Clean burner holes by using a heavy-duty 
pipe cleaner. Compressed air may help clear away
smaller particles.

Carbon deposits may create a fire hazard. Clean reflector, 
thermocouple and emitter screen with a dry cloth if any    
carbon deposits develop.

STORAGE:

Between uses:

During periods of extended inactivity or when
transporting;

Turn the control knob to "OFF" position.

Disconnect the regulator from the LP Cylinder by turning


counter-clockwise and move to a secure, well ventilated
location outdoors. DO NOT store in location that will
exceed 125 degrees F.


Store heater upright in an area sheltered from direct

If desired, cover heater to protect exterior surfaces and to 
help prevent build up in air passages. 

Page 21 of 23

contact with inclement weather (such as rain, sleet, hail,
snow, dust and debris).

Summary of Contents for FSPTMV5004

Page 1: ...TO ASSEMBLE OR OPERATE THIS PRODUCT Adult assembly required Keep screws and parts out of reach of children Customer Service 866 814 0585 8 00am to 8 00pm Monday thru Friday Eastern Standard Time 8 00a...

Page 2: ...NING DANGER WARNING WARNING This appliance can produce carbon monoxide which has no odor Never use this appliance in an enclosed space such as a camper tent or building CARBON MONOXIDE HAZARD Using it...

Page 3: ...rts and Hardware List For your convenience some parts may be pre assembled or attached to heater components If all parts are not included do not attempt to assemble heater Call the toll free number on...

Page 4: ...ee from combustible materials gasoline and other flammable vapors and liquids Keeping the ventilation opening s of the This appliance shall be used only in a well ventilated space and shall not be use...

Page 5: ...le Provided with a listed overfilling prevention device and provided with a cylinder connection device compatible with the connection for the appliance Storage of an appliance indoors is permissible o...

Page 6: ...act customer service for replacement parts SPECIFICATION Certification CSA Height 90 55 2 30m 32 28 82cm LP 11 W C Page 5 of 23 Diameter of reflector Rated heat input 40 000 BTU hr Fuel Gas Supply 20l...

Page 7: ...ST Please check the contents of the packaging to ensure all parts are included If missing parts please contact customer service TOOLS AND PARTS CC BB AA A B HH C DD J D E EE FF F G H GG I Page 6 of 23...

Page 8: ...river 1 2 TOOLS AND PARTS Part Description Picture A Quantity 1 4 1 1 1 1 1 1 1 1 B C D E F G H I Center Reflector Cap Reflector Shields Burner Head Upper Pole Lower Pole Decorative Cap Base Cylinder...

Page 9: ...0 Screw M6 x 20 Bolt DD EE M6 x 14 Bolt M5 x 12 Flat Bolt FF GG 2 Please check the contents of the packaging to ensure all parts are included HARDWARE Picture Quantity 12 18 15 6 4 4 HH M6 x 70 Double...

Page 10: ...IS APPLIANCE REQUIRES INSTALLATION BY A COMPETENT PERSON PROPER ASSEMBLY IS THE RESPONSIBILITY OF THE INSTALLER ASSEMBLY INSTRUCTIONS Attach the lower pole E to the base G with 4 M6 x 20 bolts FF then...

Page 11: ...NING THIS APPLIANCE REQUIRES INSTALLATION BY A COMPETENT PERSON PROPER ASSEMBLY IS THE RESPONSIBILITY OF THE INSTALLER ASSEMBLY INSTRUCTIONS C E J D D C DD EE M6 x 14 Bolt x 4 EE M5 x 12 Flat Bolt x 6...

Page 12: ...four reflector shields B with 12 M6 x 10 screws AA 12 6mm washers BB and 12 M6 nuts CC WARNING THIS APPLIANCE REQUIRES INSTALLATION BY A COMPETENT PERSON PROPER ASSEMBLY IS THE RESPONSIBILITY OF THE I...

Page 13: ...PROPER ASSEMBLY IS THE RESPONSIBILITY OF THE INSTALLER ASSEMBLY INSTRUCTIONS Step 8 Step 7 Step 7 Step 8 Fill sand into the hole till full BB CC Hardware Used M6 Nut 6mm Washer BB CC Place the reflec...

Page 14: ...alve Close and latch the door Note Make sure to check for leaks after attaching the cylinder For instructions refer to the page14 SAFETY CHECK To remove the regulator turn off the cylinder valve and t...

Page 15: ...cylinder connection Turn on gas cylinder valve Inspect the 3 connections and look for bubbles 4 If no bubbles appear the connection is safe 5 If bubbles appear there is a leak Loosen and re tighten th...

Page 16: ...look for bubbles e If no bubbles appear the connection is safe f If bubbles appear there is a leak Shut off the LP gas cylinder valve loosen and then re tighten this connection g Check again for leak...

Page 17: ...ntrol knob to OFF position 2 Turn LP cylinder gas valve to fully open position 3 Push in the gas control knob and turn counter clockwise to LOW position this will light the burner If needed keep depre...

Page 18: ...wise to HIGH position If you want a lower temperature turn the control knob clockwise to the LOW position Flame Characteristic The flame pattern at the emitter screen should be visually checked whenev...

Page 19: ...oke indicating an obstruction of airflow through the burners Operation pressure checked If the flame is very small this is because the supply pressure is not enough Please refill gas cylinder Re light...

Page 20: ...the heating of outdoor patios decks spas pools and open working areas Always make sure that adequate fresh air ventilation is provided Follow the spacing tolerances shown in the following figure 1 at...

Page 21: ...Heater does NOT reach the desired temperature Heater glow is excessively uneven Heater makes popping noises Visually check burner flames Screw down the screws on pole take out the burner head assembly...

Page 22: ...eaner Compressed air may help clear away smaller particles Carbon deposits may create a fire hazard Clean reflector thermocouple and emitter screen with a dry cloth if any carbon deposits develop STOR...

Page 23: ...e orifice Ignition pin fails Call customer service Gas cylinder valve is closed Turn gas cylinder valve to ON Pressure is low Valve broken Turn gas cylinder valve OFF and Call customer service replace...

Page 24: ...rge for installation by the consumer Defects or damage caused by the use of other than genuine parts are not covered by this warranty This warranty shall be effective from the date of purchase as show...

Page 25: ...e plus petite 8 Base en aluminium coul 9 Base en fonte poteau et roulettes 1 Poteau 1 pi ce sans roulettes 2 Poteau 1 pi ce avec roulettes 3 Poteau 2 pi ces sans roulettes 4 Poteau 2 pi ces avec roule...

Reviews: