7
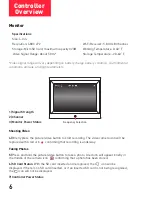
1. lnstall 4 “AAA” alkaline batteries in the monitor’s battery compartment. Please check that the
batteries’ positive and negative terminals are oriented correctly.
2. lnstall 4 “AA” alkaline batteries in the controller’s battery compartment. Please check that the
batteries’ positive and negative terminals are oriented correctly.
3. With the drone’s battery installed, slide the
Power
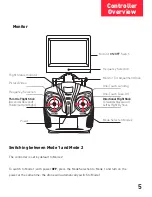
switch on the side of the monitor to
ON
. The
monitor will illuminate.
4 Slide the
Power
switch on the front of the controller to
ON
. The controller will beep twice and
the monitor will display real-time video from the drone.
Channel Selection
The Pro Live-4000’s controller features 8 selectable channels for optimum 5.8 GHz video signal
strength. The controller is set to channel 1 at the factory and will default to that channel each
time it is powered on.
If the video image becomes distorted due to environmental conditions such as interference from
other devices, you may select another channel:
First, slide the Power switch on the side of the monitor to
ON.
Second, slide the Power switch on the front of the controller to
ON.
To select a channel first do so on the monitor, secondly on the controller:
Channel
2
3
4
5
6
Monitor
Controller
Briefly press the
Frequency
Selection
button once.
Briefly press the
Frequency
Selection
button
once. The controller will beep
twice.
Briefly press the
Frequency
Selection
button
twice. The controller will beep
three times.
Briefly press the
Frequency
Selection
button
three times. The controller will beep
four times.
Briefly press the
Frequency
Selection
button
four times. The controller will beep
five times.
Briefly press the
Frequency
Selection
button
five times. The controller will beep
six times.
Briefly press the
Frequency
Selection
button twice.
Briefly press the
Frequency
Selection
button three times.
Briefly press the
Frequency
Selection
button four times.
Briefly press the
Frequency
Selection
button five times.
Controller
Operation


