28
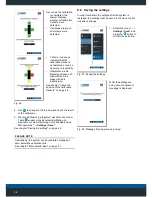
As soon as the calibration
is completed, the
system displays
whether all calibration
markers were
detected.
• If all areas are green,
all markers were
detected.
• Yellow or red zones
indicated that the
calibration marker is
not detected or can be
observed only partially.
• Überprüfen sie die
Markerpositionen und
wiederholen Sie in
diesem Fall die
Kalibrierung.
See chapter "Check the
position of the calibration
markers" on page 26.
Fig. 26
4. Use
to change to the top view and check the result
of the calibration.
5. War die Kalibrierung erfolgreich, wechseln Sie mit der
Taste
wieder in die Benutzeroberfläche und
Speichern sie die Kalibrierung durch Auswählen des
Menüpunktes "
... / Settings / Save".
See chapter "Saving the settings" on page 28.
PLEASE NOTE
Alternatively, the system can be calibrated manually if
semi-automatic calibration fails.
See chapter "Manual calibration" on page 31.
6.6 Saving the settings
In order to maintain the settings after the system is
restarted, the settings must be saved in the video control
unit after a change.
1.
Select the menu “
... /
Settings / Save"
and
press the
button to
confirm the selection.
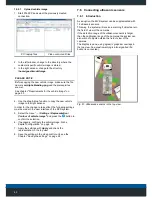
Fig. 27: Saving the settings
While the settings are
being safe, the adjacent
message is displayed.
Fig. 28
: Message “Saving process running”

