background image

33

34

9. OTHER INFORMATION

9.1 Options

We offer below options to add functionality for your scooter, please contact the authorized 

dealer for more information. 
•  We reserve the rights to modify or change the accessories.

•  Please read through the cautions for battery and charger (section 6) if optional lead acid 

battery is purchased.

•  Scooter folding / unfolding process may be interfered with optional accessories (armrests, 

bags) equipped. Please remove these accessories before folding/unfolding the scooter 

(accessories such as optional bigger battery will not affect the folding / unfolding, you 

don’t have to remove the battery box).

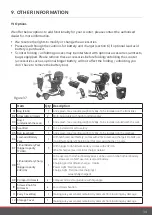
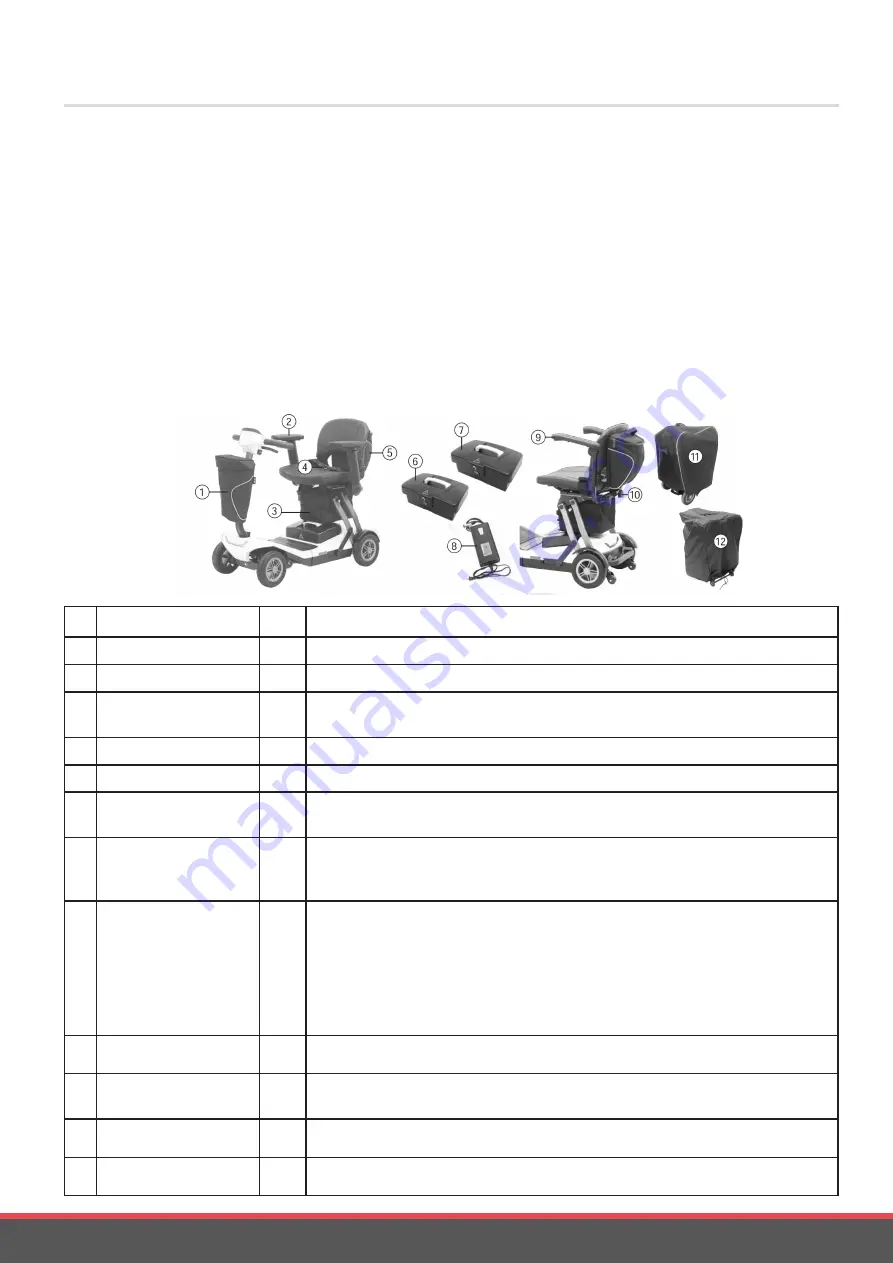
Item

Qty Description

01 Bag (Front)

1

Anti-splash, max. loading weight of 2Kgs. To be installed on the front tiller.

02 Adjustable Armrests

2

Multi-Adjustable with height and flip angles.

03 Bag 1

(underneath the seat)

1

Anti-splash, max. loading weight of 2Kgs. To be installed underneath the seat.

04 Seat Belt

1

To be installed for extra safety.

05 Bag (seatback)

1

Anti-splash, max. loading weight of 2Kgs. To be installed on the seatback.

06 Lead-acid Battery 

Pack

1

With 12Ah lead-acid battery, comes with 24/2A lead-acid charger( Do NOT use 

it on lithium battery) Charging port for lead-acid charger : 3 ports.

07

Lithium Battery Pack 

(bigger capacity 

17.4AH)

1

With bigger 17.4Ah lithium battery, comes with 24V/4A
lithium charger. (see item 8 for charger details)

08

Lithium Battery Charg-

er

(bigger capacity 

24V/4A)

1

To be used on 17.4 lithium battery pack, can be used on 11.6Ah lithium battery 

also. However, do NOT use it on lead-acid battery.
Charging port for lithium charger : 4 ports
Power Light : Red (power on)
Charge Light : Red (normal charging) /
                          Green(fully charged)

09 Compact Armrests

2

Compact armrests adjustable with flip angle.

10 Screws Knob for 

Armrests

2

For armrests fixation.

11 Carry Cover Bag

1

making sure your scooter remains dry and safe from incurring any damage.

12 Storage Cover

1

making sure your scooter remains dry and safe from incurring any damage.

Figure 37

Summary of Contents for eFlexx

Page 1: ...User Manual PRODUCT CODE EF001...

Page 2: ...OTER 13 4 1 IDENTIFICATION OPERATION OF CONTROL PANEL 4 2 OPERATION OF MAIN SWITCH 4 3 OPERATION OF THROTTLE 4 4 OPERATION OF FREE WHEELING 4 5 TILLER HEIGHT ADJUSTMENT 4 6 SEAT ADJUSTMENT DISMANTLE 5...

Page 3: ...an electric scooter We pride ourselves on providing safe and comfortable products Our goal is to ensure your complete satisfaction We sincerely hope you enjoy your eFlexx mobility scooter Please read...

Page 4: ...es not exceed the maximum permissible load of the device Never use the mobility device to transport more than one person including children You should not assemble maintain and operate the mobility sc...

Page 5: ...uch as rain or show as this may cause damage to electronics Do not remove safety protected parts such as anti tipper from scooter Do not use the unauthorized parts such as battery or charger on the sc...

Page 6: ...on If necessary please drive it in the presence of an attendant Dark bad weather such as in rain snow mist storm and poor visibility Narrow paths level crossing and uneven terrain Wet grass sand grave...

Page 7: ...way or dangers Never operating the folding unfolding process on a slope Please read through the section 5 for folding unfolding operation before you operate the scooter Turn off the power before you f...

Page 8: ...age to electronics see section 7 2 The brake does not apply when the scooter is in folded and standing position Do not place the standing folded scooter on a slope to avoid roll away and danger Fig 1...

Page 9: ...throttle control lever forward and continue safely driving To prevent any danger do not make turns on ascending descending ramp The batteries voltage normally will go up when driving on descending ro...

Page 10: ...are a number of sources of relatively intense electromagnetic fields in the everyday environment Some of these sources are obvious and easy to avoid Others are not apparent and exposure is unavoidabl...

Page 11: ...CB radios or turn ON personal communication devices such as mobile phones while the mobility scooter is turned ON 2 Be aware of nearby transmitters such as radio or TV stations and try to avoid coming...

Page 12: ...f the scooter before demounting or rotating the seat Scooter information label States the date of manufacture and serial number of the scooter This product has been supplied from an environmentally aw...

Page 13: ...r 16 Battery Box Handle 06 Seat Springs 17 Charging Port battery box 07 Supporting Wheels 18 Circuit Breaker 08 Rear Wheels 19 Folding unfolding light indicator buttons 09 Charging Port upper 20 Tail...

Page 14: ...or errors 7 Horn Press to sound warning tone when necessary 8 Digital Lock enter key Press Enter when password is confirmed 1 2 3 5 6 7 8 4 Figure 5 eFlexx Control Panel Please keep the panel clean aw...

Page 15: ...er is entered Press E on the pad when password entering is finished pad light will be flashing three times If there is enter error press power switch button again or wait for 30 seconds to re enter th...

Page 16: ...again if unlocking is interrupted Scooter cannot be operated unless it s unlocked green light on Figure 9 PANEL BACK LIGHT ADJUSTMENT FIVE LEVELS Press the power switch to get the scooter on power st...

Page 17: ...Tail light will be on anyway when the brake is engaged and when the scooter speed is reduced HORN Press horn button to sound the buzzer Buzzer sound and light will last until you release the horn but...

Page 18: ...r turn the power key switch off and then on again Do not pull both right and left throttle at the same time you might not able to control the scooter Turning the scooter OFF whilst driving will bring...

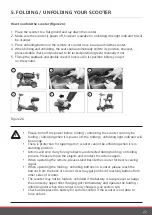
Page 19: ...lever then turn on and drive scooter 4 5 TILLER HEIGHT ADJUSTMENT Loosen counterclockwise the screw knob to adjust the tiller height tighten clockwise screw knob again to lock at a desired position Th...

Page 20: ...ket Push the seat towards to the front of scooter green point fasten the screws L and insert the springs K back to seat slide bracket Please make sure to follow the direction of Fig 21 shown when putt...

Page 21: ...ons on remote Figure 24 Press folding button P once to auto fold please make sure the scooter is fully expanded before folding Press unfolding button Q to auto unfold please make sure the scooter is f...

Page 22: ...2 Press and hold the folding button N or unfolding button O on scooter for 3 seconds to wake up the scooter the light indicator M will be orange 3 Press and hold the folding button P or unfolding butt...

Page 23: ...n it is power off the folding unfolding light indicator will be orange There is protection for tapping error scooter cannot be unfolding when it is in standing position Actions will stop if any foreig...

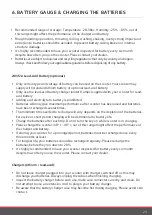
Page 24: ...tact dealer if you need to replace internal battery 6 2 CAUTIONS FOR BATTERY CHARGER Lithium Battery Only certain type and voltage of battery can be used on the scooter Your scooter may supply with st...

Page 25: ...performance after scooter has been used and batteries have been recharged several times The minimum time needed to recharge will vary depends on the depletion of the batteries Excessive or short peri...

Page 26: ...ions in mind Any battery charger faults due to the unauthorized maintenance dismantle misuse or accidental damage is not covered by the manufacturer s warranty Check battery capacity before driving Re...

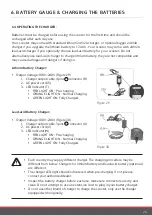
Page 27: ...rd S 3 LED Indicator T RED LIGHT ON Pre charging ORANGE LIGHT ON Normal Charging GREEN LIGHT ON Fully Charged Figure 29 Lead acid Battery Charger Output Voltage 100V 240V Figure 30 1 Charger output ca...

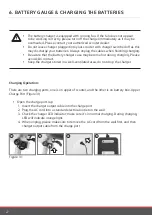
Page 28: ...e hot during charging Please avoid skin contact Keep the charger stored in a well ventilated area do not drop the charger Charging Operation There are two charging ports one is on upper of scooter and...

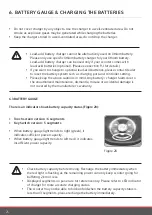
Page 29: ...ry box back to scooter 6 BATTERY GAUGE CHARGING THE BATTERIES Figure 32 Be sure the scooter key power is in the OFF position when charging The time needed to recharge will vary depending on the deplet...

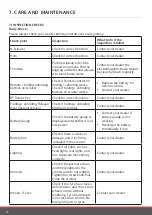
Page 30: ...Key Check for correct function Contact your dealer Folding unfolding Release lever manual version Check if folding unfolding function is normal Contact your dealer Battery Gauge Check if the battery...

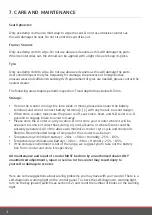
Page 31: ...ly tighten to the scooter Contact your dealer EVERY SIX MONTHS CHECK Please take your scooter to a qualified technician for a thorough inspection and servicing every six months 7 2 CLEANING AND MAINTE...

Page 32: ...he power is off seat lock is fixed and N D lever is in D position to engage brake to avoid roll away Please store the scooter in a dry location Do not store your scooter where it will be exposed to so...

Page 33: ...the park brake is faulty Check the park brake and associated connections and wiring Ensure any associated switches are in their correct positions Switch to D drive position Turn off the power and turn...

Page 34: ...he folding unfolding procedure 5 Scooter is not on flat ground Scooter cannot be folding unfolding if it s not placed lay down on a flat ground Please place the scooter on a flat ground and restart th...

Page 35: ...nderneath the seat 04 Seat Belt 1 To be installed for extra safety 05 Bag seatback 1 Anti splash max loading weight of 2Kgs To be installed on the seatback 06 Lead acid Battery Pack 1 With 12Ah lead a...

Page 36: ...8 WEIGHT W BATTERIES 30 6 kg 67 5 lbs MAX SPEED 6 4 kmph 4 mph WEIGHT CAPACITY 115 kg 255 lbs GROUND CLEARANCE 43mm 1 7 GRADE CLIMBABLE 6 degree CURB CLIMBABLE 40mm 1 6 TURNING RADIUS 1120 mm 44 1 BRA...

Page 37: ...nsaxle Brake and Electronics Motion Healthcare warrants the Motor Transaxle Brake Electronics of its Mobility Scooter to be free from defects in material and workmanship under normal use for a period...

Page 38: ...ver the shipping charge to our preference of freight for only the replacement of part or repair of any such product and not other shipping charges that arise thereafter Also note that this warranty do...

Page 39: ...38 NOTES...

Page 40: ......

Reviews: