background image

10

USING THE UPPER BAG SUPPORTS

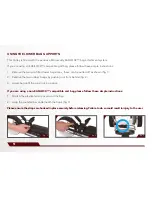
Use the following instructions to secure the upper bag supports:
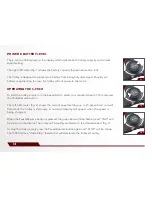
1.  Stretch the elasticated straps around the bag
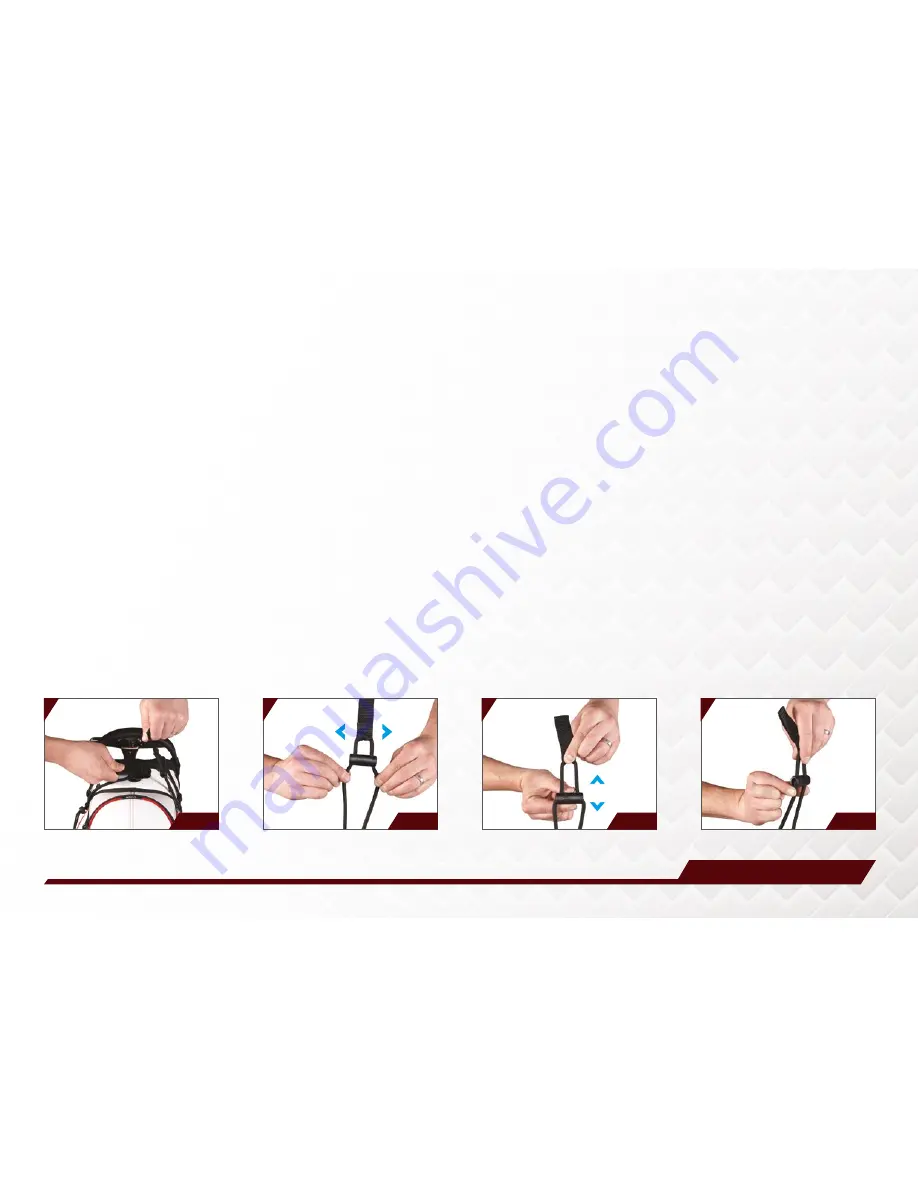
2.  Loop the rounded bar underneath the hook (fig. 1)

ADJUSTING THE BAG SUPPORTS

The bag support straps are manufactured from elasticated material to allow your golf bag to be held tightly in place. 
The strap should be adjusted to be reasonably tight around the golf bag:
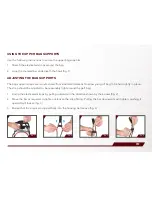
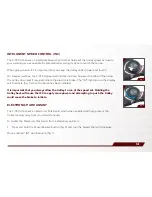
1.  Unclip the elasticated straps by pulling outwards in the direction shown by the arrows (fig. 2)
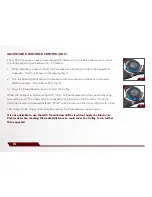
2.  Move the bar as required to tighten or loosen the strap fitting. Pulling the bar downwards will tighten, pushing it 

upwards will loosen (fig. 3)

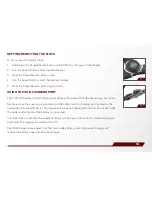
3.  Ensure that the straps are clipped back into the housing before use (fig. 4)

fig. 1

fig. 4

fig. 2

fig. 3

Summary of Contents for C-TECH

Page 1: ...REGISTERONLINE www motocaddy com warranty INSTRUCTION MANUAL...

Page 2: ...ng your C TECH trolley 7 Folding your C TECH trolley 8 Using the lower bag supports 9 Using the upper bag supports Adjusting the bag supports 10 Equipment overview 11 Handle overview 12 Power Battery...

Page 3: ...d be kept handy for future use The same number should also be on the box received with your trolley Please ensure that you keep hold of the packaging in case you need to return your trolley for any re...

Page 4: ...assist you when going up hills Submerging the trolley in water eg a lake is likely to cause damage to the trolley Do not operate the trolley whilst under the influence of drugs or excessive amounts of...

Page 5: ...s designed for use with Motocaddy C TECH Lithium batteries only The charger should only be connected to an earthed socket outlet and should only be opened and maintained by authorised personnel Unauth...

Page 6: ...charger from the mains power supply and disconnect the charger from the battery The charging process will take between 4 to 6 hours depending on the depth of discharge please be aware that this may t...

Page 7: ...to protect the battery from excessive abuse high currents deep discharge and overcharge When the battery is delivered there may be no output as the BMS is designed to maximize safety whilst shipping P...

Page 8: ...ide the wheels back on to the axle as far as they will go 4 Release the button and pull the wheel back slightly to lock in to place 5 Pull lever fig 2 lift and unfold centre frame section this will lo...

Page 9: ...ock into place once folded fig 2 3 Remove each wheel by pressing the quick release button 4 Flip the wheel over as shown 5 Slide the wheels back on to the axle as far as they will go fig 3 6 Release t...

Page 10: ...ulled off as shown fig 1 2 Remove the two rubber bungs by pushing out from behind fig 2 3 Lower bag until the pins lock in position If you are using a non EASILOCK compatible cart bag please follow th...

Page 11: ...ted material to allow your golf bag to be held tightly in place The strap should be adjusted to be reasonably tight around the golf bag 1 Unclip the elasticated straps by pulling outwards in the direc...

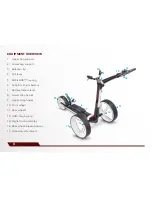
Page 12: ...5 EASILOCK housing 6 Snap fit Lithium battery 7 Battery release lever 8 Lower strap hooks 9 Upper strap hooks 10 Front wheel 11 Rear wheels 12 USB charging port 13 Digital control display 14 Rear whe...

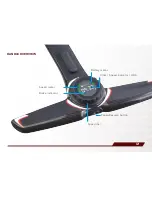
Page 13: ...12 HANDLE OVERVIEW Battery meter Speed meter Speed dial Pause Resume button Clock Speed indicator ADC Brake indicator...

Page 14: ...d Dial to select your required speed 1 10 and press the Pause Resume button The left LED meter fig 2 shows the current speed setting up to 10 green bars and will flash while the trolley is stationary...

Page 15: ...e The B indicator on the display will illuminate fig 1 when the brake has been initiated It is important that you always allow the trolley to run at the speed set Holding the trolley back will cause t...

Page 16: ...fig 2 3 Press the Pause Resume button to start the trolley Whilst the trolley is in motion using ADC Adc will be displayed and the speed indicating bars will be solid The trolley will run at speed set...

Page 17: ...harging Port designed to power GPS devices during your round Simply remove the covering cap and plug a USB cable into the charging port located on the underside of the handle fig 2 The device will con...

Page 18: ...a damp fine microfibre cloth Avoid using high pressure air hoses near moving components Makes sure the rear wheels are clean before inverting for transportation storage Keep battery and loom connecti...

Page 19: ...18 Model S1 S1 PRO S3 PRO M1 PRO M3 PRO S1 PRO DHC S3 PRO DHC M1 PRO DHC S7 REMOTE C TECH Thursday January 01 2017...

Page 20: ...reat Hallingbury Hertfordshire CM22 7DG United Kingdom t 44 0 1279 712 370 e info motocaddy com w www motocaddy com We are dedicated to protecting the environment and encourage the recycling of Motoca...

Reviews: