

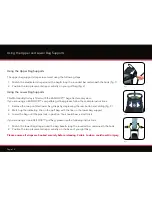
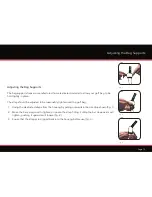
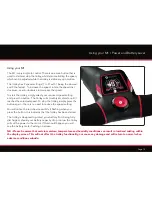


Page 16
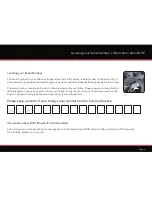
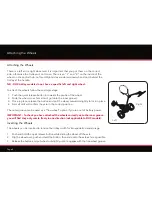
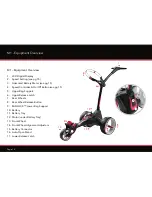
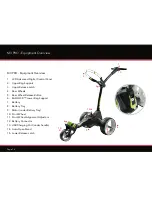
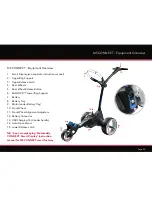
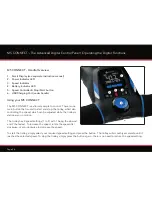
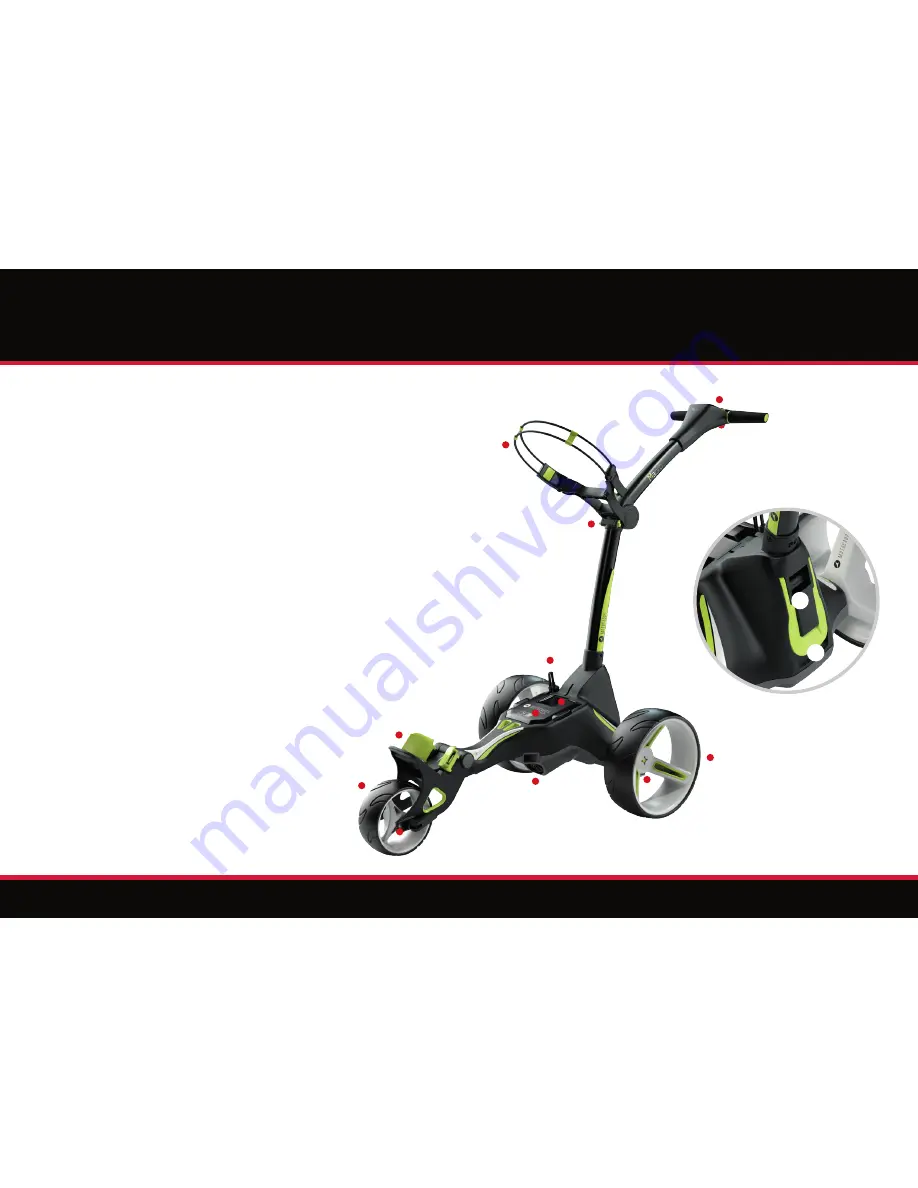
M3 PRO - Equipment Overview
M3 PRO - Equipment Overview
1. LCD Advanced Digital Control Panel
2. Upper Bag Support
3. Upper Release Latch
4. Rear Wheels
5. Rear Wheel Release Button
6. EASILOCK™ Lower Bag Support
7. Battery
8. Battery Tray
9. Motor (under Battery Tray)
10. Front Wheel
11. Front Wheel Alignment Adjusters
12. Battery Connector
13. USB Charging Port (under handle)
14. Auto-Open Stand
15. Lower Release Latch
1
2
3
4
6
7
9
10
5
8
11
12
13
14
15


