background image

Page 7

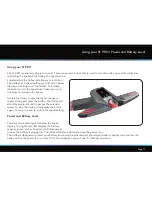
Caring for your Lithium Battery

Recommendations for the hibernation of Lithium Batteries during Winter months


If for any reason your lithium battery is not going to be used for lengthy periods, e.g. 3 months over the winter, it is advised to 
store the battery half charged. To do this simply use the battery for a round of golf as usual and charge it for 1.5 hours at the 
end of the round. Before the battery is used again, recharge it (top it up) prior to use. We recognise that extended absences 
are not always planned in advance, however when it is likely that you will not be using your battery for a period of time it 
is good practice to follow these steps to extend the life of your lithium battery. Please ensure that the charger is ALWAYS 
disconnected from the battery after charging. 

Lithium Battery Management System (BMS)


Motocaddy Lithium Batteries are fitted with a comprehensive battery management system (BMS) to protect the battery from 
excessive abuse, high currents, deep discharge and overcharge. When the battery is delivered there may be no output as the 
BMS is designed to maximize safety whilst shipping. Please ensure that the battery is fully charged prior to connecting it to 
your trolley as this will activate the BMS and effectively “switch-on” the battery. From time to time, at deep discharge or long 
term storage the BMS may switch-off the battery. A full battery charge will rectify this problem.  

Motocaddy golf trolleys are designed to work with the BMS system installed in the Lithium batteries and the voltage meter is 
also synchronised to work in conjunction with the battery. If for any reason the voltage on the battery reaches that below the 
low battery warning on the trolley, then the BMS may disable the battery to protect it. Again if this occurs please recharge fully. 
Please be aware that Lithium batteries tend to “drop off” quickly at the end of the cycle so it is not advisable to attempt to 
play excessive holes as the BMS will activate for protection purposes.

Summary of Contents for S1 Pro DHC

Page 1: ...S1 PRO S3 PRO Electric Trolley Instruction Manual REGISTERONLINE www motocaddy com warranty...

Page 2: ...nty online and should be kept handy for future use The same number should also be on the box received with your trolley Please ensure you keep hold of the packaging in case you need to return your tro...

Page 3: ...ndle To attach the wheels follow these simple steps 1 Push the quick release in towards the centre of the wheel 2 Slide the wheel on to the axle as far as it will go 3 Release the button and pull the...

Page 4: ...any other battery and is designed for use with Motocaddy Lithium batteries only The charger should only be connected to an earthed socket outlet the battery charger should only be opened and maintaine...

Page 5: ...arger from the mains power supply 6 Finally disconnect the charger from the battery NB Never charge the battery outside or in conditions that may allow moisture to penetrate the charger or connections...

Page 6: ...N Battery fully charged and ready to be disconnected 5 The charging process will take between 3 to 5 hours depending on the depth of discharge please be aware that this may take longer for the first f...

Page 7: ...y management system BMS to protect the battery from excessive abuse high currents deep discharge and overcharge When the battery is delivered there may be no output as the BMS is designed to maximize...

Page 8: ...the upper QUIKFOLD release button fig 1 2 Lift the handle and release the button 3 Unfold the upper frame section fully fig 2 4 Lift the main frame from the central hinge using the section marked Hold...

Page 9: ...ery tray 2 Ensure that the upper bag support has been folded up 3 Press and hold the lower QUIKFOLD release button fig 1 4 Lower the main frame fig 2 and release the button 5 Fold the handle towards t...

Page 10: ...liding fig 1 2 Match up the indicating line on your cart bag with the line on the lower bag support 3 Lower bag until the pins lock in position If you are using a non EASILOCK bag please use the follo...

Page 11: ...left Adjusting the Bag Supports The bag support straps are manufactured from elasticated material to allow your golf bag to be held tightly in place The strap should be adjusted to be reasonably tight...

Page 12: ...sually be shown and the left hand LED will still be lit fig 1 For an S3 PRO the screen will flash LOAD where the distance would usually be displayed and the blue circle will still be rotating fig 2 Pr...

Page 13: ...o minimise exposure to rain as much as possible with an umbrella during heavy rainfall Wipe excess water from the trolley prior to storage Never use a pressure washer to clean your trolley To prevent...

Page 14: ...ing for the duration of time that the cable is attached and the battery is connected It is important to note that the speed of charge will be lower than that of a mains AC charger and similar to plugg...

Page 15: ...wheel nut fig 1 2 There are two small metal dials on either side of the housing that are used to realign the wheel fig 2 3 If your trolley is veering to the right you will need to turn the left hand...

Page 16: ...M Upper Release Button 4 QUIKFOLDTM Lower Release Button 5 Rear Wheels 6 Rear Wheel Release Button 7 EASILOCKTM Lower Bag Support 8 Battery 9 Battery Tray 10 Motor located under Battery Tray 11 Front...

Page 17: ...and press the button The trolley will smoothly accelerate until it reaches the selected speed To stop the trolley simply press the button again there is no need to reduce the speed setting Power and...

Page 18: ...clockwise to decrease to your preferred distance setting 4 Press the on off button to set the trolley off in motion Whilst the trolley is in motion using ADC the left hand indicating LED will flash 5...

Page 19: ...UIKFOLDTM Lower Release Button 5 Rear Wheels 6 Rear Wheel Release Button 7 EASILOCKTM Lower Bag Support 8 Battery 9 Battery Tray 10 Motor located under Battery Tray 11 Front Wheel 12 Front Wheel Align...

Page 20: ...isplay activates the speed setting number located within the blue circle will indicate the speed the trolley will set off at once started The solid blue circle will rotate when moving NB Please be awa...

Page 21: ...ase follow the procedure below 1 Hold down the Scroll button while plugging in the battery and release the button once the screen illuminates 2 Press the Scroll button to toggle between S Standard Ext...

Page 22: ...tationary select the speed that you wish to set your trolley off at 2 Hold down the central on off button for a couple of seconds 3 The Distance display will change to indicate 05 5 yards or metres an...

Page 23: ...nly measure distance whilst it is switched on and the motor is running i e if you push the trolley along when it is switched off the distance readings will not increase The measurements are taken from...

Page 24: ...can test that your lost ball timer is working by doing the following Press and hold the Set button whilst plugging in the battery the alarm should beep twice if operating correctly After the second b...

Page 25: ...fore using your Motocaddy S3 PRO with distance readings enabled To enable competition mode follow the steps below 1 Whilst stationary hold down the Scroll and Set buttons together for three seconds 2...

Page 26: ...d 3 for each of the four digits 5 Once you have entered the fourth number and pressed the Set button the blue circle will illuminate to indicate a valid pin code has been entered fig 2 6 Unplug the ba...

Page 27: ...lly be displayed fig 2 Disabling the Pin Code To disable the security feature follow the procedure for changing your pin code and when you get to the stage of entering a new pin code enter four zeros...

Page 28: ...e easy handling PLEASE NOTE The lights on the controller box are numbered as described within the troubleshooting diagram 1 In the event that your trolley will not complete 18 holes after a full charg...

Page 29: ...ions is loose Unzip the battery bag to check the connections No Is the battery meter displayed on the screen S3 PRO S1 PRO Is the right LED on the handle lit Is the speed indicator circle rotating S3...

Page 30: ...e replace this part Is the speed setting 1 9 changing Is it running at a slow speed The ON OFF switch is faulty Please replace this part The controller box is faulty Please replace this part No Yes Ye...

Page 31: ...Page 31 Declaration of Conformity...

Page 32: ...addy sk w www motocaddy sk We are dedicated to protecting the environment and encourage the recycling of Motocaddy products through a free collection and disposal service To find out more or to locate...

Reviews:

Related manuals for S1 Pro DHC