16A
16B
46
45
47
48
50
49
47.A
EN
EN
04. INSTALLATION
04. INSTALLATION
COMPONENTS
BATERRIES
After installing the motors and glasses, proceed to the installation of all the extra components
that are in the order. These may include:
-
MCELE 01
Seletor
-
MR27
Radar
-
MR29
Radar
-
M1601
Radar
-
FOTO9S1A
Photocells
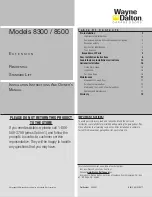
The automatic glass door has 3 batteries of 12V each, connected in series (36V connection).
These batteries are an important safety element to make the opening in case of power failure.
To install these components, by following the instructions in each manual. You can find it
inside the packaging or attached to this manual.
230V/110V CONNECTION
•
BATTERIES ACTIVATION
•
REPLACING BATTERIES
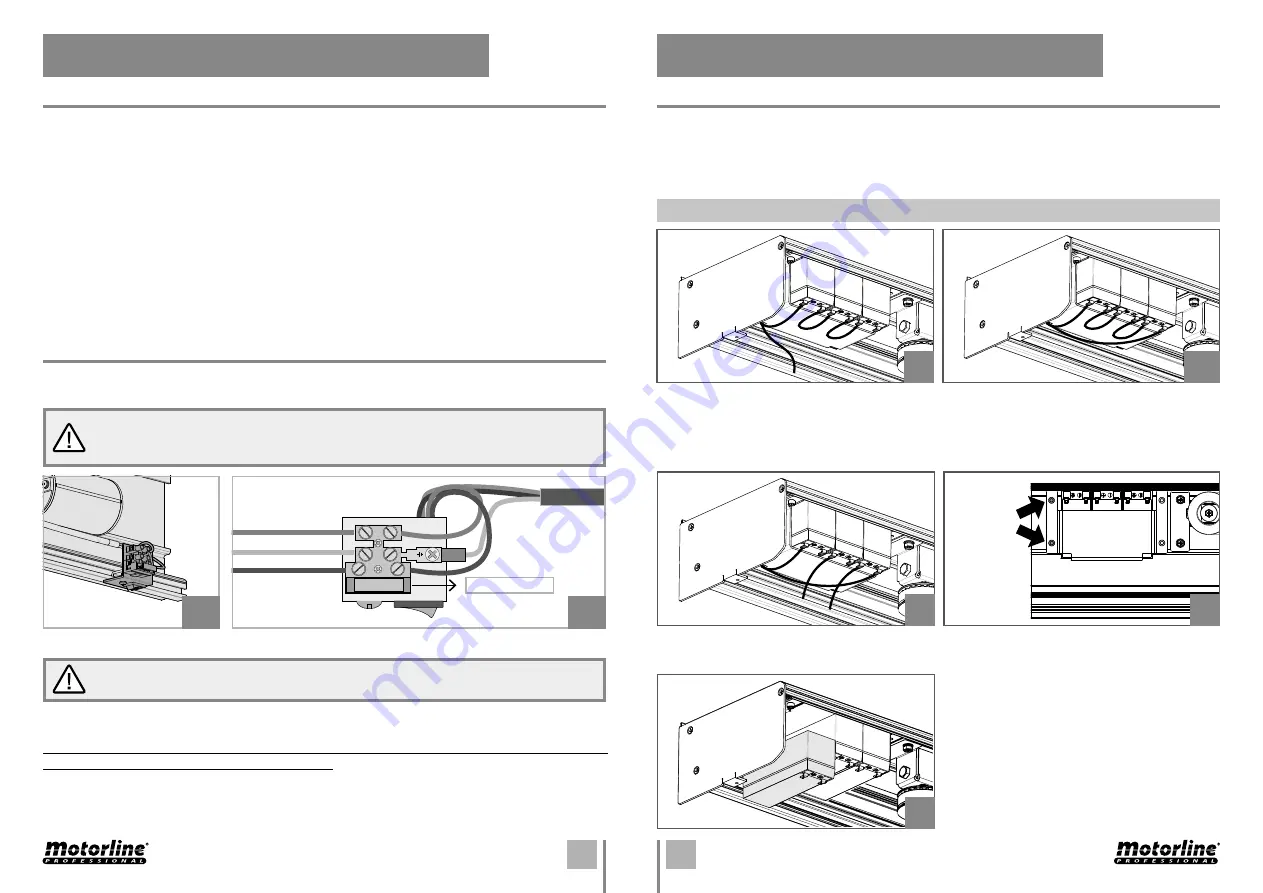
After installing and connecting all components, you must connect the automation to a power
supply.
Neutral
Ground wire
Phase
Fuse
F5AL250V
36.
Make the wiring as shown in the image.
Turn ON now the door by clicking the red button.
Once that button is triggered, the door will make a full slowly opening and closing maneuver,
recognizing and automatically saving the route.
Test the installed components, interrupting the their signal and observing the behavior of
the door.
Finally, connect the batteries (instructions on the next page - BATTERIES ACTIVATION).
37.
After testing all the components, connect the batteries by placing the loosen cable.
ATTENTION: The K2 dipper must be enabled! (More info in page 16B)
38.
Disconnect the cables that connect the
batteries.
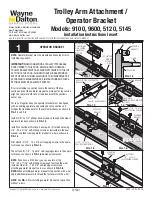
39.
With a wrench, unscrew the two screws
shown in the image above. Grab the metal
plate throughout the process, to prevent
the batteries from falling once you unscrew
them completely.
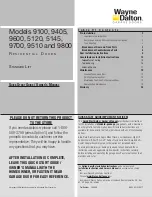
40.
Change the batteries, replace the metal
plate and tighten the two screws.
If you need to replace any battery, follow the next steps:
Before connecting the wires, make sure that the power button is turned off!
In 230v version, the fuse wires goes directly to the control board, while in 110V
version goes to transformer.


