

11A
11B
10A
10B
EN
EN
04
• Appears the
function currently set.
If you want, change
the function to 00 or
01, using
↑↓.
DISTANCE PROGRAMMING
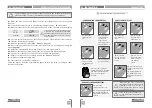
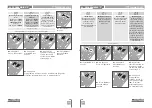
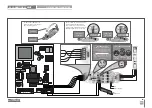
06
• P1 appears.
To exit the
programming press
↑↓ simultaneously.
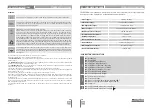
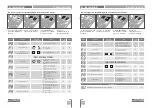
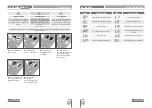
04. PROGRAMMING "P"
distance PGM OFF
distance PGM ON
This menu allows you to enable or disable
the new transmitters programming without
access directly to the control board by using
a previously stored transmitter (memorize
transmitters page 4B).
Factory default (
00
)
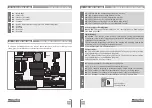
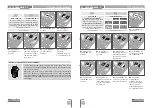
Distance programming operation (PGM ON):
•
Press the keys indicated in the picture at the same time for 10
seconds and the flashing light will start to flash (the display shows
the 1st free position).
Whenever you memorize a transmitter, the control board will
leave the distance programming mode. If you want to program
more transmitters, you will need to repeat the process of pressing
simultaneously the transmitter buttons for 10 seconds for each new
transmitter.
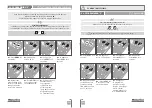
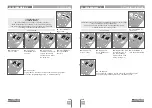
03
• P9 appears.
Press MENU for 3
seconds.
05
• Press MENU to
save the defined
function.
01
• Press MENU for 3
seconds.
02
• P0 appears.
Press ↓ 9 times.
04
• Appears the
function currently set.
If you want, change
the function to 00 or
01, using
↑↓.
07
• Appears the
function currently set.
If you want, change
the function to 00 or
01, using
↑↓.
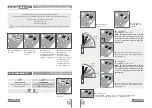
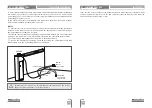
PRESENT MAN
01
• Press MENU for
10 seconds.
Present man
01 (activates p
resent man
)
The motor only works if you hold
down the pushbutton LS or LO.
00 (deactivates p
resent man
)
Whenever an order is sent to the
LS and LO the motor performs a
complete maneuver.
Push button mode
(Factory default
00
)
(
Factory default
00
)
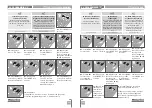
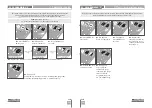
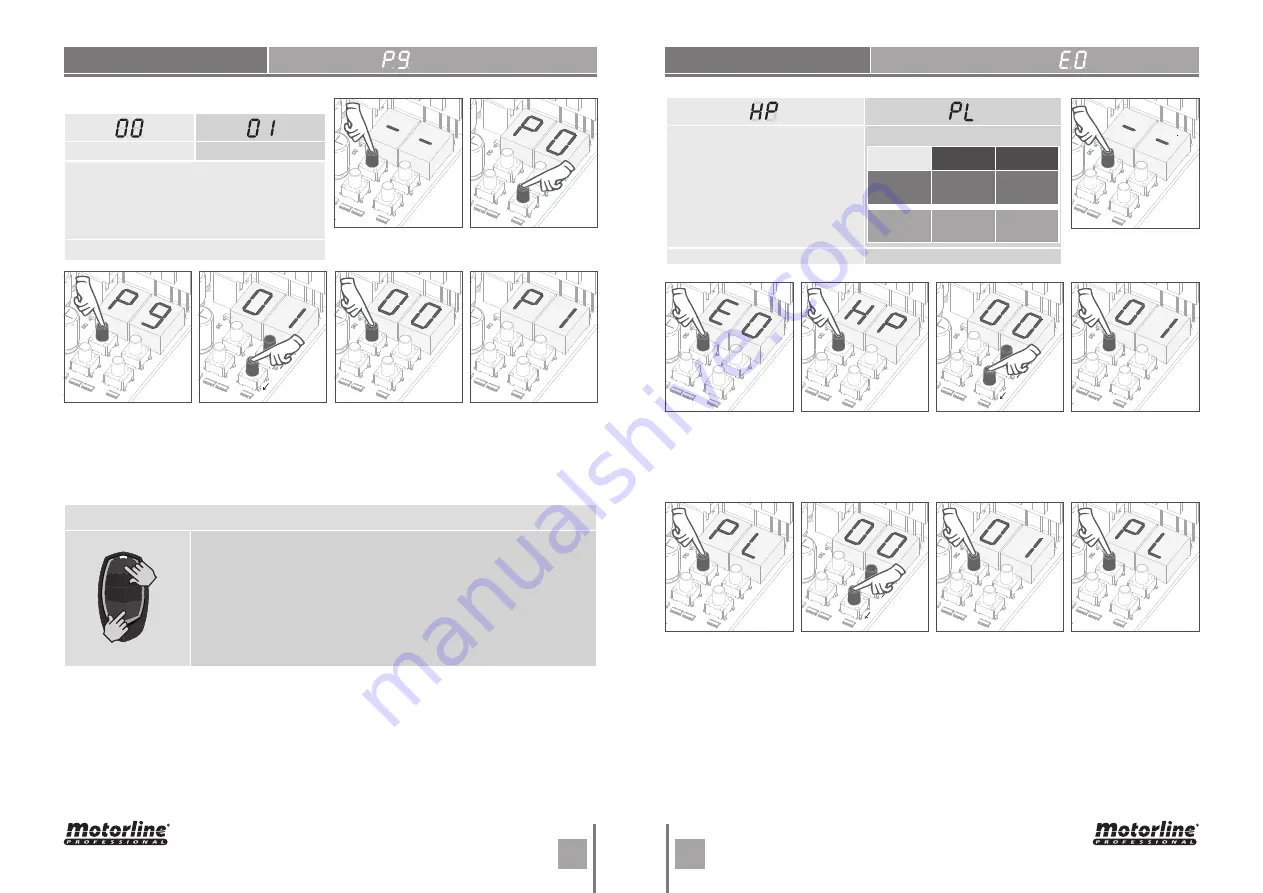
02
• E0 appears.
Press MENU for 3
seconds.
09
• E1 appears.
To program E1,
continue in step 3
from E1 menu (page
11B). To exit the
programming press
↑↓ simultaneously.
03
• HP appears.
Press MENU for 3
seconds.
06
• PL appears.
Press MENU for 3
seconds.
05
•
Press MENU for
3 seconds to confirm
the defined time.
08
•
Press MENU for
3 seconds to confirm
the defined function.
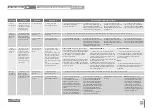
05. PROGRAMMING "E"
LS Button LO Button
01
ACTIVATED
Total
Opening
Total
Closing
00
DEACTIVATED
Pedestrian
maneuvers
Total
maneuvers


