
8A
8B
7A
7B
EN
EN
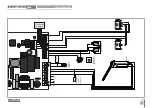
02
• P0 appears.
Press ↓ twice.
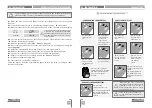
06
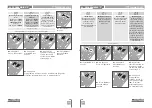
•
Press MENU for
3 seconds,
to save
the defined value.
03
• P2 appears.
Press MENU for 3
seconds.
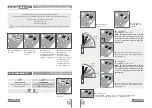
05
•
Appears the
value defined from
factory. If you want,
change the value
from 1 to 9 using ↑↓.
04
• FS appears.
Press MENU for 3
seconds
.
01
• Press
MENU
for
3 seconds.
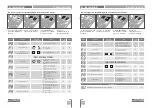
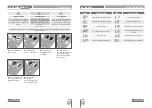
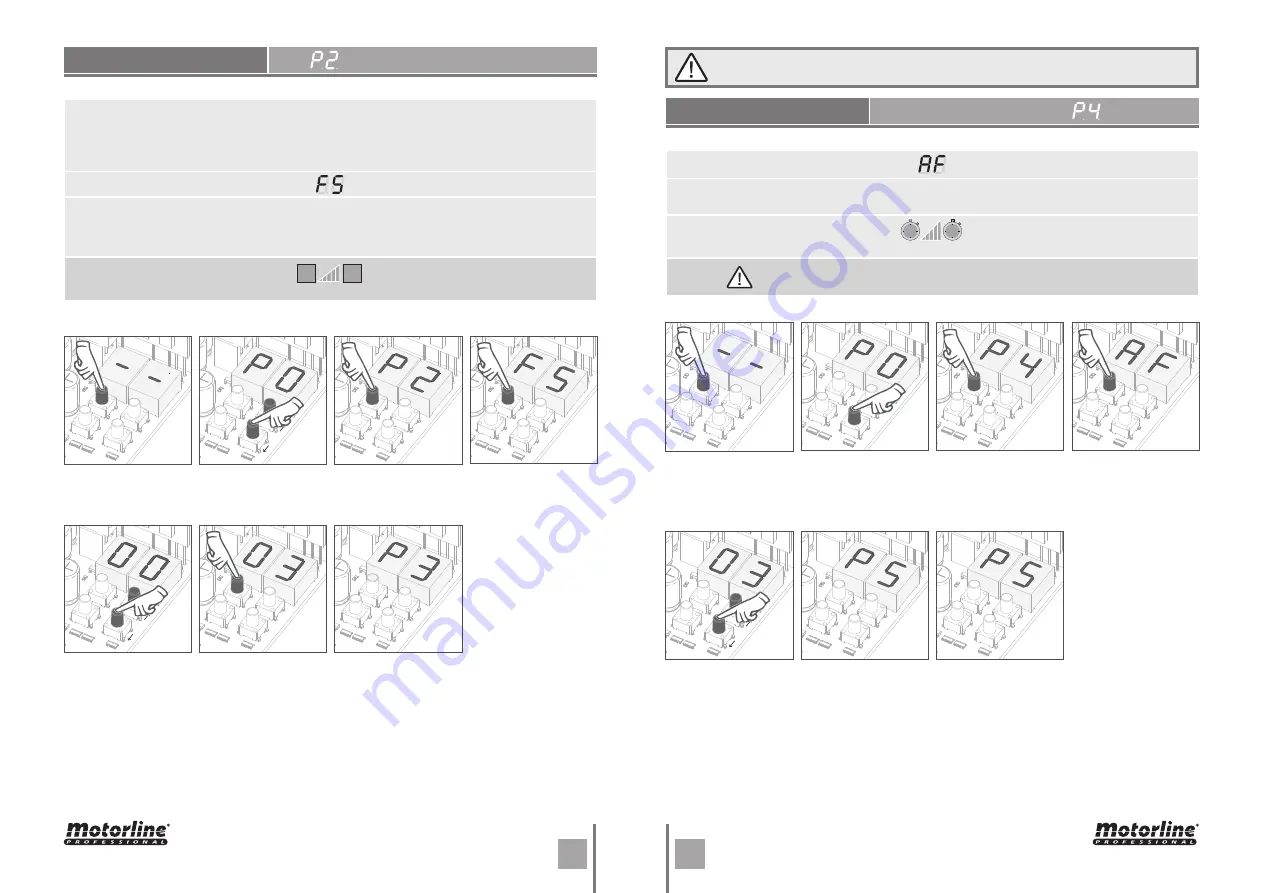
SETTING STRENGTH AND SENSITIVITY
If the control board has very high sensitivity values, you may see the
LI
error.
After four attempts, the
LI
error will turn
ER
.
You will have to wait 10 sec. to return to program the barrier.
Sensitivity adjustment
It allows you to adjust the engine sensitivity in detecting obstacles. The higher the
sensitivity the less effort is needed to detect any obstacle and reverse the direction.
(Factory default
00
)
min.
max.
1
9
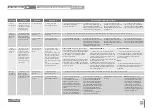
07
• P3 appears (not
available menu).
To program P4,
continue in step
3 from P4 menu
(page 7B). To exit the
programming press
↑↓
simultaneously.
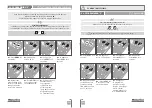
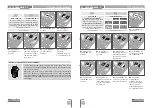
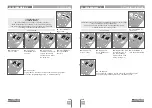
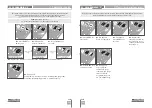
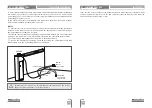
04. PROGRAMMING "P"
05
• Appears the time
set from factory. If
you want, change
time between 1 and
99 sec., using ↑↓.
07
• P5 appears.
To program P5,
continue in step 3
from P5 menu (page
8A). To exit the
programming press
↑↓ simultaneously.
02
• P0 appears.
Press ↓ four times.
01
• Press MENU for 3
seconds.
03
• P4 appears.
Press MENU for 3
seconds.
04
• AF appears.
Press MENU for 3
seconds.
06
• Press MENU for
3 seconds
to save
the defined time.
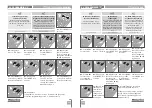
PAUSE TIME
04. PROGRAMMING "P"
04. PROGRAMAR "P"
TEMPO DE PAUSA
P3 MENU INACCESSIBLE.
Pause time adjustment of the total closure
Allows you to set the time that the barrier will remain open.
(factory default
3 seg.
)
When the values are zero, the automatic closing ceases to exist.
99s
min.
max.
1s