5A
5B
4A
4B
EN
EN
01
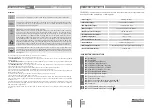
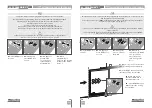
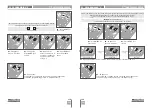
• Make the connections of all the accessories according to the connection scheme
(page 19).
02
• Connect the control board to a 230V power supply (3 and 4 - CN1 terminals).
03
• Make sure that the gate movement is the same as the one shown on the display:
04
• Check is the limit switches, so that the FC LED turns off during the closure and the
LED FO turns off during the opening.
05
• Make an automatic programming -
P0
menu (
page 6A
).
06
• If necessary, adjust the gate of the deceleration time in opening and closing -
P1
menu (
page 7A
).
07
• Adjust the strength and sensitivity of the motor -
P2
menu (
page 8
).
08
• Make an automatic programming of the course again -
P0
menu (
page 6A
).
09
• Enable or disable the use of photocells in the
P5
menu (
page 10A
).
10
• Enable or disable the use of safety band in the
P6
menu (
page 10B
)
11
• Program a transmitter (
page 4B
).
The control board is now fully configured!
Check the menus from the programming pages in case you wish to configure other
features of the plant.
The installation process assumes that the gate has already limit switches
plates installed. For more information consult the motor's manual.
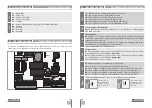
CLOSING
OPENING
If the display does not match the gate's
movement, turn off the control board from
the power supply e swap the 5 and 7 wires
from CN1 and check if it is correct with 3
and 4 from CN2.
ESSENTIAL STEPS FOR INSTALLATION
03. INSTALLATION
TRANSMITTERS
03. INSTALLATION
05
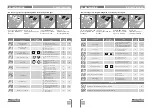
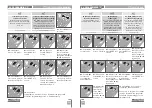
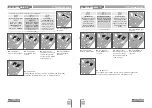
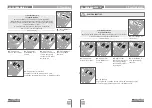
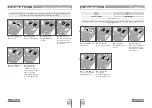
• Press cmd for 3sec.
and the position is
empty.
The display will flash
and the position will be
available.
02
• The display will show
dL
, confirming that all
transmitters have been
erased.
01
• Press the
cmd button for 5 sec.
01
• Press the
cmd button for
1 sec.
Transmitter programming for total opening.
Transmitter programming for pedestrian opening.
02
• Select the
function (SU or
SP) using
↓↑.
03
• Press cmd
once to confirm
the function (SU
or SP).
04
• Use
↓↑
to select the
transmitter
location you want
to delete.
04
• The first free
position appears.
05
• Press the command
button you want to program.
The display will blink and
move to the next free
location.
03
• Press cmd
once to confirm
the function (SE
or SP).
01
• Press the
cmd button for
1 sec.
02
• Select the
function where
you want to
program the
transmitters (SU
and SP) using
↓↑.
• PROGRAMMING TRANSMITTERS
• ERASE ALL THE TRANSMITTERS
• ERASE TRANSMITTERS
• If you do not press any key for 10
sec. the control board will return to
standby.
• Whenever you store or delete a
command, the display will flash and
show the next position. You can add
or delete commands without having
to go back to point 01.


