Sarix Professional 4 Bullet Camera Installation Manual
C6726M | 11/22
6
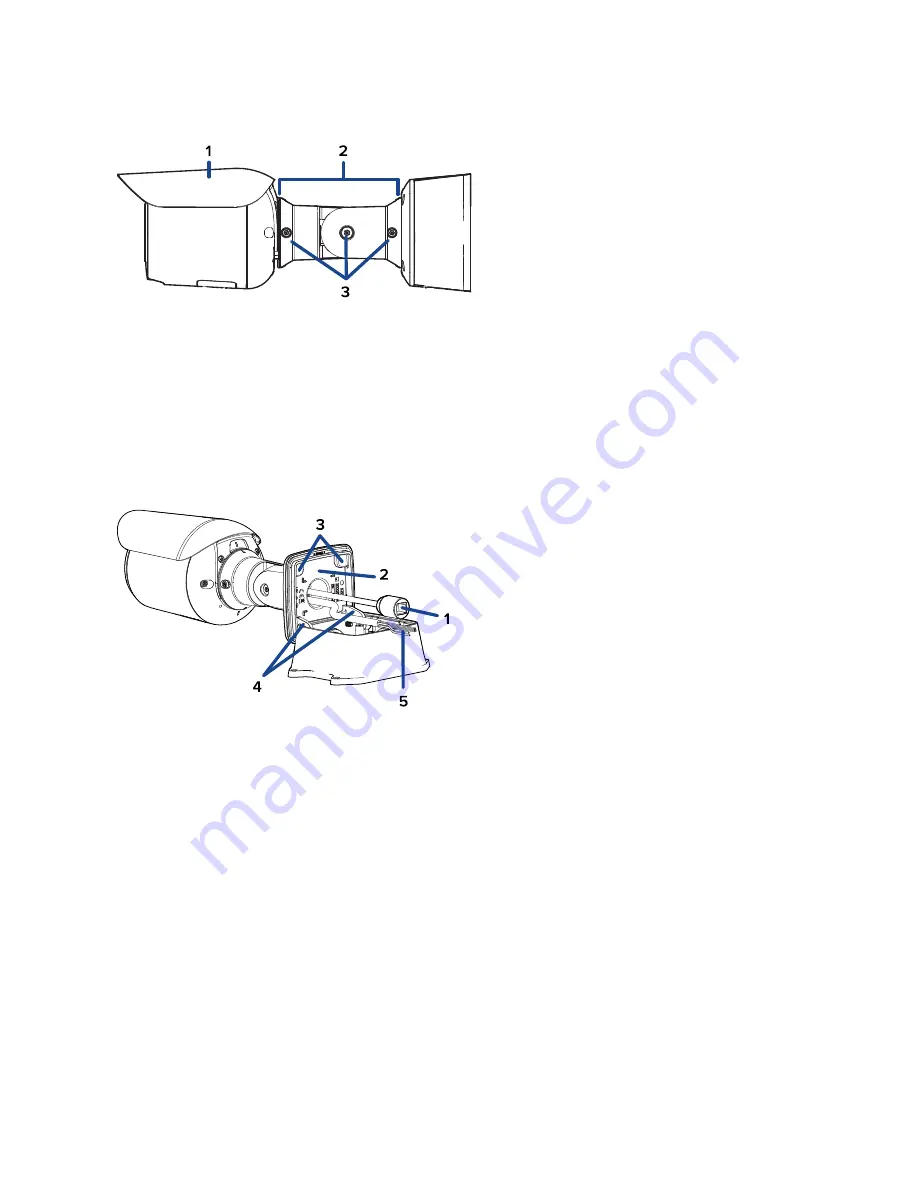
Side View
1.
Sun shroud
An adjustable cover to help protect the lens against glare from the sun.
2.
Mount arm
Adjustable mount arm for positioning the camera.
3.
Adjustment screws
Provides a locking mechanism for the mount arm.
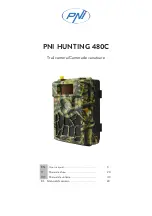
Rear View
1.
Ethernet port
Accepts power and Ethernet connection to the network. Server communication and image data
transmission also occur over this connection.
The camera can either be powered by Power over Ethernet (PoE) or 12 VDC Aux.
2.
Serial number tag
Device information, product serial number and part number label.
3.
Camera mounting screws
Screws for mounting the camera to the junction box.
4.
Mounting hooks
Hooks to attach the camera to the junction box while connecting the required cables.
5.
Power and I/O cables
Cables for connecting the camera to auxiliary power and I/O devices. For more information, see


