


Chapter 2: Network Setup
14
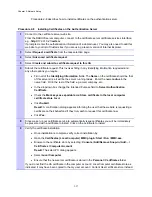
Observe the following prompt:
Binary install directory:
/opt/MotoMeshDuo _setup/
Configuration install directory: /etc
Ready to install. [Y/n]:
Enter
Y
to start the installation of the r0k daemon.
15
You may see the following prompt during the r0k daemon installation:
`/opt/MotoMeshDuo _setup/r0kd' -> `/opt/MotoMeshDuo _setup/r0kd'
`/opt/MotoMeshDuo _setup/r0k.conf' -> `/etc/r0k.conf'
r0kd will now be set to startup in runlevels 3-5.
r0kd doesn't appear to be running, start it? [Y/n]:
If you see this, enter
N.
The daemon will be started later when EAP-TTLS Secure Mesh is
configured.
16
Verify that the hardware IP address assignments are correct. It may take several minutes
for the IP interfaces to come up after the install script completes. At the command prompt
type:
[root@ WMS root]# ip addr
Several lines of text similar to the following will be displayed:
eth0: <BROADCAST,MULTICAST,UP> mtu 1500 qdisc pfifo_fast qlen 1000
link/ether 00:0c:76:4e:5b:4e brd ff:ff:ff:ff:ff:ff
inet 172.31.0.20/16 brd 172.31.255.255 scope global eth0
17
Verify that an entry for WMS has been added to the
/etc/hosts
file. Confirm that the
remaining entries are correct. At the prompt, type the following:
[root@ WMS root]# cat /etc/hosts
Several lines of text similar to the following will be displayed:
127.0.0.1 localhost
172.31.0.20 WMS
WMS.meshnetworks.net
18
Try to ping the hostname
WMS
by typing the following at the terminal window prompt:
[root@WMS root]#
ping WMS
Several lines of text similar to the following will be displayed:
PING WMS (172.31.0.20) 56(84) bytes of data.
64 bytes from WMS (172.31.0.20): icmp_seq=0 ttl=0 time=0.047 ms
64 bytes from WMS (172.31.0.20): icmp_seq=2 ttl=0 time=0.040 ms
19
Verify that you get a reply from WMS. Press
CTRL-C
to return to the terminal window.
Keep the window open for the next step.
2-21
Summary of Contents for 2.1
Page 2: ...This page intentionally left blank ii ...
Page 4: ...This page intentionally left blank iv ...
Page 10: ...This page intentionally left blank x ...
Page 12: ...This page intentionally left blank xii ...
Page 14: ...This page intentionally left blank xiv ...
Page 59: ...Chapter 3 MOTOMESH Duo Hardware This page intentionally left blank 3 12 ...
Page 86: ...Chapter 5 Customer Information This page intentionally left blank 5 7 ...
Page 123: ......
Page 131: ...Appendix A Figure 9 39 General Settings Tab in the Web User Interface 9 30 ...


