background image

NOTE: 

The cable install method is short A connect the handset, longer B connect 

the IP Phone.

b) Phone Installation:

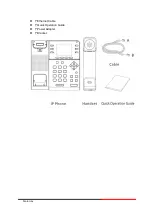
This section introduces how to install the phone with the components in the packing
list:

Adjust the Bracket

Connect the Handset and optional Headset

Connect the Network and Power

Adjust the Bracket

Pls follow the following picture to let the bracket adjust to safety 

Motorola

Summary of Contents for 300IP-6P

Page 1: ...300IP 6P Smart VoIP Phone User Manual Motorola User Manual ...

Page 2: ...he Call 15 3 5 7 Auto Answer 15 3 5 8 Ending a Call 16 3 5 9 Using Hold and Recover Switch Calling Line 16 3 5 10 Transferring Calls 17 3 5 11 Using Mute 17 3 5 12 Do Not Disturb 18 3 5 13 3 way Conference 18 3 5 14 Voice Mail 19 3 6 Advanced Settings 19 3 6 1 Using the phone book 19 3 6 2 Using Call Logs 22 3 6 3 Peer to Peer 22 3 7 Keypad Setting 23 3 7 1 Language Setting 23 3 7 2 Message 23 3 7...

Page 3: ... BLF Setting 51 7 12 TR069 52 8 Phone Book 52 8 1 Contact 52 8 2 Group 53 8 3 LDAP 54 8 4 Blacklist 55 8 5 Phone Call Info 56 9 Maintenance 57 9 1 HTTP Upgrade 57 9 2 FTP Upgrade 58 9 3 TFTP Upgrade 58 9 4 Auto Provisioning 59 9 5 Log 61 9 5 Local Log 62 Check the log file on the local 62 9 6 Default Settings 62 9 7 Reboot 62 10 Security 62 10 1 Password 62 10 2 Trusted Certificates 63 10 3 IP Str...

Page 4: ...ll duplex speakerphone LCD support multi language Chinese English French Italian Portuguese Portuguese Brazil Russian Spanish Turkish Hebrew Chinese Traditional Korean Netherlands Slovak Web support multi language Chinese English French Italian Portuguese Russian Spanish Turkish Chinese Traditional 2 10 100 1000M Ethernet ports integrated POE Wall mountable optional integrated stand with 2 adjusta...

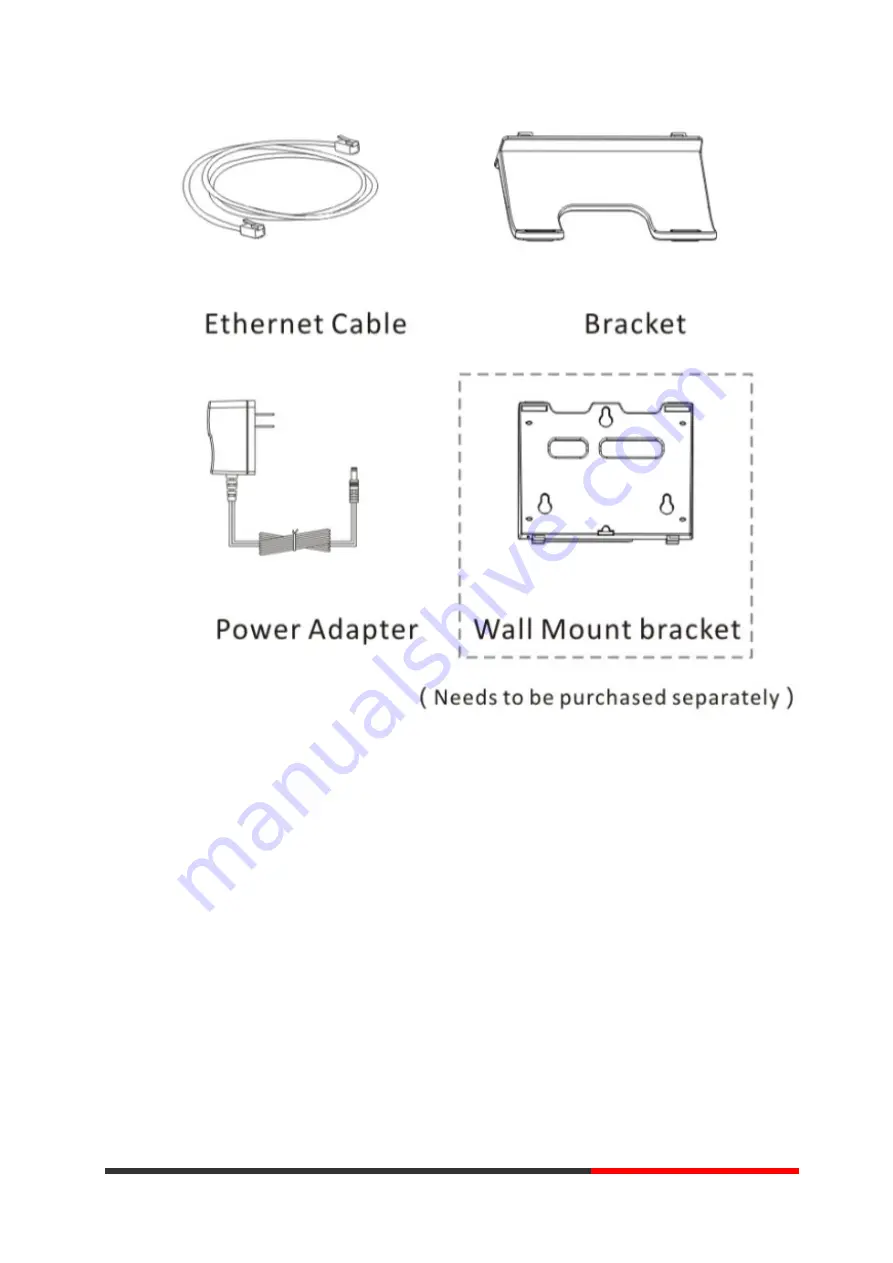
Page 5: ... 1 Ethernet Cable 1 Quick Operation Guide 1 Power Adapter 1 Bracket Motorola ...

Page 6: ...Phone Installation This section introduces how to install the phone with the components in the packing list Adjust the Bracket Connect the Handset and optional Headset Connect the Network and Power Adjust the Bracket Pls follow the following picture to let the bracket adjust to safety Motorola ...

Page 7: ...Connect the Handset and optional Headset Connect the Network and Power You have two options for power supply Your system administrator will advise you which Motorola ...

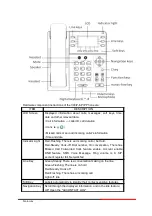
Page 8: ...wer PoE Power over Ethernet is provided you don t need to connect the power adapter Make sure the Ethernet cable and hub switch are PoE compliant 3 Phone User Interface 3 1 Hardware Component Instructions The main hardware components of the 300IP 6P IP Phone are the LCD screen and the keypad Motorola ...

Page 9: ... Steady Hook off Dial number On conversation There has Missed Call Forwarded Calls feature enable Account enable DND feature SMS Voice Message Ring volume is 0 SIP account register fail Network fail Line Key Green Steady There is a conversation making on the line Green Flashing The line is on hold Red Steady Hook off Red Flashing There has a incoming call Light off idle Soft Key Labels automatical...

Page 10: ...ransfer Hold Speaker Key Toggles the hands free speaker phone mode Mic Voice input Volume Key Adjusts the volume of the handset headset speaker and ringer Keypad Provides the digits letters and special characters in context sensitive applications Headset Key Toggles and indicates the headset mode 3 2 Phone Screen Display Features If the phone has successfully started up and after using the idle LC...

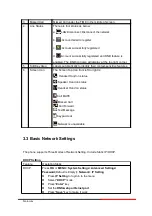
Page 11: ... features 6 Screen Icon The Screen Top Icon from left to right is Handset Hand on status Speaker Hand on status Headset Hand on status Call MUTE Missed Call Call Forward Text Message Keypad Lock Network is unavailable 3 3 Basic Network Settings The phone supports Three Modes of Network Setting Include Static IP DHCP DHCP Setting Feature Operating Steps DHCP Press OK or MENU System Settings Advance...

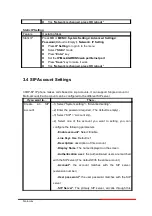
Page 12: ...figured to the different SIP server If you want to Then Create an SIP account 1 Select System setting Advanced setting 2 Enter the password required The default is empty 3 Select SIP Account sip 4 Select one of the account you want to setting you can configure the following parameters Enable account Select Enable Line Keys Use Default is 1 Description description of this account Display Name The n...

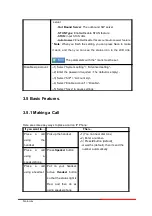
Page 13: ...word required The default is empty 3 Select SIP Account sip 4 Select Enable account Disable 5 Select Save to saves settings 3 5 Basic Features 3 5 1 Making a Call Here are some easy ways to place a call on IP Phone If you want to Then Place a call using the handset Pick up the handset 1 You can hear dial tone 2 Enter a number 3 Press button default or wait 5s default then it send the number automa...

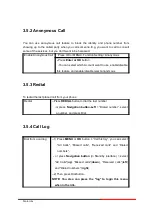
Page 14: ...nd enable disable reject anonymous 3 5 3 Redial To redial the last placed call from your phone Redial Press REDIAL button to dial the last number or press Navigation button Left Dialed number select a number and press Dial 3 5 4 Call Log Dial from a call log 1 Press MENU or OK button Call history you can select All Calls Missed calls Received calls and Dialed numbers or press Navigation button in ...

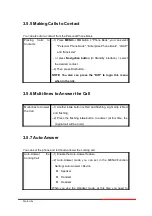
Page 15: ...gin this menu when in the idle 3 5 6 Multi lines to Answer the Call Multi lines to Answer the Call 1 Another Line button is Red and flashing Light strip is Red and flashing 2 Press the flashing Line button to answer at this time the original call will be hold 3 5 7 Auto Answer You can set the phone and let it auto answer the coming call Auto Answer the Coming Call 1 Enable the Auto Answer feature ...

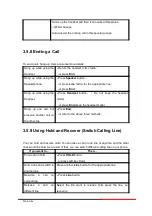
Page 16: ...nd keep the headset mode Hang up one call but preserve another call on the other line Press End or refer to the above three methods 3 5 9 Using Hold and Recover Switch Calling Line You can hold and resume calls You can take a call in one line at anytime and the other lines would be hold As a result of that you can switch different calling line on our phone If you want to Then Put a call on hold Pr...

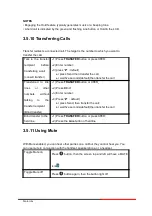
Page 17: ...er the call Transferred to idle lines or other numbers without talking to the transfer recipient Blind transfer 1 Press TRANSFER button or XFER 2 Press Blind 3 Enter number 4 Press default or press Send then transfer the call or wait five seconds default then transfer the call Blind transfer to the held line 1 Press TRANSFER button or press XFER 2 Press the Line button of held line 3 5 11 Using Mu...

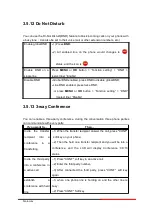
Page 18: ...5 13 3 way Conference You can enable a three party conference during the conversation three phone parties can communicate with every party If you want to Then Invite the transfer recipient into a conference in a transferring 1 When the transfer recipient answer the call press CONF soft key on your phone 2 Then the held one transfer recipient and you will be into a conference and the LCD will displ...

Page 19: ...prise Phone Book Search the Contacts from Enterprise Phone Book 1 Press DIR in the idle status or press MENU or OK button Phone book Enterprise Phone Book 2 Select Enterprise Phone Book press OK button 3 Press Find and input the name who you want to search Call the Contact from Enterprise Phone Book 1 Press DIR in the idle or press MENU or OK button Phone book Enterprise Phone Book 2 Select Enterp...

Page 20: ...hers Number Setting the contact Others Number SIP Account Setting the contact call SIP account Group the contacts be divided into different user s groups 4 Press Save soft key to complete Add group 1 Press DIR soft key or press MENU button Phone book Personal phone book View All or press OK button Phone book Personal phone book View All 2 Select the add group then press OK button 3 Use the navigat...

Page 21: ...OK button 3 Select a group you want to delete press OK button LDAP Search the Contacts from LDAP 1 Press DIR in the idle or press MENU or OK button Phone book LDAP 2 Select LDAP press OK button 3 Press Find and input the name or number who you want to find search from the LDAP server Call the Contact from LDAP 1 Press DIR in the idle or press MENU or OK button Phone book LDAP 2 Select LDAP press O...

Page 22: ...maintains records of your missed placed and received calls View call logs 1 Press MENU or LOG button All Call Missed Calls Received Calls or Dialed numbers 2 Use the navigation keys to view the call record information Delete Save Call Logs 1 Login in to the Call Logs 2 Use the navigation keys to view the call record or select DEL key 3 Use the navigation keys to view the call record or select Save...

Page 23: ... OK or MENU button System Setting Phone Setting Language 2 Here you can select English French Italian Polish Protuguese Runssian Spanish Turkish Chinese 3 After you finish select press Save to make it work 3 7 2 Message 300IP 6P have Message feature It will display in the LCD when it has a New Message Create a Message 1 Press OK or MENU button 2 Select Messaging 3 Voice Message Setting the Voice M...

Page 24: ...ng Year Month Days Hours Minutes Seconds Time Display Format 1 Press OK or MENU button 2 Press OK or MENU button System Setting Phone Setting Time Date Time Display Format 3 Time Mode 24hour 12hour Date mode DDMMWWW MMDDWWW WWWDDMMM DDMMMYY YYYYMMDD DDMMYYYY MMDDYY DDMMMYYYY WWWDDMMM etc 3 7 4 Ring Tone and Volume Setting Ring Type 1 Press OK or MENU button 2 Press OK or MENU button System Setting...

Page 25: ...is Accurate Search 3 7 6 Cannot Set the Features with Keypad As below features are cannot setting with the keypad 1 Dial Plan 2 Custom Ring Type 3 SNTP Server and Time Date 4 Update the Firmware or Backup 4 WEB User Interface In addition to the phone user interface you can also customize your phone via web user interface In order to access the web user interface you need to know the IP address of ...

Page 26: ...Time The phone system normal running time Register Status The status with Account 1 6 Network Status The status with LAN MAC LAN IP Net mask Gateway Primary DNS Secondary DNS VPN IP PC IP PC Net mask Device Type DHCP Server System Information The status with Phone Model Software Version Hardware Version Hardware ID Kernel Version Auto Provision Server Motorola ...

Page 27: ...URL TFTP Server IP 4 1 Network 4 1 1 LAN Port ITEM DESCRIPTION Network Connection Mode Network Connection Mode has DHCP Static IP PPPoE DNS Settings Select the DNS mode that you want Motorola ...

Page 28: ... it means that pc port and LAN port will share the same network AS Router Router feature is for the phone PC Port You must input IP address it s equivalent to a gateway and Net mask If you want to use DHCP function please turn it on input start IP and end IP Motorola ...

Page 29: ...able VPN You can enable disable VPN for phone and pc VPN Type Choose the appropriate type of VPN VPN Server Addr VPN server s IP VPN User Name VPN user s name VPN Password A password be used for authentication OPEN VPN Upload the ovpn file to the phone Upload VPN cfg Select the VPN configuration to upload Motorola ...

Page 30: ...phone and PC VID LAN PC Port The VLAN ID you want the phone or PC to join Port Management Settings Port Management Settings HTTP Port The default web port is 80 if you want to change it for example change it to88 You must input IP and Web port to login the web page for example HTTP 192 168 0 200 88 It will take effect on next reboot Motorola ...

Page 31: ... can change the local SIP port to another The default local SIP port is 5060 RTP Port Range You can change the RTP port range to another The default RTP port range is 10000 to 10128 QoS ITEM DECSRIPTIO SIP QoS The range is 0 63 default is 26 Voice QoS The range is 0 63 default is 46 Network Packet Mirroring Network Packet Mirroring When select on then you can capture the phone s packet use noteboo...

Page 32: ...able 802 1 x Identity You can setting the 802 1 x Identity here MD5 Password You can setting the MD5 Password here CA Certificates You can upload the CA Certificates here LLDP ITEM DECSRIPTIO LLDP Enable Disable the LLDP feature LLDP Packet Interval You can setting the LLDP packet Interval here Default is 60s Motorola ...

Page 33: ... Paging Setting NOTE This feature priority is followed the serial number In other words paging 1 is the highest priority Paging1 Enable Disable Paging feature Group IP and Port Group IP and Port with Paging Motorola ...

Page 34: ...ll find the following parameters ITEM DECSRIPTIO Account Select the Account Number what you want to set Enable You can choose on off to enable disable the line Account Mode VOIP mode Number Of Lines The line key of account used default is 1 Motorola ...

Page 35: ...r in this secondary server Outbound Proxy Server Put into the address with the outbound proxy server Secondary Outbound Proxy Server When the main out bound server can t work it also can use this secondary server Poling Interval Time Of Registration Poling Interval Time Of Registration default is 32 s NAT Traversal Defines the STUN server will be active or not STUN Server Session traversal utiliti...

Page 36: ...5 2 Advanced Motorola ...

Page 37: ...ITEM DECSRIPTIO Motorola ...

Page 38: ...s Enable Disable Allow events Registered NAT Enable Disable Registered to NAT Keep alive Type Default is UDP or you can change to Options or Notify or disable it Keep alive Interval Default is 30 second User user phone There will be a sign user phone in the invite packet of the SIP message Conference Way Default is conference on phone You can change on server Network based conference URI Setting t...

Page 39: ... program keys feature Key1 24 The key amount depend on the lines and support 4 page 24 4 6 Mode Support Speed Dial Speed Dial Prefix DTMF BLF Paging Call Park Intercom Pickup XML Browser Broadsoft BLF BLA Account Select account to make it work Name The name of the key Number The number of the key Motorola ...

Page 40: ...quickly and easily forward time sensitive announcements out to people within the multicast group Call Park You can use call park feature to place a call on hold and then retrieve the call from another phone in the system for example a phone in another office or conference room Intercom You can press the configured intercom key to automatically connect with a remote extension for outgoing intercom ...

Page 41: ... 6 4 Soft Key Soft Keys Soft key is the key with below display in the LCD You can change it for your mind to the other features in many all kinds of status As below example when you dialing with someone the LCD display soft key is Send Del Empty End Empty means nothing in it Motorola ...

Page 42: ...e looks like English French etc Backlight The LCD backlight default is 60s Ring type The incoming call s ring default has ring1 8 Upload ring tone Please upload a ring tone with G 711A wav audio coding maximum is 10 rings and the total size must be less than 150KB Motorola ...

Page 43: ...7 2 Features Motorola ...

Page 44: ...Call Waiting This call feature allows your phone to accept other incoming calls during the conversation Call Waiting Tone Set tone for prompting a new call during a call Auto Redial Enable or disable auto redial feature Auto Redial Interval 1 300s Setting the auto redial interval Auto Redial Times 1 300 Setting the auto redial times Motorola ...

Page 45: ...altering calls and casing LED or Only show altering calls or disable Booking Voice mail Enable or disable Booking Voice mail Play Voice mail tone Enable or disable Play Voice mail tone Display missed Calls Enable or disable Display missed Calls DND Soft key Enable or disable DND Soft key Play Hangup Tone Enable or disable Play Hangup Tone Transfer Code Enable or disable Transfer Code or number Con...

Page 46: ...onses SIP Session Timer seconds T2 T2 use with T1 SIP Session Timer seconds T4 T4 represents the possible information transmission time between the client and server side transaction on the network The default value of T4 is 5 seconds Affiliated Port Enable or disable register Affiliated port Headset Mode Headset Mode default is Normal or you can select Seat Mode Ring type in Seat Mode Ring type i...

Page 47: ...ng Time Enable disable the DST for the phone Time Format You can use 24 hour time format or 12 hour time format Date Format You can choose the appropriate time format Time Zone GMT You can select different time zone for the phone Manual Setting Setting time manually 7 4 Keyboard Lock Keyboard Lock Enable Disable keyboard lock you can lock MENU Key FUNCTION Key ALL Keys LOCK all keys but auto Answe...

Page 48: ... frequency with the VOIP Call Forward 7 6 Remote Control List IP address of PC who can remote control this device 7 7 Action URL It allows IP phone to interact with web server applications by sending an HTTP or HTTPS get request You can specify a URL that triggers a get request when a specified event occurs Action URL can only be triggered by the pre defined events e g Incoming Call The valid URL ...

Page 49: ...is Lv5 the range is 1 9 Speaker Phone Volume The speaker volume default is Lv5 the range is 1 9 Headset Volume The headset volume default is Lv3 the range is 1 9 Handset MIC Volume The handset MIC volume default is Lv3 the range is 1 7 Speaker Phone MIC Volume The speaker MIC volume default is Lv3 the range is 1 7 Headset MIC Volume The headset MIC volume default is Lv3 the range is 1 7 Motorola ...

Page 50: ...fault is 30ms High Rate Of G723 1 Enable Disable High Rate of G723 1 feature VAD Enable Disable VAD feature Echo Suppression Mode Enable Disable Echo Suppression Mode feature Side Tone Enable Disable Side Tone feature 7 9 Ring Internal ringer text This Internal ringer text enables the server to distinguish between internal and external rings The trace head info must include Alert Info info Interna...

Page 51: ...7 10 Dial Plan If you want to setup a dial plan you can click Dial Plan Motorola ...

Page 52: ... Add Rule button to add dial rule pls see as below detail ITEM DECSRIPTIO ID Dial Plan ID IP The ip of a phone which you want to call Description Description with this dial rule Port Setting the Port with this dial rule default is 5060 Prefix The number which you need to press actually if you want to call the phone Called Insert Number There have two option Enable or Disable Position Which positio...

Page 53: ... Delete Number There have two option Enable or Disable NOTES If you want to know more detail about Dial Rule pls find it in the official website to download the specific document 7 11 BLF Setting Create the BLF groups and members of group Motorola ...

Page 54: ...hone book including Group Contact LDAP and Ban list please review the following for more details 8 1 Contact You can add edit and delete contact in a phone book on this web page The phonebook can storage 300 contacts entry Motorola ...

Page 55: ... if you want to delete all Contacts you just ought to click Delete All Contact You can edit or move this contact to Ban List after you select You can download and save this contact to PC after you select 8 2 Group You can add edit and delete group in a phone book on this web page If you want to add a Group you just ought to click Add Group Motorola ...

Page 56: ...detail about LDAP pls find it in the office website to download the specific document As below figure is an example e g LDAP Name Filter sn s LDAP Number Filter telephoneNumber s Server Address 192 168 0 65 BASE DC ldap DC Motorola DC com User Name bb ldap Motorola com Pass Word Motorola_2012 LDAP Name Attributes 1 sn LDAP Name Attributes 2 cn LDAP Number Attributes 1 telephoneNumber Motorola ...

Page 57: ...8 4 Blacklist You can add edit and delete contact in a Ban List on this web page Motorola ...

Page 58: ... List by click You can delete an existed Ban List by click if you want to delete all Ban List you just ought to click Delete All Ban List You can edit or move this contact to Contact after you select 8 5 Phone Call Info You can remote or local control the IP phone to make a call by WEB Motorola ...

Page 59: ...re Upgrade Used for upgrading the software of the phone Kernel Upgrade Used for upgrading the kernel of the phone Configuration You can used upload download to upload download the configure file of the phone XML Phone Book Used for uploading downloading the XML phonebook of the phone Vcard Downloading all contacts in the Vcard mode but upload only support one by one EXT Module Used for updating ba...

Page 60: ... FTP server Software Upgrade Used for upgrading the software of the phone Kernel Upgrade Used for upgrading the kernel of the phone Configuration Used for updating backup to update backup the configure file of the phone Phone Book Used for updating backup to update backup the phonebook of the phone EXT Module Used for updating backup the expansion of the phone NOTES The mode doesn t support this f...

Page 61: ...ed for updating backup the phonebook of the phone EXT Module Used for updating backup the expansion of the phone NOTES The mode doesn t support this feature NOTES It s not necessary to input filename when doing backup Configuration Phone Book EXT Module 9 4 Auto Provisioning When you open this auto provision feature the phone will do auto provision after it detect a different software or kernel Hi...

Page 62: ...s to obtain a support URL for upgrade PNP Interval minutes Setting the PNP interval Auto Provision You can enable disable auto provision by select on off Protocol Used for auto provision it includes TFTP HTTP FTP Software Server URL The server address of the auto provision Username Providing by provision server Motorola ...

Page 63: ...the server during the phone power on Wait Time 1 100s The time when configuration interface of zero sp touch will show up when power on Disable the phone while booting checking Enable Disable the booting checking feature Auto Provision Frequency Used for setting the time interval for auto provision Auto Provision Time Used for the specific time for auto provision Auto Provision Next Time Reset the...

Page 64: ... Settings You can load the phone to the factory default setting in default setting option Press the Reset to Factory Setting option the phone will load to factory default setting on next reboot 9 7 Reboot You can use reboot option to reboot the phone Motorola ...

Page 65: ...ssword management Select your type If you login as an administrator you can modify both the user s and admin s passwords 10 2 Trusted Certificates 10 3 IP Strategy You can use IP Strategy feature to make a list which can be set to only allow the incoming call on the list Motorola ...

Page 66: ...ans you just allow come from this IP address meeting 11 WEB Other Settings or Information Appendix 11 1 Logout Logout the IP Phone web management 11 2 Note Tips In the right middle of the website page there is a Note tips in every function page Hope it can help you to know something about that Motorola ...

Page 67: ...Motorola ...

Reviews: