Radio Mounting
Radio Installation
1-5
6.0
Radio Mounting
6.1
Mounting Trunnion
The standard mounting trunnion allows the radio to be mounted to a variety of surfaces. Ensure the
mounting surface is able to adequately support the weight of the radio. Allow sufficient space around
the radio for free air flow for cooling. Ensure that the unit is close enough to the vehicle operator to
permit easy access to operating controls. Although the trunnion can be mounted to a plastic
dashboard, it is recommended that the mounting screws be located so they penetrate the
supporting metal frame of the dashboard.
6.2
DC Power Cable Installation
This radio must be operated only in negative ground electrical systems. Reverse polarity will cause
the cable fuse to blow. Check the vehicle ground polarity before you begin installation to prevent
wasted time and effort.
The 3 meter (10 feet) DC power cable shipped with the radio is long enough for installation in most
vehicles. Begin the power cable installation in the following manner:
1.
Determine a routing plan for the power cable with reference to where the radio is to be
mounted.
2.
Locate an existing hole with a grommet in the vehicle fire wall, or drill a 10 mm Ø access hole
at the location for passing the power cable into the engine compartment. Install a grommet
with 5 mm Ø inner diameter in the access hole to avoid damage to the cable.
CAUTION:
High degree of care should be exercised not to damage any existing vehicle wires.
3.
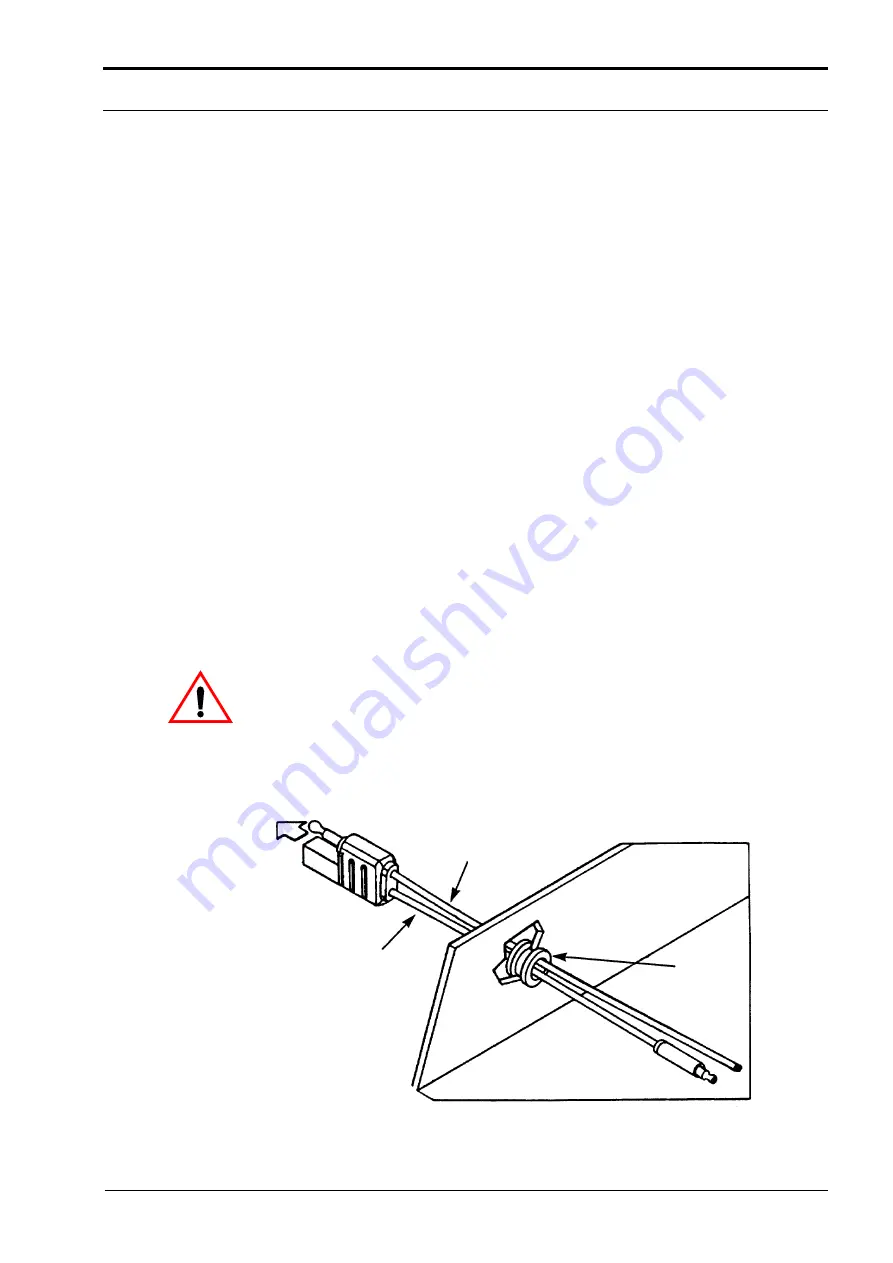
From inside the vehicle, feed the red and black leads (without lugs attached) through the
access hole and into the engine compartment. (see Figure 1-1).
Figure 1-1
Power Cable Routing into Engine Compartment.
Black Lead
Red Lead
Grommet
FIREWALL
ENGINE COMPARTMENT
To Radio


