background image

12

Doing more with your Digital Photo Frame

2.5.3

Change Time and Date

You can set the time, date and time format to be displayed 
on your Digital Photo Frame.

2.5.3.1 Set Year, Month, Day, Hour and Minute

1.

Press 

a

 or 

b


to select 

Time and Date

 and press 

o

.

2.

Press  

a

 or 

b

 to select a setting (

Year

,


Month

,


Day

,


Hour


and


Minute

) and press 

c

 or 

d

 to set the value.

2.5.3.2 Set Time Format

1.

Press 

a

 or 

b


to select 

Time and Date

 and press 

o

.

2.

Press  

a

 or 

b

 to select 

Time Format

 and press 

c

 or 

d

 to select a format (

24h


or


12h

).

2.5.4

Languages

You can select the display language of your Digital Photo 
Frame. 

1.

Press 

a

 or 

b


to select 

Languages

 and press 

o

.

2.

Press 

a

 or 

b

 to select a language and press 

o

.

2.5.5

Programmable On/Off time (Auto On/Off)

You can set the Digital Photo Frame to switch on and off 
automatically at a specific time of the day. 

2.5.5.1 Set auto on/off

1.

Press 

a

 or 

b


to select 

Auto On/Off

 and press 

o

.

2.

Press 

a

 or 

b


to select 

No auto on/off

 and press 

c

 or 

d

 to select a setting (

ON


or


OFF

).

2.5.5.2 Set auto on time

1.

Press 

a

 or 

b


to select 

Auto On/Off

 and press 

o

.

2.

Press 

a

 or 

b


to select 

Auto on hour


and press 

c

 or 

d

 to set the value.

3.

Press 

a

 or 

b


to select 

Auto on minute


and press 

c

 or 

d

 to set the value.

2.5.5.3 Set auto off time

1.

Press 

a

 or 

b


to select 

Auto On/Off

 and press 

o

.

2.

Press 

a

 or 

b


to select 

Auto off hour


and press 

c

 or 

d

 to set the value.

3.

Press 

a

 or 

b


to select 

Auto off minute


and press 

c

 or 

d

 to set the value.

2.5.6

Display

You can change the display brightness and contrast.

1.

Press 

a

 or 

b


to select 

Display

 and press 

o

.

2.

Press 

a

 or 

b


to select a setting  (

Brightness


or


Contrast

and press 

c

 or 

d

 to set the value (

0

 – 

16

).

2.5.7

Photo view options

You can control the size of the pictures displayed.

1.

Press 

a

 or 

b


to select 

Photo view options

 and press 

o

.

2.

Press 

a

 or 

b


to select a setting  (

Original

 or 

Fit to 

screen

) and press 

o

.

2.5.8

Default settings

This option resets all settings to the default.

1.

Press 

a

 or 

b


to select 

Default settings

 and press 

o

.

2.

Press  

a

 or 

b

 to select 

Yes

 and press 

o

.

LS420_IFU_EN.book  Page 12  Monday, December 28, 2009  4:20 PM

Summary of Contents for LS420

Page 1: ...LS420_IFU_EN book Page 4 Monday December 28 2009 4 20 PM ...

Page 2: ...f your Motorola product you will need to provide a copy of your dated sales receipt to confirm warranty status Registration is not required for warranty coverage For product related questions please call 1 888 331 3383 in US and Canada 0845 218 0890 in UK 65 68412668 in Singapore LS420_IFU_EN book Page 5 Monday December 28 2009 4 20 PM ...

Page 3: ...A 1 LCD screen 2 Face plate Frame overview 1 LS420_IFU_EN book Page 6 Monday December 28 2009 4 20 PM ...

Page 4: ...re with your Digital Photo Frame 9 2 1 Viewing mode 9 2 2 Dual Slideshow Mode 9 2 2 1 Selecting a screen 9 2 2 2 Pause picture transition 9 2 2 3 Changing pictures manually 9 LS420_IFU_EN book Page 4 Monday December 28 2009 4 20 PM ...

Page 5: ...at and extreme temperatures such as fluorescent Care and maintenance Wipe the frame and the LCD screen gently with a soft clean dry cloth To remove fingerprints on the LCD screen wipe gently with a soft lint free cloth Do not use cleaning solutions unless they are designed specifically for LCD screens LS420_IFU_EN book Page 5 Monday December 28 2009 4 20 PM ...

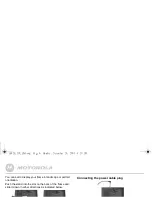
Page 6: ...n landscape or portrait orientation Push the stand into the slot on the back of the frame and slide it down in either directions as indicated below Connecting the power cable plug LS420_IFU_EN book Page 6 Monday December 28 2009 4 20 PM ...

Page 7: ...ry card Your Digital Photo Frame supports SD SDHC and MMC memory cards Connecting a USB device Your Digital Photo Frame supports USB flash drive and card reader LS420_IFU_EN book Page 7 Monday December 28 2009 4 20 PM ...

Page 8: ...ewing your first slideshow If you have inserted a memory card with pictures that are in JPEG format the slideshow starts automatically when you switch on your digital photo frame Mounting holes LS420_IFU_EN book Page 8 Monday December 28 2009 4 20 PM ...

Page 9: ...ideshow you are ready to learn about more great features of your Digital Photo Frame 2 2 2 Pause picture transition You can pause the automatic transition of pictures in the selected screen 1 Press o 2 To resume automatic transition press o again 2 2 3 Changing pictures manually LS420_IFU_EN book Page 9 Monday December 28 2009 4 20 PM ...

Page 10: ...pping screen display When you first enter Clock Calendar Mode the top screen displays a full screen picture while the bottom screen displays a clock calendar To swap screen display press b LS420_IFU_EN book Page 10 Monday December 28 2009 4 20 PM ...

Page 11: ...2 5 Settings Mode The settings mode allows you to change the various settings of your Digital Photo Frame In this mode the bottom screen displays a list of options while the top screen displays full screen pictures As you change LS420_IFU_EN book Page 11 Monday December 28 2009 4 20 PM ...

Page 12: ...b to select Time and Date and press o 2 Press a or b to select a setting Year Month Day Hour 2 5 5 2 Set auto on time 1 Press a or b to select Auto On Off and press o 2 Press a or b to select Auto on hour and press c or d to set the value 3 Press a or b to select Auto on minute and press c or d to set the value LS420_IFU_EN book Page 12 Monday December 28 2009 4 20 PM ...

Page 13: ...securely connected page 6 Make sure you are using the power adapter that was included with your Digital Photo Frame 4 General Information If your product is not working properly 1 Read this User s Guide 2 Visit our website LS420_IFU_EN book Page 13 Monday December 28 2009 4 20 PM ...

Page 14: ...ed below conform to this warranty Binatone Electronics International LTD may use functionally equivalent reconditioned refurbished pre owned or new Products Accessories or parts in such repair or replacement and any Products Accessories or parts removed or being replaced under this warranty become the property of Binatone Electronics International LTD LS420_IFU_EN book Page 14 Monday December 28 2...

Page 15: ...NUE SAVINGS OR PROFITS LOSS OF BUSINESS LOSS OF PROGRAMS DATA INFORMATION WHETHER CONFIDENTIAL PROPRIETARY OR Products or Accessories Covered Length of Coverage Consumer Products One 1 year from the date of purchase by the first consumer purchaser of the product Consumer Accessories Ninety 90 days from the date LS420_IFU_EN book Page 15 Monday December 28 2009 4 20 PM ...

Page 16: ...her acts or omissions which are not the fault or neglect of Motorola or Binatone Electronics International LTD are excluded from coverage How to Obtain Warranty Service or Other Information To obtain service or information please call 1 888 331 3383 in US and Canada 0845 218 0890 in UK 65 68412668 in Singapore 0860100551 in South Africa LS420_IFU_EN book Page 16 Monday December 28 2009 4 20 PM ...

Page 17: ...y This equipment has been tested and found to comply with the limits for a Class B digital device pursuant to Part 15 of the FCC Rules These limits are designed to provide reasonable protection against harmful interference in a residential installation This equipment generates uses and can radiate radio Screens size 4 2 diagonal x 2 LS420_IFU_EN book Page 17 Monday December 28 2009 4 20 PM ...

Page 18: ...nce with FCC regulation FCC and Industry Canada This device complies with Industry Canada RSS 210 and FCC Rules Operation is subject to the following two conditions 1 this device may not cause harmful LS420_IFU_EN book Page 18 Monday December 28 2009 4 20 PM ...

Page 19: ...LS420_IFU_EN book Page 0 Monday December 28 2009 4 20 PM ...

Reviews: