background image

MC21XX SERIES

MOBILE COMPUTER

USER GUIDE

Summary of Contents for MC21XX SERIES

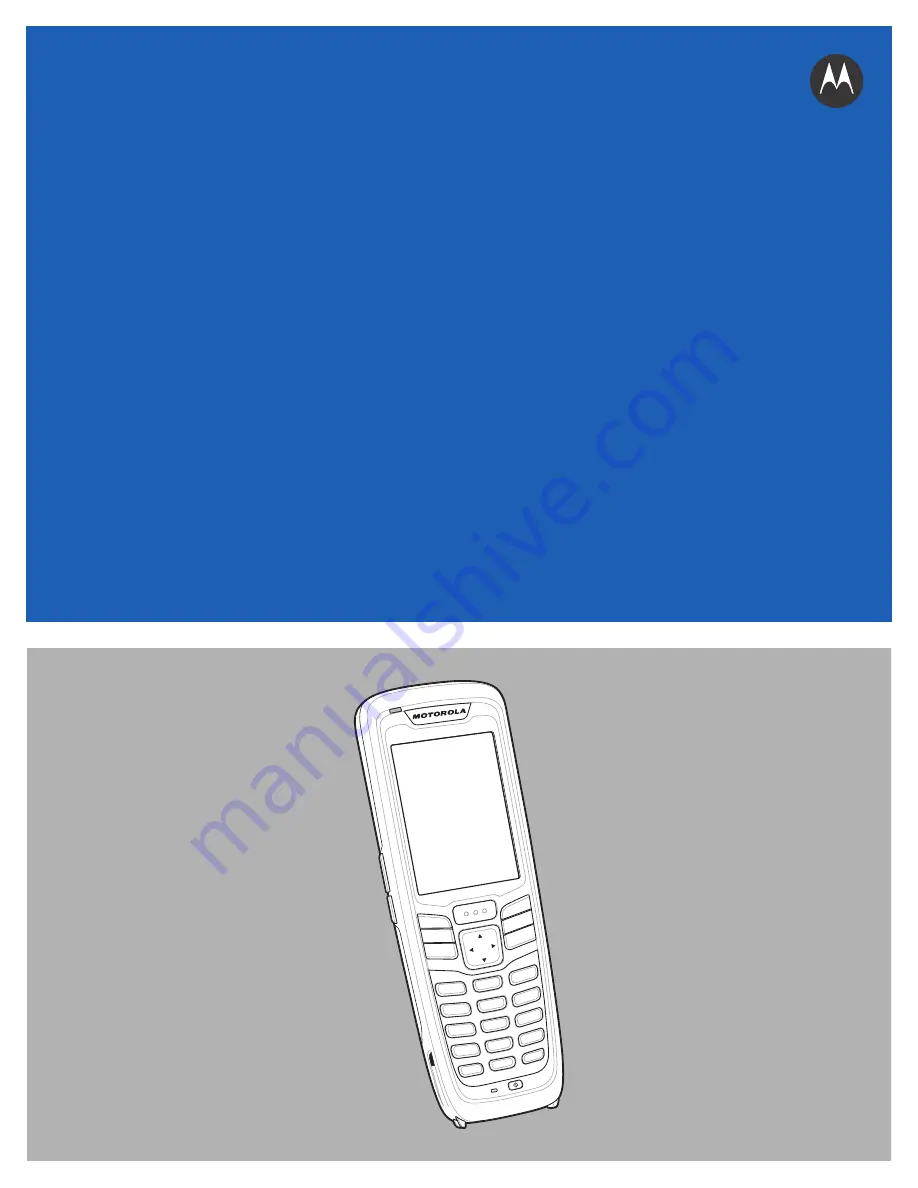
Page 1: ...MC21XX SERIES MOBILE COMPUTER USER GUIDE ...

Page 2: ......

Page 3: ...MC21XX SERIES MOBILE COMPUTER USER GUIDE 72E 155020 01 Rev A December 2011 ...

Page 4: ...r copyright law The user shall not modify merge or incorporate any form or portion of a licensed program with other program material create a derivative work from a licensed program or use a licensed program in a network without written permission from Motorola The user agrees to maintain Motorola s copyright notice on the licensed programs delivered hereunder and to include the same on any author...

Page 5: ...iii Revision History Changes to the original guide are listed below Change Date Description 01 Rev A 12 23 11 Initial release ...

Page 6: ...iv MC21XX Series User Guide ...

Page 7: ... Getting Started Introduction 1 1 Unpacking the Mobile Computer 1 1 Features 1 2 Mobile Computer Startup 1 3 Install microSD Card 1 3 Install Main Battery 1 4 Battery Charging 1 4 Spare Battery Charging 1 6 Starting the MC21XX 1 6 Calibration Screen 1 6 Main Battery Removal 1 7 Turning Off the Radios 1 8 WLAN Radio 1 8 Safe System Shutdown Re boot 1 8 Chapter 2 Operation Introduction 2 1 Power But...

Page 8: ...ng Keypad 2 11 Entering Information Using the Keyboard Input Panel 2 12 Entering Data via the Bar Code Scanner 2 12 Resetting the MC21XX 2 12 Performing a Warm Boot 2 12 Performing a Cold Boot 2 12 Waking the MC21XX 2 13 Battery Health 2 14 Using the Keypad 2 15 Browser 2 16 Audio Routing 2 17 Chapter 3 Data Capture Introduction 3 1 Linear Imager 3 1 1D Laser Scanner 3 1 2D Imaging 3 1 Operational...

Page 9: ...rength Icon 5 3 Turning Off the Radio 5 3 Minimum Setup 5 3 Chapter 6 Accessories Introduction 6 1 Single slot USB Cradle 6 3 Battery Charging 6 3 Four slot Charge Only Cradle 6 4 Battery Charging 6 4 Power LED 6 4 Four slot Ethernet Cradle 6 5 Battery Charging 6 5 LED Charge Indications 6 5 Speed LED 6 6 Link LED 6 6 Four slot Spare Battery Charger 6 7 Spare Battery Charging 6 7 Modem Adapter Cab...

Page 10: ...Cleaning Notes 7 3 Materials Required 7 3 Cleaning the MC21XX 7 4 Housing 7 4 Display 7 4 Scanner Exit Window 7 4 Connector 7 4 Cleaning Cradle Connectors 7 4 Cleaning Frequency 7 5 Troubleshooting 7 6 MC21XX 7 6 Single slot USB Cradle 7 8 Four slot Charge Only Cradle 7 9 Four slot Spare Battery Charger 7 9 USB ActiveSync Charge Cable 7 10 Appendix A Specifications MC21XX and Accessory Technical S...

Page 11: ...uter User Guide describes how to use the MC21XX MC21XX Series Mobile Computer Integrator Guide describes how to set up the MC21XX and the accessories Microsoft Applications for Windows Mobile 6 1 and CE 6 0 User Guide describes how to use Microsoft developed applications Application Guide for Motorola Enterprise Mobility Devices describes how to use Motorola Enterprise Mobility developed applicati...

Page 12: ...ware version Tap Start Settings Control Panel System Info icon System tab Fusion Software To determine the Fusion software version Tap Wireless Strength icon Wireless Status Versions Configuration Radios Display Memory Data Capture Operating System MC2100 None Color no touch 128 MB RAM 256 MB Flash Linear imager or 1D laser Windows CE 6 0 MC2180 WLAN 802 11 b g n WPAN Bluetooth Color touch screen ...

Page 13: ...applications on the MC21XX Chapter 6 Accessories describes the accessories available for the MC21XX and how to use the accessories to charge the MC21XX Chapter 7 Maintenance Troubleshooting includes instructions on cleaning and storing the MC21XX and provides troubleshooting solutions for potential problems during MC21XX operation Appendix A Specifications includes a table listing the technical sp...

Page 14: ...r C available at http supportcentral motorola com ActiveSync software available at http www microsoft com For the latest version of this guide and all guides go to http supportcentral motorola com Service Information If you have a problem with your equipment contact Motorola Solutions Global Customer support for your region Contact information is available at http www motorolasolutions com contact...

Page 15: ...About This Guide xiii If you purchased your product from a Motorola Solutions business partner contact that business partner for support Manufacturing Label Location ...

Page 16: ...xiv MC21XX Series User Guide ...

Page 17: ...terial from around the mobile computer and save the shipping container for later storage and shipping Verify that the equipment listed below is included Mobile computer Mini stylus and tether touch screen configurations only Battery Regulatory Guide Quick Start Guide Inspect the equipment for damage If any equipment is missing or damaged contact the Motorola Solutions Global Support immediately Se...

Page 18: ...ure 1 1 MC21XX Mobile Computer Keypad Display Power Scan Button Microphone MC2180 only LED Indicator I O Connector Power Input Port Volume Down Button Default Programmable MC2180 only Volume Up Button Default Programmable MC2180 only Navigation Pad Exit Window Mini Stylus Battery Speaker Battery Release Latch ...

Page 19: ...Lift the microSD card holder door Figure 1 2 Inserting the microSD Card 4 Position the microSD card with the contacts facing down into the microSD holder 5 Close microSD card door 6 Slide the card holder up to lock CAUTION Follow proper Electro Static Discharge ESD precautions to avoid damaging the microSD card Proper ESD precautions include but are not limited to working on an ESD mat and ensurin...

Page 20: ...er to charge the main battery out of the MC21XX or the supplied power supply to charge the main battery while it is installed in the MC21XX Before using the MC21XX for the first time fully charge the main battery until the LED Indicator remains lit see Table 1 1 on page 1 5 for charge status indications The battery fully charges in less than four hours The MC21XX is equipped with a memory backup b...

Page 21: ...be charged within the 0 to 40 C 32 to 104 F ambient temperature range To charge the MC21XX using the optional power supply Figure 1 5 Charging Using Power Supply 1 Connect the AC Line Cord to the power supply 2 Connect the AC plug to an AC outlet 3 Lift the rubber plug covering the MC21XX power port 4 Plug the power supply barrel jack into the power port on the bottom of the MC21XX The MC21XX star...

Page 22: ...ttery is charging See Chapter 6 Accessories for charging indications The battery usually fully charges in less than four hours Starting the MC21XX Press the Power button to turn on the MC21XX If the MC21XX does not power on perform a cold boot See Resetting the MC21XX on page 2 12 When the MC21XX is powered on for the first time it initializes The Splash screen appears for a short period of time O...

Page 23: ...tings Main Battery Removal To remove the main battery from an MC21XX 1 If the MC21XX is in suspend mode press the Power button to wake the MC21XX 2 Press the Power button to place the MC21XX in suspend mode 3 On the MC2180 tap Safe Battery Swap On the MC2100 using the navigation pad scroll down to Safe Battery Swap Press the Enter key 4 Wait for the LED Indicator to turn red and then turn off 5 Us...

Page 24: ...he task tray and select Enable Radio The X disappears from the icon indicating that the radio is enabled on See Chapter 5 Wireless Applications for more information Safe System Shutdown Re boot To ensure that data is not lost or that system corruption does not occurs the user must follow the Safe Battery Swap procedure when replacing the battery See Main Battery Removal on page 1 7 If the Safe bat...

Page 25: ...rst perform a warm boot A warm boot maintains radio status and registry settings Do not perform a cold boot unless necessary Performing a cold boot resets the MC21XX to factory defaults and loss of all registry settings To perform a warm boot press and hold the Power button for five seconds ...

Page 26: ...1 10 MC21XX Series User Guide ...

Page 27: ...ed By default an installation icon is on the Desktop Double tap the icon to install the sample applications When installed the Sample Applications window appears on the screen whenever the MC21XX re boots Refer to the MC21XX Series Mobile Computer Integrator Guide for installation and configuration The Sample Applications window links to sample applications The sample applications are intended to ...

Page 28: ...plications for Mobile and CE 6 0 User Guide p n 72E 78456 xx Figure 2 2 Windows CE Desktop Using the Keypad to Navigate Applications The MC2100 screen is a non touch screen and therefore navigation and control of an application is performed using the keypad Key Combinations The MC2100 uses special key combinations to easily navigate applications Table 2 1 lists the key combinations required to per...

Page 29: ...e first item 4 Press CTRL navigation pad to move within the list The item name is outlined 5 Repeat step 4 to move to the desired item 6 Press SPACE to highlight the item Table 2 1 Key Combinations Action Key Combination Access the Start menu on the Task bar Press CTRL ESC Switch fields within an application Press TAB Close windows or cancel operations Press ESC Access the Task Manager Press ALT T...

Page 30: ...rol box appears Figure 2 3 Volume Control Box 2 Use the navigation pad to adjust the volume 3 After three seconds of inactivity the settings are saved and the box disappears Adjusting the Screen Brightness To adjust the screen brightness 1 Press Orange key F2 The brightness contrast control box appears Figure 2 4 Brightness Control Box 2 Use the navigation pad to adjust the contrast 3 After three ...

Page 31: ... battery status in 10 increments from 10 to 100 The backup battery low icon indicates that the backup battery charge is low See Battery Charging on page 1 4 for backup battery charging instructions Figure 2 5 Taskbar Table 2 2 Taskbar Icons Icon Description Clock Indicates the current time Battery This icon indicates that the main battery is charging or that the terminal is operating on AC power D...

Page 32: ...e to access available programs Favorites Displays files in Favorites directory Documents Displays files in Documents directory Settings Accesses the Control Panel the Network and Dial up Connections and the Taskbar and Start menu Wireless Connection Status Indicates WLAN signal strength DataWedge Running Indicates that the DataWedge application is running DataWedge Idle Indicates that the DataWedg...

Page 33: ...r 5 Wireless Applications for more information Command Prompt Opens a DOS command prompt window CtlPanel View and change MC21XX settings such as Scanner Parameters Display Settings Audio Settings Printer Settings Date and Time Settings Touch Screen Settings etc MSP Agent Interacts with MSP agents to collect monitoring and asset information to enable the configuration provisioning monitoring and tr...

Page 34: ...s software operation information to use if a serious error occurs Input Panel Switch input methods and set input options Keyboard Change keyboard repeat delay and rate Mouse Adjust double click sensitivity for both the speed and timing Network and Dial up Connections Connect to other computers networks and the Internet using a modem Owner Change owner s personal profiles Password Set a password fo...

Page 35: ...ctions to set display and clock options Task Manager 1 Press Blue key CTRL to activate the ALT state then press TAB to display the Task Manager Figure 2 6 Task Manager Window 2 Select a task in the Active Tasks list and select Switch To to make that task the primary task or select End Task to end the selected task 3 Tap X or press ESC to exit the Task Manager window Properties 1 Select Start Setti...

Page 36: ... if there were documents in the list the Clear button would delete them 3 Select the Expand Control Panel checkbox to display the entire contents of the Control Panel in list form rather than icons Figure 2 8 Taskbar and Start Menu Advanced Tab 4 Select OK to save the settings and exit the window Mini Stylus To remove the mini stylus lift the point end of the stylus up and slide it out of the bar ...

Page 37: ...data fields Use Microsoft ActiveSync or Windows Mobile Device Center WMDC to synchronize or copy information from the host computer to the MC21XX For more information on ActiveSync and WMDC refer to the MC21XX Series Mobile Computer Integrator Guide Entering Information Using Keypad The alphanumeric keypad produce the 26 character alphabet A Z numbers 0 9 function keys and assorted characters The ...

Page 38: ...t reset it There are two reset functions warm boot and cold boot A warm boot restarts the MC21XX by closing all running programs All data that is not saved is lost A cold boot also restarts the MC21XX but erases all stored records and entries from RAM In addition it returns formats preferences and other settings to the factory default settings Perform a warm boot first If the MC21XX still does not...

Page 39: ...ne what actions wake up the MC21XX after it has gone into suspend mode The MC21XX can go into suspend mode by either pressing the Power button or automatically by Control Panel time out settings These settings are configurable and the factory default settings are shown in Table 2 5 To access the Wakeup settings Select Start Settings Control Panel Power icon Wakeup tab CAUTION Cold boot resets the ...

Page 40: ...ation on changing the Battery Usage Threshold refer to the MC21XX Series Mobile Computer Integrator Guide Table 2 6 BatteryMgmt Window Item Description State of Health Indicates the current state of the battery Healthy or Unhealthy Battery Usage Indicator Indicates the usage of the battery Battery Usage Threshold Indicates the usage indicator threshold Battery Serial Displays the serial number of ...

Page 41: ...Operation 2 15 Using the Keypad Figure 2 14 Entering Data on the Keypad Single hand Method Two hand Method ...

Page 42: ... Bar Tap to display the soft keyboard Tap in the Address Bar and then enter an address Press the Enter key The web page loads Tap to view and manage Favorites Tap in the tap left corner to close the browser Tap to size the web page NOTE MC2180 only Display Address and Menu Bar Address Bar Menu Bar Favorites Forward Back Displays the soft keyboard Full screen toggle ...

Page 43: ...eration 2 17 Audio Routing To route audio to the I O connector on the bottom of the MC21XX 1 Tap Start Settings Control Panel 2 Double tap USBConfig 3 On the Bottom I O Mode tab select Audio Mode 4 Tap OK ...

Page 44: ...2 18 MC21XX Series User Guide ...

Page 45: ...er The MC21XX with an integrated 1D laser scanner has the following features Reading of a variety of bar code symbologies including the most popular linear postal and 1 D code types Intuitive aiming for easy point and shoot operation 2D Imaging The MC21XX with an integrated 2D imager has the following features Omnidirectional 360 reading of a variety of bar code symbologies including the most popu...

Page 46: ...device decodes well over a particular working range minimum and maximum distances from the bar code This range varies according to bar code density and scanning device optics Scanning within range brings quick and constant decodes scanning too close or too far away prevents decodes Move the scanner closer and further away to find the right working range for the bar codes being scanned However the ...

Page 47: ...ure 3 1 Data Capture 4 Press the scan button Ensure the red scan beam covers the entire bar code The LED Indicators illuminate red to indicate that the beam is on The LED Indicator turns green and a beep sounds to indicate a successful decode Figure 3 2 Laser Aiming Figure 3 3 Linear Aiming Optimal scanning distance varies with bar code density and scanner optics Hold the scanner farther away for ...

Page 48: ...he aiming dot The aiming dot is used for increased visibility in bright lighting conditions The Scan Decode LED lights red to indicate that scanning is in process then lights green and a beep sounds by default to indicate the bar code was decoded successfully Note that when the MC2180 is in Pick List Mode the imager does not decode the bar code until the crosshair or aiming dot touches the bar cod...

Page 49: ...sing applications on the MC21XX Using CtlPanel To change the beep volume using the CtlPanel application 1 Select Start Programs CtlPanel 2 Select Audio Settings 3 Use the navigation pad to change Beeper Volume Select a value between 0 and 3 where 0 is the lowest and 3 the highest 4 Select OK 5 Select Exit Using DataWedge When using DataWedge the beep volume can only be changed using the DataWedge ...

Page 50: ...3 6 MC21XX Series User Guide 4 Select 5 Feedback 5 Select 2 On Send 6 Select 1 Beeper 7 Select 4 Volume 8 Enter a value between 0 and 3 where 0 is the lowest and 3 the highest 9 Select Save ...

Page 51: ...cy interferers and can be used with Bluetooth voice All devices in the piconet Bluetooth network must be AFH capable in order for AFH to work There is no AFH when connecting and discovering devices Avoid making Bluetooth connections and discoveries during critical 802 11b communications AFH for Bluetooth consists of four main sections Channel Classification A method of detecting an interference on...

Page 52: ...on PIN number in the devices being paired generates the initialization key The PIN number is never sent over the air By default the Bluetooth stack responds with no key when a key is requested it is up to user to respond to the key request event Authentication of Bluetooth devices is based upon a challenge response transaction Bluetooth allows for a PIN number or passkey that is used to create oth...

Page 53: ...e presence of active connections in this scenario The user can take the decision on whether to proceed with suspend or not If user proceeds with suspend operation the MC2180 immediately goes into suspend mode In this case the active connections are closed on resume During Battery Swap Suspend All active connections are closed before going into suspend mode There is a delay before going into suspen...

Page 54: ...e MC2180 and a bonded device exchange information automatically when you turn the Bluetooth radio on To find Bluetooth devices in the area 1 Ensure that Bluetooth is enabled on the device 2 Ensure that the Bluetooth device to discover is in discoverable and connectable modes 3 Ensure that the two devices are within 10 meters 30 feet of one another 4 Tap Start Settings Control Panel Bluetooth Devic...

Page 55: ...ring won t include those services even though the devices are paired If services are not selected you will be continually re prompted for the passcode from the device 15 The device appears in the list on the main window After the passcodes have been accepted on both sides you have a trusted paired connection Available Services The MC2180 with Microsoft Bluetooth stack offers the Serial Port servic...

Page 56: ...tap the desired device 9 In the menu tap Trusted 10 Tap OK 11 In the Enter PIN text box enter a PIN and then tap OK 12 On the remote device enter the PIN 13 In the Bluetooth Manager window double tap the remote device 14 In the menu tap Active The activated device icon has a red checkmark on it 15 Tap OK 16 In the Modem window Select the Bluetooth device from the Select a modem drop down list NOTE...

Page 57: ...e Number window appears Figure 4 7 Phone Number 18 In the phone number text box enter the phone number check with the phone carrier 19 Tap Finish A new icon is created in the Connection window Figure 4 8 Connection Window 20 Double tap the new Connection icon ...

Page 58: ...Drivers for the MC2180 from the Support Central web site 2 Change the following registry entries of the desired printer using a remote registry editor Key HKEY_LOCAL_MACHINE Drivers BuiltIn SymPrint Set TldDLL to PrintTLDBluetooth dll Modify PrintPort with appropriate COM port index value e g COM4 19200 3 Tap Start Settings Control Panel Bluetooth Device Properties 4 Tap Scan device 5 Pair and act...

Page 59: ...OM Index text box enter the COM port value entered in the registry see step 2b 12 Tap Create 13 Tap Start Programs Samples Printing Install the Samples from the Desktop if not installed 14 Tap Settings Printer 15 Select the printer from the dialog box and tap OK 16 Tap File Print or Print without Graphics ...

Page 60: ...4 10 MC21XX Series User Guide ...

Page 61: ... hardware To configure the MC21XX a set of wireless applications provide the tools to configure and test the wireless radio in the MC21XX Refer to the Wireless Fusion Enterprise Mobility Suite User Guide for Version X1 01 for information on configuring wireless profiles Go to http www motorola com enterprisemobility manuals for the latest version of this guide See Software Versions on page x to de...

Page 62: ...les Manage Certs Invokes the Certificate Manager application which allows you to manage certificates used for authentication Manage PACs Invokes the PAC Manager application which helps you manage the list of Protected Access Credentials used with EAP FAST authentication Options Invokes the Options application which allows you to configure the Fusion option settings Wireless Status Invokes the Wire...

Page 63: ... that you read the profile editor chapter Table 5 2 Signal Strength Icons Descriptions Icon Status Action Excellent signal strength WLAN network is ready to use Very good signal strength WLAN network is ready to use Good signal strength WLAN network is ready to use Fair signal strength WLAN network is ready to use Notify the network administrator that the signal strength is only Fair Poor signal s...

Page 64: ...sonal authentication type tunnel type certificate requirements Protected Access Credentials PAC requirements Note that not all of the items listed may be relevant 2 Create the profile using the information provided by the IT administrator 3 Enter the Manage Profile screen select the profile press and hold and select the Connect option in the context menu that appears ...

Page 65: ... Cradle CRD2100 4000ER Charges up to four MC21XXs and connects to the MC21XX with an Ethernet network Charging Four slot Spare Battery Charger SAC2100 4000CR Charges up to four MC21XX spare batteries Power Supply PWRS 14000 249R Provides power to the MC21XX Single slot USB Cradle and the USB ActiveSync Charge cable Power Supply PWRS 14000 148R Provides power to the Four slot Charge Only Cradle and...

Page 66: ...Holster SG MC2121205 01R Provides a soft clip on holder for the MC21XX Lanyard SG MC2127225 01R Optional lanyard for holding the MC21XX Miscellaneous Modem Dongle MDM9000 100R Provides modem connectivity through the MC21XX and Modem Adapter Cable Modem Adapter Cable 25 154074 01R Connects Modem Dongle to the MC21XX 2400 mAh Battery BTRY MC21EAB0E Replacement battery Mini Stylus STYLUS 00007 03R Re...

Page 67: ...C21XX 1 Slide the MC21XX into the slot The MC21XX LED Indicator indicates the MC21XX battery charging status The battery charges in approximately four hours See Table 1 1 on page 1 5 for charging status indications Figure 6 1 Single slot USB Cradle 2 When charging is complete remove the MC21XX from the cradle Use the optional mating adapter to connect two or more cradles together Each cradle still...

Page 68: ...dle slot Figure 6 2 Four slot Charge Only Cradle 2 The MC21XX LED Indicator indicates the MC21XX battery charging status The battery usually charges in approximately four hours See Table 1 1 on page 1 5 for charging status indications 3 When charging is complete remove the MC21XX from the cradle Power LED The green Power LED lights to indicate that the Four slot Charge Only cradle is connected to ...

Page 69: ...thernet Cradle 2 The MC21XX LED Indicator indicates the MC21XX battery charging status The battery usually charges in approximately four hours See Table 1 1 on page 1 5 for charging status indications 3 When charging is complete remove the MC21XX from the cradle LED Charge Indications The Four slot Ethernet cradle use the MC21XX amber LED Indicator to indicate the battery charging status See Table...

Page 70: ...ndicate that the transfer rate is 100 Mbps When it is not lit it indicates that the transfer rate is 10 Mbps Link LED The yellow Link LED blinks to indicate activity or stays lit to indicate that a link is established When it is not lit it indicates that there is no link ...

Page 71: ... battery to ensure proper contact The battery charges in approximately four hours See Table 1 1 on page 1 5 for charging status indications 4 When charging is complete press the battery clip and lift battery out of the slot The Spare Battery Charging LEDs indicate the spare battery charging status See Table 1 1 on page 1 5 for charging status indications CAUTION Ensure that you follow the guidelin...

Page 72: ...Cable Figure 6 6 Modem Dongle The following items are required for a modem connection Telephone number IP address and DNS WINS address information from the dial in server administrator Dial in account on the host system including a user ID and password RJ11 or RJ12 modem cable Functioning telephone jack that supports plug in modems connected to the local telephone system Setup of Country Codes to ...

Page 73: ...Setup Connecting to the MC21XX Figure 6 7 Modem Dongle Setup Latch down position Latch up position Modem Dongle Modem Adapter Cable CAUTION Do not connect the modem s 15 pin connector into a VGA port of a host computer ...

Page 74: ...ssary check with the local phone company or administrator to make sure you are using the right type of line before sending data NOTE If using a phone connect the cord from the phone to the Phone port on the modem Table 6 2 Modem LED Indicator LED Indication Off Modem is not properly connected to the MC21XX modem is not receiving power Green Modem is connected to the MC21XX and is receiving power S...

Page 75: ...puter For communication setup procedures refer to the MC21XX Series Mobile Computer Integrator Guide To attach the cable to the MC21XX 1 Ensure that the two latches are in the down position 2 Align the cup with the bottom of the MC21XX and connect 3 Slide the two latches up to lock the cup onto the MC21XX Figure 6 8 USB Charge Cable Battery Charging and Operating Power To charge the MC21XX battery...

Page 76: ... LED Indicator indicates the MC21XX battery charging status The battery usually charges in less than four hours See Table 1 1 on page 1 5 for charging status indications 5 When charging is complete slide the two latches down and remove the cable cup LED Charge Indications The USB ActiveSync Charge cable use the amber LED Indicator to indicate the battery charging status See Table 1 1 on page 1 5 f...

Page 77: ...essories 6 13 Holster The holster provides a holder for the MC21XX Figure 6 10 Holster The holster holds the MC21XX on a belt or waist band Slide the MC21XX into the holster with the screen facing the user ...

Page 78: ...p Figure 6 12 Feed Loops Through Mounting Slots 1 Feed both loops through the two mounting holes 2 Slide the loops over the strap tab 3 Press the tab down to secure 4 Feed the ends of both belts through the handstrap bar Thick Belt Buckle Mini Stylus Holder Loop Loop Material Hook Material Thin Belt Pen Stylus Holder 1 2 3 Loop Strap Tab Mounting Slots ...

Page 79: ... belt through the buckle 6 Feed the end of the thin belt through the buckle Removal To remove the handstrap 1 Pull the belt through the buckle 2 Pull the belt through the handstrap bar 3 Lift the strap tab 4 Lift both loops off the strap tab 5 Pull loops through the mounting slots 6 5 5 4 4 5 ...

Page 80: ...h belts through the handstrap bar Figure 6 15 Lanyard Installation 2 Feed the end of the thick belt through the buckle 3 Feed the end of the thin belt through the buckle Removal To remove the lanyard 1 Pull the belt through the buckle 2 Pull the belt through the handstrap bar Mini Stylus Holder Belt Buckle Pen Stylus Holder 1 1 2 5 1 2 3 ...

Page 81: ...e tether into the mini stylus slot Figure 6 16 Attach Tether to Mini Stylus 2 Thread the other end of the tether through the loop 3 Feed the end of the tether through the hole in the handstrap bar Figure 6 17 Attach Mini Stylus to MC21XX 4 Thread the mini stylus through the loop of the tether ...

Page 82: ...6 18 MC21XX Series User Guide ...

Page 83: ...Although the MC21XX is water and dust resistant do not expose it to rain or moisture for an extended period of time In general treat the MC21XX as a pocket calculator or other small electronic instrument The screen of the MC21XX is glass Do not to drop the MC21XX or subject it to strong impact Protect the MC21XX from temperature extremes Do not leave it on the dashboard of a car on a hot day and k...

Page 84: ...bout the compatibility of a battery or a charger contact Motorola Enterprise Mobility support For devices that utilize a USB port as a charging source the device shall only be connected to products that bear the USB IF logo or have completed the USB IF compliance program To enable authentication of an approved battery as required by IEEE1725 clause 10 2 1 all batteries will carry a Motorola hologr...

Page 85: ...e pre moistened wipes Do not wrap the device in the cloth or wipe but gently wipe the unit Be careful not to let liquid pool around the display window or other places Allow the unit to air dry before use Special Cleaning Notes Many vinyl gloves contain phthalate additives which are often not recommended for medical use and are known to be harmful to the housing of the MC21XX The MC21XX should not ...

Page 86: ...ipped applicator back and forth across the connector on the bottom of the MC21XX Do not leave any cotton residue on the connector 4 Repeat at least three times 5 Use the cotton tipped applicator dipped in alcohol to remove any grease and dirt near the connector area 6 Use a dry cotton tipped applicator and repeat steps 4 through 6 7 Spray compressed air on the connector area by pointing the tube n...

Page 87: ...on ambient temperature and humidity for the alcohol to air dry before applying power to cradle If the temperature is low and humidity is high longer drying time is required Warm temperature and dry humidity requires less drying time Cleaning Frequency The cleaning frequency is up to the customer s discretion due to the varied environments in which the mobile devices are used They may be cleaned as...

Page 88: ...rature Battery does not charge if ambient temperature is below 32 F 0 C or above 104 F 40 C Cannot see characters on screen MC21XX not powered on Press the Power button During data communication no data was transmitted or transmitted data was incomplete MC21XX removed from cradle or unplugged from host computer during communication Replace the MC21XX in the cradle or reattach the cable and re tran...

Page 89: ...cation See the system administrator Unreadable bar code Ensure the symbol is not defaced Distance between scan window and bar code is incorrect Ensure the MC21XX is within proper scanning range MC21XX is not programmed for the bar code type Ensure the MC21XX is programmed to accept the type of bar code scanned MC21XX is not programmed to generate a beep If a beep on a good decode is expected and a...

Page 90: ...y seated During data communication no data was transmitted or transmitted data was incomplete MC21XX removed from cradle during communication Replace MC21XX in cradle and retransmit Incorrect cable configuration See the system administrator or refer to the MC21XX Series Integrator Guide Communication software is not installed or configured properly See the system administrator or refer to the MC21...

Page 91: ... the cradle Remove and re insert the MC21XX into the cradle ensuring it is correctly seated Table 7 4 Troubleshooting the Four slot Spare Battery Charger Symptom Possible Cause Solution Spare battery is not charging Spare Battery Charging LED does not light Charger is not receiving power Ensure the power cable is connected securely to both the charger and to AC power Spare battery is not correctly...

Page 92: ...charge properly If so replace the faulty battery The MC21XX is not fully seated in the cable Remove and re attach the MC21XX to the cable ensuring it is correctly seated During data communication no data was transmitted or transmitted data was incomplete Cable removed from MC21XX during communication Reattach cable to MC21XX and retransmit Incorrect cable configuration See the system administrator...

Page 93: ... 228 g 8 04 oz MC2180 236 g 8 32 oz Display 2 8 inch TFT Color QVGA 240 x 320 display with backlight Touch Panel Analog resistive touch MC2180 only Backlight LED backlight Battery Rechargeable Lithium ion 2400 mAh minimum 3 7V Expansion Slot User accessible microUSB slot located under battery up to 32 GB Network Connections Full speed USB host or client Bluetooth MC2180 only WLAN MC2180 only USB a...

Page 94: ...harge Sealing IP54 per IEC sealing specifications Wireless LAN Data and Voice Communications Wireless Local Area Network WLAN radio IEEE 802 11b g n Data Rates Supported 1 2 5 5 6 9 11 12 18 24 36 48 54 Mbps and MCS0 7 Operating Channels Channel 1 13 2412 2472 MHz Channel 14 2484 MHz Japan only actual operating channels frequencies depend on regulatory rules and certification agency Security Secur...

Page 95: ...il minimum element width Roll 35 from vertical Pitch Angle 65 from normal Skew Tolerance 40 from normal Ambient Light Sunlight 107 640 Lux Artificial Light 4 844 Lux Scan Rate 104 12 scans sec bidirectional Scan Angle 47 typical 2D Imager Engine Specifications Field of View Horizontal 39 2 Vertical 25 4 Optical Resolution 752 H x 480 V pixels gray scale Roll 360 Pitch Angle 60 from normal Skew Tol...

Page 96: ...A 4 MC21XX Series User Guide ...

Page 97: ...n key blue values and the alternate ALPHA key orange values Note that keypad functions can be changed by an application so the MC21XX keypad may not function as described See Table B 1 on page B 2 for key and button descriptions and Table B 2 on page B 4 for the keypad alternate functions NOTE For information about using the soft keyboard input panel For more information see Entering Information U...

Page 98: ...wn left and right from one item to another Increases decreases specified values ESC Produces the ESC function by default CTRL Press and release the CTRL key to activate the keypad alternate CTRL functions The icon appears on the taskbar Press and release the CTRL key again to return to the default keypad functions Press and release the blue FUNC key and then the CTRL key to activate the ALT functi...

Page 99: ... Period Decimal Point Produces a period for alpha entries and a decimal point for numeric entries by default Press the Orange key then the SHIFT key to activate the keypad alternate SHIFT functions The icon appears on the taskbar Press the SHIFT key a second time to enable Shift Lock feature The icon appears on the taskbar Press and release the SHIFT key again to return to the default keypad funct...

Page 100: ...ess 1st Press 2nd Press 3rd Press 4th Press 1 1 See Note 2 See Note 2 2 2 a b c A B C 3 3 d e f D E F 4 4 g h i G H I 5 5 j k l J K L 6 6 m n o M N O 7 7 p q r s P Q R S 8 8 t u v T U V 9 9 w x y z W X Y Z 0 0 space 0 Note 1 An application can change the key functions The keypad may not function exactly as described Note 2 Press the 1 key up to ten times to create the following characters ...

Page 101: ...Keypads B 5 ...

Page 102: ...B 6 MC21XX Series User Guide ...

Page 103: ...irBEAM Smart Client provides the MC21XXs with the smarts to request software from the host It allows them to request download and install software as well as to upload files and status data The AirBEAM Smart Client uses the industry standard FTP or TFTP file transfer protocols to check the host system for updates and if necessary to transfer updated software Most often AirBEAM Smart Client is used...

Page 104: ...its 0 and 1 combined in a pattern to represent a specific character or numeric value Bits are numbered from the right 0 through 7 with bit 0 the low order bit One byte in memory is used to store one ASCII character boot or boot up The process a computer goes through when it starts During boot up the computer can run self diagnostic tests and configure hardware and software C CDRH Center for Device...

Page 105: ...rt ports are identified by number e g COM1 COM2 Continuous Code A bar code or symbol in which all spaces within the symbol are parts of characters There are no intercharacter gaps in a continuous code The absence of gaps allows for greater information density Cradle A cradle is used for charging the terminal battery and for communicating with a host computer and provides a storage place for the te...

Page 106: ...s An IP address for a network gateway or router A MC21XX may be part of a subnet as specified by its IP address and Netmask It can send packets directly to any node on the same subnet If the destination node is on a different subnet then the terminal sends the packet to the gateway first The gateway determines how to route the packet to the destination subnet This field is an option used by networ...

Page 107: ...s continuous code type uses no intercharacter spaces Only numeric 0 to 9 and START STOP characters may be encoded Internet Protocol Address See IP IP Internet Protocol The IP part of the TCP IP communications protocol IP implements the network layer layer 3 of the protocol which contains a network address and is used to route a message to a different network or subnetwork IP accepts packets from t...

Page 108: ... refers to the Motorola wireless handheld computer It can be set up to run as a stand alone device or it can be set up to communicate with a network using wireless radio technology N Nominal The exact or ideal intended value for a specified parameter Tolerances are specified as positive and negative deviations from this value Nominal Size Standard size for a bar code symbol Most UPC EAN codes are ...

Page 109: ...it transforms optical detector output into a digitized bar pattern Scanning Mode The scanner is energized programmed and ready to read a bar code SDK Software Development Kit Self Checking Code A symbology that uses a checking algorithm to detect encoding errors within the characters of a bar code symbol Shared Key Shared Key authentication is an algorithm where both the AP and the MU share an aut...

Page 110: ... margin adjacent to the start character to the end of the quiet zone margin adjacent to a stop character Symbology The structural rules and conventions for representing data within a particular bar code type e g UPC EAN Code 39 PDF417 etc T Tolerance Allowable deviation from the nominal bar or space width U UPC Universal Product Code A relatively complex numeric symbology Each character consists o...

Page 111: ...wo dimensional 3 1 basic browser 2 7 battery charging 1 4 install 1 4 battery charge status 2 5 battery chargers four slot spare battery charger battery charging 6 7 four slot spare battery charger LED indicators 6 7 MC21XX charge cables LED indicators 6 12 battery charging backup battery 1 4 four slot cradles 6 4 6 5 four slot spare battery charger 6 7 main battery 1 4 temperature range 1 5 batte...

Page 112: ...rge end task 2 9 entering data with scanner 2 12 entering information 2 11 scanning 2 12 Enterprise Mobility Developer Kit for NET see EMDK ESD 1 3 F favorites 2 6 four slot charge only cradle 1 6 6 1 6 4 four slot cradles battery charging 6 4 four slot spare battery charger 1 6 6 1 battery charging 6 7 LED indicators 6 7 troubleshooting 7 9 function status 2 5 H handstrap 6 14 hard reset 2 12 4 3...

Page 113: ...ning 2 12 adjusting the distance 3 3 angle 3 2 imaging 3 1 range 3 2 scanning considerations 3 2 screen calibration 1 6 screen brightness 2 4 SD card 1 3 installation 1 3 secure device card 1 3 security Bluetooth 4 2 selecting items using the keypad 2 3 settings 2 6 show clock 2 10 single slot USB cradle 1 6 6 1 6 3 battery charging 6 3 soft reset 2 12 4 3 spare battery charging 1 6 start menu 2 6...

Page 114: ...tion xii USB charging Cable 6 2 USB charging cable 1 6 USB port 2 8 using stylus 2 10 V volume audio 2 4 beeper 2 4 W wakeup conditions 2 13 warm boot 2 7 2 12 4 3 Windows CE NET 6 0 Professional 2 2 2 7 wireless status icon 2 6 WLAN x WLAN status 2 6 WPAN Bluetooth x ...

Page 115: ......

Page 116: ...U S A http www motorolasolutions com MOTOROLA MOTO MOTOROLA SOLUTIONS and the Stylized M Logo are trademarks or registered trademarks of Motorola Trademark Holdings LLC and are used under license All other trademarks are the property of their respective owners 2011 Motorola Solutions Inc All Rights Reserved ...

Reviews: