background image

CHAPTER 7 BLUETOOTH

Introduction

Bluetooth-equipped devices can communicate without wires, using frequency-hopping spread spectrum 
(FHSS) radio frequency (RF) to transmit and receive data in the 2.4 GHz Industry Scientific and Medical (ISM) 
band (802.15.1). Bluetooth wireless technology is specifically designed for short-range (10 meters/32 feet) 
communication and low power consumption. 

MC67s with Bluetooth capabilities can exchange information (e.g., files, appointments, and tasks) with other 
Bluetooth enabled devices such as phones, printers, access points, and other mobile computers. To use the 
MC67 as a modem, create a dial-up modem connection between a computer and MC67.

The MC67 with Bluetooth technology uses either the StoneStreet Bluetooth stack or the Microsoft Bluetooth 
stack. To write an application that uses the StoneStreet One Bluetooth stack APIs, refer to the Enterprise 
Mobility Developer Kit (EMDK) Help.

Adaptive Frequency Hopping

Adaptive Frequency Hopping (AFH) is a method of avoiding fixed frequency interferers, and can be used with 

Bluetooth voice. All devices in the piconet (Bluetooth network) must be AFH-capable in order for AFH to work. 
There is no AFH when connecting and discovering devices. Avoid making Bluetooth connections and 
discoveries during critical 802.11b communications. AFH for Bluetooth consists of four main sections:

Channel Classification - A method of detecting an interference on a channel-by-channel basis, or 
pre-defined channel mask.

Link Management - Coordinates and distributes the AFH information to the rest of the Bluetooth network.

Hop Sequence Modification - Avoids interference by selectively reducing the number of hopping 
channels.

Channel Maintenance - A method for periodically re-evaluating the channels.

When AFH is enabled, the Bluetooth radio “hops around” (instead of through) the 802.11b high-rate channels. 

AFH coexistence allows Motorola mobile computers to operate in any infrastructure. 

Summary of Contents for MC67

Page 1: ...MC67 USER GUIDE ...

Page 2: ......

Page 3: ...MC67 USER GUIDE 72E 161697 02 Rev A August 2013 ...

Page 4: ...yright law The user shall not modify merge or incorporate any form or portion of a licensed program with other program material create a derivative work from a licensed program or use a licensed program in a network without written permission from Motorola The user agrees to maintain Motorola s copyright notice on the licensed programs delivered hereunder and to include the same on any authorized ...

Page 5: ...iii Revision History Changes to the original guide are listed below Change Date Description 01 Rev A 09 19 12 Initial release 02 Rev A 08 30 13 Add CDMA WAN support ...

Page 6: ...iv MC67 User Guide ...

Page 7: ...tarted 1 2 Installing a microSD Card 1 2 Installing the SIM Card 1 3 Installing the Battery 1 4 Charging the Battery 1 5 Charging the Main Battery 1 5 Charging Spare Batteries 1 6 Charging Temperature 1 6 Powering On the MC67 1 6 Calibrating the Screen 1 6 Checking Battery Status 1 6 Replacing the Battery 1 7 Replacing the microSD Card 1 7 Replacing the SIM Card 1 8 Battery Management 1 9 Changing...

Page 8: ...attery Reserve Options 2 15 Main Battery Temperature Notifications 2 16 Interactive Sensor Technology 2 17 Power Management 2 17 Display Orientation 2 17 Free Fall Detection 2 17 Stylus 2 18 Entering Data 2 18 Using Voice Over IP 2 19 Chapter 3 Data Capture Introduction 3 1 Imaging 3 1 Operational Modes 3 1 Digital Camera 3 2 Scanning Considerations 3 2 Imager Scanning 3 3 Digital Camera Scanning ...

Page 9: ...Call 4 6 Taking Notes 4 6 Using Call History 4 7 Managing Call History 4 7 Changing the Call History View 4 7 Resetting the Recent Calls Counter 4 8 Deleting All Call History Items 4 8 Viewing Call Status 4 8 Using the Call History Menu 4 9 Conference Calling 4 10 Swapping Calls 4 10 Speed Dial Setup 4 11 Adding a Speed Dial Entry 4 11 Editing a Speed Dial Entry 4 13 Deleting a Speed Dial Entry 4 ...

Page 10: ...ailable Services 7 9 Object Push Services via Beam 7 9 Internet Sharing 7 10 Serial Port Services 7 11 ActiveSync Using Serial Port Services 7 12 Phone Book Access Profile Services 7 13 Using Bluetooth StoneStreet One Bluetooth Stack 7 14 Turning the Bluetooth Radio Mode On and Off 7 14 Disabling Bluetooth 7 14 Enabling Bluetooth 7 14 Modes 7 14 Wizard Mode 7 14 Explorer Mode 7 14 Discovering Blue...

Page 11: ...l While in a Vehicle 8 2 Assisted GPS 8 2 Chapter 9 Settings Settings Folder 9 1 Locking the MC67 9 4 Power Settings 9 4 Backlight Settings 9 5 Keypad Backlight Settings 9 5 USB Configuration 9 5 UI Settings 9 6 Start Screen Settings 9 6 IE Zoom Mapping 9 6 IST Settings 9 8 Info Tab 9 8 Display Tab 9 8 Power Management Tab 9 8 On Face Down 9 9 Keep Alive On Motion 9 9 Setting Sensitivity 9 9 Event...

Page 12: ... LED Indicators CRD5500 4000ER 10 9 LED Indicators CRD5501 4000ER 10 9 VCD5000 Vehicle Cradle 10 10 Charging the MC67 Battery 10 10 Removing the MC67 10 10 Battery Charging Indicators 10 11 Charging Temperature 10 11 Four Slot Battery Charger 10 12 Battery Charging 10 12 Battery Charging Indicators 10 12 Charging Temperature 10 12 Cables 10 13 Battery Charging and Operating Power 10 13 LED Charge ...

Page 13: ...Cradle 11 8 Four Slot Ethernet Cradle 11 9 Vehicle Cradle 11 9 Four Slot Battery Charger 11 10 Cables 11 10 Magnetic Stripe Reader 11 11 Appendix A Technical Specifications MC67 A 1 Appendix B Keypads Introduction B 1 Numeric Keypad Configuration B 1 Alpha numeric Keypad Configurations B 5 PIM Keypad Configuration B 13 DSD Keypad Configuration B 15 Special Character Key B 18 Glossary Index ...

Page 14: ...xii MC67 User Guide ...

Page 15: ... user needs and includes MC67 Quick Start Guide describes how to get the MC67 up and running MC67 User Guide describes how to use the MC67 MC67 Integrator Guide describes how to set up the MC67 and accessories Enterprise Mobility Developer Kit EMDK Help File provides API information for writing applications NOTE Screens and windows pictured in this guide are samples and can differ from actual scre...

Page 16: ...ndicates that the device is running AKU version 5 3 12 8 OEM Version To determine the OEM software version Tap Settings System System Info System Fusion Software To determine the Fusion software version Configuration Radios Display Memory Data Capture Options Operating System Keypads MC67NA WLAN 802 11 a b g n WPAN Bluetooth v2 1 EDR WWAN GSM UMTS GPS Stand alone GPS or A GPS 3 5 VGA Color 512 MB ...

Page 17: ...rovides information about GPS navigation with the MC67 Chapter 9 Settings provides basic instructions for using the MC67 phone Chapter 10 Accessories describes the available accessories and how to use them with the MC67 Chapter 11 Maintenance Troubleshooting includes instructions on cleaning and storing the MC67 and provides troubleshooting solutions for potential problems during MC67 operation Ap...

Page 18: ...s Mobile Device Center software available at http www microsoft com For the latest version of this guide and all guides go to http supportcentral motorola com Service Information If the user has a problem with the equipment contact Motorola Solutions Global Customer Support in the region Contact information is available at http www motorolasolutions com support When contacting support please have ...

Page 19: ...ctions Motorola Solutions is not responsible for any damages incurred during shipment if the approved shipping container is not used Shipping the units improperly can possibly void the warranty Remove the SIM card and or microSD card from the MC67 before shipping for service If the device was purchased from a Motorola Solutions business partner contact that business partner for support ...

Page 20: ...xviii MC67 User Guide ...

Page 21: ...pping Verify that the following were received MC67 mobile computer 3600 mAh Lithium ion battery stylus with tether installed Regulatory Guide Quick Start Guide Inspect the equipment for damage If any equipment is missing or damaged contact the Motorola Solutions Global Customer Support center immediately See page xvi for contact information Prior to using the MC67 for the first time remove the pro...

Page 22: ...cturer s recommendations for use To install the microSD card 1 Remove the handstrap 2 Lift the rubber access door 3 Slide the SIM card holder door up to unlock 4 Lift the SIM card holder door Figure 1 1 Lift SIM Slot Holder Door 5 Lift the microSD card holder door 6 Insert the microSD card into the card holder door ensuring that the card slides into the holding tabs on each side of the door CAUTIO...

Page 23: ...quires a SIM card Obtain the card from a service provider The card fits into the MC67 and can contain the following information Mobile phone service provider account details Information regarding service access and preferences Contact information which can be moved to Contacts on the MC67 Any additional subscribed services To install the SIM card 1 Lift rubber access door 2 Slide the SIM card hold...

Page 24: ... holder door and slide down to lock into place 6 Close the rubber access door 7 Install the battery Installing the Battery To install the battery 1 Insert the battery bottom first into the battery compartment in the back of the MC67 2 Press the battery down into the battery compartment until the battery release latch snaps two clicks into place 3 Replace the handstrap NOTE If the battery has signi...

Page 25: ...attery requires approximately 40 hours to fully charge This is also true any time the backup battery is discharged which occurs when the main battery is removed for several hours The backup battery retains random access memory RAM data in memory for at least 15 minutes at room temperature when the MC67 s main battery is removed When the MC67 reaches a very low battery state the combination of main...

Page 26: ...es The MC67 or accessory indicates when charging is disabled due to abnormal temperatures via its LED See Table 1 1 Powering On the MC67 Press the Power button to turn on the MC67 The splash screen displays for about a minute as the MC67 initializes its flash file system then the calibration window appears Table 1 1 LED Charge Indicators Charging Battery Status LED Indication Off MC67 is not charg...

Page 27: ...adle remove it before performing a Safe Battery Swap 2 If the MC67 is in suspend mode press the red Power button to wake the device 3 Press the red Power button The Power Action Key window appears 4 Tap Safe Battery Swap The Data Capture LED lights red 5 When the LED turns off remove the handstrap 6 Slide the battery latch to the right The battery ejects slightly Figure 1 6 Removing the Battery NO...

Page 28: ...to unlock 9 Lift SIM Card holder door 10 Lift the microSD card holder door 11 Remove microSD card from holder 12 Close microSD card holder door 13 Close SIM card holder door 14 Slide SIM card holder door down to lock into place 15 Close the rubber access door 16 Insert the battery bottom first into the battery compartment in the back of the MC67 17 Press the battery down until the battery release ...

Page 29: ...ccess door 14 Insert the battery bottom first into the battery compartment in the back of the MC67 15 Press the battery down until the battery release latch snaps two clicks into place 16 Replace the handstrap 17 Warm boot the MC67 See Resetting the MC67 on page 2 12 Battery Management Observe the following battery saving tips Leave the MC67 connected to AC power at all times when not in use Set t...

Page 30: ... the Advanced tab 4 Tap the Disable keylight check box to turn off the keypad backlight 5 Select OK Turning Off the Radios The MC67 includes Wireless Manager which provides a simple method of enabling disabling and configuring all the MC67 s wireless capabilities To open Wireless Manager tap Settings Connections Wireless Manager Tap All to toggle all the radios on or off Tap Phone to toggle the ph...

Page 31: ...ivation window appears 7 Tap Start Activation and PRL Update 8 Follow the on screen instructions For detailed information for configuring the phone and activating on a different network refer to the MC67 Integrator Guide Switching from CDMA to GSM UMTS To switch from a CDMA network to a GSM UTMAS network 1 Tap Start Settings Connections Network Setup Activation The Network Activation window appear...

Page 32: ...tion type Options a Auto GSM UTMS b GSM Only c UMTS Only 6 Tap Apply GSM UMTS Settings 7 Tap OK Switching from GSM UTMS to CDMA 1 Tap Start Settings Connections Network Setup Activation The Network Activation window appears 2 Tap Switch to CDMA 3 The window closes NOTE Switching radio bands may not be available on all networks ...

Page 33: ...ctions for using the MC67 including resetting the MC67 and entering data Features Figure 2 1 MC67 Front View Data Capture LED Charging Battery Status LED WAN Radio Status LED Scan Action Button Keypad Alpha Numeric Keypad Shown Power Button I O Connector Volume Up Down Button Touch Screen with Protective Overlay Microphone Scan Button ...

Page 34: ...dicates Wide Area Network WAN radio status Table 2 1 describes the LED indications Figure 2 3 LED Indicators Battery Speaker Exit Window Stylus Battery Latch Camera Stylus Clip Camera Flash Action Button Scan Action Button Handstrap Table 2 1 LED Indications LED State Indication Data Capture LED Solid Green Successful decode capture Solid Red Data capture in process Data Capture LED Charging Batte...

Page 35: ...g down for battery replacement Off Data capture not enabled Charging Battery Status LED Slow Blinking Amber Main battery in MC67 is charging Solid Amber Main battery in MC67 is fully charged Fast Blinking Amber Charging error Off MC67 not charging WAN Radio Status LED Slow Blinking Green RF WAN radio is on Off RF WAN radio is off Table 2 1 LED Indications Continued LED State Indication NOTE For in...

Page 36: ...screen on the MC67 is the Windows Embedded Handheld Home screen The Home screen contains a Status Bar at the top of the screen and a Tile Bar at the bottom of the screen The Home screen is scrollable and contains a list of application plug ins and an Information Status bar The Information Status bar highlights the application plug in that is under it and provides additional information Figure 2 5 ...

Page 37: ...finger and the Information Status bar and application name center in the screen Figure 2 7 Moving Information Status Bar Figure 2 8 Information Bar Example To customize the Home screen tap Settings Today On the horizontal scroll use Appearance to customize the background and the Items to change the display format Application Icon Application Information ...

Page 38: ...igure 2 9 Classic Today Screen To change to the classic view tap Settings Home Items Figure 2 10 Home Screen Settings Deselect the Windows Default checkbox and select any of the other checkboxes Tap The task bar at the bottom of the screen can contain the task tray icons listed in Table 2 2 Tile Bar Status Bar Today Screen Task Tray ...

Page 39: ...indicates that the Bluetooth radio is off Displays only if the StoneStreet One Bluetooth stack is enabled Bluetooth Communication The Bluetooth Communication icon appears in the task tray and indicates that the mobile computer is communicating with another Bluetooth device Displays only if the StoneStreet One Bluetooth stack is enabled Table 2 3 Status Bar Icons Icon Description Icon Description N...

Page 40: ...rphone is on Phone on good signal Phone off No WAN service Searching for WAN service Evolved High Speed Packet Access HSPA connecting HSPA in use 3G in use 3G connecting General Packet Radio Service GPRS in use GPRS connecting Enhanced General Packet Radio Service EGPRS in use EGPRS connecting Subscriber identification module SIM Card not installed Audio All sounds are on All sounds are off Vibrat...

Page 41: ...ed calls Low Backup Battery Indicates that the backup battery is low Notifications Indicates that notifications are available Headset Indicates that a wireless stereo headset is connected to the MC67 Connectivity Displays the Connectivity dialog box Phone Data Displays the Phone dialog box Volume Displays the Volume dialog box Power Displays the Power window Clock Alarms Opens the Clocks Alarms wi...

Page 42: ...Chapter 9 Settings for more information Calendar Keep track of appointments and create meeting requests Getting Started Launch the Getting Started application Pictures Videos View and manage pictures and video files Alarms Set the clock to the date and time of the current location Alarms can also be set at specified days and times of a week Windows Media Play back audio and video files Messenger U...

Page 43: ...bled DEMO Provides a web link to install Motorola s featured demos for the MC67 After installation launches the demo application MSP Agent Enables management of the MC67 from an Mobility Services Platform MSP Server Requires the purchase of an appropriate MSP client license per device to suit the level of management functionality required MotoBTUI Use to set Bluetooth options and configuration Rap...

Page 44: ...lizes some drivers Data saved in flash memory or a memory card is not lost If the MC67 is not functioning properly perform a warm boot first If the MC67 still does not respond perform a cold boot Performing a Warm Boot Hold down the red Power button for approximately five seconds As soon as the MC67 starts to boot splash screen displays release the Power button Performing a Cold Boot To perform a ...

Page 45: ...appears Figure 2 15 Simple PIN Lock Screen Enter the password to un lock the device Tap the Unlock button to unlock the device and go to the Home screen or tap the Contact button to unlock the device and go to the Contacts window or tap the Email button to unlock the device and go to the Messaging window Un locking with Strong Password When the MC67 is locked the Lock screen appears ...

Page 46: ...on appears in the Status bar and a battery dialog box appears indicating the status of the backup battery Figure 2 17 Battery Status Dialog Boxes The Battery icon always appears in the Status bar The icon indicates the battery power level The message displays until the Dismiss button is pressed Also view the battery status using the Power window Either Tap the Status bar and then the Battery icon ...

Page 47: ...he battery reaches a critical threshold the MC67 shuts down This threshold can be changed but affects the amount of time that data can be retained 1 Tap Settings System Power RunTime A warning message appears Figure 2 19 Warning Message 2 Read the warning message and tap OK Figure 2 20 RunTime Tab ...

Page 48: ...erature thresholds Level 1 Temperature Watch this level is similar to main battery low warning It indicates that the battery temperature has reached the first threshold level The user should move to an environment within proper operating temperature Level 2 Temperature Warning this level is similar to main battery very low warning It indicates the battery temperature has reached the second thresho...

Page 49: ...reen brightness for optimum visibility while conserving power The near range proximity sensor detects any object in close proximity to device This information can be used to disable the touch pad when the caller s face is close to the device to prevent unintended key press See IST Settings on page 9 8 for more information Power Management The MC67 orientation and motion sensitive data can be used ...

Page 50: ...ion buttons and open menu items Tap and Hold Tap and hold the stylus on an item to see a list of actions available for that item On the pop up menu that appears tap the action to perform Drag Hold the stylus on the screen and drag across the screen to select text and images Drag in a list to select multiple items Entering Data When entering data on the keypad use either the single hand method or t...

Page 51: ... It is recommended that the wireless network use the 802 11a 5 GHz band for voice applications Using the 5 GHz band avoids some noise sources that may occur on the 802 11b g 2 4 GHz band due to wireless interference When using a Bluetooth headset with the MC67 and VoWLAN it is required to use the Bluetooth Headset profile instead of Hands free profile Use the buttons on the MC67 to answer and end ...

Page 52: ...2 20 MC67 User Guide ...

Page 53: ...sulting image in its memory and executes state of the art software decoding algorithms to extract the bar code data from the image Operational Modes The MC67 with an integrated imager supports three modes of operation listed below Activate each mode by pressing the Scan button Decode Mode In this mode the MC67 attempts to locate and decode enabled bar codes within its field of view The imager rema...

Page 54: ...r a particular working range minimum and maximum distances from the bar code This range varies according to bar code density and scanning device optics Scanning within range brings quick and constant decodes scanning too close or too far away prevents decodes Move the scanner closer and further away to find the right working range for the bar codes being scanned Angle Scanning angle is important f...

Page 55: ...ed to indicate that scanning is in process then lights green and a beep sounds by default to indicate the bar code was decoded successfully Note that when the MC67 is in Pick List Mode the imager does not decode the bar code until the crosshair or aiming dot touches the bar code Figure 3 2 Aiming Pattern Figure 3 3 Pick List Mode with Multiple Bar Codes in Aiming Pattern 5 Release the scan button ...

Page 56: ...dow and a red aiming line emits from the MC67 The Data Capture LED lights red indicating that the data capture is in process 5 Move the MC67 until the red aiming line is across the bar code 6 The light emitting diode LED lights green and a beep sounds by default to indicate the bar code was decoded successfully 7 The bar code content data displays in the text field DataWedge Enable DataWedge To en...

Page 57: ...end the DataWedge process The DataWedge Status changes to Stopped 3 Tap OK Taking Pictures To take a picture 1 Tap Pictures Videos 2 Tap Camera Figure 3 5 Camera Window The Camera window displays the view finder Information about the current settings or the remaining number of pictures that can be saved to the MC67 are displayed on the lower right corner of the screen 3 Check the image on the view...

Page 58: ... Zoom to display the Zoom panel used to zoom in or out of a picture Tap Menu Zoom again to close the Zoom panel 4 To rotate a picture 90 degrees counter clockwise tap Menu Edit then tap Rotate 5 To crop a picture tap Menu Edit then tap Menu Crop Drag the stylus across the screen to select the crop area Tap inside the area to crop the picture or outside of the area to cancel cropping Setting a Pict...

Page 59: ... the camera resolution level Note that selecting a high resolution picture increases the size of the file significantly Flash Turns flash on and off Auto Focus Turns auto focus on and off Full Screen Toggles the viewfinder between full screen and window modes Options Displays the camera options window 3 Tap OK to exit Recording a Video To record a video 1 Tap Pictures Videos 2 Tap Camera 3 Tap Men...

Page 60: ...e memory Full Screen Toggles the viewfinder between full screen and window modes Options Displays the video options window 3 Tap OK to exit Viewing Pictures and Videos To view a picture or video 1 Tap Pictures Videos 2 Tap the thumbnail of the picture or video Tap the Show drop down list to browse folders Tap the Sort By drop down list to sort the files by name date or size Figure 3 7 Pictures Vid...

Page 61: ...es folder as a screen saver whenever the device is connected to the USB sync cable and is idle for 2 minutes 4 On the Camera tab set the following options In the Type filename prefix text box enter the prefix to be used as a default title for the image file In the Save files to drop down list select to save image files to onboard memory or built in storage In the Still image compression level drop...

Page 62: ...3 10 MC67 User Guide ...

Page 63: ...line Making a Call With the MC67 make a call from the phone contacts speed dial and call history Using the Phone Keypad To make a call using the phone keypad 1 Press 2 Enter the phone number on the dialer or keypad The number appears in the call line 3 Press 4 Press to stop dialing or end the call NOTE The user can make emergency calls even when the MC67 is locked or when a subscriber identificati...

Page 64: ...r starting from the first character of a contact name as well as from the character that appears after a space dash or underscore in a contact name For example if the user taps number 2 which is associated with a b c on the Phone keypad contact names such as the following will be considered matches Smith Bernard Adams John Carlson Eileen Dillon Albert Childs Larry Cooper Robert and Parks Celine If...

Page 65: ...re 4 2 Contacts Menu 3 Tap Call Work Call Home or Call Mobile Using Call History To make a call using Call History 1 Press 2 From the Phone keypad tap Call History Figure 4 3 Call History Window 3 Tap the phone icon next to the number to begin dialing and return to the phone keypad NOTE To make a call from an open contact tap the number to call See On Device Help for more information about Contact...

Page 66: ...hen tap and hold the second digit or From the keypad tap Speed Dial and tap the speed dial location number of the desired contact in the list Figure 4 4 Speed Dial Contact List 3 To stop dialing or end the call press Answering a Call A dialog box appears on the MC67 when it receives an incoming call If the phone is set to ring a ring tone sounds Answer or ignore the incoming call To answer an inco...

Page 67: ...to the SIM card However the SIM card must be inserted in the MC67 in order to use the numbers stored on it See the service provider for additional information Audio Modes The MC67 offers three audio modes for use during phone calls Handset Mode Switches audio to the speaker at the top front of the MC67 so The user can use the MC67 as a handset This is the default mode Speaker Mode Use the MC67 as ...

Page 68: ...the dialer to mute the audio The Mute button becomes yellow Taking Notes To create a note during a call tap Note on the display then enter the note For more information about creating notes see the Windows On Device Help To access a note created during a call 1 Press 2 From the Phone keypad tap Call History 3 Tap and hold the number or the Note icon for the phone call entry containing the note Fig...

Page 69: ...History View 1 Press to display the Phone dialer 2 From the Phone dialer tap Call History 3 Tap Filter to show the menu 4 Select a view type from the menu to display only missed calls outgoing calls incoming calls or calls listed alphabetically by caller name 5 Tap OK to exit the Call History window Resetting the Recent Calls Counter 1 Press to display the Phone dialer 2 From the Phone dialer tap ...

Page 70: ...All Call History Items 1 Press to display the Phone dialer 2 From the Phone dialer tap Call History 3 Tap 4 Select Delete all calls 5 Tap Yes 6 Tap OK to exit the Call History window Viewing Call Status 1 Press to display the Phone dialer 2 From the Phone dialer tap Call History 3 Tap an entry The Call Status window appears Figure 4 8 Call History Detail ...

Page 71: ...e to display the Text Messages window 6 Tap OK to exit the Call History window Conference Calling To create a conference phone session with multiple people 1 Press to display the Phone dialer 2 Enter the first phone number and press Talk When the call connects Hold appears on the dialer 3 Tap Hold to place the first call on hold 4 Enter the second phone number and tap Talk NOTE When more than one ...

Page 72: ...the connection enter or select a number and tap Talk 3 When you are connected to the second party tap Talk to begin the 3 way call If one of the people you called hangs up during the call the two remaining callers stay connected If you initiated the call and are the first to hang up all callers are disconnected Swapping Calls GSM UMTS To move between two phone calls 1 Press to display the Phone ke...

Page 73: ...er and tap Talk Figure 4 11 Call Conferencing Conferencing 5 Tap Swap to move from one call to the other 6 Tap End or press the red phone key on the MC67 keypad to end each call Swapping Calls CDMA To swap between two incoming phone calls 1 Tap Answer icon to connect to the first call NOTE For use with CDMA networks only ...

Page 74: ...tive call The remaining call re connects 5 Tap End or press the red phone key on the keypad to end the last call Speed Dial Setup Create speed dial numbers to dial frequently called numbers with a single tap Before creating a speed dial entry ensure the phone number exists in Contacts Adding a Speed Dial Entry To add a speed dial entry from the phone keypad 1 Ensure the contact and phone number ar...

Page 75: ...cation field tap the up down arrows to select an available location to assign as the new speed dial entry The first speed dial location is reserved for voice mail 6 Tap OK to add the contact to the speed dial list Figure 4 16 Speed Dial Contact List 7 Tap OK to exit the Speed Dial Contact List To add a speed dial entry from the Contacts window ...

Page 76: ...peed Dial Figure 4 18 Speed Dial Contact Location 4 Tap the up down arrows to select an available location to assign as the new speed dial entry The first speed dial location is reserved for voice mail 5 Tap OK Editing a Speed Dial Entry To change a speed dial entry 1 Press 2 Tap Speed Dial button ...

Page 77: ... To delete a speed dial entry 1 Press 2 Tap Speed Dial button 3 Tap and hold the contact name 4 Tap Delete 5 Tap Yes to confirm permanently deleting the speed dial entry NOTE Editing names and phone numbers in Speed Dial does not alter contact information in Contacts Contacts NOTE Deleting names and phone numbers in Speed Dial does not delete the contact information in Contacts Contacts ...

Page 78: ...4 16 MC67 User Guide ...

Page 79: ...set up to enforce the chosen WLAN security scheme use the Fusion Wireless Companion software to configure the MC67 to match Fusion Overview The Fusion Wireless Companion software contains applications with which to create wireless profiles Each profile specifies the security parameters to use for connecting to a particular WLAN as identified by its Extended Service Set Identification ESSID The Fus...

Page 80: ...t The Internet 4 Tap OK Supported Applications The Fusion menu items and their corresponding applications are summarized in Table 5 1 Table 5 1 Supported Applications Application Description Find WLANs Invokes the Find WLANs application which displays a list of the WLANs active in the area Manage Profiles Invokes the Manage Profiles application which includes the Profile Editor Wizard to manage an...

Page 81: ...tion which allows the user to configure the Fusion option settings Wireless Status Invokes the Wireless Status application which allows the user to view the status of the current wireless connection Wireless Diagnostics Invokes the Wireless Diagnostics application which provides tools with which to diagnose problems with the wireless connection Log on off Invokes the Network Login dialog which all...

Page 82: ...ist select None 10 Tap Next The Encryption dialog box displays 11 In the Encryption Type drop down list select WEP 40 40 24 Figure 5 5 Encryption Dialog Box 12 Select the Pass phrase or Hexadecimal Keys radio button to indicate whether a pass phrase or hexadecimal keys will be entered on the next page 13 Select the For added security Mask characters entered check box to hide characters entered Des...

Page 83: ...mit Key drop down list select the key to transmit 20 Tap Next The IPv4 Address Entry dialog box displays Figure 5 7 IP Address Entry Dialog Box 21 Ensure that all three check boxes are selected 22 Tap Next The Battery Usage dialog box appears 23 In the Battery Usage Mode dialog box select a power consumption option Figure 5 8 Battery Usage Dialog Box 24 Tap Next The Performance Settings dialog box...

Page 84: ...5 6 MC67 User Guide ...

Page 85: ...l Message To create an email message 1 Press E mail 2 Select an email account 3 Tap New 4 To add recipients enter their email addresses separating them with a semicolon Tap To to add email addresses stored in Contacts 5 Enter a subject and compose the message 6 To add an attachment to the message tap Insert and tap the item to attach Picture Voice Note or File 7 Tap Viewing an Email Message To vie...

Page 86: ...message center then forwarded to the destination mobile device If the recipient is not available the message is stored and can be sent later Viewing Text Messages The user can view a text message whether the phone is on or off When the phone is on the user can view a text message from its notification pop up Tap the text message notification icon on the navigation bar to display the message Figure...

Page 87: ...l view received text message 1 Tap Text or on the Today screen tap the text message on the Information Bar Figure 6 3 Text Messaging on Today Screen 2 The Text Messages window appears 3 In the message list tap the text message Figure 6 4 Text Messages List Tap to View Text Messages Enter reply here ...

Page 88: ...size of the message If the user wants to know if the text message was received tap Menu Message Options then select the Request message delivery notification check box 4 Tap Send when finished the message If the phone is turned on the text message is sent If it is off the user is prompted to turn on the phone If the user does so the message is sent otherwise tap OK the message is saved in the Draf...

Page 89: ... two phone lines on a single card For example one line can be a business phone line and the other a personal phone line To switch between phone lines 1 Tap Programs SIM Toolkit Figure 6 7 SIM UI Window 2 Select Dual and then tap Select Figure 6 8 Change Phone Line 3 Select Change and then tap Select 4 If applicable sign in with the PIN number for the other line NOTE NOTE Check with the service pro...

Page 90: ...ssword checkbox is checked by default to allow the MC67 to always remember the email account password To prevent other users from viewing the email account tap the Save password checkbox to remove the checkmark and deactivate the feature 6 Tap Next 7 Tap the Try to get e mail settings automatically from the Internet checkbox to place a checkmark in the checkbox Tap Next to attempt to retrieve thes...

Page 91: ...ap Setup E mail 3 In the E mail address field enter the email address for the account 4 In the Password fields and the password for the account 5 The Save password checkbox is checked by default to allow the MC67 to always remember the email account password To prevent other users from viewing email tap the Save password checkbox to remove the checkmark and deactivate the feature 6 Tap Next 7 Tap ...

Page 92: ...ired options Tap Done once completed making updates to these settings 21 Tap Next 22 In the Automatic Send Receive drop down list select the time interval for the MC67 to send and check for new email 23 Tap the Review all download settings link for additional download settings and options 24 Tap Finish Editing an Email Account To edit general email settings 1 Tap E mail 2 Highlight an account and ...

Page 93: ...eckbox to continue to check the email at predetermined intervals even if in a roaming area In the When deleting messages drop down list select whether to automatically delete or retain messages on the email server when deleting messages from the MC67 15 Tap Done 16 Tap Next 17 Tap an on screen field and change any settings Tap an option to select it In the Message format drop down list select to v...

Page 94: ...6 10 MC67 User Guide ...

Page 95: ...the Enterprise Mobility Developer Kit EMDK Help Adaptive Frequency Hopping Adaptive Frequency Hopping AFH is a method of avoiding fixed frequency interferers and can be used with Bluetooth voice All devices in the piconet Bluetooth network must be AFH capable in order for AFH to work There is no AFH when connecting and discovering devices Avoid making Bluetooth connections and discoveries during c...

Page 96: ...tication of Bluetooth devices is based upon a challenge response transaction Bluetooth allows for a PIN number or passkey that is used to create other 128 bit keys used for security and encryption The encryption key is derived from the link key used to authenticate the pairing devices Also worthy of note is the limited range and fast frequency hopping of the Bluetooth radios that makes long distan...

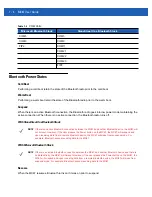
Page 97: ...oth stack Table 7 2 list the COM ports available for the StoneStreet One Bluetooth stack and the Microsoft Bluetooth stack Table 7 1 Bluetooth Services Service Microsoft Bluetooth StoneStreet One Bluetooth Generic Access Profile GAP Yes Yes Service Discovery Protocol SDP Profile Yes Yes Serial Port Profile Server and Client Yes Yes Hands free Profile Audio Gateway Yes Yes Headset Profile Audio Gat...

Page 98: ...ooth Stack StoneStreet One Bluetooth Stack COM5 COM5 COM9 COM9 FIP2 COM11 COM21 COM22 COM23 FIP2 NOTE If there is an active Bluetooth connection between the MC67 and another Bluetooth device the MC67 will not timeout However if the user presses the Power button on the MC67 the MC67 will suspend and upon receiving data from a remote Bluetooth device the MC67 will wake from suspend mode For example ...

Page 99: ...ormation The view the MC67 Bluetooth information 1 Tap Start MotoUI 2 Tap My Device Information 3 The Device Information window displays Device Name HCI version number LMP version number Bluetooth chip manufacturer name BT UI version number 4 Tap the Back button to return to the MotoBTUI window FIPS Configuration NOTE By default the MC67 has a FIPS key installed If required the user can generate a...

Page 100: ... Bluetooth device Place the file into the Application folder 2 Navigate to the Application folder 3 Locate the NewAESKey reg file and tap the filename The RegMerge confirmation box displays 4 Tap Yes 5 Perform a warm boot Device Status Use the Device Status option to set if the MC67 would be seem by other Bluetooth devices Touch the Device Status option to toggle the MC67 from Hidden to Discoverab...

Page 101: ...n Bluetooth checkbox to turn on the Bluetooth radio on c Tap OK 2 Wireless Manager a Tap the Status Bar b Tap the Connectivity icon c Tap Wireless Manager d Tap Bluetooth to turn the Bluetooth radio on e Tap X 3 MotoBTUI application a Tap MotoBTUI b Tap the Bluetooth Off tab to turn the Bluetooth radio on c Tap X Disabling Bluetooth There are three ways to disable Bluetooth 1 Microsoft Bluetooth a...

Page 102: ... devices without pairing However once paired the MC67 and a paired device exchange information automatically when the Bluetooth radio is turned on See Pairing with Discovered Device s on page 7 32 for more information To find Bluetooth devices in the area 1 Ensure that Bluetooth is enabled on both devices 2 Ensure that the Bluetooth device to discover is in discoverable and connectable modes 3 Ens...

Page 103: ... a device from the list Figure 7 5 Select a Bluetooth Device 7 Tap Next The Enter Passcode window appears Figure 7 6 Enter Passcode NOTE If Smart pairing is configured and the device is requesting one of the pre defined PINs the Enter Passcode window does not appear ...

Page 104: ...de from the device 12 The device appears in the list on the main window After the passcodes have been accepted on both sides a trusted paired connection is created Available Services The MC67 with Microsoft Bluetooth stack offers the following services OBEX Object Push Services via Beam Serial Port Services Personal Area Networking Services PBAP Services Dial up Networking Services A2DP AVRCP Serv...

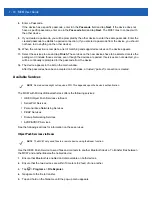
Page 105: ...e and sends the file When completed Tap to send changes to Done Figure 7 8 Beam File Window To transfer a contact between the MC67 and another Bluetooth enabled device 1 Ensure that Bluetooth is enabled and discoverable on both devices 2 Ensure that the two devices are within 10 meters 32 feet of one another 3 Tap Contacts 4 Navigate to the contact to transfer 5 Tap and hold on the contact until t...

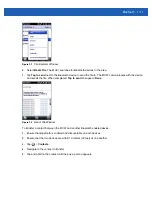
Page 106: ...AN 5 In the Network Connection list select the connection type Select the network connection that the device should use to connect to the Internet 6 Tap Connect 7 On the computer or laptop setup a Bluetooth PAN with the device a Select Start Control Panel Network Connections b Under Personal Area Network select Bluetooth Network Connection c Right click on Bluetooth Network Connection and select V...

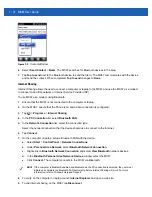
Page 107: ...erial Port checkbox 10 Tap Save 11 Tap COM Ports 12 Tap New Outgoing Port The add device window appears 13 Select the serial device in the list and then tap Next 14 Select a COM port from the drop down list 15 Tap Finish ActiveSync Using Serial Port Services Use the wireless Bluetooth serial port connection for ActiveSync just as a physical serial cable connection Configure the application that wi...

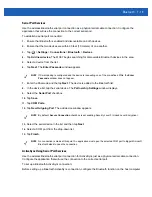
Page 108: ...ecommended for enhanced security The passkey must be between 1 to 16 alphanumeric characters If the user does not want to use a passkey tap Next 8 To disconnect the ActiveSync connection tap ActiveSync Menu Disconnect 9 Tap Disconnect Phone Book Access Profile Services Phone Book Access profile PBAP is used to synchronize contacts between a remote device and the MC67 To establish an PBAP synchroni...

Page 109: ...ode window appears 7 Enter the Passcode and the tap Next The device is added to the Bluetooth list 8 A dialog box appears requesting to transfer contacts to the car kit 9 Select Yes or No 10 If Yes is selected contacts from the MC67 are transferred to the car kit NOTE If Smart pairing is configured and the device is requesting one of the pre defined PINs the Enter Passcode window does not appear ...

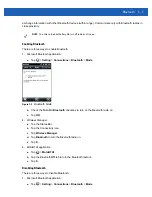
Page 110: ... and select Wireless Manager in the Connectivity dialog box Tap the blue Bluetooth bar to turn on the Bluetooth radio Modes The BTExplorer application has two modes for managing Bluetooth connections Wizard Mode and Explorer Mode The Wizard Mode is for novice Bluetooth users and the Explorer Mode is for experienced Bluetooth users To switch between modes select View Wizard Mode or View Explorer Mo...

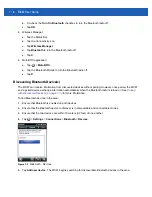
Page 111: ...ally when the Bluetooth radio is turned on See Pairing with Discovered Device s on page 7 32 for more information To find Bluetooth devices in the area 1 Ensure that Bluetooth is enabled on both devices 2 Ensure that the Bluetooth device to discover is in discoverable and connectable modes 3 Ensure that the require profile is enabled on the MC67 See Profiles on page 7 41 for more information 4 Ens...

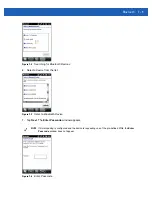
Page 112: ... Box The discovered devices display in the Select Remote Device window NOTE If a device discovery action has not been previously performed a device discovery is automatically initiated If a device discovery has previously been performed the device discovery process is skipped and the previously found list of devices displays To start a new device discovery tap and hold in the window and select Dis...

Page 113: ...re 7 15 Device Services 10 Select a service from the list and press Next The Connection Favorite Options window appears Figure 7 16 Connection Favorite Options Window 11 In the Favorite Name text box enter a name for this service that will appear in the Favorite window NOTE If the MC67 discovers a service but the service is not supported the service icon is grayed out ...

Page 114: ...1 for more information 2 Use the Connection Wizard to search for a Bluetooth device 3 Select the device and tap Next The Select Remote Service window appears 4 Select File Transfer and tap Next The Connection Favorite Options window appears 5 Tap Next The Connection Summary window appears 6 Tap Connect The remote device s accessible folders appear NOTE Some devices might not require a PIN This dep...

Page 115: ...ted file on the remote device Get File copy the file from the remote device to the MC67 Put File copy a file from the MC67 to the remote device Creating a New File or Folder To create a new folder or file on the remote device 1 Tap and hold on the screen and select New Folder or New File The Create New Folder or Create New File window appears 2 Enter the name for the new folder or file 3 Tap OK to...

Page 116: ... 7 34 2 Ensure that the Personal Area Networking profile is enabled on the MC67 See Profiles on page 7 41 for more information 3 Use the Connection Wizard to search for a Bluetooth AP 4 Select the Personal Area Network or Network Access service and select Connect from the pop up menu The MC67 connects with the access point 5 Tap Internet Explorer The Internet Explorer window appears 6 In the addre...

Page 117: ...evices display in the Select Remote Device window 6 Select the Bluetooth Phone from the list and tap Next The MC67 searches for services on the Bluetooth Phone Figure 7 20 Select Remote Service Window 7 Select Dial up Networking Gateway service from the list and tap Next The Connection Favorite Options window appears Figure 7 21 Connection Favorite Options Window 8 In the Favorite Name text box en...

Page 118: ...nection 14 In the Password text box enter the password for this connection 15 In the Domain text box enter the domain name for this connection if required 16 Tap Finish or Connect 17 The phone begins dialing and connects to the network 18 To end a session tap the Connection icon and then tap Disconnect in the dialog box Add a Dial up Entry To add a dial up entry 1 In the Select Dial up Networking ...

Page 119: ...ce Info on page 7 34 2 Ensure that the OBEX Object Push profile is enabled on the MC67 See Profiles on page 7 41 for more information 3 Use the Connection Wizard to search for a Bluetooth device 4 Select the device and tap Next 5 Select the OBEX Object Push service and tap Next The Connection Favorite Options window appears 6 Tap Next The Connection Summary window appears 7 Tap Connect The OBEX Ob...

Page 120: ...confirmation dialog box on the other device to accept the contact A Send Contact dialog appears 7 Tap Ok Swapping Contacts To swap contacts with another device 1 Tap and hold on OBEX Object Push and select Connect The OBEX Object Push window appears NOTE Prior to sending and receiving contacts a default contact must be set up before attempting to send a contact NOTE Prior to swapping contacts a de...

Page 121: ...y a confirmation dialog box on the other device to accept the contact 7 Tap Ok Fetching a Contact To fetch a contact from another device 1 Tap and hold on OBEX Object Push and select Connect The OBEX Object Push window appears Figure 7 27 OBEX Object Push Window 2 In the Action drop down list select Fetch Contact information NOTE Prior to sending and receiving contacts a default contact must be se...

Page 122: ...bject Push Window 2 In the Action drop down list select Send A Picture 3 Tap The Send Local Picture window appears Figure 7 29 Send Local Picture Window 4 Navigate to the picture to send to the other device 5 Tap Open 6 Tap OK to send the picture to the other device and display a confirmation dialog box on the other device to accept the picture A Send Picture dialog appears 7 Tap Ok Headset Servic...

Page 123: ...ction to the correct serial port To establish a serial port connection 1 Use the Connection Wizard to search for a Bluetooth serial device 2 Select the device and tap Next The Connection Favorite Options window appears 3 In the Local COM Port drop down list select a COM port 4 Tap Finish ActiveSync Using Serial Port Services Use the wireless Bluetooth serial port connection for ActiveSync just as ...

Page 124: ...indow appears 3 Tap Connect The Remote Service Connection window appears Figure 7 31 Remote Service Connection Window 4 In the Service Type drop down list select Active Sync 5 Tap OK The MC67 connects the PC and an ActiveSync session begins 6 Tap Finish The Connection Favorite Options window appears 7 To end the session tap the ActiveSync icon in the Favorite window and select Disconnect from the ...

Page 125: ...34 2 Ensure that the remote Bluetooth device is in discoverable mode See the devices user manual for instructions 3 Ensure that the A2DP AVRCP profile is enabled on the MC67 See Profiles on page 7 41 for more information 4 Tap Menu New Connection 5 Select Connect to High Quality Audio from the drop down list 6 Tap Next 7 Select the device and tap Next 8 Enter the PIN Code for the remote device and...

Page 126: ...overed Device s A pair is a relationship created between the MC67 and another Bluetooth device in order to exchange information in a secure manner Creating a pair involves entering the same PIN on both devices After creating a pair and turning on the Bluetooth radios the devices recognize the pair and can exchange information without re entering a PIN To pair with a discovered Bluetooth device 1 T...

Page 127: ... delete a device no longer needed 1 Tap the Bluetooth icon and select Show BTExplorer The BTExplorer window appears 2 Tap Menu Trusted Devices The Trusted Devices window appears 3 Tap and hold on the device select Delete Link Key in the pop up menu 4 A confirmation dialog appears Tap Yes Accepting a Pairing When a remote device wants to pair with the MC67 enter a PIN when requested to grant permis...

Page 128: ...plorer Settings window to configure the operation of the BTExplorer application Tap Menu Settings Device Info Use Device Info to configure the MC67 s Bluetooth connection modes Services Use Services to add or delete Bluetooth services Table 7 3 Device Info Data Item Description Device Name Displays the name of the MC67 Discoverable Mode Select whether or not the MC67 is discoverable by other Bluet...

Page 129: ... appropriate information and then tap OK See the following sections for information on the available services Dial Up Networking Service Dial up Networking allows other Bluetooth devices to access a dial up modem Table 7 4 Dial up Networking Information Data Item Description Service Name Displays the name of the service Service Security Select the type of security from the drop down list Options a...

Page 130: ...ort Options Select the port option Table 7 5 File Transfer Information Data Item Description Service Name Displays the name of the service Service Security Select the type of security from the drop down list Options are None Authenticate or Authenticate Encrypt Root Directory Select the directory that other Bluetooth devices can access File Permissions Select the file permissions for the selected ...

Page 131: ...Security Select the type of security from the drop down list Options are None Authenticate or Authenticate Encrypt Phonebook Select the Phonebook checkbox to allow synchronization with the MC67 s contacts Select Read Write Create and or Delete to allow phonebook permissions Calendar Select the Calendar checkbox to allow synchronization with the MC67 s calendar Select Read Write Create and or Delet...

Page 132: ...the drop down list Options are None Authenticate or Authenticate Encrypt Support Group Ad Hoc Networking Select to enable Ad Hoc networking Table 7 11 Serial Port Services Data Item Description Service Name Displays the name of the service Service Security Select the type of security from the drop down list Options are None Authenticate or Authenticate Encrypt Local COM Port Select the COM port Lo...

Page 133: ...plorer Settings Security Discovery Use Discovery to set and modify discovered devices NOTE To use PIN Code select Authenticate or Authenticate Encrypt from the Service Security drop down list on each local service Table 7 14 Security Data Item Description Use PIN Code Incoming Connection Select for automatic use of the PIN code entered in the PIN Code text box It is recommended not to use this aut...

Page 134: ...ts the amount of time the MC67 takes to discover Bluetooth devices in the area Name Discovery Mode Select either Automatic or Manual to automatically attempt to discover a Bluetooth device s name after finding the device Discovered Devices Delete Devices Deletes all discovered devices and link keys from memory Discovered Devices Delete Linked Keys Removes all pairing from remote Bluetooth devices ...

Page 135: ...ight To decrease key repeat delay drag the Delay slider to the left Rate To increase key repeat speed drag the Rate slider to the left To decrease key repeat speed drag the Rate slider to the right Table 7 18 System Parameters Data Item Description Page Timeout Sets the amount of time the MC67 searches for a device before moving on the next device Link Supervision Timeout Sets the amount of time t...

Page 136: ...7 42 MC67 User Guide ...

Page 137: ...determine that the application is compatible with the MC67 Refer to the application s user guide for application installation and setup information MC67 GPS Setup The GPS enabled MC67 automatically manages access to the GPS receiver to allow multiple programs to simultaneously access GPS data By default the MC67 has the following settings 1 Tap Settings System External GPS 2 In the Programs tab th...

Page 138: ... from satellites To improve GPS signal strength place the MC67 where there is a clear view of the sky A direct line of sight is required between the MC67 and the GPS satellites to access information from the satellites Assisted GPS GPS can be used in stand alone or Assisted GPS A GPS modes A Stand alone GPS receiver downloads data from GPS satellites It can take several minutes to get a fix By usi...

Page 139: ...he Motorola SUPL server 4 Enter the SUPL Server IP address in the Server IP field The server IP address is not required when using the Motorola server 5 Enter the SUPL Server port number in the Port field The port number is not required when using the Motorola server 6 User ID type is to choose which ID type to use during the SUPL session This option is not available when using the Motorola server...

Page 140: ...8 4 MC67 User Guide ...

Page 141: ...ome Customize the appearance of the Home screen and the information to display on it Sounds Notifications Enable sounds for events notifications and more and set the type of notification for different events Connections Folder Contains connection setting applications System Folder Contains system setting applications Personal Folder Contains personal setting applications Connections Folder Beam Se...

Page 142: ...ile 6 software Encryption Allow files on a storage card to be encrypted Encrypted files are readable only on the device DataWedge Enable data capture using the camera or imager Error Reporting Enable or disable the Microsoft s error reporting function GPS Setup View GPS SUPL information See MC67 GPS Setup on page 8 1 External GPS Set the appropriate GPS communication ports if required Refer to MC6...

Page 143: ...entation re calibrate the screen and change the screen text size Remove Programs Remove programs that were installed on the MC67 System Info Obtain system information UI Settings Set Start screen layout and IE zoom feature Refer to UI Settings on page 9 6 Task Manager Stop running programs USBConfig Configure the MC67 USB port Refer to USB Configuration on page 9 5 Table 9 1 Setting Applications C...

Page 144: ...he Password field A strong password must contain at least seven characters and contain at least three of the following uppercase and lowercase letters numerals and punctuation b Re enter the password in the Confirm field 6 Tap OK 7 Tap OK Power Settings To set the MC67 to turn off after a short period of non use 1 Tap Setting System Power NOTE If the device is configured to connect to a network us...

Page 145: ...ight 6 Tap the Persist Disable backlight setting over reset check box to enable the settings to persist after a reset 7 Tap OK Keypad Backlight Settings To change the keypad backlight settings 1 Tap Settings System Keylight Battery Power tab 2 Select the Disable keylight if device if not used for check box and select a value from the drop down list 3 Select the Advanced tab 4 Tap the Keylight Auto...

Page 146: ...ontrol Zooming in Internet Explorer Start Screen Settings To change the grid view of the Start screen 1 Tap Start Settings System UI Settings 2 Tap the Start Screen Settings tab Figure 9 2 Start Screen Settings Tab 3 Select the number of columns 4 Tap OK 5 Tap OK 6 Preform a warm boot IE Zoom Mapping When Internet Explorer opens the volume keys on the side of the MC67 are used to zoom in and out T...

Page 147: ...Settings 9 7 2 Tap the IE Zoom Mapping tab Figure 9 3 IE Zoom Mapping Tab 3 Select Off 4 Tap OK 5 Tap OK to turn off mapping ...

Page 148: ...rations required for sensors such as setting sensor threshold values sensor calibration and etc Info Tab Use the IST Info tab to view IST software version information Figure 9 4 IST Info Tab Display Tab Use the Display tab configure display interaction settings Figure 9 5 Display Tab The Auto Orientation parameter controls the display rotation according to the MC67 orientation Select the Auto Orie...

Page 149: ...ge Sensitivity button Setting Sensitivity Use the slider to set the sensitivity A low setting indicates that a harder shake faster movement is required for the IST to initiate a wake up action The sensitivity can be set from 0 to 10 and when the sensitivity is set to lower values a simple shake motion can be detected by IST A high setting allows IST to issue a wake up action when an easier movemen...

Page 150: ...on of the MC67 in pictorial and graphical views Motion detects High G or Free Fall of the device Value 0 is no motion detected When a Free Fall is detected sensor Visualize window will play a wave with highest amplitude Acceleration displays device acceleration along the X Y and Z axis Tilt Angle Provide angular rotation with respect to the horizontal plane ALS Provides light intensity variation w...

Page 151: ...r ID Range Unit Scale Connectivity Device status The Setting button shows if the selected sensor has any parameter that is user configurable including calibration if supported This screen is specific to a particular sensor Tap Visualize to display sensor in a pictorial view Figure 9 10 Visualize Screen Example 1 ...

Page 152: ...9 12 MC67 User Guide ...

Page 153: ...C67 with a host computer through an Ethernet Modem or USB connection Four Slot Charge Only Cradle CRD5500 4000CR CRD5501 4000CR Charges up to four MC67 devices Four Slot Ethernet Cradle CRD5500 4000ER CRD5501 4000ER Charges up to four MC67 devices and connects the MC67 with an Ethernet network CRD5500 4000ER provides up to a maximum of 100 Mbps CRD5501 4000ER provides up to a maximum of 1 Gbps Veh...

Page 154: ...tween the Single Slot USB Cradle and a host computer Printer Cable 25 136283 01R Provides connection to a Monarch Paxar Serial printer Trigger Handle TRG5500 101R Adds a gun style handle with a scanning trigger for comfortable and productive data capture Trigger Handle Hand Strap 21 138874 01R Handstrap for the Trigger handle Magnetic Stripe Reader MSR5500 100R Captures data from magnetic stripe c...

Page 155: ...4 VDC power for operating the MC67 Synchronizes information between the MC67 and a host computer Refer to the MC67 Integrator Guide for information on setting up a partnership between the MC67 and a host computer Charges the MC67 s battery Charges a spare battery Charging the MC67 Battery Connect the cradle to power Insert the MC67 into the slot to begin charging Figure 10 1 MC67 Battery Charging ...

Page 156: ... Temperature Charge batteries in temperatures from 0 C to 40 C 32 F to 104 F Charging is intelligently controlled by the MC67 To accomplish this for small periods of time the MC67 or accessory alternately enables and disables battery charging to keep the battery at acceptable temperatures The MC67 or accessory indicates when charging is disabled due to abnormal temperatures via its LED See Table 1...

Page 157: ...he MC67 Download the Cradle Modem Country Configurator Application Software for MC55xx package from the Motorola Support Central web site http supportcentral motorola com Following the instructions with the software package to install the application on the MC67 The application includes country selections for all supported countries and automatically programs the modem and adjust its operating par...

Page 158: ... is no link Operation Ethernet Connection Place the Connection switch on the bottom of the cradle to the Ethernet position Place the MC67 into the cradle To test the connection tap Programs Internet Explorer Enter a web address Modem Connection Place the Connection switch on the bottom of the cradle to the Modem position Place the MC67 into the cradle The MC67 dials the phone number and connects t...

Page 159: ...e LED shows the status of the battery charging in the MC67 See Table 1 1 on page 1 6 for charging status indications The 3600 mAh battery fully charges in less than six hours Charging Temperature Charge batteries in temperatures from 0 C to 40 C 32 F to 104 F Charging is intelligently controlled by the MC67 To accomplish this for small periods of time the MC67 or accessory alternately enables and ...

Page 160: ...e LED shows the status of the battery charging in the MC67 See Table 1 1 on page 1 6 for charging status indications The 3600 mAh battery fully charges in less than six hours Charge batteries in temperatures from 0 C to 40 C 32 F to 104 F Charging is intelligently controlled by the MC67 To accomplish this for small periods of time the MC67 alternately enables and disables battery charging to keep ...

Page 161: ... to indicate activity or stays lit to indicate that a link is established When it is not lit it indicates that there is no link LED Indicators CRD5501 4000ER There are two green LEDs on the front of the cradle These green LEDs light and blink to indicate the data transfer rate When the LEDs are not lit the transfer rate is 10 Mbps Table 10 3 CRD5500 4000ER LED Data Rate Indicators Data Rate Green ...

Page 162: ...R into a cradle or connecting to a charging cable Attaching and Removing the MSR To attach slide the MSR onto the bottom of the MC67 and secure by snapping the arms into the MC67 housing Figure 10 8 MSR Installation To remove the MSR open the arms and pull the MSR from the MC67 Using the MSR Install an MSR enabled application onto the MC67 To use the MSR 1 Attach the MSR to the MC67 NOTE When atta...

Page 163: ...h the MSR with the magnetic stripe on the card facing down Swipe the card in either direction from left to right or from right to left For best results gently press down on the card while swiping to ensure contact with the bottom of the reader 5 The application indicates if the data has been read correctly ...

Page 164: ...ng the MC67 Battery Insert the MC67 into the vehicle cradle to begin charging A click indicates that the MC67 button release locking mechanism is enabled and the MC67 is locked in place Figure 10 9 MC67 Battery Charging Removing the MC67 To remove the MC67 hold back the release lever on the cradle and pull the MC67 up and out of the cradle CAUTION Ensure the MC67 is fully inserted in the cradle La...

Page 165: ... charges in less than six hours Charging Temperature Charge batteries in temperatures from 0 C to 40 C 32 F to 104 F Charging is intelligently controlled by the MC67 To accomplish this for small periods of time the MC67 alternately enables and disables battery charging to keep the battery at acceptable temperatures The MC67 indicates when charging is disabled due to abnormal temperatures via its L...

Page 166: ...he charger has an amber LED for each battery charging well See Table 10 5 for charging status indications The 3600 mAh battery fully charges in less than six hours Charging Temperature Charge batteries in temperatures from 0 C to 40 C 32 F to 104 F Charging is intelligently controlled by the MC67 To accomplish this for small periods of time the charger alternately enables and disables battery char...

Page 167: ...d with the Motorola approved power supply DEX cable Provides communication with electronic data exchange devices such as vending machines Battery Charging and Operating Power The communication charge cables can charge the MC67 battery and supply operating power To charge the MC67 battery 1 Connect the communication charge cable power input connector to the Motorola approved power source 2 Slide th...

Page 168: ...s The amber Charge LED on the MC67 indicates battery charging status See Table 1 1 on page 1 6 for charging status indications Charging Temperature Charge batteries in temperatures from 0 C to 40 C 32 F to 104 F Charging is intelligently controlled by the MC67 To accomplish this for small periods of time the MC67 or accessory alternately enables and disables battery charging to keep the battery at...

Page 169: ...3 Trigger Handle Features Inserting the MC67 into the Trigger Handle Slide the MC67 into the Trigger Handle until it locks in place The latches secure the MC67 to the Trigger Handle Figure 10 14 Installing the MC67 Removing the MC67 To remove the MC67 press the release buttons and pull the MC67 forward Scanning To scan bar codes Trigger Release Button Latch NOTE A scanning application must be inst...

Page 170: ...Start the MC67 s scanning application 2 Aim the MC67 at the bar code 3 Press the trigger on the handle The Scan Decode LED lights and a beep sounds to indicate a successful decode Figure 10 15 Scanning with the Trigger Handle ...

Page 171: ...Tap Pairing Barcode A bar code displays Figure 10 16 Pairing Bar Code 6 Point the RS507 at the bar code The RS507 reads the bar code and begins pairing with the MC67 If required enter PIN 12345 Tap Yes 7 If using DataWedge configure DataWedge to use the Bluetooth SSI Scanner Driver See DataWedge on page 3 4 for setup instructions 8 Launch a scanning enabled application or DataWedge 9 Point the RS5...

Page 172: ...10 20 MC67 User Guide ...

Page 173: ...the surface of the MC67 screen Motorola recommends using a screen protector p n KT 129195 01R The touch sensitive screen of the MC67 is glass Do not to drop the MC67 or subject it to strong impact Protect the MC67 from temperature extremes Do not leave it on the dashboard of a car on a hot day and keep it away from heat sources Do not store or use the MC67 in any location that is dusty damp or wet...

Page 174: ...sing a thin plastic card such as a credit card then carefully lift it off the display Figure 11 1 Removing the Screen Protector Battery Safety Guidelines The area in which the units are charged should be clear of debris and combustible materials or chemicals Particular care should be taken where the device is charged in a non commercial environment Follow battery usage storage and charging guideli...

Page 175: ...ose to water or other liquids or expose to fire explosion or other hazard Do not leave or store the equipment in or near areas that might get very hot such as in a parked vehicle or near a radiator or other heat source Do not place battery into a microwave oven or dryer Battery usage by children should be supervised Please follow local regulations to properly dispose of used re chargeable batterie...

Page 176: ...phthalates or before hands are washed to remove contaminant residue after gloves are removed If products containing any of the harmful ingredients listed above are used prior to handling the MC67 such as hand sanitizer that contain ethanolamine hands must be completely dry before handling the MC67 to prevent damage to the plastics Materials Required Alcohol wipes Lens tissue Cotton tipped applicat...

Page 177: ...of the connector should also be rubbed with the cotton tipped applicator 5 Spray compressed air in the connector area by pointing the tube nozzle about inch away from the surface 6 Ensure that there is no lint left by the cotton tipped applicator remove lint if found 7 If grease and other dirt can be found on other areas of the cradle use lint free cloth and alcohol to remove 8 Allow at least 10 t...

Page 178: ... reset See Resetting the MC67 on page 2 12 MC67 removed from cradle while battery was charging Insert MC67 in cradle The 3600 mAh battery fully charges in less than six hours Extreme battery temperature Battery does not charge if ambient temperature is below 0 C 32 F or above 40 C 104 F Cannot see characters on display MC67 not powered on Press the Power button During data communication no data tr...

Page 179: ...eature Screen is not calibrated correctly Re calibrate the screen See Calibrating the Screen on page 1 7 The device is not responding Reset the device See Resetting the MC67 on page 2 12 A message appears stating that the MC67 memory is full Too many files stored on the MC67 Delete unused memos and records If necessary save these records on the host computer or use an SD card for additional memory...

Page 180: ... required Contact system administrator Error message SIM Error Cannot save information to the SIM appears when copying contacts to a SIM card Feature not supported on some SIM cards If error appears while copying one contact reboot the MC67 The contact appears on the SIM card after rebooting If error appears while copying multiple contacts copy one contact at a time and follow above solution Use M...

Page 181: ...fully charges in less than six hours Battery is faulty Verify that other batteries charge properly If so replace the faulty battery The MC67 is not fully seated in the cradle Remove and re insert the MC67 into the cradle ensuring it is firmly seated Extreme battery temperature Battery does not charge if ambient temperature is below 0 C 32 F or above 40 C 104 F Spare battery is not charging Battery...

Page 182: ...erature of the cradle is too warm Move the cradle to an area where the ambient temperature is between 0 C 32 F and 50 C 122 F Table 11 4 Troubleshooting the Vehicle Cradle Symptom Possible Cause Action MC67 battery charging LED does not light up Cradle is not receiving power Ensure the power input cable is securely connected to the cradle s power port MC67 battery is not recharging MC67 was remove...

Page 183: ...bleshooting the Cables Symptom Possible Cause Action MC67 battery is not charging MC67 was disconnected from AC power too soon Connect the power cable correctly Confirm main battery is charging Tap Power Settings Battery tab The 3600 mAh battery fully charges in less than six hours Battery is faulty Verify that other batteries charge properly If so replace the faulty battery The MC67 is not fully ...

Page 184: ...67 was removed from MSR or MSR was unplugged from AC power too soon Ensure MSR is receiving power Ensure MC67 is attached correctly Confirm main battery is charging Tap Settings System Power Battery tab The 3600 mAh battery fully charges in less than six hours Battery is faulty Verify that other batteries charge properly If so replace the faulty battery The MC67 is not fully attached to the MSR De...

Page 185: ...el Glass analog resistive touch Backlight Light Emitting Diode LED backlight Battery Pack Rechargeable Lithium Ion 3 7V 3600 mAh battery Backup battery Nickel metal hydride Ni MH battery rechargeable 15 mAh 2 8V non user accessible or replaceable Expansion Slot micro Secure Digital SD slot supports up to 32 GB Connection Interface Universal Serial Bus USB 2 0 High Speed host and client Notificatio...

Page 186: ...ing temperature per MIL STD 810G Tumble 1 000 1 6 ft 0 5 meter tumbles at room temperature per applicable IEC tumble specifications Electrostatic Discharge ESD 15kVdc air discharge 8kVdc direct discharge 8kVdc indirect discharge Sealing IP67 per IEC specification Vibration 4 g s PK Sine 5 Hz to 2 kHz 0 04g2 Hz Random 20 Hz to 2 kHz 60 minute duration per axis 3 axis Thermal Shock 40 C to 70 C 40 F...

Page 187: ...SCHAPv2 EAP GTC LEAP EAP FAST TLS MS CHAPv2 EAP GTC Voice Communications Voice over IP ready Wi Fi certified IEEE 802 11a b g n direct sequence wireless LAN Wi Fi Multimedia WMM and WMM PS Motorola Voice Quality Manager VQM Wireless PAN Data and Voice Communications Bluetooth Class II v2 1 with Enhanced Data Rate EDR Global Positioning System GPS Integrated stand alone or Assisted GPS A GPS Data C...

Page 188: ...ine SE4500 DL Specifications Field of View Horizontal 39 2 Vertical 25 4 Optical Resolution WVGA 752 H x 480 V pixels gray scale Roll 360 Pitch Angle 60 from normal Skew Tolerance 60 from normal Ambient Light Indoor 450 ft candles 4845 lux Outdoor 9000 ft candles 96 900 lux Sunlight 8000 ft candles Fluorescent 450 ft candles Focal Distance From center of exit window 18 5 cm 7 3 in Aiming Element V...

Page 189: ... Codes Chinese 2 of 5 Codabar Code 11 Code 128 Code 39 Code 93 Coupon Code Discrete 2 of 5 EAN 8 EAN 13 GS1 DataBar GS1 DataBar 14 GS1 DataBar Expanded GS1 DataBar Expanded Stacked GS1 DataBar Limited Interleaved 2 of 5 ISBT 128 Korean 2 of 5 Matrix 2 of 5 MSI TLC39 Trioptic 39 UCC EAN 128 UPCA UPCE UPCE1 UPC EAN Supplementals Webcode 2D Bar Codes Australian Postal Aztec Canadian Postal Composite ...

Page 190: ...A 6 MC67 User Guide ...

Page 191: ...ins application keys scroll keys and function keys The keypad is color coded to indicate the alternate function key blue values Note that an application can change keypad functions so the MC67 s keypad may not function exactly as described See Table B 1 for key and button descriptions and Table B 2 on page B 4 for the keypad s special functions Figure B 1 MC67 Numeric Keypad ...

Page 192: ... only to the next key pressed to the orange lock state This displays the following icon at the bottom of the screen Talk Start Menu Talk Green Phone press to display the phone keypad window or to dial a phone number from the phone keypad window When on a phone call press to place the call on hold Use this key in conjunction with the Blue key to instantly display the Start menu from any application...

Page 193: ...roduce the upper case alphabetic characters on the key For example press and release the Orange key press and release the SHIFT key and then press the 4 key once to produce the letter G press and release the Orange key press and release the SHIFT key and then press the 4 key three times to produce the letter I Backspace Produces a backspace SHIFT Press and release the SHIFT key to activate the key...

Page 194: ...d Press 3rd Press 4th Press 1 1 F1 2 2 F2 a b c A B C 3 3 F3 d e f D E F 4 4 F4 g h i G H I 5 5 F5 j k l J K L 6 6 F6 m n o M N O 7 7 F7 p q r s P Q R S 8 8 F8 t u v T U V 9 9 F9 w x y z W X Y Z 0 0 F10 Up Up Up High light Up Left Left Down Down Down High light Down Right Right Enter Action Action Action Action Action Note An application can change the key functions The keypad may not function exa...

Page 195: ...r key to press to produce a particular character or action The keypad default is alphabetic producing lowercase letters See Table B 3 for key and button descriptions and Table B 4 on page B 8 for the keypad s special functions AZERTY keypad is used on configurations installed with the French operating system QWERTZ keypad is used on configurations installed with the German operating system Figure ...

Page 196: ... activate this mode temporarily followed by another key This displays the following icon at the bottom of the screen until a second key is pressed Press the Orange key twice to lock this mode This displays the following icon at the bottom of the screen Press the Orange key a third time to unlock Talk Start Menu Talk Green Phone press to display the phone keypad window or to dial a phone number fro...

Page 197: ... command or menu above it on the screen Shift Changes the state of the alpha characters from lowercase to uppercase Press the Shift key to activate this mode temporarily followed by another key This displays the following icon at the bottom of the screen until a second key is pressed Press the Shift key twice to lock this mode This displays the following icon at the bottom of the screen Press the ...

Page 198: ... R 3 r T t T t Y y Y _ y U u U u I i I i O o O o P p P áü p A a A a S s S 4 s D d D 5 d F f F 6 f G g G g H h H h J j J j K k K k L l L l Backspace Backspace Backspace Backspace Backspace Shift Shift Shift Lock Shift Shift Note An application can change the key functions The keypad may not function exactly as described Table B 3 Alpha numeric Keypad Descriptions Continued Key Action ...

Page 199: ... Keypad Input Modes Key Normal Shift Key Orange Key Blue Key A a A a Z z Z 1 z E e E 2 e R r R 3 r T t T t Y y Y _ y U u U u I i I i O o O o P p P áü p Q q Q q Note An application can change the key functions The keypad may not function exactly as described Table B 4 QWERTY Keypad Input Modes Continued Key Normal Shift Key Orange Key Blue Key Note An application can change the key functions The ke...

Page 200: ... X x X 8 x C c C 9 c V v V v B b B b N n N n M m M m Enter Enter Enter Enter Enter 0 0 0 0 TAB Tab Tab Back tab Tab SPACE Space Space Space Space Backlight Backlight Backlight Backlight Backlight Period Table B 5 AZERTY Keypad Input Modes Continued Key Normal Shift Key Orange Key Blue Key Note An application can change the key functions The keypad may not function exactly as described ...

Page 201: ...3 r T t T t Z z Z _ z U u U u I i I i O o O o P p P áü p A a A a S s S 4 s D d D 5 d F f F 6 f G g G g H h H h J j J j K k K k L l L l Backspace Backspace Shift Shift Y y Y 7 y X x X 8 x C c C 9 c V v V v B b B b N n N n M m M m Note An application can change the key functions The keypad may not function exactly as described ...

Page 202: ...ab Tab SPACE Space Space Space Space Backlight Backlight Backlight Backlight Backlight Period Table B 6 QWERTZ Keypad Input Modes Continued Key Normal Shift Key Orange Key Blue Key Note An application can change the key functions The keypad may not function exactly as described ...

Page 203: ...place the call on hold Use this key in conjunction with the Blue key to instantly display the Start menu from any application without tapping the screen This function is user programmable End Red Phone End Red Phone press when the phone keypad window displays to stop dialing or end a call Use this key in conjunction with the Blue key as an OK or close button This function is user programmable Star...

Page 204: ...ft Moves left one item Scroll Right Moves right one item Soft Keys Accesses the command or menu above it on the screen Enter Executes a selected item or function OK Use this key as an OK or close button Table B 7 PIM Keypad Descriptions Continued Key Description ...

Page 205: ...con at the bottom of the screen until a second key is pressed Orange Key Use this key to access the secondary layer of characters and actions shown on the keypad in orange Press the Orange key once to lock the keypad into Alpha state A single press illuminates the key and displays the following icon at the bottom of the screen Press the Orange key a second time to return to the normal state Press ...

Page 206: ...es down one item Scroll Left Moves left one item Scroll Right Moves right one item SPACE Produces a space character Alphanumeric In default state produces the numeric value on the key In Alpha state produces the lower case alphabetic characters on the key Each key press produces the next alphabetic character in sequence For example press and release the Orange key and then press the 4 key once to ...

Page 207: ...y Numeric Mode Orange Key Alpha Lowercase Mode Blue Key SHIFT Key 1st Press 2nd Press 3rd Press 4th Press 1 1 F1 2 2 F2 a b c 3 3 F3 d e f 4 4 F4 g h i 5 5 F5 j k l 6 6 F6 m n o 7 7 F7 p q r s 8 8 F8 t u v 9 9 F9 w x y z 0 0 F10 Note An application can change the key functions The keypad may not function exactly as described Table B 8 MC67 DSD Keypad Descriptions Continued Key Description ...

Page 208: ...character Table B 10 lists the special characters the user can generate Up Up Up Highlight Up Left Down Down Down Highlight Down Right Enter Action Action Action Action Table B 9 DSD Keypad Input Modes Continued Key Numeric Mode Orange Key Alpha Lowercase Mode Blue Key SHIFT Key 1st Press 2nd Press 3rd Press 4th Press Note An application can change the key functions The keypad may not function exa...

Page 209: ...Keypads B 19 y Y z Z _ Table B 10 Special Characters Continued Key Special Characters Key Special Characters ...

Page 210: ...B 20 MC67 User Guide ...

Page 211: ...nd spaces which represents numeric or alphanumeric data in machine readable form The general format of a bar code symbol consists of a leading margin start character data or message character check character if any stop character and trailing margin Within this framework each recognizable symbology uses its own unique format See Symbology Bit Binary digit One bit is the basic unit of binary inform...

Page 212: ...elf checking code with a character set consisting of digits 0 to 9 and six additional characters and Code 128 A high density symbology which allows the controller to encode all 128 ASCII characters without adding extra symbol elements Code 3 of 9 Code 39 A versatile and widely used alphanumeric bar code symbology with a set of 43 character types including all uppercase letters numerals from 0 to 9...

Page 213: ...ions are specified metrically EAN is used primarily in retail EMDK Enterprise Mobility Developer s Kit ESD Electro Static Discharge F File Transfer Protocol FTP A TCP IP application protocol governing file transfer via network or telephone lines See TCP IP Flash Memory Flash memory is nonvolatile semi permanent storage that can be electronically erased in the circuit and reprogrammed FHSS Frequenc...

Page 214: ...s signal characteristics and signal meanings Types of interfaces include RS 232 and USB IP Internet Protocol The IP part of the TCP IP communications protocol IP implements the network layer layer 3 of the protocol which contains a network address and is used to route a message to a different network or subnetwork IP accepts packets from the layer 4 transport protocol TCP or UDP adds its own heade...

Page 215: ...ct relatively quickly They require external light to reflect their information to the user M MC Mobile Computer MDN Mobile Directory Number The directory listing telephone number that is dialed generally using POTS to reach a mobile unit The MDN is usually associated with a MIN in a cellular telephone in the US and Canada the MDN and MIN are the same value for voice cellular users International ro...

Page 216: ... device that connects networks and supports the required protocols for packet filtering Routers are typically used to extend the range of cabling and to organize the topology of a network into subnets See Subnet S Scanner An electronic device used to scan bar code symbols and produce a digitized pattern that corresponds to the bars and spaces of the symbol Its three main components are 1 Light sou...

Page 217: ...r systems This standard is the protocol of the Internet and has become the global standard for communications TCP provides transport functions which ensures that the total amount of bytes sent is received correctly at the other end UDP is an alternate transport that does not guarantee delivery It is widely used for real time voice and video transmissions where erroneous packets are not retransmitt...

Page 218: ...imply ignored because there is no time to retransmit If UDP is used and a reliable delivery is required packet sequence checking and error notification must be written into the applications UPC Universal Product Code A relatively complex numeric symbology Each character consists of two bars and two spaces each of which is any of four widths The standard symbology for retail food packages in the Un...

Page 219: ...justing volume 2 12 AFH 7 1 Alpha numeric keypad B 5 alpha numeric keypad key descriptions B 6 answering a call 4 4 auto charge cable 10 2 10 13 AZERTY B 5 B bar codes two dimensional 3 1 battery charging 1 5 10 3 10 7 10 8 10 10 10 12 check status 1 6 installing 1 4 removing 1 7 battery chargers communication charge cables 10 13 LED indicators 10 14 four slot 10 12 battery charging 1 5 communicat...

Page 220: ...ge cables 10 13 battery charging 10 13 LED indicators 10 14 conference call 4 10 configuration xiii Contacts 2 10 contacts 2 10 contacts application 4 3 conventions notational xv cradles four slot charge only 10 1 10 7 four slot charge only cradle 10 7 four slot Ethernet 10 1 10 8 four slot spare battery charger 10 12 single slot USB 10 3 vehicle 10 10 D data capture xiii digital camera 3 1 dot ai...

Page 221: ...um ion battery 1 1 locking the MC67 keypad 9 4 M main battery charging 1 2 1 5 installing 1 2 maintenance 11 1 masked characters 5 4 Media Player 2 10 memory xiii messaging 2 10 MMC 1 2 10 3 MSP Agent 2 11 multi media card 1 2 10 3 muting a call 4 6 N navigation bar icons 2 7 notational conventions xv notes 2 10 notes application 4 6 numeric keypad B 1 B 13 B 15 input modes B 4 B 17 key descriptio...

Page 222: ...ging 1 6 10 4 10 12 spare battery charger charging 10 12 charging indicators 10 12 setup 10 12 speaker icon 2 12 special character key B 18 speed dial 4 4 4 11 spring loaded stylus 10 2 starting the EDA 1 2 1 6 status icon 2 7 battery 2 8 2 14 speaker 2 12 strap 1 1 stylus 1 1 2 18 10 2 subscriber identification module 1 3 suspend 1 7 1 8 7 5 synchronize with PC using Bluetooth 7 12 T task tray ic...

Page 223: ......

Page 224: ... S A http www motorolasolutions com MOTOROLA MOTO MOTOROLA SOLUTIONS and the Stylized M Logo are trademarks or registered trademarks of Motorola Trademark Holdings LLC and are used under license All other trademarks are the property of their respective owners 2013 Motorola Solutions Inc All Rights Reserved ...

Reviews: