background image


MTM800E

 260MHz

TETRA Mobile Terminal

When printed by Motorola

Feature User Guide

Summary of Contents for MTM800E

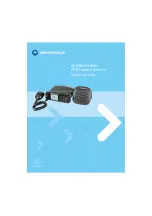
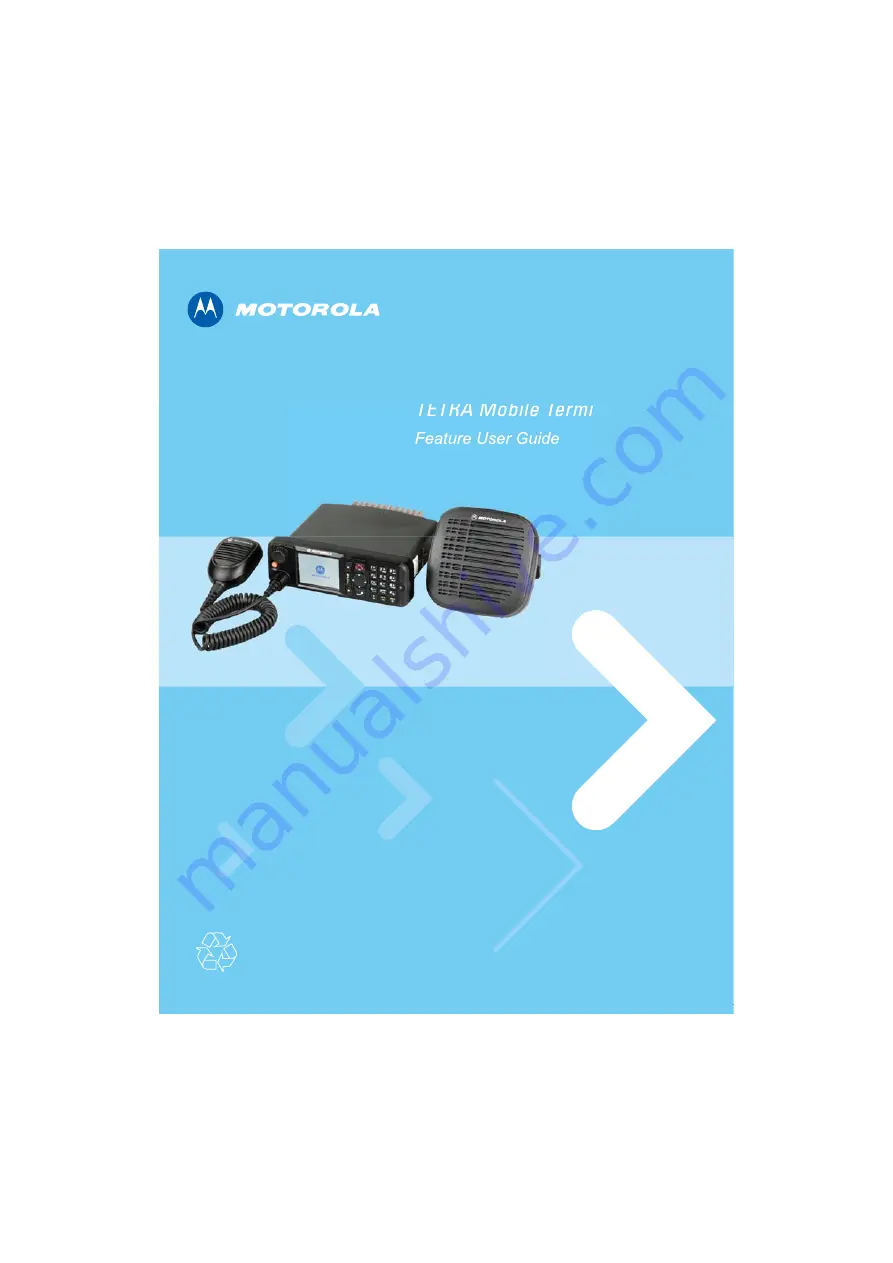
Page 1: ...MTM800E 260MHz TETRA Mobile Terminal When printed by Motorola Feature User Guide ...

Page 2: ......

Page 3: ...cy Button 9 Powering On with Transmit Inhibit TXI Active 9 Unlocking the MTM800E 10 Locking Unlocking the Keys Buttons 10 Selecting Your Network 11 RUA RUI 11 Looking After Your MTM800E 11 The Display 12 The LED Status Indicator 15 Key Knob and Button Overview 16 Aliases Names 20 Screen Saver 21 Home Display Text Message 22 Time Date 22 Terminal Disable Enable 22 Terminal Permanent Disable 23 Sele...

Page 4: ... Scanning 40 Making a Group Call 41 Receiving a Group Call 41 Transmit Inhibit 44 Dynamic Group Number Assignment DGNA 44 DMO Group Call 47 General 47 Favorite Folders 48 Selecting a Group 48 Selecting a Group using Navigation Keys Alphabetic Search Folder Search 48 Selecting a Folder 48 Group Scrolling Configuration 48 Gateway Repeater Selection 49 Making a DMO Group Call MS to MS 52 Making a DMO...

Page 5: ...ral 65 Making a Phone or PABX Call 65 Other Ways of Dialing 66 Answering a Phone or PABX Call 68 Emergency Operation 69 General 69 Emergency in TMO 71 Silent Emergency Mode 77 Emergency in DMO 78 Using the Browser 81 Icons 81 Entering Exiting the Browser 81 Browser Menu Pane Contents 86 Keys Usage 87 Browser Menu Panes Overview 88 Navigate Pane 89 Bookmarks Pane 91 History Pane 93 Options Pane 94 ...

Page 6: ...Entering Group Setup 131 Entering Scan 131 My Groups TMO DMO 135 Viewing Modifying Personal Information 137 Recent Calls 138 Shortcuts 140 RUI 142 Networks 145 Location 148 Packet Data 148 Messages 151 General 151 Entering the Messages Sub menu 152 New Message 153 Using the Inbox 154 Calling a Number in a Message 157 User Defined Templates 159 Predefined Templates 160 Sending a Status Message to a...

Page 7: ...Keys Usage 170 Writing in iTAP Alphanumeric 175 Writing in Tap Hiragana 176 Writing in Numeric Mode 176 Writing in Symbol Mode 177 Writing in TAP Alphanumeric 177 Adding Words to the Dictionary 177 What to do if 179 Tones 185 Index 189 Quick Reference Guide 195 Motorola Inc 2010 MOTOROLA and the Stylized M Logo are registered in the U S Patent and Trademark Office All other product or service name...

Page 8: ...vi ...

Page 9: ...ther people Disposal Information The European Union Waste of Electrical and Electronic Equipment directive requires that products sold into EU countries must have the crossed out trashbin label on the product or the package in some cases As defined by the WEEE directive this cross out trashbin label means that customers and end users in EU countries should not dispose of electronic and electrical ...

Page 10: ...shall not be deemed to grant either directly or by implication estoppel or otherwise any licence under the copyrights patents or patent applications of Motorola except for the normal non exclusive licence to use that arises by operation of the law in the sale of a product Product Specific Information Max RF Power 3 16 Watts Max Speaker Load 10 Watts at 4 Ohms Antenna Impedance 50 Ohms Ambient Temp...

Page 11: ...ted safety icon implies information that if disregarded may result in minor or moderate injury or serious product damage The signal word Caution may be used without the safety icon to state potential damage or injury that is not related to the product Notes contain information more important than the surrounding text such as exceptions or preconditions They also refer the reader elsewhere for addi...

Page 12: ...4 ...

Page 13: ...ervice Provider or your organisation may have customised your MTM800E to optimise its use for your individual needs Check with your Service Provider or organisation to find out the differences from this guide Throughout the text in this publication you will notice the following special notations used to highlight certain information or items Example Description or Select Key presses are shown as a...

Page 14: ...ob to toggle between volume and list Press and hold to turn the MTM800E on 1 Rotary Knob On Push Button 2 Color Display 3 Menu Button 4 On Off End Home Key 5 Alphanumeric Keypad 6 LED 8 Microphone Handset Connector 7 Emergency Button 9 Soft Keys 10 Send Key 12 13 14 Function Keys 11 Navigation Key 15 PTT Key 16 Microphone ...

Page 15: ...s and text messages 6 LED Indicator 7 Emergency Button Press and hold to enter Emergency mode and send Emergency Alarms as programmed Press and hold to start an Emergency Private Call Simplex or full duplex When the MTM800E is Off press and hold to power on in Emergency Operation or in standard mode as programmed 8 Mobile Microphone Port Provides connection for accessories such as fist microphone ...

Page 16: ...ons 15 Push To Talk Button PTT Press and hold this side button to talk in Simplex calls or to initiate a group call release it to listen Press to send status and text messages 16 Microphone Before using your MTM800E for the first time remove the plastic lens protector from the display It is recommended to turn off the terminal before connecting any of the accessories OPTION 1 Before disconnecting ...

Page 17: ...e 78 Your MTM800E performs a self check and registration routine After successful registration the MTM800E is in service To power off Press and hold If the radio is powered on via the ignition it can be turned off via the ignition or press and hold You will see the Powering Off message Powering On Emergency Button Press and hold the Emergency button to power On The MTM800E will power On in Emergen...

Page 18: ...y be locked at power up To unlock the MTM800E after powering on enter the code at the prompt The MTM800E enters the default Home display The unlock code is originally set to 0000 Your Service Provider may change this number before you receive your terminal Locking Unlocking the Keys Buttons Press Menu and For detailed information see Locking Unlocking the Keypad on page 115 Pressing the Emergency ...

Page 19: ...access to the system user needs to provide the login with the PIN number To login go to Menu More RUI Log on You will see the screen as illustrated where you can type your User ID up to 16 alphanumeric characters and User PIN up to 6 numeric characters Press Select to login You should see the display with Log On Accept Looking After Your MTM800E To clean your MTM800E use a moistened or antistatic ...

Page 20: ...nal Strength TMO Allows you to check signal strength More bars indicate a stronger signal No Service Scan Indicates scanning is activated in the MTM800E status icon area Trunked Mode Home Display soft key area menu context sensitive icon soft key area text display area Direct Mode Home Display status icon area text display area soft key area menu context sensitive icon soft key area Network 1 Fold...

Page 21: ...l Direct Mode Displayed when the MTM800E is in Direct Mode DMO Gateway Indicates that gateway is selected The icon has three states Solid while the MTM800E is synchronised with the gateway Flashing while the MTM800E is not synchronised or during attachment No icon during a terminal to terminal and repeater call DMO Repeater Displayed when the repeater option in DMO is selected This icon has three ...

Page 22: ...e audio will not sound through the speaker RUI Pseudo Log On Indicates that the user is pseudo logged on Emergency Appears while the MTM800E is in Emergency Operation List Scrolling Displayed to indicate that the Rotary knob use is list scrolling as long as this use is selected New Message Has Arrived Indicates a new message just arrived New Message s in Inbox Indicates that you have unread messag...

Page 23: ...e Control Head is switched off Link Error Indicates on Master Control Head that Slave Control Head is unavailable as a result of error not powered off Key Press Token Dual Control Head Indicates by blinking that key press token is reserved by one of the Control Heads Indicator Status Solid GREEN In use Flashing GREEN In service Solid RED Out of service Flashing RED Connecting to a network Entering...

Page 24: ...anised in a hierarchy See List of Menu Items on page 107 The menu options provide access to a further list of options called a sub menu The context sensitive menu when icon is on to view a list of items for the current menu Examples of Menu and Sub menus The example below shows how to setup the Ring Style in the terminal Network 1 Folder 1 Talkgroup 1 Hello Contcs Optns Home Display 1st Sub menu 2...

Page 25: ...ontrol the knob is used to scroll lists or menu items In this case volume control is always via menu or via external accessories if present 3 Volume Control the knob is used only as a volume control turn clockwise to increase the audio volume level Press and hold the Rotary knob to lock it press and hold it again to unlock Powering Off also unlocks a locked Rotary knob Emergency Button Press and h...

Page 26: ...to the previous talkgroup even if the operation mode was different Talkgroup Scan Toggles on off the Talkgroup Scan function TMO only DMO TMO Toggles between DMO and TMO Status Message Sends a dedicated status message to a dedicated address Text Message Template Sends a predefined user defined template to a dedicated address Call Dial Private Phone PABX Initiates a call to a predefined entry in th...

Page 27: ...ated in DMO when the phone book index is required Initiate Fallback Alert Sends Fallback Alert RUI Log On Off Logs on off the user Display OPTA Displays Operative Tactival Address BSI Encryption Toggles on off encryption Speaker Enable Disable Per Call Toggles on off the speaker RMS Mode Toggles on off RMS feature Applicable only for the and keys If programmable one touch keys are enabled one touc...

Page 28: ...if not programmed with another function by your Service Provider Backlight Key If the backlight is set to Manual there are five profiles of backlight intensity combinations see Setting the Backlight on page 129 To change the backlight intensity press default function if not programmed with another function by your Service Provider Aliases Names Aliases are optional names that you can assign to sto...

Page 29: ...800E stays idle for a pre programmed period of time If you press a key or a call arrives the screen saver is deactivated and the MTM800E resumes standard operation You can also activate this feature manually by pressing the relevant pre programmed button either a side button or numeric key For example if manually activated during a group call the screen saver allows to hide the caller s identity f...

Page 30: ...ck time and date wherever in menu by pressing relevant one touch button Check in the menu options whether the Service Provider has given you the capability of customising time and date settings see page 126 Terminal Disable Enable Your MTM800E is provided with a feature that allows your Service Provider to disable it temporarily in case it is stolen When your MTM800E is disabled no calls can be in...

Page 31: ... Provider can disable your MTM800E permanently While operating in DMO the propagation travels directly from the transmitting terminal antenna to the receiving terminal antenna with no assistance from any base station or tower Therefore the range is critically dependent on the position of the user and the antenna To achieve best results hold the terminal in the hand as high as comfortably possible ...

Page 32: ...ess the TMO DMO one touch button if programmed by your Service Provider TMO Calls You can make and receive the following types of calls when the MTM800E operates in Trunked Mode Group Calls Private Calls Phone Calls PABX Calls local office extension calls Emergency Calls DMO Calls You can make and receive Group Calls when the MTM800E operates in Direct Mode DMO This includes Emergency Group and Pr...

Page 33: ... pressed will result in permission to talk D PTT tone is not audible on sending radio Individual Call Talk Group Dialing by Index You can press Talk Group speed number then to join the Talk Group Press Attach to confirm Non Emergency calls Pressing PTT If the call type is Group or Private then pressing PTT initiates Group or Private Simplex call accordingly Otherwise special indication is given to...

Page 34: ...g Text Message During Dialing The Long Text Message is indicated on the display and it interrupts the dialing process Changing Call Type By dialing from the idle screen the user is given the possibility to change the Type of the Call Modifying the Type of Call The infrastructure can modify the type of call you started For example you might start a Simplex Private Call and the infrastructure could ...

Page 35: ...speak urgently with a user whose terminal is busy in a non emergency voice call A pre emptive priority call PPC is either an Emergency Group Call or a Private PPC Simplex or Duplex call This feature allows to disconnect the on going lower priority call and to connect to the incoming higher priority call To place a PPC see the Emergency Operation and Private Call sections in the user guide Your MTM...

Page 36: ... going non emergency lower priority voice call and connects to the higher priority Private Call A PPC with lower or equal priority will be dropped without any indication to the called user and will enter the missed call list A PPC Call with Emergency Call priority will be displayed on the screen as Emergency instead of Priority Simplex Private PPC Received Any in Use Emgcy in Use ID David Talkgrou...

Page 37: ...ting a talkgroup during a broadcast call see Selecting a Group on page 36 For changing folder during a broadcast call see Selecting a Folder on page 39 Ambience Listening AL This feature if enabled by your Service Provider allows a console operator or dispatcher to establish a special call with a specific terminal to monitor voice activity in the local vicinity The call is setup without any indica...

Page 38: ...nce Wait to answer the call After a time out set by your Service Provider the call number will be forwarded to the missed call list Press Reject soft key displayed in an incoming Duplex call The call number will be forwarded to the missed call list Using In call Features Loudspeaker The loudspeaker feature allows you to hold impromptu meetings in Phone PABX and Duplex Private Calls 1 To activate l...

Page 39: ...ode gives to you the ability completely shut down all visible and audible MTM800E alerts and notifications This feature makes the MTM800E effectively unnoticeable even in a silent and dark environment To Enter the Covert Mode Press the Cover Mode one touch button if programmed by your Service Provider Select Covert Mode in the Security menu refer to Covert Mode on page 119 Local Area Service This ...

Page 40: ...is in Local Area Service Registration Attachment Group Call Emergency Call Emergency Alarm Exiting Local Area Service When the link with the central network controller is re established the MTM800E exits Local Area Service and the following occurs The MTM800E sounds a tone Any call in progress during Local Area Service is dropped Packet Data The Packet Data PD Service allows you to transfer data i...

Page 41: ...different setup Master Single Control Head Mode This mode occurs when the connection between the Master and Slave was not established upon power up and when Slave was switched off Icon is displayed Slave Standalone Mode It is related to Slave Control Head when the Master Control Head is turned off In this mode no radio functionality is available except button to turn it off Dual Control Head Link ...

Page 42: ...Master In such case a notification is displayed on Slave Voice During any call voice can be heard in both Master and Slave speakers simultaneously Only one MIC PTT can be opened at a time The one that is pressed as first is allowed to initiate the transmission Service Provider can adjust the time that the keypad is blocked on the other Control Head At any time Emergency button and can be pressed o...

Page 43: ...Perform an alphabetical search of the talkgroup aliases Scroll through the entire talkgroup list Organise your groups into three folders default name for the first favorite folder is called My Groups which is set up by your Service Provider Your talkgroups may be organized into scan lists set up by your Service Provider or by yourself through the Menu When you activate one of these scan lists your...

Page 44: ...ement Talkgroup Your MTM800E will always monitor the Group Calls in the ATG scan list To place an Announcement Call you must first select the specified Announcement Talkgroup as advised by your Service Provider otherwise you will only be able to participate when an Announcement Talkgroup is received Activation and deactivation of talkgroup scanning has no effect on the ATG scan list Selecting a Gr...

Page 45: ... Alphabetic Search From the Home display press Optns Select a group by abc search TG by abc You can type up to 12 characters that are shown at the bottom of the screen while you are typing It will highlight the closest talkgroup name Press Select to enter the group Using Folder Search From the Home display press Optns Select a group by folder search TG by Folder Select the folder name and select t...

Page 46: ... by abc and then highlight an appropriate folder name 3 Press Menu 4 Select View to view the talkgroup speed number In this example 82 is the speed number Press Back to return to the attached group screen Dialing a speed number 1 Enter a number for example 82 2 Press 3 Press Attach to attach the new group or press PTT to attach and call Selecting a Group using Navigation Keys Alphabetic Search Fol...

Page 47: ...Cancel when using Navigation Keys and Back when using Alphabetic Folder Search and then calling party information display appears again if you are still in the call Selecting a Folder From the Home display press Optns Select Folder and select the desired folder The display shows the last selected group in that folder My Groups Folders You can organise your favorite groups into three folders Select...

Page 48: ... the folder group list To move to the next Folder you should select it For example Folder 1 has Group11 and Group12 Folder 2 has Group21 and Group22 Select Folder 1 Group11 Group12 Group11 Group12 will appear during scrolling Change to Folder 2 Group 21 Group 22 Group 21 and Group 22 will appear during scrolling In addition your Service Provider might configure the rotary knob as follows End Stop ...

Page 49: ... the Group Call To talk back press and hold PTT Your MTM800E shows the Group name and the caller s private number or name if previously stored in your contact list The following screens show examples of how the caller s private number ID 124 is displayed The No Group message is displayed when you are out of the normal coverage area of your selected group You must then select a new group that is va...

Page 50: ...e selected talkgroup or from the associated ATG Receiving the scan call functions as receiving an associated ATG or selected call in scan off is possible except for the following For incoming call alert see settings in the Tones menu option page 123 When receiving a Group call you will hear a New Group Call tone if configured by your Service Provider Private ID without alias Private ID with alias ...

Page 51: ...ll has higher priority than the on going call OR Presented to you if it has higher priority than the on going call To accept the call press Join To cancel the call press End Receiving an Emergency Group Call For detailed information see page 28 Receiving a Broadcast Call For detailed information see page 29 When receiving a High Priority Group Call you will hear a High Priority Group Call tone if ...

Page 52: ...E sounds the Transmit Inhibit tone When no danger to safety exists anymore for instance if you leave the RF sensitive area the TXI Mode can be deactivated and the MTM800E returns to standard operation Setting the TXI Mode is described in Setting Transmit Inhibit TXI Mode on page 147 Activated Transmit Inhibit is indicated by the solid orange LED and flashing between the two displays Dynamic Group ...

Page 53: ...d Emergency button Pressing one of them exits the DGNA display 1 To view the added deleted talkgroups details press View You may scroll through the list 2 To return to the previous display press Back 3 To select the DGNA group press Attach Or scroll to another group and press Attach Your Service Provider can gather some Talkgroups under one Super group and transmit it to your MTM800E as a DGNA In ...

Page 54: ...he user ability to send preset status message by pressing the button footswitch In TMO mode the ability to send an Alarm and initiate a TMO Group Private call is unavailable Message addressing and sending the address can be predefined by the Service Provider if not it is sent to currently selected group if no group is selected the message is sent to the reserved address message is sent even if the...

Page 55: ...ave their units turned on and are within the group subscriber identity as configured by the Service Provider will receive the transmission In DMO the MTM800E can communicate with the trunking system and vice versa if the Gateway option is enabled in the MTM800E To enhance the terminal s DMO coverage area the DMO group can link to a repeater if the Repeater option is enabled in the terminal Additio...

Page 56: ...ing Renaming Favorite Folders For more information see My Groups TMO DMO on page 135 Selecting a Group See Selecting a Group on page 36 Selecting a Group using Navigation Keys Alphabetic Search Folder Search See Selecting a Group using Navigation Keys Alphabetic Search Folder Search on page 38 Selecting a Folder See Selecting a Folder on page 39 Group Scrolling Configuration See Group Scrolling Co...

Page 57: ... DMO terminal to terminal call 1 Press Optns scroll to Config and press Select 2 Scroll to MS MS and press Select The following message to be displayed for a few seconds MS MS Will Be Used DMO Folder 1 Police Hello Contcs Optns DMO Options sub menu Folder TG by Folder TG by abc Trunked Mode Config MS MS Gateway Repeater GW Rep Automatic Specific Automatic Specific Folder TG by Folder TG by abc Tru...

Page 58: ...ss for that talkgroup Upon selecting Specific you will see one of the following displays The selected gateway address e g 1022 pre programmed by your Service Provider or previously entered by yourself via the keypad Press Edit and then Ok to use the current address or enter a new address via the keypad and press Ok The Gateway icon will flash upon selecting the gateway None indicating that no gate...

Page 59: ...nd Repeater While in DMO proceed as follows to choose the Gateway and Repeater option to set up a call via Gateway or Repeater Gateway preferred for the selected talkgroup 1 Press Optns scroll to Config and press Select 2 Scroll to GW Rep and press Select 3 The display shows the last GW Rep type selection Use the navigation key to scroll to your selection and press Select Automatic the MTM800E wil...

Page 60: ...nter an address via the keypad and press Ok The Gateway and Repeater icons will flash upon selecting the gateway When the MTM800E detects the appropriate gateway and or the repeater the Gateway and or Repeater icons will turn solid respectively Making a DMO Group Call MS to MS 1 Enter Direct Mode by pressing Optns and selecting Direct Mode 2 Make sure that you have selected the required group Pres...

Page 61: ...teway is available you will start a DMO call with gateway The Gateway icon will be solid Making a DMO Group Call via Repeater 1 While in DMO choose the Repeater option as described in Selecting DMO Group Call via Repeater on page 51 2 Place the call for the selected talkgroup If you press PTT while the repeater is not available you will start a DMO call without repeater The Repeater icon will disa...

Page 62: ...The Gateway icon will disappear If it is not successful your MTM800E will display the message MS MS Call and a terminal to terminal call will proceed The Gateway and Repeater icons will disappear If you press PTT while both gateway and repeater are available a gateway call will be attempted If it is successful your MTM800E will start a DMO call with gateway The Gateway icon will be solid The Repea...

Page 63: ... the devices is not available the call setup is proceeding as if this device was not selected Example In case of the Gateway is available and the Repeater is not available after an unsuccessful Gateway call attempt the call falls back to MS MS mode immediately with the MS MS Call message For call alert see settings in the Tones menu option page 123 Without alias and Private ID Private ID without a...

Page 64: ...detailed information see Private Call in DMO on page 62 Emergency Group Call For detailed information see Emergency in DMO on page 78 If MS to MS mode is selected and the terminal receives a call via repeater the Repeater icon will be shown if the repeater mode is enabled by the Service Provider otherwise the call will not be accepted If Gateway mode is selected but a gateway is not available The ...

Page 65: ...57 DMO Group Call Exiting DMO To exit DMO press Optns and select Trunked Mode For other ways see Selecting TMO or DMO Operation on page 23 ...

Page 66: ...58 ...

Page 67: ...al a number 2 If Private is not the first type of call presented press CType to select the Private Call type 3 For a Simplex call press and release the PTT button You will hear a ringing tone Wait for the called person to answer your call This is also called a hook setup OR If your Service Provider has restricted access to the Contacts list it might not be possible to create a new contact edit exi...

Page 68: ...ers surround the contact icon Use to select the number Short Number Dial If set up by your Service Provider Short Dial allows you to dial part of the full number of the person you wish to call Your MTM800E will automatically complete the number and send it over the air based on your own MTM800E s identity For example 1 Dial 456 instead of 4282456 the full number 2 To place the call press the PTT o...

Page 69: ... provide up to 8 digits if more it will switch to fixed mode If you will provide less then 8 digits radio fills the number with its own ISSI The rest of the 16 digit number is automatically given by the radio If you select more then 16 digits the display will give you a warning about incorrect input Recent Calls List Select the number from the recent call list See Recent Calls on page 138 One touc...

Page 70: ...ve a DMO Private Call only when your MTM800E is in DMO The calling and called party needs to be on the same talkgroup Making a Private Call in DMO 1 From the Home display enter a number Dialing via Contact List or Recent Calls Lists works like described in Other Ways of Dialing on page 60 2 Press and hold PTT Wait for the talk permit tone if configured before talking and release the PTT when liste...

Page 71: ...ged for the Group Call Otherwise display is changed accordingly to the incoming call type and after the call display returns to where the dialing process was left There is no presence check for Private Calls in DMO This means you don t know whether the called party is available when you starts the call If the called party presses the DMO private call is suspended for a specified time and in case t...

Page 72: ... or Duplex Private Call Call Queuing When there are no available infrastructure resources for a call while in a setup phase or while in an active call during cell re selection the call will be queued The MTM800E will remain in queue for a pre programmed period of time If the resources become available the call will proceed If there are no resources after a certain period of time the MTM800E will e...

Page 73: ...m the Home display dial a number 2 If Phone or PABX are not the first type of call presented press CType repeatedly to select the Phone or PABX Call type 3 Press and release You will hear a ringing tone Wait for the called person to answer your call 4 To end the call press If your Service Provider has restricted access to the Contacts list it might not be possible to create a new contact edit exis...

Page 74: ...l a shortened number of up to three digits instead of the full number The speed dial number is the location of an entry in the contact list 1 Enter the pre programmed speed dial number for example 5 and press 2 To place the call press 3 To hang up press Talk Group Dialling by Index Talk Group dialling by index allows you to dial the index of the TG and instead of going through the menu and picking...

Page 75: ...ess the DTMF keys 0 9 When pressed the DTMF key will sound a tone and the entered digit will be displayed on the screen MS ISDN This feature adds to the radio ISDN number Users can choose between MS ISDN and ISSI to address the call send the message or pre defined templates It works for both simplex and duplex calls based on the assigned ISDN number Recent Calls List Select the number from the rec...

Page 76: ...PABX Call 2 To answer the incoming call press or any other key if programmed except Home End On Off key 3 To end the call press If the called person or the infrastructure end the call the Call Ended message is displayed For call alert see settings in the Tones menu option page 123 ...

Page 77: ...der Pressing the Emergency button can be used to activate one or more services Emergency Mode Sending Emergency Alarm Starting Hot Mic operation Starting emergency individual call Powering up the terminal Sending the GPS location infromation if this option is enabled by your Service Provider Pressing the Emergency button even if Transmit Inhibit is activated causes immediately the MTM800E to trans...

Page 78: ...ode A tactical call initiates on the currently selected talkgroup Emergency Call You are able to make an Emergency Call either by PTT or emergency button footswitch when in Emergency Mode if it is enabled Radio provides the information about the current active Emergency Call If the Emergency Calls are disabled you are going to see PTT Denied on the screen Emergency Power Up during PIN Lock Termina...

Page 79: ... Call or requesting emergency transmit priority After entering Emergency Mode you may send an Emergency Alarm if configured and then start the Emergency Group Call and activate Hot Microphone if configured The Emergency Alarm is a special Status message sent to the infrastructure before the Emergency Group Call starts The terminal may wait for infrastructure acknowledge for this Alarm and attempt ...

Page 80: ...ed the Emergency Call is initialized Changing Folder or Group See Group Call section on page 35 Entering or Exiting Emergency Mode Upon entry into Emergency Mode any existing call or service other than packet data service will be aborted or cleared down In Emergency Mode the terminal will automatically reject Phone PABX and Private Calls and will not monitor the groups in the user selected scan li...

Page 81: ...show one of the following delivery reports Alarm Sent Alarm Failed In both cases the screen returns within a few seconds to the main screen of the Emergency Mode Due to no delivery confirmation in DMO Alarm Sent information confirms only sending the alarm Or if configured by your Service Provider your MTM800E will send an Emergency Alarm If you press the Emergency button without entering Emergency...

Page 82: ...0E by your Service Provider you can make an Emergency Group Call without the need to press and hold the PTT The following will happen upon entering Emergency Mode 1 The MTM800E will automatically send an Emergency Alarm to the dispatcher if configured by your Service Provider 2 A Talk permit tone will be heard 3 The following typical display will appear The microphone will stay open for a time per...

Page 83: ... automatically attempt to get talk permit again and the Wait For Mic message will be displayed Receiving an Emergency Group Call A terminal in TMO receives an Emergency Group Call to the selected group associated ATG Announcement Talkgroup or scanned group If the ATG is the currently selected group the terminal will receive the Emergency Group Call to the group associated with this ATG For informa...

Page 84: ...e the call as you would do in a Simplex or Duplex call Receiving an Emergency Private Call 1 The talker s identity is displayed when the terminal receives the Simplex call 2 When the terminal receives the call the display will show Emergency Prvt In Use and the caller s identity If configured by your Service Provider the screen background will be red 3 Continue the call as you would do in a Simple...

Page 85: ... the Emergency button Exiting the Silent Emergency Mode To exit the Silent Emergency mode user initiates it by pressing Menu and then key within 3 seconds the Silent Emergency alarm is not successful or it is rejected ambience listening terminates Silent Emergency Mode interactions User presses the Emergency button while in Silent Emergency radio sends silent emergency alarm radio provides no audi...

Page 86: ...on the radio indicates power on but it is still in Silent Emergency mode Silent Emergency mode and PIN protect The radio enters the Silent Emergency mode while in the PIN protected state it asks the user for the unlocking code When the radio exits the Silent Emergency mode it is still in the PIN protected state Emergency in DMO Overview You can initiate an Emergency Group Call to a group You can r...

Page 87: ...anging Folder or Group Proceed as explained in the Group Call section TMO Group Call on page 35 Making an Emergency Group Call To initiate or answer a call 1 Enter Emergency Mode by pressing the Emergency button 2 Press and hold PTT 3 Wait for the talk permit tone if configured and talk 4 Release PTT to listen When the radio is in emergency mode and it switches from TMO to DMO and vice versa the H...

Page 88: ...ll always sound via the speaker If configured by your Service Provider the screen background will be red If the incoming call is an InterMNI call in Emergency Mode you can view network information by pressing Optns and selecting Network If the incoming call is an InterMNI call not in Emergency Mode you can view network information by pressing Network ...

Page 89: ...ting the Browser 1 Set Packet Data to Voice Data or Data Only see Setting Up the Data Function on page 121 2 From the main menu press Menu and select Browser 3 The display shows one of the following Clear screen first time activation after power up then your home page WAP is only available on the Master Control Head in the Dual Control Head configuration User working on Slave Control Head by press...

Page 90: ...r menu pane you were in The Options pane will pop up if the web page you navigated to has two or more soft keys options From here you may scroll to other panes with the left or right navigation keys Or you may select Browser Menu and then scroll to the required pane Tips for Browsing Create and use the following for easy browsing Creating a Bookmark via Navigate Pane Mark Page Mark a web page for ...

Page 91: ...ved bookmarks or More 4 Select Menu 5 Scroll to New Bookmark 6 Enter the bookmark title and URL and select its location 7 Press Save Using a Bookmark 1 Enter the browser 2 Scroll to Bookmarks pane 3 Scroll to the required bookmark and select Go The bookmark downloads the selected page from the web Creating a Hotkey Assign a bookmark to a hotkey keys to quickly download a web page 1 Enter the brows...

Page 92: ...roll to Bookmarks pane 3 Select Organise if there are no saved bookmarks or More 4 Select Go to enter the Saved Pages folder 5 Select a saved page and press OK The display shows the saved page Depending on the saved page you may browse the web from here Disabled Packet Data Service If there is no Packet Data Service the terminal displays Error Network Not Available when entering the browser for th...

Page 93: ...e during PIN lock if the Service Provider has not configured this feature when the terminal is disabled Browser entry is enabled during Ambience Listening AL If you navigate to previously stored pages the AL state remains When you need to activate Packet Data for the first time AL is disconnected and you have the same look and feel as if you were not in AL before ...

Page 94: ...Press Timer 4 Set Proxy 1 WAP Proxy 1 2 WAP Proxy 2 3 WAP Proxy 3 5 Circuit Prompt 6 Resend Data 1 Secure Prompt 2 Current Certificate 3 CA Certificates 4 Send Referrer 5 Authentication 2 Security 3 Clear 4 Restart Browser 5 About Bookmarks Tools History Up to 9 entries Saved Pages Folder Up to 9 entries 1 Show URL 2 Save Page 3 Find Text 4 Copy Text ...

Page 95: ...n Creating a Hotkey on page 83 Press or press and hold In the editor inserts a space Press or press and hold Brings up the Text Input pane while in editor See Text Input Pane on page 94 Otherwise sounds a wrong key press Left and right soft keys Selects the option that appears in the display directly above the left and right soft key part of the page While in list of options moves up one line Pres...

Page 96: ...d for volume adjustment only Emergency De activates the browser The terminal enters Emergency mode Menu Pane Description Navigate Provides access to the home page and commonly used items Bookmarks Provides access editing and storage options to stored bookmarks and saved pages History Provides access to recently visited pages and shows the position of the currently loaded page in the history stack ...

Page 97: ...urrent document Advanced See the following section Advanced 1 From the Navigate pane select Advanced 2 The screen displays a list of items for accessing advanced browser features and settings Select the required item Settings 1 From the Navigate pane select Advanced Settings 2 Select the required item Downloads for setting download preferences You may de activate the downloading of images and obje...

Page 98: ...e pane select Advanced Security 2 Select the required item Secure Prompt for enabling disabling the browser to inform you that it replaced a non secure connection with a secure connection and vice versa Current Certificate for viewing the digital certificate identifying the server that delivers the current document A Certificate Authority CA digitally signs and thus authenticates this certificate ...

Page 99: ...t Browser 2 The browser restarts clearing the history About 1 From the Navigate pane select Advanced About 2 The display shows information about the current version of Openwave Mobile Browser Bookmarks Pane If there are bookmarks in the root folder select More to access the Options pane If the root folder is empty select Organise then press Menu to access the Options pane The Options pane allows y...

Page 100: ...ng with the Saved Pages Folder 1 From the Bookmarks pane select Saved Pages folder 2 The browser displays the page snapshot saved using Save Page in Tools pane 3 Scroll to a saved page 4 Select Menu to open the Options pane for the saved page 5 Select an option Back for displaying this page saved on its cache Details for modifying the page title and URL of the saved page Update Page for replacing ...

Page 101: ...s tory entry Delete for deleting the selected history entry Delete All for deleting the list of history entries Exit for exiting the Options pane Next History and Prev History for accessing the next and previous entries page respectively Tools Pane 1 From the Tools pane select More 2 Scroll to a document 3 Select Menu to open the Options pane for that document 4 Select an option Show URL for displ...

Page 102: ... Details for displaying the image details Show Image for showing the image on its own page Text Input Pane This pane is visible when the browser menu is opened and text entry field is active The browser has several text entry modes depending on the type of input required For example to enter a URL extension when typing a URL 1 Type the URL 2 Press the abc soft key The Text Input pane opens up 3 Sc...

Page 103: ...cons indicate the status of messages in the WAP Box Mode Soft Key Action Alphabetic characters lower case abc Enter text in lowercase Alphabetic characters upper case ABC Enter text in uppercase Symbols Sym Enter symbols Numeric 123 Enter numbers http mode www Enter This feature needs to be enabled by your Service Provider and it is unavailable in DMO WAP Box Icon Description WAP Message Icon Disp...

Page 104: ...message is deleted from the WAP Box Select Delete All and press Yes to delete all the messages When the display shows Deleted All Messages all the messages are deleted from the WAP Box Select Refresh to re order the WAP Box list and see new messages if any WAP Message Created Displayed next to the create date WAP Message Expired Displayed next to the expiry date WAP Box Icon Description You have 4...

Page 105: ...is displayed otherwise there is no indication Load Push Message High Browser opens to the user with the New WAP Message tone Low the icon is displayed with the New WAP Message tone To check the tone related to WAP Box please go to New WAP Message on page 187 Service Provider sets the priority of the message Animation is not displayed if the user is in a call or in Emergency mode or in Call Out or ...

Page 106: ...98 ...

Page 107: ... Service can assist your Dispatcher or Colleagues in many ways such as more efficient deployment of resources or locating your terminal if you trigger your emergency service The terminal can be configured to display location information on the terminal s display or to send it over the air to your dispatcher where it can be displayed in control center Please check with your Service Provider on the ...

Page 108: ...ng GPS Performance Sometimes the GPS feature of your terminal may be unable to complete a location calculation successfully You will then see a message indicating that your terminal cannot see enough visible satellites To maximize the ability of your terminal to determine a location fix please note the following guidelines The GPS feature works best where there is nothing between the GPS antenna a...

Page 109: ... data is available when you leave emergency mode the GPS icon will be displayed again GPS Enable Disable 1 From the main menu press Menu and select More Location Interface The current selection On Off is highlighted 2 Select the new choice The display shows On Location Service On Off Location Service Off Entering GPS Location Service To enter the GPS sub menu press the Menu button and select More ...

Page 110: ...used to calculate the location In general more satellites make for better accuracy The maximum is twelve satellites To calculate your location again press Refresh For the users from United Kingdom and Ireland there are two letters for UK or 1 letter for IRL displayed This feature needs to be enabled by the Service Provider This feature works in DMO and TMO modes when it is set by the Service Provi...

Page 111: ...alculation before it is completed Press Back to return to the previous screen Each time approximate location of your terminal is calculated the latest location information is stored in your terminal and remains there even when your terminal is powered off You will see this information the next time you view the Position screen If you received a terminal call or alert while attempting to determine ...

Page 112: ...104 ...

Page 113: ...et of menu items as in the example below repeat step 2 Navigating Menu Items When scrolling up down menu items try also right left scrolling This will select the item or return to previous level In a list press and hold for automatic scrolling To Return to the Previous Level Press Back or Network 1 Folder 1 Talkgroup 1 Hello Contcs Optns Messages Contacts Browser Setup More Back Select Main Menu D...

Page 114: ...menu are active Messages Send status messages Send text messages free text or according to user defined or predefined templates Received messages in Inbox Contacts Add search edit or erase entries in the contact list Security Lets you turn On Off and verify security features and change passwords Setup Allows you to customize your MTM800E More Contains more customisable menu items Scroll Bar Indica...

Page 115: ... Validity Change Code PIN Protect Covert Mode DMO SCK Contacts Messages Name 2 Name 1 New Contact Setup Ring Style Set Volume Off On Off On See next page Auto Lock Lock Keypad Start Locked Delay Remote Ctrl Off On 9 styles 10 styles Simplex Duplex Book on Reject Book on Accept Language Book On User Defined English Data Setup Voice Data Data Only Voice Only ...

Page 116: ...n Off On Normal Tone No Tone Short Tone Tone Off Tone On Periodic Alert Period Alert See next page Off On Triple Single Double D PTT Tone Style D PTT Display Screen Saver Text Size Backlight Standard Zoom Activate Text Disabled Auto On SemiAuto Wallpaper Time Date Display Off Date Only Time Only Time Date Off ...

Page 117: ...fset Accry Type Handset Standard External Setup See next page More Group Setup Scan 40 lists Scanning On Off Select List Active List Scan Lists My Info My Phone Num My Private Num Service Page Shortcuts shortcut name New Entry RUI Log Off Log On Recent Calls Missed Dialed Received My Groups New Folder FolderName FolderName ...

Page 118: ...n is stored in the entry A Contacts type Each number stored must be assigned a Contacts type A Number Each Contacts entry must contain a number This may be any type of phone number and Private ID This is the standard menu layout Your Service Provider may enable disable some menu items or change their names More Networks TXI Mode Networks Sel Direct Mode Trunked Mode Home Only Select Net Activate D...

Page 119: ...of stored number If set up by your Service Provider it is not possible to create or edit Contacts or dial a number which is not in the Contacts list The menu items for creating editing and deleting Contacts are not available Speed Dial Number is not assigned to a Private type contact Contact Icon Description Private ID Number Mobile Phone Number Home Phone Number Work Phone Number PABX Number Othe...

Page 120: ... Scroll up and down the entries Continue to enter other types and numbers as you may keep several numbers Private Mobile Home Work PABX Other for the same person under the same contact name To correct an entry press Change 6 When finished press Done Press Back to return to Home display Editing a Contact 1 From the contact list scroll to the entry you want to edit 2 Press the Menu button to enter C...

Page 121: ...ntry you want to delete 2 Press Menu 3 To delete the entire entry select Delete Contact 4 Press Yes to confirm Checking Capacity To see how many numbers are stored in Contacts 1 From the contact list press Menu 2 Select Capacity 3 Select Contact to check Select Back to exit Security From the main menu select Security or More Security see the note on page 110 If an entry contains only one number de...

Page 122: ...rrect code The display returns to the Security sub menu and shows the active setting On To unlock the MTM800E before powering off 1 From the main menu select Security PIN Protect Off is highlighted 2 Press Select 3 At the Code prompt enter the 4 digit code The display will show the following message Unit Unlocked you entered the correct code The display returns to the Security sub menu and shows t...

Page 123: ...the old code does not match the entered code at verification the display prompts you to re enter the old code If the entered code matches the old code the display prompts you to enter a new 4 digit code and to repeat it for confirmation If the confirmation code does not match the new code the display prompts you to re enter the new code When the new code is accepted the display returns to the Secu...

Page 124: ...tup User can set the Keylock at the start up of the terminal To turn it on off highlight Start Locked and press Change Choose On Off and press Select Air Encryption On Off From the main menu select Security Air Encrypt This sub menu allows you to view air encryption On Off state Call encryption provides service confidentiality between you and the system If encryption is on and you receive a clear ...

Page 125: ... provides service confidentiality between your MTM800E and the system To verify K validity press Select The display will show one of the following messages K is Valid the infrastructure can authenticate your MTM800E K is Invalid the infrastructure shall not authenticate your MTM800E Please call your Service Provider to restore K to your MTM800E It takes a minute for this feature to delete all the ...

Page 126: ...ur Service Provider to restore SCKs to your MTM800E DMSCK Validity From the main menu select Security DMSCK Validity SCK Static Cipher Key is a secret key the infrastructure uses to encrypt call and data in the system Air interface encryption provides service confidentiality between your MTM800E and the system Your MTM800E should be provided with a set of SCKs To verify SCK validity for DMO press ...

Page 127: ...e following message Change to version Select Yes to change the key Key version changed display will appear Select No to leave the key Key version display will appear Covert Mode From the main menu select Security Covert Mode Set Covert Mode to On Select On All tones are set to off and the backlight and the LED are disabled immediately The group audio is routed to the earpiece Set Covert Mode to Of...

Page 128: ...hear the new ring style immediately for a few seconds If necessary adjust the volume level Setting the Volume This sub menu allows you to adjust the Simplex Duplex Earpiece Speaker and Keypad tone volume To set the volume 1 From the main menu select Setup Set Volume 2 Scroll through the list 3 Choose the required item and press Change 4 Adjust the level with the left arrow to decrease and the righ...

Page 129: ...C The MTM800E will then be capable of transmitting and receiving data from the external device To connect the MTM800E accessory connector to the external device use cable FKN4897 The external device must run an application complying with the TETRA standards From the main menu select Setup Data Setup If the display shows only one option Volume user can adjust all of the above settings at once User ...

Page 130: ...800E to the external device and the MTM800E is ready for data transfer The Data Transmit Receive icon is displayed to indicate data is being transferred to received from the external device The MTM800E ends the Ambience Listening AL call and the microphone is closed when the MTM800E is in one of the following states Entering the out of service area Outgoing packet data call setup To exit data retu...

Page 131: ... and press Select or press Back to exit Setting Tones From the main menu select Setup Tones This sub menu allows you to activate deactivate the MTM800E tones For a detailed list of tones see Tones on page 185 Setting Keypad Tone To activate deactivate keypad tone at every key press 1 From the main menu select Setup Tones Keypad Tone 2 Scroll through the settings On Off 3 Choose required setting an...

Page 132: ... PTT To change your Talk Permit Tone settings 1 From the main menu select Setup Tones Talk Permit 2 Scroll through the settings 3 Choose required setting and press Select Press Back to exit Setting Clear to Send The Clear to Send tone indicates to the transmitting terminal that the receiving terminal is ready to accept the transmission When all tones are disabled your MTM800E switches into covert ...

Page 133: ... Alert 2 Choose required setting and press Select Press Back to exit To set the period between tone indications 1 From the main menu select Setup Tones Periodic Alert Period 2 Choose required setting and press Select Press Back to exit Setting D PTT Tones To activate deactivate the D PTT Tone 1 From the main menu select Setup Tones D PTT Tones D PTT Mode 2 Choose required setting and press Select ...

Page 134: ...splays time only Format Date sub menu is disabled 3 Date Only The MTM800E displays date only Format Time sub menu is disabled 4 Off The MTM800E does not display time nor date Format menu is disabled Scroll to the desired setting and press Select Press Back to exit Setting Time Format To change displayed time format between 24 hour scale and 12 hour scale 1 From the main menu select Setup Time Date...

Page 135: ...ad and press Done Press Cancel to exit Setting Date To set date 1 From the main menu select Setup Time Date Set Set Date 2 Enter time using navigation key and or numeric keypad and press Done Press Cancel to exit Setting Offset To set local time offset 1 From the main menu select Setup Time Date Set Time Offset 2 Enter time offset using navigation key and press Done Press Cancel to exit Time and d...

Page 136: ...automatic update Setup Time Date System Update Time Offset Time and offset are updated after receiving broadcasted information Display Features The display menu controls how the display appears From the main menu select Setup Display Text Size sets size of text on the display Screen Saver covers the MTM800E display after the MTM800E stays idle for a pre programmed period of time if configured by y...

Page 137: ...67 4 Press Select to exit Setting the Backlight Your MTM800E has 3 backlight settings Manual By pressing the Backlight Key you can toggle through 5 intensity profiles See the table below Semi Auto Per default the backlights are switched off You can switch the backlights on by pressing the Dimmer button After a few seconds configured by your Service Provider the backlights switch off automatically ...

Page 138: ...ay Backlight 2 Press Change 3 Select required setting 4 Press Done to exit Setting the Wallpaper 1 From the main menu select Setup Display Wallpaper 2 Press Change 3 Select required setting On Off 4 Press Done to exit Profile Display backlight Keypad backlight Status LED Emergency button backlight 1 Intensity High 100 on 100 100 2 Intensity Below High 75 on 75 100 3 Intensity Above Low 50 on 50 10...

Page 139: ...n lists Setting Group Scanning This sub menu allows you to activate deactivate the scanning of a list of pre defined groups programmed in the MTM800E The MTM800E will join any group call as long as this group is defined in the scan list and scan is turned on From the main menu select More Group Setup Scan Scanning After completing the settings the display returns to the Scan sub menu It is not pos...

Page 140: ... and press Select The display shows for example the Scanning Scan List 1 message The terminal will then try to attach to this list Selecting a List with Scanning Off 1 Select Select List 2 To select a list other than the highlighted one scroll and press Select The display shows for example the Scan List 1 Selected message The Network List Your terminal can scan and attach to a list belonging to an...

Page 141: ...The display will show one of the following states There is a selected inactive scan list Scan List 1 is Not Active Scanning is off Scanning is off and the Network List is selected Network List Not Active There is a selected active scan list Scanning is on Then the display will show the Scan Lists sub menu 2 Scroll to the required list and press View to see the groups that belong to the list 3 Scro...

Page 142: ...cted scan list press Yes You will be prompted to remove all groups from the selected scan list Add a group to the selected scan list Every added group including a favourite group comes with its folder its name or number and its priority if pre programmed To select a folder scroll through the folder list The list does not show folders whose groups are fully used in the selected scan list Press Ok t...

Page 143: ...Delete You will be prompted to remove the selected group After a few seconds the display shows the updated scan list To change the group priority press Priority Scroll to the selected priority and press Select My Groups TMO DMO This sub menu allows you to select edit your favorite group list Adding a Group 1 From the main menu select More Group Setup My Groups FolderName New Group 2 Select a group...

Page 144: ...ss Menu Select Delete All 3 Select Yes to confirm Adding Favorite Folder 1 Press Menu and select More Group Setup My Groups 2 Select New Folder 3 After entering the name of the folder press Ok to confirm Renaming Favorite Folder 1 Press Menu and select More Group Setup My Groups 2 Highlight a group folder name and press Menu 3 Select Rename Folder 4 After editing the name of the folder press Ok to...

Page 145: ...o Info The displayed private number cannot be modified To modify the displayed phone number press Edit Edit the number and select Ok to confirm The new phone number does not modify the MTM800E number in the system Radio Info stores information about Manufacturer Product Type ISSI TEI Serial Number OPTA information available only if the BSI feature is anabled You cannot delete the last favorite fol...

Page 146: ...ou delete them or until they reach the end of the list A number dialed more than once will appear only once in the list Upon receiving a missed call notification the MTM800E will display the missed calls prompt When a call is received during an active call the number is written to the missed calls list This missed calls prompt will be invoked automatically at the end of the call Press Ok to displa...

Page 147: ...ry by selecting View then Edit 4 With the contact type field highlighted scroll left or right to display the contact type you want to assign the number For information on contact types see page 110 5 If you wish to add more information to the entry see page 112 6 Press Done Deleting Recent Calls 1 From the recent calls list scroll to the call you want to delete 2 Press Menu Enter Dialled Calls Sel...

Page 148: ... Press Done to exit help Creating Menu Shortcut For example let s create a shortcut to the All Tones options 1 From the main menu select Menu Setup Tones then highlight All Tones 2 Press and hold the Menu button until a confirmation screen appears Press Yes to confirm 3 The first free position is assigned as a shortcut key A confirmation screen appears Press Done to confirm A call that was missed ...

Page 149: ...rrent shortcut number with a newly created one Deleting Shortcuts 1 From the main menu select More Shortcuts 2 Scroll to the shortcut you wish to delete 3 Press Menu and select Delete Press Yes to delete a shortcut Press No to cancel Deleting All Shortcuts 1 From the main menu select More Shortcuts 2 Scroll down to the shortcuts 3 Press Menu and select Delete All Press Yes to delete a shortcuts Pr...

Page 150: ...s Menu and the numeric key s assigned to the shortcut RUI It gives more flexibility to the users to pick any radio and log on with it and have a full access to the service All the services are forwarded to the radio that you are logged on to Radio States Full Service user Log On Book On was successful Radio has full functionality Limited Service user not logged on Specified by the service provider...

Page 151: ...and press Menu to enter New User ID press Select Type your User ID and press OK to choose your User ID from the list highlight the correct one and press Select You can press Menu anytime to view the detailed list useful for the long User ID s that are not fully displayed Press Menu again to go back to the previous list Back Select RUI Logon User ID _______Me User PIN Back Select RUI Logon User ID ...

Page 152: ...an check who was using this radio before by going to Menu More RUI Log on User ID The chronological list is displayed under the New User ID Log Off You can change the state that you are logged on by pressing Menu Setup RUI Log Off from the idle screen The radio prompts to accept log off state or to deny it if you selected it by mistake Color blue of the display is when the user is in full service ...

Page 153: ... user is not going to see any notification Force Off The Service Provider can log off the user Radio informs the user about the result and the reason of Force Off state Networks Entering the Networks Sub menu From the main menu select More Networks This sub menu allows you to select the network your MTM800E registers to and what mode it operates on When the Book on feature is disabled by the Servi...

Page 154: ...ur MTM800E to be registered to 1 From the main menu select More Networks Networks Sel Select Net 2 The list of the allowed networks is displayed Scroll to the desired network A network may have an alias Press Menu to view the network ID Then press Select 3 Return to the Home display The display shows the network ID or alias Selecting Trunked Mode This sub menu allows you to select the mode your MT...

Page 155: ...ls or in potentially explosive areas To activate the TXI Mode 1 From the main menu select More Networks TXI Mode 2 Select Activate The MTM800E will sound the Transmit Inhibit tone The dis play shows TXI Mode in the first row and the solid amber LED indicates the TXI Mode It is not possible to switch from Direct Mode to Trunked Mode if the MTM800E is in Transmit Inhibit Mode It is not possible to s...

Page 156: ...ider the screens present information about Amount of sent data Amount of received data Bandwidth of the data session Data encryption status Viewing Sent Data Statistics 1 Select Sent Data in the Packet Data sub menu The number of KBytes sent since current packet data activation is displayed Additionally the throughput is shown 9 kbps e g active packet data session N A standby packet data session D...

Page 157: ... is shown 75 e g active packet data session N A standby packet data session Viewing Encryption Status 1 In the Packet Data sub menu select Encryption 2 The encryption state of the ongoing packet data session is displayed Encrypted Not Encrypted clear Your Service Provider has set the maximal number of time slots to allocate to 1 2 3 or 4 The bandwidth percentage refers to the possible number of sl...

Page 158: ...150 ...

Page 159: ...a Text Message You can send new messages send messages based on user defined templates or send messages based on predefined templates The predefined templates are programmed into your MTM800E by your Service Provider The user defined templates can be Inbox messages or new Outbox messages that you choose to store in your MTM800E memory User defined messages may also be programmed into your MTM800E ...

Page 160: ...e call and send the message The terminal will return to the edit screen The call started before or after message editing began The terminal will send the message while staying in the call Sending a text message during Emergency Broadcast Call if configured Press One of the following might occur The call started before message editing began The terminal will leave the call and send the message The ...

Page 161: ... be defined by the user Sending the Message 1 Press Send If set up by your Service Provider you have the option to send the message to a private phone number or a talkgroup Otherwise select the mail recipient of your choice from the contact list or enter the address directly 2 Press Send or PTT or to send the message The display will show one of the following delivery reports Your MTM800E can rece...

Page 162: ... Inbox The inbox list contains new or old incoming text messages and can contain 100 messages Inbox Icons The following icons indicate the status of messages in the Inbox It is recommended to wait for the message acknowledge before sending a new message Inbox Icon Description Unread New Message Indicates that you have not read the message yet Read Old Message Indicates that you have read the messa...

Page 163: ... the entire message Reading a new text message changes its state from New to Old The read message is kept in the Inbox 2 The display shows the incoming message number sender and up to 4 lines of the text message For message alert see settings in the Tones menu option page 123 If your service provider has enabled the PTT Callback feature then pressing PTT will initiate a call to the message origina...

Page 164: ...s are deleted from the Inbox The display shows Messages sub menu Select Reply This invokes the edit screen The old message body serves as the default message and the message originator is the destination When you are done with editing adding text press Send PTT or to send the message Select Forward This invokes the edit screen The old message body serves as the default message Enter the recipient ...

Page 165: ...ting contact or create a new one for details on how to create a contact see Creating a Contact on page 109 5 Press CType to select the type of call Private Phone or PABX Then press PTT or If necessary save the entries in the contact list Outbox All sent messages are stored in Outbox To go to Outbox press Menu Messages Outbox Submenu of the Outbox includes Select Store and press Select to store the...

Page 166: ...the recipient s number and press Send PTT or to send Select Refresh to re order the outbox list and see new messages if any Delivery Status as displayed Shows the date and the time of the message when it was Sent Delivered Read Expired was not delivered Expired was not read Failed unknown Every time the status is changing you are going to receive new message regarding it All the messages are descr...

Page 167: ...ct Store to save the edited template as a new one Default name is given Template 1 Template 2 Select Save Changes to save edited template Edit Name to edit the name of the template that is stored After editing select Ok to save the name Delete and press Yes to delete the template When the display shows Deleted Template n the current template is deleted from the Inbox The display shows the next tem...

Page 168: ...me Use the keypad to enter up to 12 characters Press Menu to enter the Predefined Menu and select one of the following options View to view the message in the template Edit In the example a registration message is displayed Editing a Predefined Template Check with your Service Provider for the types of predefined templates in your terminal There are three types of predefined templates Alphanumeric...

Page 169: ...select Messages Send Status 3 In this example Lunch is the last sent status If you wish to send a different status scroll to your selection in the list of pre programmed statuses or enter 5 digit status number and skip the next step 4 Press Menu and select View to view the status message Press Back to return to the status list 5 Press Select and select Group as a target of your status message 6 Hi...

Page 170: ...e display will show one of the following delivery reports Status Sent the screen exits the status screen Sts Failed the screen returns within a few seconds to the previous display Wait for the delivery report before sending a new status If you enter the status menu from a busy talkgroup audio is momentarily suspended to allow transmission of your status message If an Emergency call is received the...

Page 171: ...d to the system or the expiration time was exceeded Call Out This feature allows the user to receive call out alerts When the Call Out messages has been received by the radio it interrupts current services and attends to the call out alert without any further delay After call out alert has been cleared the radio exits Call Out mode and reverts back to normal mode User is able only to receive Emerg...

Page 172: ...ge DMO Mode Call Out is not supported Emergency Mode all the Call out alert are ignored Call Out service phases Alerting phase user receives a Call Out message The alarm tone indicates the message text is displayed and under it there are three options for the user to pick Accept Reject or Menu If the user will accept the alert no other service from this point can interrupt Menu key gives more choi...

Page 173: ...ction which enables the user to send a text message to the Service Provider User can always respond and send back the text or the voice message using voice group call Call Out Box CO Box is giving to the user the option to view and store the Call Out messages for future reference To view them press Menu Messages CO Box When the radio is in Call Out Mode you can only read the ongoing Call Out messa...

Page 174: ...166 ...

Page 175: ...Primary Numeric Symbol or Secondary if you have set it up Adding Secondary to the List of Text Entry Modes Secondary is convenient when you use one language and sometimes wish to switch to another one This mode appears in the list only if you set it up first via Menu Entry Setup None is the default programming from factory and indicates no secondary entry mode is selected Selecting the Text Entry ...

Page 176: ...try screen icons tell you which text entry mode and method you are using A character counter icon indicates the number of entered characters Primary Icons Secondary Icons Description TAP no capitals TAP capitalise next letter only TAP all capitals iTAP no capitals iTAP capitalise next letter only iTAP all capitals Tap Hiragana Japanese characters Numeric Icon Description Enter numbers Symbolic Ico...

Page 177: ... your message after you selected the desired words A row of suggested characters words will be displayed Tap Hiragana Display Press a key and the display will show the following information The icon indicating the current text writing method see icons The main text entry area that will hold your message after you selected the desired words Two rows of suggested characters words will be displayed A...

Page 178: ...ic mode in iTAP select the word To exit Numeric mode in TAP press and hold any numeric key List of Keys and Characters in Alphanumeric Mode Characters available for a key are examples and differ for each language setting see Setting the Display s Working Language on page 121 Key Alphanumeric Mode TAP iTAP Press to cycle through single shift caps lock and lower case 0 1 _ A B C 2 a b c 2 D E F 3 d ...

Page 179: ...W X Y Z 9 w x y z 9 Key Alphanumeric Mode Tap Hiragana わ を ん わ ー 0 あい う え お あ い う え お 1 か き く け こ 2 さ し す せ そ 3 た ち つ て と つ 4 な に ぬ ね の 5 は ひ ふ へ ほ 6 ま み む め も 7 や ゆ よ や ゆ よ 8 ら り る れ ろ 9 Key Alphanumeric Mode TAP iTAP ...

Page 180: ...handakuten marker List of Keys and Characters in Numeric Mode Dakuten marker か が き ぎ く ぐ け げ こ ご さ ざ し じ す ず せ ぜ そ ぞ た だ ち ぢ つ づ て で と ど Dakuten and handakuten marker は ば ひ び ふ ぶ へ べ ほ ぼ ば ぱ び ぴ ぶ ぷ べ ぺ ぼ ぽ Key Numeric Mode to to Press to enter digit at insertion point Press and hold any numeric key to enter TAP alphanumeric mode To exit TAP alphanumeric mode press and hold any numeric key ...

Page 181: ...y Symbol Mode _ _ Key Description Any numeric key In TAP press any key to reject word completion and continue with text entry A new completion will be displayed if available after the time out for TAP expires Press and hold to enter Numeric mode from TAP or iTAP alphanumeric ...

Page 182: ... character Press and hold to clear the entire main text area In TAP press to reject word completion and scroll up In TAP press to change previously entered small letter to capital In TAP press to reject word completion and scroll within the text area In TAP press to change previously entered capital letter to small Press to be able to choose the word from the alternative row Press to navigate to t...

Page 183: ... row to the right until you reach David 4 Press Select to select the word It is displayed in the main text area 5 Enter the numbers by pressing one key for each letter The row shows the suggested numbers Scroll the alternative row to the right until you reach the required combination 6 To enter the symbol press The row shows the suggested symbol Scroll the alternative row to the right until you re...

Page 184: ... dictionary and or to narrow down the list of alternates to those that begin with a particular prefix 1 Try to enter the word Scroll the alternate line for a word option Each option is successively highlighted and partially locked 2 Enter the second part of the word The first part remains unchanged locked The newly entered letters will be highlighted and then locked while you scroll to the next wo...

Page 185: ...abelled with the desired character once for the first character twice for the second and so on For example to enter s press key four times To enter 7 press the key five times If you do not press a key for a few seconds the character is accepted and the cursor moves to the next position Adding Words to the Dictionary Each language comes with its own dictionary You can create words including alphanu...

Page 186: ...178 ...

Page 187: ...ty Emgcy In Use Wait For Mic The Hot Microphone feature is active but the channel transmit grant has been given to another Emergency Call on the same talkgroup The MTM800E microphone is not active during this time but the MTM800E will automatically try to regain talk permit after a predetermined time Emgcy Mic Ended The Hot Microphone timer has automatically expired or the user has pressed the PTT...

Page 188: ... other incoming and outgoing call and data services are blocked List Empty There are no programmed entries in the scrolling list Type the entry List not Attached All talkgroups in the scan list are not attached List Partially Attached The scan list is active but not all talkgroups are attached to it Message Delivered Indicates mail successfully delivered Message Failed Indicates mail delivery fail...

Page 189: ...in the Inbox No Selected Scan List You selected an empty Network List No List No Service The MTM800E is out of coverage Not Allowed To Start Call You are not allowed to dial a number which is not in the Address Book if set up by your Service Provider Not Allowed To Transmit Release PTT and try again later You are not allowed to send a text message or a status message to a number which is not in th...

Page 190: ...ot available Speaker Volume bars Use Rotary knob to adjust volume level Rotary knob is programmed to Dual or Volume Talkgroup Added Group name added to the favourite talkgroup folder TG cannot be deleted You cannot delete this group from the favourite talkgroup folder Your Service Provider has set this group to non deletable Try Again Later The requested service is temporarily unavailable Unit Dis...

Page 191: ...rvices The message is displayed on Slave Control Head in Standalone mode Software Error Incompatible SW ver No available services The message is displayed on Slave Control Head only when the software version is different than on Master Dual CH Link Error Verify cables connection The message is displayed when the connection between Control Heads is lost WAP initiated Not available on this unit End ...

Page 192: ...184 ...

Page 193: ... service Once In Call Call clear warning Call modified Once Call waiting tone while Phone or Private Call are pending Every 6 seconds until a call is terminated Data Connected or Data Disconnected Once Talk Permit sounds upon pressing the PTT Once Normal Tone Once Short Tone Talk Permit without gateway sounds upon pressing PTT The tone indicates the gateway is no longer available Twice Once Talk P...

Page 194: ...Once Status message sent to the dispatcher or failed Once Status message is not acknowledged by the dispatcher and the timer expires Once Incoming Calls Your MTM800E received a Group Call without gateway setup only Once High Priority Group Call received Once Emergency Alarm sent or received Twice Emergency Alarm failed Four times Emergency Call received Once Phone ring reception Full duplex Privat...

Page 195: ...swered or rejected Limited Service Once upon entering limited service New Mail Received Once New WAP Message Once New Group Call Once General Volume setting earpiece keypad speaker Continuous Volume setting Ringer While setting the volume Transmit Inhibit TXI Once Rotary knob tone Once when toggling from List to Volume Low battery alert Repeated DTMF 0 9 during the call DTMF Continuous until the u...

Page 196: ...in coverage Once GPS out of coverage Once Dual Control Head Tone Single CH Once Tone Dual CH Once Tone Dual CH Error Once Call Out tones cannot be muted by the user High Tone Low Tone Description Type Repeated ...

Page 197: ...ueuing 64 certificate authorities CA 90 certificate authority CA 90 cleaning your unit 11 code changing 115 contact list 110 contacts sub menu 110 covert mode 9 31 covert mode one touch 18 D data setup 121 date display settings 126 one touch 18 setting 127 setting format 127 DGNA Dynamic Group Number Assignment 44 dialed call history 138 dialed number list 138 dictionary 177 direct mode operation ...

Page 198: ...7 H half duplex private call 59 handsfree speakerphone 30 history dialed call 138 missed call 138 received call 138 home display 12 hook setup 26 Hot Mic hot microphone 74 hot microphone feature Hot Mic 74 HTTP authentication 91 I icons browser 81 contacts 111 data connected 13 data transmit receive 13 direct mode 13 DMO gateway 13 DMO repeater 13 dual control head 15 dual control head link error ...

Page 199: ...nu item list 107 messages sub menu 110 151 missed call history 138 more sub menu 131 MSPD multi slot packet data 33 multi slot packed data MSPD service 33 my info sub menu 137 N network list 132 networks sub menu 145 non tactical call 70 notations 5 numeric key programmable 18 O one touch backlight adjustment 18 call dial 18 covert mode 18 date 18 DMO TMO 18 screen saver 18 status message 18 talkg...

Page 200: ...personal unblocking key 115 push to talk button PTT 8 R received call history 138 receiving calls 27 recent calls sub menu 138 repeater 47 51 ring style of incoming call 120 rotary knob 17 end stop rotary knob scrolling 40 RUA RUI 11 RUI 142 S scan list 35 scan on off in TMO group call 42 scan setup 131 scanning selection 35 SCK static cipher key 118 screen saver 21 screen saver setup 129 screen s...

Page 201: ...3 TMO group call making 41 receiving 41 TMO DMO one touch 18 tones setting clear to send 124 setting all tones 124 setting keypad tone 123 setting talk permit tone 124 tones setup 123 transmit inhibit TXI mode 44 one touch 18 trunked mode operation TMO 23 TXI transmit inhibit 44 U unblocking the terminal 115 unlocking the terminal 114 user defined template 159 W wallpaper setup 130 WAP wireless ap...

Page 202: ...194 ...

Page 203: ... appear on the display and talk without pressing PTT To exit Emergency Mode press and hold Exit soft key Making a DMO Emergency Group Call Enter DMO Press and hold the Emergency button Press and hold PTT Wait for the talk permit tone if configured and talk Release PTT to listen To exit Emergency Mode press and hold Exit soft key Making a TMO Simplex Private Call From the Home display dial a number...

Page 204: ...g the Menu button and a numeric key No delay between the Menu button and the key You can ask your Service Provider to program menu shortcuts You may also define a new shortcut enter the menu item press and hold the Menu button and follow the instructions in the display High Low Audio Control You can control audio routing speaker earpiece for any Private or Group Call via the dedicated speaker cont...

Page 205: ......

Page 206: ...www motorola com tetra 68015000565 A EN ...

Reviews: