Disk and Tape Drive
http://www.mcg.mot.com/literature
5-7
5
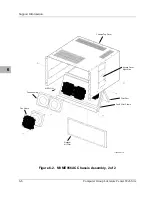
Figure 5-2. Disk/Tape Drive Removal
Replacement
1. Follow the replacement procedure in the installation instructions
that came with your drive.
Note: Use the short (1/4 inch long) screws to attach the brackets to
the drive. The longer screws may damage the drives. Ensure that all
drives are properly identified and that the terminating resistor is
installed or removed as applicable.
2. Reconnect the power and data cables.
3. Position the side access cover on the screws to engage the keyhole
slots properly. The washers must be on the outside of the cover.
4. When the screws have properly engaged the keyhole slots, slide the
cover down and tighten the screws.
11823.00 9708


