background image

Motorola 2247-N8 DSL Wi-Fi Gateway User Guide

Please visit 

www.motorola.com/us/support

 for FAQs and additional product documentation.

42

Update Router

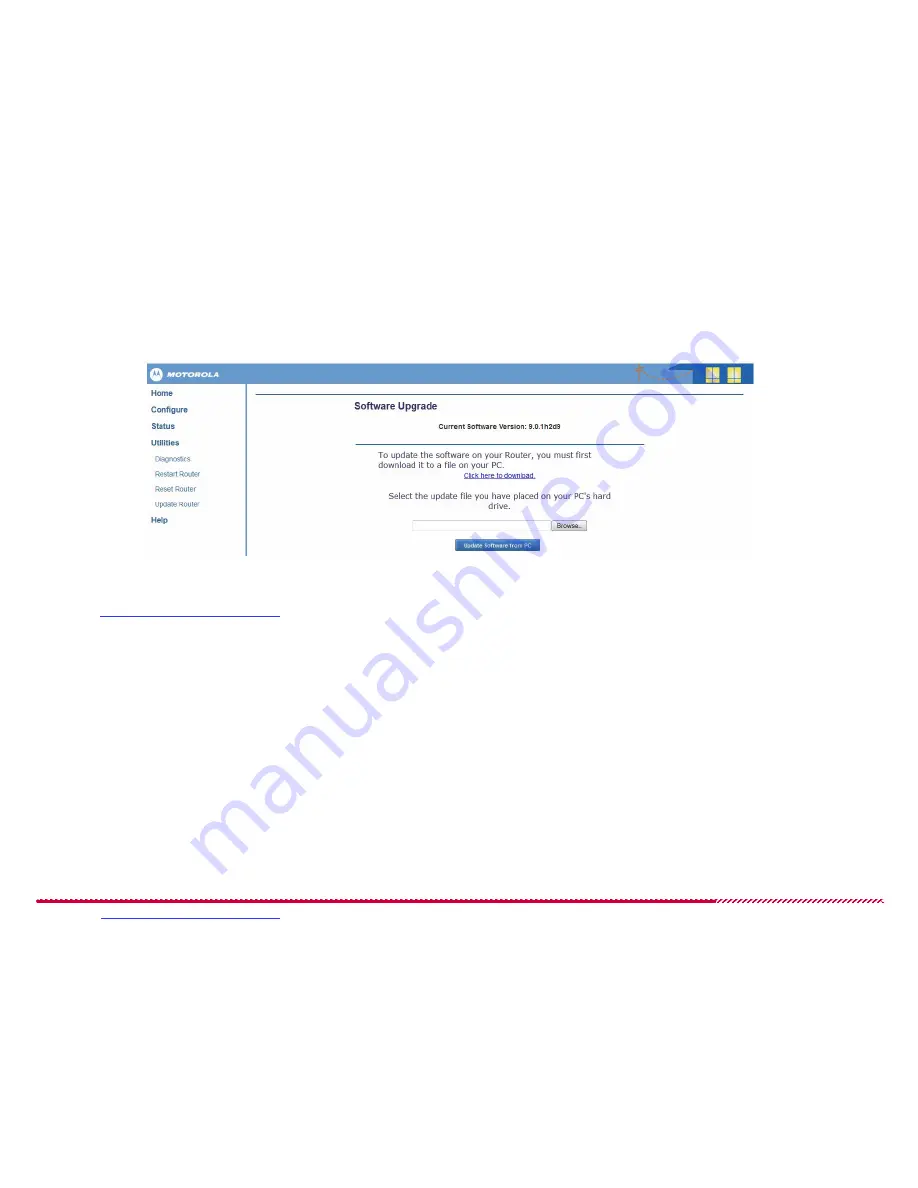
The 

Software Upgrade

 page allows you to update the firmware on your Motorola 2247-N8 DSL Wi-Fi Gateway. 

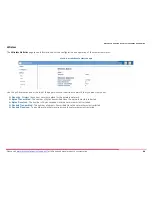
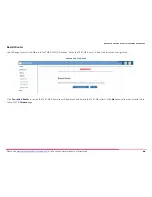
Update Router Page

The current firmware version is displayed at the top of the page. You can periodically check for new firmware by clicking the “

Click here to download

” 

link and comparing the firmware version to the one you are currently running. Firmware can also be downloaded from the Motorola support website 
by visiting 

www.motorola.com/us/support

 . Save the new firmware to a location like your computer's desktop and follow the steps below to complete 

the upgrade.

1. Click the 

Browse

 button and navigate to the location on your computer where you saved the new firmware.

2. Double-click the 

.bin

 firmware file you downloaded.

3. Click the 

Update Software from PC

 button on the 

Software Upgrade

 page.

4. When the update completes you will see “Firmware image is valid - Please restart to complete update” in red at the top of the page.

5. Click the 

Restart Router

 link to go to the 

Restart Router

 page.

6. Click 

Yes, restart Router

 to complete the upgrade.

7. Follow the on-screen instructions to log back into the 2247-N8. You can confirm that the new firmware is installed by clicking the 

Home

 page and 

looking for the 

Software Version

.

Summary of Contents for Netopia 2247-N8

Page 1: ...User Manual Motorola 2247 N8 DSL Wi Fi Gateway SAVE THESE INSTRUCTIONS ...

Page 2: ...t Interface 13 ADVANCED CONFIGURATIONS 15 Links Bar 15 Home 16 Configure 16 Connection 17 DHCP Server 19 More IP Subnets 20 Wireless 21 NAT 27 Router Password 28 Time Zone 29 Status 29 DSL 30 WAN 31 Ethernet 32 Wireless 33 IP 34 LAN 36 System Log 37 Firewall Log 38 Utilities 39 Diagnostics 39 Restart Router 40 Reset Router 41 Update Router 42 Help 43 FREQUENTLY ASKED QUESTIONS AND ANSWERS FAQS 44 ...

Page 3: ...XP 60 Mac OS X 61 Access Information 63 SUPPORT 64 CARING FOR THE ENVIRONMENT BY RECYCLING 65 Recycling your Motorola Equipment 65 Genbrug af dit Motorola udstyr 65 Recycling bei Geräten von Motorola 65 Reciclaje de su equipo Motorola 65 Recyclage de votre équipement Motorola 66 Uw Motorola materiaal recycleren 66 Recykling posiadanego sprz tu Motorola 66 Reciclagem do seu equipamento Motorola 66 ...

Page 4: ... STRICT LIABILITY OR OTHERWISE FOR ANY A MATTER BEYOND ITS REASONABLE CONTROL B LOSS OR INACCURACY OF DATA LOSS OR INTERRUPTION OF USE OR COST OF PRO CURING SUBSTITUTE TECHNOLOGY GOODS OR SERVICES C INDIRECT PUNITIVE INCIDENTAL RELIANCE SPECIAL EXEMPLARY OR CONSEQUENTIAL DAMAGES INCLUDING BUT NOT LIMITED TO LOSS OF BUSINESS REVENUES PROFITS OR GOODWILL OR D DIRECT DAMAGES IN THE AGGREGATE IN EXCES...

Page 5: ...or have configuration and use questions go to www motorola com us support Quick Start Guide Before you Begin IMPORTANT You must have an existing DSL connection installed before starting installation of the 2247 N8 You will also need the information below from your DSL service provider PPP or PPPoE user name and password This may be the e mail user name and password from your DSL provider s service...

Page 6: ... If the location is too hot or the vents are blocked the high temperature could cause the 2247 N8 to malfunction Location Guidelines 2 Connect the 2247 N8 to the DSL service Plug the telephone cable included gray cord into the gray DSL port on the back of the 2247 N8 Plug the other end of the telephone cable into a phone jack acti vated for DSL Note If your DSL service uses line filters do not plu...

Page 7: ...tlet Turn on the Power switch The Power light on the front of the 2247 N8 should light solid green Connecting Power 4 Wait for the DSL light on the front of the 2247 N8 to turn solid green steady and not blinking This may take up to five minutes To connect a wireless device continue with Wireless Wi Fi Network Setup on page 8 To connect a wired device continue with Wired Ethernet Network Setup on ...

Page 8: ...Motorola 2247 N8 DSL Wi Fi Gateway User Guide Please visit www motorola com us support for FAQs and additional product documentation 7 ...

Page 9: ...reless network TIP Because your computer detects the strongest wireless networks first position it close within 10 feet to the 2247 N8 if you can to ensure that you are connecting to your 2247 N8 1 Connect your primary computer to the 2247 N8 wireless network Click the wireless tray icon open the wireless settings panel or click the AirPort menu depending on your operating system 2 Find the networ...

Page 10: ...ss Restriction After you log in to the 2247 N8 the Quickstart page will appear 5 Enter your PPP user name and password provided to you by your DSL service provider Remember you may need to call your DSL pro vider for this information QuickStart Page 6 Enter your password a second time in the Confirm Password field and click the Connect button You will see the Connection Information screen when the...

Page 11: ...urity to your wireless network and enable the fastest wireless speeds on your 2247 N8 Home Start Page 1 Log in to the management interface Click the Configure link located on the left side of the screen 2 Click Wireless to view the Wireless Base Settings page A number of wireless networking categories are displayed below the Wireless link in the side menu bar You will use these links later in the ...

Page 12: ...lete the default Passphrase and change it to a password that is easy for you to remember but difficult for someone else to guess This password will be needed each time you add a new device to your wireless network The WPA PSK passphrase can be between 8 and 63 characters For best security it should be at least 20 characters WPA PSK Security Settings 8 Click the WPA Version pull down menu and selec...

Page 13: ...ireless network WEP Manual Security Settings 13 Click Apply Changes Security is now activated and you will be tempo rarily disconnected from the 2247 N8 14 Use the wireless tray or wireless settings Windows or the wireless menu option Mac OS to find and connect to the 2247 N8 one more time This time you will need to enter your wireless network key to complete your connection 15 Open a Web browser ...

Page 14: ...e into an Ethernet network ing port on your computer Press the connector into the port until the tab clicks into place Once the Ethernet devices are connected to the 2247 N8 your net work may resemble the figure shown to the right Note Almost every device is configured to get its network information automatically using DHCP and you should not need to configure your computer If you have trouble get...

Page 15: ...ur DSL service provider Remember you may need to call your DSL provider for this information QuickStart Page 6 Enter your password a second time in the Confirm Password field and click the Connect button You will see the Connection Information screen when the connec tion to your service provider is successful TIP If you are having trouble connecting enter your information again and make sure the C...

Page 16: ... need help logging in to the 2247 N8 refer to Wireless Wi Fi Network Setup on page 8 or Wired Ethernet Network Setup on page 13 Links Bar The links located on the left side of the Web user interface allow you to monitor diagnose and update your 2247 N8 Clicking an option will expand or collapse the pages available to you Links Bar Default Content The following sections and subsections describe the...

Page 17: ...ion the configuration and identification of the 2247 N8 and the local address configuration Gateway Home Screen Configure Use the Configure menu options to change and update the settings on your 2247 N8 Gateway The Configure category contains the following pages which will show under the Configure selection in the links bar Connection on page 17 DHCP Server on page 19 More IP Subnets on page 20 Wi...

Page 18: ...t common settings until one is found Thereafter the 2247 N8 will always attempt to use that pair If the 2247 N8 cannot detect the VPI VCI set in use you can clear the check box and enter the values manually VPI 0 and VPI 35 and VPI 8 and VCI 35 are the most common virtual circuit pairs used Always try auto detection first and then contact your service provider if another value is required Encapsul...

Page 19: ...k LAN side of the 2247 N8 to establish a connection to your ser vice provider In this mode all traffic is passed through the 2247 N8 and it does not provide routing or security features Use Static IP Addressing use this option if your service provider has hard coded your network information and provided you with the val ues needed below Please note that using DHCP to obtain a WAN IP address is not...

Page 20: ...ation Page Router IP Address The 2247 N8 LAN IP address The default setting is 192 168 1 254 Subnet Mask The 2247 N8 LAN subnet mask The default setting is 255 255 255 0 DHCP Server Enable Enables or disables the 2247 N8 DHCP server Clear the check box if you have another DHCP server that provides addresses to your network The default setting is enabled box selected DHCP Start Address This address...

Page 21: ...portant the DHCP server for the primary subnet must be enabled and serving at least one IP address in order for the DHCP server feature to serve addresses for additional subnets More IP Subnets Page Use the options below to configure additional subnets IP Address Enter the IP address for the 2247 N8 Gateway Netmask Enter the subnet mask Enable DHCP Server Use this option to enable or disable a DHC...

Page 22: ...tures on your Motorola 2247 N8 DSL Wi Fi Gateway using the options below Wireless Base Settings Page Enabled When this check box is selected default setting the wireless radio is enabled Clear this box to disable the wireless radio No wire less devices will be able to access the 2247 N8 when the radio is disabled Connect to the 2247 N8 using Ethernet to turn the radio back on Standard The followin...

Page 23: ...advanced secure Wi Fi connections Wi Fi certified WPS clients can connect and learn the security setting of the 2247 N8 using their hardware push button if supported or by entering their special PIN number at the 2247 N8 WPS support page Non WPS clients can be added by following the steps in Adding Devices to the Wireless Net work on page 49 Follow the steps below to use WPS Make sure your wireles...

Page 24: ...Enter a WEP key that matches the character length you chose using a combination of numbers from 0 9 and letters from a f For example c8335fde7742a467bc85df2fc8 is a valid 26 character key You must enter the assigned key for each new device that is added to the network WPA PSK This is the preferred security method Use the options below to configure your wireless network to use Wi Fi Protected Acces...

Page 25: ...w to create additional wireless networks on the 2247 N8 Please note that by default all SSIDs have access to the 2247 N8 LAN and the other SSIDs that are enabled Wireless Multiple SSID Page Use the options below to create additional wireless networks on the 2247 N8 Configure settings for Use the pull down menu to select the wireless network SSID that you wish to configure SSID Enable Select the ch...

Page 26: ...nditions With WMM enabled voice and video are given the higher priority service that they need Wireless WiFi Multimedia Page Select the Enabled check box to enable WMM Clear the box to disable WMM When WMM is disabled voice and video are treated the same as any other data If WMM is enabled the 2247 N8 examines each packet to determine the type of data in order to assign it to a queue The predefine...

Page 27: ...elow to configure MAC filtering Configure settings for Use the pull down menu to select the wireless network SSID that you wish to configure MAC Filtering Type Use the pull down menu to select one of the following options Disabled No MAC filtering will be used default Whitelist Only MAC addresses on this list will be able to access the wireless network All other wireless access will be denied Blac...

Page 28: ...rk Your home network uses private IP addresses and the 2247 N8 keeps track of each device s request and translates it to the single public address as it goes out to the Internet NAT also allows you to open specific ports to your home network using a pinhole to sup port applications that need to be accessed from the Internet NAT Page The following functions are provided on the NAT page NAT Enable I...

Page 29: ...s button to add the pinhole entry You can edit or remove an entry from the Pinhole List located directly above the Pinhole Entry section of the Web page Note a separate pinhole entry is needed for each port that you wish to open Pinhole entries are also specific to the protocol chosen Click the Help link while visiting the NAT Configuration Web page for additional information Click Apply Changes t...

Page 30: ...e to guess If you use password protection your user name is admin Time Zone This option is used to apply time stamps for the system and firewall logs The default setting is UTC Choose an option from the pull down menu and click Apply Changes to save your update Status This section displays statistics for the 2247 N8 ports and LAN and it provides log entries that can be helpful for troubleshooting ...

Page 31: ...h used by the device s processor Current VPI The VPI currently in use This may have been auto detected by the 2247 N8 Current VCI The VCI currently in use This may have been auto detected by the 2247 N8 Speed kbps Downstream traffic from the Internet and Upstream traffic to the Internet speeds in kilobits per second SN Margin dB Signal to noise margin in decibels These values display the amount of...

Page 32: ... Tx Good Frames The number of good frames transmitted since the WAN connection was established Tx Packets The number of packets transmitted since the WAN connection was established Tx Discard Frames The number of frames discarded since the WAN connection was established Rx Good Frames The number of good frames received since the WAN connection was established Rx Packets The number of packets recei...

Page 33: ... hardware address for the LAN ports Tx Good Frames The number of good frames transmitted on the LAN Tx Packets The number of packets transmitted on the LAN Tx Discard Frames The number of transmitted frames that have been discarded on the LAN Rx Good Frames The number of good frames received on the LAN Rx Packets The number of packets received on the LAN Rx Multicast Frames The number multicast fr...

Page 34: ...n menu near the top of the page to choose the wireless network that you want to monitor Security Displays the current security in place for the wireless network Bytes Transmitted The number of bytes transmitted since the network was last restarted Bytes Received The number of bytes received since the network was last restarted Packets Transmitted The number of packets transmitted since the network...

Page 35: ...he 2247 N8 Status IP Statistics Page The following information is displayed General IP WAN Address The wide area network IP address IP Gateway The gateway address of the service provider network Primary DNS The primary domain name server IP address Primary DNS Name The primary domain name server name Secondary DNS The secondary domain name server IP address Secondary DNS Name The secondary domain ...

Page 36: ...tion is displayed for each subnet Network Routing Table This section displays the destination network subnet mask gateway and interface name for each route assigned to the 2247 N8 When additional IP subnets are configured routing information is displayed for each subnet Host Routing Table This section displays the network subnet mask gateway and interface name for each host address assigned to the...

Page 37: ...ollowing information is displayed Router IP Address The IP address assigned to the 2247 N8 LAN Subnet Mask The subnet mask assigned to the 2247 N8 LAN DHCP Start Address The first IP address in the DHCP pool DHCP End Address The last IP address in the DHCP pool DHCP Server Status Displays ON enabled or OFF disabled DNS Server The IP address of the default domain name server Devices on LAN Displays...

Page 38: ... system log displays a chronological list of events that have occurred in the 2247 N8 Status System Log The system log options are Clear Log Removes all entries from the log and logging resumes Save to File Saves the current log entries to a file on your computer You will be prompted to open the file or specify a location on your com puter to save it ...

Page 39: ...ys a chronological list of firewall events that have occurred in the 2247 N8 and how they were handled Status Firewall Log The firewall log options are Clear Log Removes all entries from the log and logging resumes Save to File Saves the current log entries to a file on your computer You will be prompted to open the file or specify a location on your com puter to save it ...

Page 40: ...ich will appear when the Utilities link is clicked in the links bar Diagnostics on page 39 Restart Router on page 40 Reset Router on page 41 Update Router on page 42 Diagnostics This automated multi layer test checks the functionality of the 2247 N8 from the physical connections to the data traffic being sent through the 2247 N8 Diagnostics Page Run Full Diagnostics When you click this button diag...

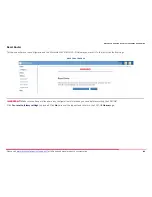
Page 41: ...Restart Router Use this page to restart the Motorola 2247 N8 DSL Wi Fi Gateway When the 2247 N8 restarts it loads the last saved configuration Restart Router Page Click Yes restart Router to restart the 2247 N8 All services will be disconnected while the 2247 N8 restarts Click No to cancel the request and return to the 2247 N8 Home page ...

Page 42: ...on will erase the configuration on the Motorola 2247 N8 DSL Wi Fi Gateway and reset it to the factory default settings Reset Router Page IMPORTANT Make sure you have written down any configuration information you need before resetting the 2247 N8 Click Yes reset to factory settings to proceed Click No to cancel the request and return to the 2247 N8 Home page ...

Page 43: ...la com us support Save the new firmware to a location like your computer s desktop and follow the steps below to complete the upgrade 1 Click the Browse button and navigate to the location on your computer where you saved the new firmware 2 Double click the bin firmware file you downloaded 3 Click the Update Software from PC button on the Software Upgrade page 4 When the update completes you will ...

Page 44: ...for FAQs and additional product documentation 43 Help Help displays helpful information about the current 2247 N8 Web page you are visiting Click the Help link any time you are unsure about a configura tion option or if you need additional information before making a change to the 2247 N8 ...

Page 45: ...een light indicates that no cable is attached to the DSL port or that the 2247 N8 is negotiating a connection A solid green DSL light along with a solid green Internet light indicates that an Internet connection is established If your DSL light does not become solid green verify that the connection from the 2247 N8 DSL port to the telephone DSL jack is secure If the con nection is secure contact y...

Page 46: ...e it the 2247 N8 will perform a factory reset clear all set tings and configurations and reboot Note To make sure the 2247 N8 Gateway returns to the factory defaults you must hold the reset button for more than 15 seconds When you release it the 2247 N8 will perform a factory reset clear all settings and configurations and reboot Keep in mind that all of your settings will need to be reconfigured ...

Page 47: ...e sure you have completed the installation of the 2247 N8 correctly If necessary re perform the procedures in Connecting the Gateway on page 5 Wireless Wi Fi Network Setup on page 8 and Wired Ethernet Network Setup on page 13 Condition Indicators LEDs When all of your connections are made the status LEDs on the front of your 2247 N8 will light according to the following diagram LEDs Showing Normal...

Page 48: ...reen Link to Ethernet device detected on the specified port Flashing green Activity detected on the specified port Wireless Flashing green Activity detected on the Wireless network WPS Wireless Protected Setup Steady green WPS operation successful USB Universal Serial Bus N A Not currently used DSL Digital Subscriber Line Steady green Connected to provider DSL network and ready Blinking green Nego...

Page 49: ... 1 877 466 8646 Power solid red Contact support 1 877 466 8646 DSL off Check that all phones have a DSL microfilter Verify that the 2247 N8 DSL line does not have a DSL microfilter installed Verify that the connection from the 2247 N8 to the phone jack is made with the telephone gray cable included with the 2247 N8 Reconnect the DSL cable at the 2247 N8 DSL port and DSL wall jack Ensure that the c...

Page 50: ... on page 54 Microsoft Windows 8 1 Open the Windows 8 charms bar Touch screens Touch the top right corner of the Windows 8 desktop and drag diagonally toward the center of the display Trackpads and mice Hover the mouse pointer at the top right corner of the Windows 8 desktop Keyboards Press and hold the Windows key and C key The Windows charms bar opens on the right edge of the screen Charms Bar wi...

Page 51: ...git number in the format xxxx xxxx 5 Click the Connect button 6 Respond to any security prompt from the computer You may need to enter a wireless access password or key WEP Manual or WPA PSK networks to join the network Windows 8 will connect you to the 2247 N8 Wi Fi network Microsoft Windows 7 1 Click the network icon or in the notification area of the desktop the lower right corner of the screen...

Page 52: ...mation window TIP The default network name is an eight digit number in the format xxxx xxxx A Connect button appears below the network ID Network Connection Button 3 Click the Connect button 4 Respond to any security prompt from the computer You may need to enter a wireless access password or key WEP Manual or WPA PSK networks to join the network 5 Wait while the computer connects to the network M...

Page 53: ... already in classic view con tinue with the procedure If the text reads Switch to Classic view click it to change from Category view to classic view Note The Windows device s wireless network adapter must be active to detect the 2247 N8 s network Classic View Switch 3 Double click the Network Connections icon The Network Connections control panel opens 4 Locate the wireless network adapter icon in...

Page 54: ...The default network name is an eight digit number in the format xxxx xxxx 7 Click the Connect button 8 Respond to any security prompt from the computer You may need to enter a wireless access password or key WEP Manual or WPA PSK networks to join the network If your network is unsecured a Wireless Network Connection warn ing window may appear Click the Connect Anyway button to close the window and...

Page 55: ...in the Wireless Network Connec tions list of the information window TIP The default network name is an eight digit number in the format xxxx xxxx Mac OS AirPort Menu Note If the AirPort adapter is not on click Turn AirPort On in the pull down menu 3 Respond to any security prompt from the computer You may need to enter a wireless access password or key WEP Manual or WPA PSK networks to join the ne...

Page 56: ... N8 to accept a dynamically assigned IP address commonly referred to as Dynamic Host Con figuration Protocol or DHCP If your devices are not configured for DHCP operation use the instructions in this section to set them to DHCP operation The procedure to configure DHCP operation is different for each set of computer operating systems The instructions that follow provide procedures for the most com...

Page 57: ...the All Apps button The applications list opens 3 Locate the Windows System apps group and find and open Control Panel under that heading 4 Click the Network and Sharing Center control panel The Network and Sharing Control Panel group opens Windows 8 System Apps Group detail 5 Click the Change Adapter Settings link in the left column of the Control Panel group A list of adapters is shown in the wi...

Page 58: ...rnet Protocol Version 4 Properties window opens Local Area Connection Properties Window 8 Click the following option buttons in the Internet Protocol Proper ties window to select them Obtain an IP address automatically Obtain DNS server address automatically 9 Click the OK button to close the Internet Protocol Properties win dow Click the OK button in the network adapter s Properties win dow to co...

Page 59: ...Sharing Center The Network and Sharing Control Panel group opens 2 Click the Change adapter settings link in the left hand column of the Control Panel group A list of adapters is shown in the window Network and Sharing Control Panel Group 3 Right click the adapter Wireless Network Connection or Local Area Connection to configure and click Properties from the pop up menu The connection properties w...

Page 60: ...net Protocol Version 4 Properties window opens Local Area Connection Properties Window 5 Click the following option buttons in the Internet Protocol Proper ties window to select them Obtain an IP address automatically Obtain DNS server address automatically 6 Click the OK button to close the Internet Protocol Properties win dow Click the OK button in the adapter s Properties window to com plete th...

Page 61: ...Connections A Network Connections window opens showing available network adapters Network Connections 2 Right click the network adapter may be labeled Local Area Con nection or Wireless Network Connection Click Properties in the pop up window The adapter s Properties window opens 3 Click Internet Protocol TCP IP to select it Click the Properties button The Internet Protocol Properties window opens...

Page 62: ...ain DNS server address automatically 5 Click the OK button to close the Internet Protocol Properties win dow Click the OK button in the adapter s Properties window to com plete the process Internet Protocol Properties Mac OS X 1 Click the Apple menu and click System Preferences from the pull down menu System Preferences Entry 2 Double click the Network control panel launcher The network preference...

Page 63: ...gure pull down menu and select Using DHCP Do not enter DNS Server or Search Domain entries in this window b Click the Apply button to close the network preferences panel 5 For Wi Fi only perform the following steps a Click the Advanced button b Click TCP IP c Click the Configure IPv4 pull down menu and select Using DHCP d Click the OK button to close the Advanced window e Click the Apply button to...

Page 64: ...on 63 Access Information Record your subscriber information here for future reference Required Information Your entries Your telephone number Your ISP user name PPP or PPPoE user name example joesurfer serviceprovider com Your ISP password Service provider support contact information Support desk number VPI and VCI numbers if used ...

Page 65: ...le on line at http www motorola com us support You can contact Motorola Broadband Technical Support at 1 877 466 8646 Before you call please note the serial number SN of your Motorola 2247 N8 DSL Wi Fi Gateway It is located on the label on the bottom of the 2247 N8 below the model number You will need the 2247 N8 serial number if you need to request technical support Have a smartphone Use this QR ...

Page 66: ...ändern und Gebieten z B in der Europäischen Union wurden Sys teme für die Rücknahme und Wiederverwertung von Elektroschrott eingeführt Erkundigen Sie sich bitte bei Ihrer Stadtoder Kreisverwaltung nach der geltenden Entsorgungspraxis Falls bei Ihnen noch kein Abfuhroder Rücknahmesystem besteht wenden Sie sich bitte an den Kundendienst von Motorola Reciclaje de su equipo Motorola No deseche este pr...

Page 67: ...np w Unii Europejskiej istniejà systemy zbierania i recyklingu sprz tu elektrycznego i elektronicznego Informacje o utylizacji tego rodzaju odpadów nale y uzyskaç od w adz lokalnych JeÊli w danym regionie nie istniejà systemy zbierania odpadów elektrycznych i elektronicznych informacje o utylizacji nale y uzyskaç od biura obs ugi klienta firmy Motorola Motorola Cus tomer Service Reciclagem do seu ...

Page 68: ...der eller regioner som t ex EU har satt upp ett system för insamling och återvinning av el och elektronikavfall Kontakta dina lokala myndigheter för information om vilka regler som gäller i din region Om det inte finns något insamlingssystem ska du kontakta Motorolas kundtjänst för hjälp Var rädd om miljön genom återvinning När du ser den här symbolen på en av Motorolas produkter ska du inte kasta...

Reviews: