


Installation
PPC/PMC-8260/DS1
2 - 11
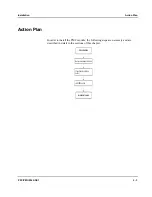
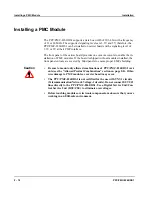
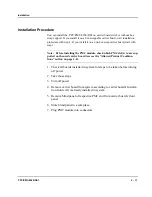
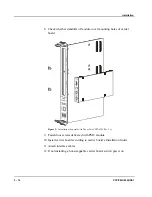
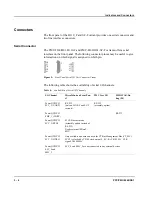
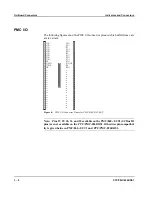
Installation Procedure
You can install the PPC/PMC-8260/DS1 on carrier boards with or without hot-
swap support. If you install it on a hot-swappable carrier board, start installation
procedure with step 4. If you install it on a non-hot-swap carrier board, start with
step 1.
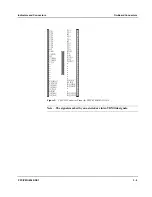
Note: Before installing the PMC module, check which PMC slot(s) is/are sup-
ported on the used carrier board (see see the “Allowed Product Combina-
tions” section on page 2-8).
1. Check all boards installed in system for steps to be taken before turning
off power.
2. Take those steps
3. Turn off power
4. Remove carrier board from system according to carrier board’s Installa-
tion Guide if it is already installed in system
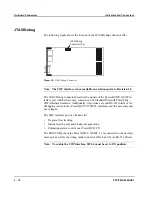
5. Remove blind panel of respective PMC slot from carrier board’s front
panel
6. Store blind panel in a safe place
7. Plug PMC module into connectors
Summary of Contents for PPC/PMC-8260/DS1
Page 1: ...PPC PMC 8260 DS1 Reference Guide P N 6806800B10A July 2006 ...
Page 8: ...viii PPC PMC 8260 DS1 ...
Page 22: ...xxii PPC PMC 8260 DS1 ...
Page 26: ...xxvi PPC PMC 8260 DS1 ...
Page 30: ...xxx PPC PMC 8260 DS1 ...
Page 31: ...1 Introduction ...
Page 32: ......
Page 39: ...2 Installation ...
Page 40: ......
Page 53: ...3 Indicators and Connectors ...
Page 54: ......
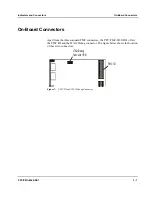
Page 64: ...On Board Connectors Indicators and Connectors 3 12 PPC PMC 8260 DS1 ...
Page 65: ...4 Firmware ...
Page 66: ......
Page 104: ...Code Examples Firmware 4 40 PPC PMC 8260 DS1 ...
Page 105: ...5 Memory Map and Devices ...
Page 106: ......
Page 132: ...Resetting the Devices Memory Map and Devices 5 28 PPC PMC 8260 DS1 ...
Page 133: ...6 TDM Channel Configuration ...
Page 134: ......
Page 145: ...A Troubleshooting ...
Page 146: ......
Page 148: ...A 4 PPC PMC 8260 DS1 ...
Page 150: ...I 2 PPC PMC 8260 DS1 ...


