


D
R
A
F
T
8
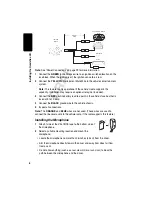
Ins
talling
th
e Han
d
s
free Kit
Note:
See “Power Connections” on page 29 for more information.
1
Connect the
GREEN
Ignition Sense wire to an ignition-switched location on the
fuse block. When the ignition is off, the ignition sense line is low.
2
Connect the
YELLOW
Entertainment Mute Wire to the vehicle’s entertainment
system.
Note:
This feature is only operational if the vehicle’s radio supports this
capability. Installation may require an optional relay (not included).
3
Connect the
RED
positive battery lead to a point in the vehicle’s fuse box that is
fused at 5 to 10 amp.
4
Connect the
BLACK
ground wire to the vehicle chassis.
5
Inspect all connections.
Note:
The
ORANGE
and
BLUE
wires are not used. (These wires are used to
connect the line-level audio to the vehicle radio, if the radio supports this feature.)
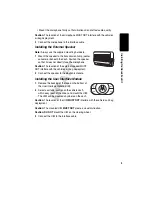
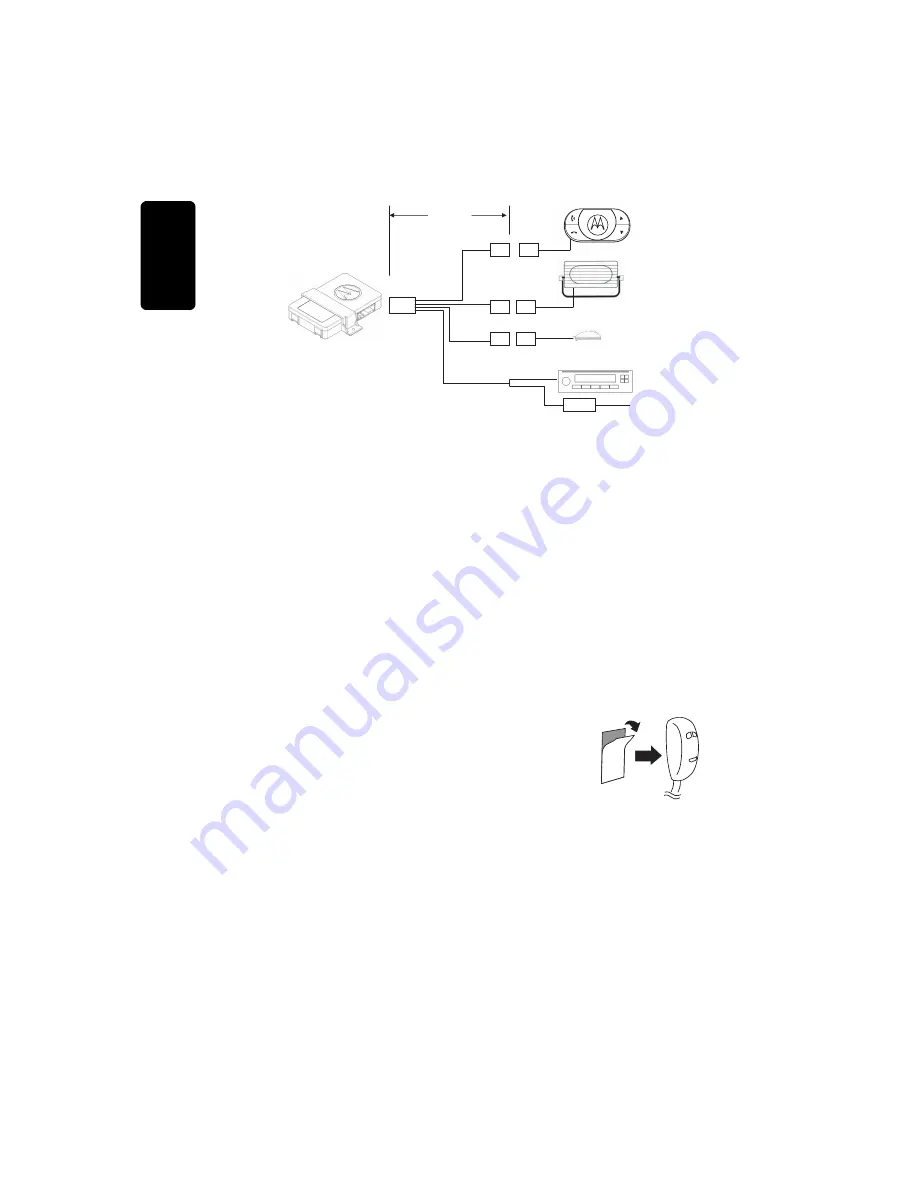
Installing the Microphone
1
Attach 1 side of the VELCRO
®
tape to the bottom side of
the microphone.
2
Select a suitable mounting location and mount the
microphone:
•
Locate the microphone no more than 16 inches (40 cm) from the driver.
•
Aim the microphone directly toward the driver and away from direct air flow
from a vent.
•
Do not allow anything (such as a rear-view mirror or sun visor) to block the
path between the microphone and the driver.
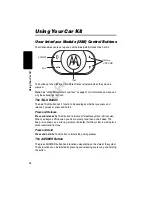
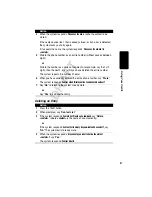
FUSES
Interface
Cable
Speaker
Microphone
Radio
IHF1000
Module
User Interface Module
(UIM)
32-pin
12-pin
2-pin
2-pin


