background image

D. Auto Dial / Access and Hangup Codes

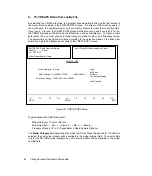
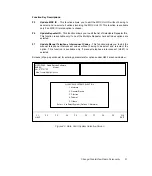
In order to access the Auto Dial menu, Option H368 must have been selected in the Radio
Feature Options Screen.  For every Auto Dial entry, the following information must be entered:
Telephone #, Name of person, Access Code, Hangup Code, Zone, and Channel.  Use the
ENTER key to move between fields or use the UP/DN arrow keys to scroll through the existing
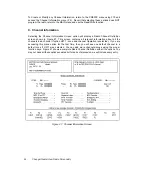
list.  See Figure 29 for the screen that will come up for Auto Dial.  For some Radio models,
Access and Hangup codes must be entered on the Manual Telephone Interconnect screen.  In
those cases, the Access and Hangup prompts will be absent from this screen.

Figure 29.  Autodial Setup Screen

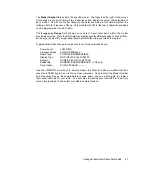
Valid Entries:

Phone Number:

Digits 0 - 9 and Characters P, #, and *.

Name:

Characters A - Z, #, *, "_" (underscore), " " (blank) 
and Digits 0 - 9.

Channel: 

Digits 0 - 9.

Zone:

Digits 0 - 9.

Access/Hangup Codes:

Digits 0 - 9 and Characters P, #, and *.

Access Code:

Digits 0 - 9 and Characters P, #, and *.

Hangup Code:

Digits 0 - 9 and Characters P, #, and *.

F1

HELP

F4

DELETE

ENTRY

F2

F3

ADD

ENTRY

F5

PRINT

F6

F7

F8

F9

F10

EXIT

 MOTOROLA  Radio Service Software
 SABER                   Model:
  Ver.  R05.00.00

  Main.Create/Modify.Dial

Use UP/DWN arrow keys to select
   or Enter  NUMBER.

AUTODIAL SETUP

Telephone #:

Access Code:

Zone:

Name:

Hangup Code:

Channel:

====================================================================================

ZN / Ch

Number

Name

Access

Hangup

<Empty List>

R07.01.00

60

Change/Create/View Radio Personality

Summary of Contents for SABER RVN4002K

Page 1: ...gV4 K W2 0Y g 7 1 hI 6X W M h J Lh V4 X W 0YheJ 7 1he I X 7 hf7 L hfV X J 5 hf 1 L he N 1 W Y hf J 1 hf3 L 7 Hhf J L 7 hfV X J 5 hf 7 1 Lhf N 1 W Y hf J 1 3 L 7 H J 7 V X J 5 7 L N 1 W Y 1 hf J L 3 L 7 Y J hf 7 1 V X J H 7 Lhf N 1 7 5 1hf L 3 H J hfJ 1 N L J 7 hf7 3 1 7 5 L he L N H 1 h J 1 O2 6K O2 6K O2 6K J h 7 W2 he he O2 6K he heO2 6K O2 6K hf 7 Lh L 7 h J HhO2 6K g g O2 6Khe 6K he W2 6X hJ 5...

Page 2: ...es or other media Laws in the United States and other countries preserve for Motorola certain exclusive rights for copyrighted computer programs including the exclusive right to copy or reproduce in any form the copyrighted computer program Accordingly any copyrighted Motorola computer programs contained in the Motorola equipment described in this manual may not be copied or reproduced in any mann...

Page 3: ...7 5e Y 7 5 e 3 heO Y h J hf3 h O Y 1f3 X g O He7 e W L N he J H 3 H N 1 he7 5 He3 H H e N 6K e O2 Hhe 7 5 hfN 6KfO2 H g I 5fV KfO2 5 e e 7 1e he 7 N 5 3 he H eN 5eJ g3 he H hf 3 eJ hN Hf N Y e 5 eJ e he 5 3 H N he J e Ye7 gN Mhf N M e7 h g3 0Ye J H W e L h H N 5 Lhe 7 5 e Y e 5g 3 Y hf 3 Yf 5 h gV Mf 7 e 7 M h e 3 1 hJ H 3 1h J H e 3 Yf Hg V4 Y J 5 V4 Y e J H h g V Y f eJ Yhe L N h7 5 N h 7 5 f N ...

Page 4: ... 42 VIII CHANGE CREATE VIEW RADIO PERSONALITY 44 View Radio Personality 45 A F3 CREATE Radio Personality File 46 B Radio Feature Options 48 C Channel Information 54 D Auto Dial Access and Hangup Codes 60 E Manual Interconnect Access and Hangup Codes 61 F Format Scan Lists 62 G Format Selectable PL 64 IX PRINT RADIO PERSONALITY 65 APPENDIX 1 ERROR MESSAGES 67 APPENDIX 2 KEYBOARD COMMANDS 69 APPENDI...

Page 5: ...gnment Data 41 17 Save RPF Display 43 18 Change Create View Codeplug Menu 44 19 View Radio Information Menu 45 20 CREATE RPF Menu 46 21 Options Screen 48 22 Quik Call II System Selection Screen 51 23 Quik Call II H701 Parameters Screen 52 24 Quik Call II H702 Parameters Screen 52 25 Quik Call II H703 Parameters Screen 53 26 Multiple Repeater Access Codes Screen 53 27 Channel Information Screen 54 ...

Page 6: ...equency DVP Digital Voice Protection EEPROM Electrically Erasable Programmable Read Only Memory EPROM Electrically Programmable Read Only Memory LED Light Emitting Diode MDC Motorola Digital Communications PC Personal Computer PL Private Line PTT Push To Talk RAM Random Access Memory RAT Repeater Access Tone RIB Radio Interface Box RPF Radio Personality File RSS Radio Service Software TOT Time Out...

Page 7: ...ustomer personality information Database here refers to a computer storage media such as a hard disk drive or a floppy disk The data files are stored in or retrieved from the database using the factory order number or any other name as the file name This user s manual has been written for the SABER Radio Service Software and provides detailed explanations on how to use this software package Files ...

Page 8: ...llel port of an IBM PC SETUP COMPUTER CONFIGURATION will configure your SABER Radio Service Software to your particular application and computer EXIT will leave the Radio Service Software and return to DOS C Customer Support If you encounter a problem first review your hardware setup Section III C and the information provided on Error Messages in Appendix 1 Problems requiring additional analysis w...

Page 9: ...G CREATING and VIEWING of radio codeplug and PRINTING of codeplug are described respectively All Radio Service Software screens are depicted in this manual and the operation of each one is described in detail A description of each data field as well as function key descriptions are also given A GLOSSARY and APPENDIX are included for definitions descriptions of error codes the database structure fo...

Page 10: ... Feature Option Auto Dial Format Scanlists Format Selectable PL Channel Info Radio Options Scan Lists Selectable PL Autodial Info PC Config Screen Color Config Align Scan Align Radio Align Channels Monitor Hold Time RX Resp Time TX Resp Time Priority Squelch DTMF Tone On Power Levels Mic Gain Low Power Med Power High Power Special Power DTMF Tone Off Audio Proc DTMFDialDelay Secure Deviation Batte...

Page 11: ...Display Area and Function Key Selection Display Area Figure 2 Screen Display Format The Screen Identification Area is the upper left area of the screen display and is sub divided into four sections as follows The first line displays MOTOROLA Radio Service Software The second line displays the SABER radio name and the model number The third line displays the current version number The last line is ...

Page 12: ...appears beneath the function key title D How To Use The Keyboard All Radio Service Software keyboard commands are summarized in this section These function keys are applicable to changing screens entering data and moving between data fields The F1 HELP function also provides keyboard information From any screen you may view this list by pressing F1 HELP and then pressing F2 KEYBOARD HELP F1 Help I...

Page 13: ...adio Codeplug Data PRINT Codeplug Data SETUP Computer Configuration Figure 3 MAIN Menu F1 HELP F2 SERVICE alignment service aids board replacement F3 GET SAVE PROGRAM codeplug data from to disk codeplug F4 CHANGE CREATE VIEW radio codeplug data F5 PRINT codeplug data F6 F7 F8 F9 SETUP Computer Configuration F10 EXIT MOTOROLA Radio Service Software SABER Model Ver R05 00 00 Main Select Function Key...

Page 14: ...lity into the EEPROMS in the radio The LOAD SAVE and DELETE RADIO CONFIGURATION DATA is used to Read codeplug data from an archived codeplug image on a diskette or hard disk for editing purposes via create change view function The LOAD SAVE is also used to Save a modified codeplug image back onto the diskette or hard disk or to delete a file from disk All GET SAVE PROGRAM functions are explained i...

Page 15: ...ill be available on both 3 1 2 and 5 1 4 RVN 4002H media and must be installed onto a hard disk drive However you can also store the data files on either 3 1 2 and 5 1 4 disks Communication Card A serial port is also required if personality files are to be read from or written to a radio The serial port must be compatible with the IBM asynchronous communications adapter Printer A parallel interfac...

Page 16: ...01 80358A56 220V 60 82728J01 9V Programming Cable RTK 4203A For Alignment See items listed in your SABER Service Manual Power Meter RF Monitor Frequency Generator 10 Hz 10 kHz Battery Eliminator RTL 4224A Portable Products Test Set RTX 4005B C Connecting The Radio To The Computer The SABER radio and the Radio Interface Box RIB should be connected to the computer as described below Refer to Figure ...

Page 17: ...ector to an audio generator capable of generating frequencies from 10 Hz to 10 kHz 8 Remove the battery from the radio which is turned off and attach the battery eliminator for the SABER radio to the radio under test Connect the battery eliminator to a 5A 10V power supply Set the power supply to 7 5 0 1 VDC 9 Connect the programming cable to the back connector on the radio 10 Load the SABER Radio ...

Page 18: ...T KEEPS SEVERAL FILES OPEN IN THE SYSTEM AT THE SAME TIME THE DOS ENVIRONMENT BY DEFAULT LIMITS THE NUMBER OF FILES THAT CAN BE OPENED AT ANY ONE TIME TO 8 THIS IS NOT SUFFICIENT TO RUN THE SABER RADIO SERVICE SOFTWARE IN ORDER TO INCREASE THE NUMBER OF FILES THAT CAN BE OPENED AT ANY ONE TIME IT IS NECESSARY TO DEFINE THIS IN YOUR CONFIG SYS FILE IF THE CONFIG SYS FILE CURRENTLY EXISTS IN YOUR SY...

Page 19: ... type INSTALL Enter and follow the directions given on the screen The Install program will check for the existence of the hard disk specified that sufficient free disk space exists on the hard disk and if the subdirectories exist before attempting to create them After the installation is complete move to either the root directory of the hard drive or to the RSS SABER sub directory and type SABER E...

Page 20: ...ow Now continue to Section IV B to complete the configuration procedure 14 Software Installation MOTOROLA INC RADIO SERVICE SOFTWARE FOR SABER SERIES RADIO Version R07 01 00 Release Date 09 01 93 Kit RVN4002K Press Any Key to Continue COPYRIGHT MOTOROLA INC 1988 1993 All Rights Reserved ...

Page 21: ...hat need to be setup in your configuration file This procedure only needs to be setup once when installing the system Each function key is explained below in order to configure your computer completely Figure 5 Setup Computer Configuration F1 Help for Computer Setup F2 F3 PC Configuration Drives Paths Ports etc F4 F5 F6 F7 Screen Color Configuration F8 F9 F10 EXIT MOTOROLA Radio Service Software S...

Page 22: ...ard disk system and want to save archive files on a floppy disk in drive A enter A for the Archive Path Name Press ENTER to continue For a floppy disk system you must enter disk drive B if you have SABER EXE in drive A and MOTOROLA LBR in drive B 2 Next you must enter the Archive Path which is the path name of the archive disk where all archive files will be kept On the Screen Data is shown but yo...

Page 23: ...u have a color monitor continue with F7 Screen Color Configuration Otherwise this completes the software installation procedure F7 Screen Color Configuration Follow the steps below to configure your screen for the various color options Press the F7 function key to access the SCREEN COLOR CONFIGURATION screen as shown in Figure 7 to enable the color display option and configure your screen colors F...

Page 24: ...m to blink on and off To disable the blinking just press the F3 key again F4 Toggle Bright This function toggles the brightness or intensity of the selected color in F2 This key just toggles between the original color and another intensity of the same color F5 Inverse Video This function allows you to switch the colors of the background of the message and the actual character letters of the messag...

Page 25: ...RINT help will create a hard copy of all help information shown on the screen F9 Other help provides additional help on such things as radio serial number software version numbers cable numbers etc F10 exits the help menu and brings you back to the previous menu If all the information cannot fit on one screen use the PgUp and PgDn keys to page through or page back all available help information To...

Page 26: ...ERVICE screens do NOT read and program the radio codeplug directly you have to use the READ WRITE functions before and after using the SERVICE menus A How To Set Up For setting up to align the radio follow the procedure in Section III C Connecting the Radio To The Computer except use the general hardware test equipment shown in Figure 8 for aligning Figure 8 Test Setup for Alignment Procedure Seri...

Page 27: ...e available alignment parameters Sections VI B VI C and VI D explain in detail the function and procedure for aligning the radio channels and scan controls Figure 9 Service Alignment Menu F1 Help on Alignment F2 F3 Align Radio Parameters F4 Align Channel Parameters F5 Align Scan Controls F6 F7 F8 F9 F10 EXIT MOTOROLA Radio Service Software SABER Model Ver R05 00 00 Select Function Key F1 F10 F1 HE...

Page 28: ...o Change Value PGUP PGDN to Change Rapidly Oscillator WARP Low POWER level Medium POWER level High POWER level Special POWER level Low Battery Threshold Battery Save Squelch Secure Deviation Offset F1 HELP F2 F3 F4 F5 PRINT SCREEN F6 F7 TOGGLE POWER BIAS F8 F9 F10 EXIT A L I G N R A D I O PARAMETERS 00 00 00 00 00 00 00 00 Power Bias is HIGH Power Bias is HIGH Power Bias is HIGH Power Bias is HIGH...

Page 29: ...ency and the frequency measured c De key the radio d Calculate the number of steps required to bring the radio on frequency using the following formulas For UHF radios number of steps frequency error in Hz 180 For VHF radios number of steps frequency error in Hz 80 NOTE A negative frequency error indicates that the frequency will have to be increased by stepping up with the UP arrow key or PGUP A ...

Page 30: ...igning the power level select the proper TOGGLE POWER BIAS with the F7 function key according to the table below Select Power Bias High Select Power Bias Low 2 W for High power radios 2 W for High power radios OR 1 W for Low power radios 1 W for Low power radios c Choose a channel with a frequency as close to the center of the band as possible or the center frequency of the radio to be aligned Set...

Page 31: ...value to optimize battery save performance for the particular system in which the radio will operate When aligning Battery Save Squelch you will not be able to test the squelch level until you reprogram the radio first In order to align battery save squelch follow the steps below a Follow the Setup Procedure in Section VI A Fig 8 b In order to align this parameter you MUST be in Battery Save Squel...

Page 32: ...dible When aligning Audio Processing you will not be able to test the audio level until you reprogram the radio first In order to align this parameter follow the steps below a Follow the Setup Procedure in Section VI A b First determine at what level you wish to set the volume level to meet radio environment c A nominal level to begin testing is at C0 where levels below C0 have regular audio and l...

Page 33: ...ines the time between DTMF tones The value for this parameter ranges from 01 to FF 1 to 255 in 5 ms units 5 ms to 1 275 seconds The default value is 1C which is 140 ms When aligning DTMF Tone Off Time you will not be able to test the OFF time until you reprogram the radio first a Follow the Setup Procedure in Section VI A Fig 8 b Determine what tone duration you wish to have and use the UP DOWN or...

Page 34: ...viation f Select the Secure function on the service monitor Increase or decrease the deviation offset value by one step using the up or down arrow key This enables the RSS to strap this channel coded if you just left the align channel screen which straps the radio clear g Key the radio measure and record the Secure deviation Label the result as DVP DEV h De key the radio i The Secure deviation mea...

Page 35: ...radios with the H852 6D master option enabled or the H549 8D master option enabled a Follow the setup procedure in Section VI A Fig 8 b Determine the microphone gain you wish to have and use the UP DOWN or PGUP PGDN arrow keys to increase decrease these values c Reprogram radio if finished with ALL alignment functions Once you have completed the radio level alignment adjustments press the F10 key ...

Page 36: ... this means AFTER all alignment is completely finished you must reprogram the radio You do not have to reprogram the radio after each parameter is aligned Function Key Descriptions F2 Copy to all This function key will copy a particular alignment parameter value to all the channels For example If VCO for the current channel is 1F pressing F2 will set VCO to 1F in all channels F3 Copy to zone This ...

Page 37: ...e radio to hear the immediate change a Follow the Setup Procedure in Section VI A Fig 8 b Select any channel on the radio c Select the SQUELCH function in the ALIGN CHANNEL screen d With no RF signal applied to the radio set the squelch value to 0 by using the DOWN arrow key You should hear noise through the speaker in the test set CSQ and SQ should be OFF CSQ PL DPL Set the switch on the test set...

Page 38: ...able Test Set Measure deviation by keying up the radio i De key the radio and adjust the VCO modulation value decrease the value if the measured deviation is higher than the required value by using the DOWN key to decrement value The valid range for this parameter is from 00 to 1F with a default value of 1C j Re key the radio and measure the deviation Repeat the procedure this step and the step ab...

Page 39: ... If you had selected the ALIGN SCAN CONTROLS function in the SERVICE screen the system will display the screen shown in Figure 12 These screens will allow you to align Scan monitor hold time Scan receive response time Scan transmit response time and Scan priority squelch Each of these parameters are explained below followed by the procedure needed to set these parameters correctly for the radio be...

Page 40: ...or Hold Time Monitor Hold Time determines how long the radio will remain on the monitored channel once the monitor button is released During monitor hold time squelch and PL are not defeated unless permanent monitor has been engaged After Monitor Hold Time expires permanent monitor is released and normal channel scan resumes To align this scan parameter follow the steps below a Set up according to...

Page 41: ...onds with a default value of 03 or 3 seconds d Reprogram radio if finished with ALL alignment functions 3 Scan Transmit Response Time After transmitting a message while scanning a programmable time interval 0 to 60 seconds in 1 second steps will be in effect called the Transmit Response Time Within this time the radio will not resume scan except for priority samples but will continue to monitor th...

Page 42: ...radio more sensitive but too low a value may cause falsing The default value is 8 and should only be changed if difficulties with priority sensitivity are encountered To align this scan parameter follow the steps below a Set up according to Section VI A and select the SCAN PRIORITY SQUELCH option in the Align Scan Menu b Increment or decrement the time parameter accordingly using the UP or PGUP or...

Page 43: ...13 Figure 13 Get Save Program Menu F1 Help F2 GET Radio Personality from Disk F3 SAVE Radio Personality to Disk F4 Delete Radio Personality from Disk F5 F6 F7 Read Radio Personality from Radio F8 Program Radio Personality to Radio F9 F10 EXIT MOTOROLA Radio Service Software SABER Model Ver R07 00 00 Select Function Key F1 F10 F1 HELP F2 GET A FILE F3 SAVE A FILE F4 DELETE FILE F5 F6 LOAD SAVE F7 R...

Page 44: ...en read back the system will convert this data into the radio personality file As the system is building the RPF several messages will appear on the screen showing the process of the build Shown below in Figure 14 is a sample screen of READ radio Figure 14 Read Radio Display Note Before reading the radio a message may appear instructing you to press the three top keys down on the keypad for a SABE...

Page 45: ...adio Make sure the radio is not in scan mode before proceeding The RSS will also prompt you to select the source for radio alignment data The radio alignment data may come from the RPF F2 or the radio about to be programmed F6 Using SHIFT F6 the RSS will also extract the unit ID from the radio For additional information on this subject see the Extraction section on the following page For some radi...

Page 46: ...ction process an explanation of the normal alignment process is necessary First assume that you have just created a new radio personality The RSS not knowing what radio the personality is destined to occupy inserts default alignment values into the personality These default values are necessary to ensure that a radio will function when programmed with the personality Next assume that you must put ...

Page 47: ...nd also several cases where extraction is not appropriate To simplify the decision making process a flowchart Figure 16 has been provided To use the chart start at its upper left corner answer the question and follow the line that matches your answer to the next question or action Figure 16 Extraction of Radio Alignment Data If you use extraction or even if you don t it is good practice to bench c...

Page 48: ...rchive copy of the codeplug information onto a diskette or hard disk An archive copy of every radio installed or serviced is STRONGLY recommended in order to be able to quickly restore customer information in case of a codeplug failure A menu screen will show up listing files after saving a file the new file name will be listed as well F4 Delete Radio Personality from Disk The REMOVE function will...

Page 49: ...dio Service Software SABER Model Ver R05 00 00 Use UP DWN arrow keys to select F1 HELP F2 SAVE FILE F3 F4 F5 F6 F7 F8 F9 F10 EXIT Main Get Save Prog Load Save Save Radio Personality to PC Database NO ELEMENTS Archive Path C RSS SABER DATA File Name ______________ R07 01 00 ...

Page 50: ...opy of the data retrieved from the codeplug or archive file via the Read Write Radio F3 or the Load Save Disk F6 functions After all Change Create View modifications are completed you MUST return to the Read Write Radio F3 or the Load Save Disk F6 functions in the MAIN menu and save them to a new archive file Otherwise the modifications will be lost when you turn off your computer exit the program...

Page 51: ...els gives the current total possible number of channels Number PL s gives the current total possible number of PL s NOTE If this is an SP RSS package the total possible numbers of PL s may actually be less than indicated CORE Patch ID gives the current CORE patch id loaded in the radio COPE Patch ID gives the current COPE patch id loaded in the radio Change Create View Radio Personality 45 Model C...

Page 52: ...lays an example of the CREATE RPF screen Figure 20 CREATE RPF Menu Toggled options the USER can select Model Category Clear or Secure Model Number SA Clear or QX Secure Frequency Range to Dependent on Radio Feature Options The Model Category field determines the model list for the Model Number field If CLEAR is selected then only clear models will be available in the model number field The same ho...

Page 53: ...per band that must match the radio you intend to program Toggled options that change in conjunction to the three selections above Power Level LOW HIGH Frequency Band UHF VHF Mid band Radio Type PORTABLE SUBMERSIBLE Display Type NO DISPLAY FULL DISPLAY Keypad NONE 3 KEYS FULL KEYPAD Bandwidth NARROW BAND WIDE BAND VHF only Scan Option SCAN CAPABLE Use the UP DOWN arrow keys to select between the Cl...

Page 54: ...dio Personality MOTOROLA Radio Service Software SABER Model Ver R05 00 00 OPTION SELECTION H251 60 second TOT H901 Non standard TOT H153 Omit all tones H365 Transmit inhibit on busy channel H359 Channel busy LED H906 Low battery LED H958 Unit ID MDC 600 H961 Unit ID Emergency MDC 600 H963 Unit ID w audible Emergency MDC 600 H923 Unit ID w emergency Revert MDC 600 H959 Unit ID MDC 1200 F1 HELP F2 S...

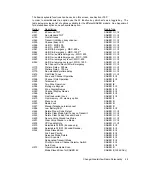
Page 55: ...III H619 Omit Side Tones SABER I II III H371 Zone and Channel Operation SABER II III H396 Channel Only Operation SABER II III H560 Talkaround SABER IE H256 Two Zone Operation SABER IE H384 Muting via Keypad SABER II III H346 Zone Display Names SABER II III H380 Channel Display Names SABER II III H368 Autodial SABER II III H669 Omit Inadvertent Lock SABER II III H670 Omit memory 2K memory option SA...

Page 56: ...7 1 Tone Singletone Via PTT Button H742 Up to 2 Tone Singletone via RAT Buttons Singletone Non Std Pretime Singletone Time Duration Multiple Repeater Access Codes MDC 600 Multiple Repeater Access Codes MDC 1200 H549 8D Master Option SABER I II III Limited Patience Timer Emergency Acknowledge Retry Timer Remote Monitor MDC 1200 Call Alert Decode MDC 1200 Individual Selective Call Decode MDC 1200 Gr...

Page 57: ...This function allows you to edit the manual telephone interconnect codes without having to deselect and re select the option This function is available only if manual telephone interconnect H297 is selected Screens of pop up windows for entering parameters for options under H852 are shown below MOTOROLA Radio Service Software SABER Model Ver R05 00 00 F1 HELP F2 F3 F4 F5 F6 F7 F8 F9 F10 EXIT Main ...

Page 58: ...ARAMETERS INDIVIDUAL Frequency Code Tone A 1357 7 197 Tone B 746 6 125 R07 01 00 MOTOROLA Radio Service Software SABER Model Ver R05 00 00 F1 HELP F2 F3 F4 F5 PRINT SCREEN F6 F7 F8 F9 F10 EXIT Main Create Modify Options Use Up Down Arrows to Select Entry Use TAB to Switch Fields Enter Quik Call Frequency ENTER QUIK CALL PARAMETERS INDIVIDUAL 2 Tone Group Frequency Code Tone A 1357 7 197 855 9 158 ...

Page 59: ...ETERS INDIVIDUAL Long Tone B Frequency Code Tone A 1357 7 197 Tone B 746 6 125 855 9 158 Frequency Code Main Create Modify Options R07 01 00 Main Create Modify Options MOTOROLA Radio Service Software SABER Model Ver R05 00 00 Use UP DWN arrow keys to select row Enter ID F1 HELP F2 F3 INSERT ID F4 DELETE ID F5 PRINT SCREEN F6 F7 F8 F9 F10 EXIT Main Create Modify Options CREATE MODIFY REPEATER MDC I...

Page 60: ...e e e e e e e W26X e eW e X e Xe W2 6X X e XeW e e Xe e W e 6Xe e 6X W2 6X 6X e W MI X e e7 L X e X f HW M I X X e N1e7H e eI L 1 J5 f 7 Le B1e e f B1 e W M I X eB1 e 7HeV e J R1 V1 e V1 f J5 7H eN1 V1 e e e e N1 7H fJ R1e e e f C5 e 7H eN1 eC5 e f 7Y e e W Y f e 3L e e W X f7Y e L e U f 0Y e 3LeW e 3X e 3X f 7H 3L eJ5 3X e N T5 e f B f e B1 e f B1 e 3L eC5 f e V KO Y e W MI L V e V f J e V K O Y ...

Page 61: ...quency in Hertz as XXX X or as a two digit alpha code For Digital PL codes enter the three digit DPL code word Note no decimal places may be entered for DPL RX PL and Quik Call II are incompatible on a channel See Appendix 7 for a complete list of squelch codes Scan List Valid entries range from 1 10 Time Out Timer Valid entries are Y and N This field will be displayed if H251 H901 is selected If ...

Page 62: ...al single tones option or one of the Multiple Repeater Access options is chosen PTT Function Valid entries are 1 or 2 for single tones 1 or 2 M for MDC and for no signalling This field will be displayed only if the general single tones option is chosen and the time duration is not zero The MDC ID field does not appear with this field Instead the PTT field itself can be used for signalling MDC thro...

Page 63: ...rompt you with a channel name You may continue to modify any of the remaining entries by pressing ENTER F4 Delete Channel In order to delete a channel the programmer will first prompt you with a statement to be sure you want to delete the present channel Press y for yes or n for no F5 Print This print function allows you to print out the channel information for this present screen F8 Copy Channel ...

Page 64: ...c use for this function allows you to insert a new zone and copy all data quickly and efficiently from the marked zone Pressing F9 again will remove the asterisk as this function acts as a toggle to enable disable the marked zone Note In order to copy information from one zone to numerous other zones first mark the zone with all the proper data press the copy zone key F4 Wide View This function al...

Page 65: ...ibute is not assigned or disabled then a period is printed in its place By moving the cursor to the specified zone channel and pressing F4 or ZOOM the complete channel information screen on that channel will be displayed F5 Print This print function allows you to print out all the channel DC ID Table This function key displays the Repeater Access Codes MDC if any of the Multiple Repeater Access Co...

Page 66: ...n those cases the Access and Hangup prompts will be absent from this screen Figure 29 Autodial Setup Screen Valid Entries Phone Number Digits 0 9 and Characters P and Name Characters A Z _ underscore blank and Digits 0 9 Channel Digits 0 9 Zone Digits 0 9 Access Hangup Codes Digits 0 9 and Characters P and Access Code Digits 0 9 and Characters P and Hangup Code Digits 0 9 and Characters P and F1 H...

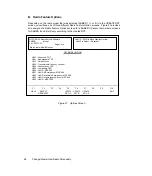
Page 67: ...make a hard copy of the autodial setup screen E Manual Interconnect Access and Hangup Codes The Manual Interconnect menu is shown in Figure 30 Simply enter the the Access Code and Hangup Code using the ENTER key to move between the selections Both Codes have a possible eight character field The only Function Key Description for this menu is the PRINT function F5 which makes a hard copy of the Manu...

Page 68: ...pendix 5 on Options list and definitions Figure 31 displays the CREATE MODIFY SCAN LISTS screen with all possible entries shown for a Zone Channel radio A similar screen will come up for a Channel only radio with only channel data entries You can have up to ten non priority channels in a scan list with at least one non priority channel entered to define a list Use the ENTER key to move between ent...

Page 69: ...e channel scan will move to the priority two channel but continue to monitor the priority one channel When carrier is dropped on the priority two channel scan will resume as normal Note If MDC is enabled with Scan and a priority channel is set to be scanned or the radio is equipped with a priority scan encryption module DOS Muting will not work properly The designated transmit channel defines the ...

Page 70: ...sert another PL code up to 9 and the Current Entry Number field will automatically be incremented as will the Total when the present PL entry is completed F4 Delete PL This function key will delete a particular PL entry Use the UP DOWN arrow keys to scroll through your entries Be sure of the PL code entry you wish to delete because the programmer will NOT prompt you before deletion The existing li...

Page 71: ...sonality function from the MAIN menu Figure 33 Print Menu F1 Help on Printing F2 Print Channel Information Form F3 Print Auto Dial Form F4 Print Radio Options F5 Print Selectable PL F6 Print Scan Lists F7 F8 F9 F10 Exit MOTOROLA Radio Service Software SABER Model Ver R05 00 00 Main Print Select Function Key F1 F10 F1 HELP F2 CHAN INFO F3 AUTO DIAL F4 OPT LIST F5 SELECT PL F6 SCAN LIST F7 F8 F9 F10...

Page 72: ... F4 Print Radio Options This function key creates a hard copy of Radio Options available For a copy of Radio Option Descriptions make a hard copy of the Appendix A 5 which gives detailed descriptions on each available option F5 Print Selectable PL This function creates a hard copy of the information entered in the Selectable PL screen listing the PL codes and names for which each PL Code belongs F...

Page 73: ...ot pressed the keys simultaneously You will have to turn off the radio and repeat the procedure until the message remains on the display for a COPE 5 C radio A full eight character display should appear for this radio unless there really is an error The following paragraphs will describe the meaning of the error messages The error message has the form ERR x yz where x is the address of the device ...

Page 74: ...more than one error occurs simultaneously the error message is simply an addition of the values of the errors involved A few examples will clarify this Note that since the error values are hexadecimal the addition will also result in hexadecimal values Some examples of common error messages are given below Error message examples ERR 0 X1 The CORE µP has an internal EEPROM checksum error X may be a...

Page 75: ...n to the MAIN Menu TAB or ENTER Advance Cursor to Next Data Field Shift TAB Backup Cursor to Last Data Field UP DOWN Arrow Keys Increment Decrement Value or Selection PGUP PGDN Increase the Increment Decrement Speed LEFT RIGHT Arrow Move Cursor Within Data Field INSERT Insert Space at Current Cursor Position BACKSPACE Erase Data Within Field Move Cursor Left DELETE Erase Current Character HOME Mov...

Page 76: ... Disk Drive Systems To format a disk with a dual floppy disk system place your DOS System disk in drive A and place the disk to be formatted in drive B Next type A FORMAT B V Press Enter After the disk is formatted you will be prompted to give the disk a volume label to uniquely identify the disk The volume label may consist from 1 to 11characters B Hard Disk Systems To format a disk with a hard d...

Page 77: ...c QX then the radio has voice privacy cc YB then the radio is submersible cc YX then the radio is submersible with voice privacy 4 When the field d N then no keypad d J then Display II is present 3 button keypad d K then Display III is present full keypad d G then SABER IE Talkaround or two zone no display 5 When the field e 7 then CORE Binary U S models e 9 then CORE TONE International models 6 W...

Page 78: ...e any alert tones or sidetones Audio feedback by the radio is muted If you choose this option the programmer will not allow you to select option H619 which omits only side tones H365 Transmit Inhibit on Busy Channel Selecting this option will prevent you from transmitting on the channel if carrier is present and the correct PL is not This option can be enabled on all channels that have PL If you t...

Page 79: ...xadecimal ID for MDC 600 in the range from 0001 to DEEE excluding any occurrence of a hexadecimal F You can go to the preset emergency channel by pressing the emergency button located on the top panel of the radio When the emergency button is pressed the radio sends out the emergency sequence and simultaneously generates side tones each time the sequence is transmitted The radio will remain on the...

Page 80: ...d per radio For emergency encode sidetones may be optionally enabled per radio in the codeplug The sidetones will be alert tones of 1640 Hz continuous while the unit ID is being transmitted Sidetones are a fixed volume level programmable per radio The microphone is muted during sidetones Selecting this option will disable all sidetones This is applicable to Single Tones and Multiple Repeater Acces...

Page 81: ... Inadvertent Lock Inadvertent lock is a standard menu option for display models This option will disable the Inadvertent Lock which allows you to lock out the keypad temporarily during periods of non usage or for safety purposes to minimize inadvertent actuation H670 Omit Memory 2K memory option This option is necessary for SABER II s with a 2K EEPROM instead of the normal 8K It is important to en...

Page 82: ...both of the priority channels For this type of scan each channel in the radio points to one of the scan lists so you can assign a different scan sequence to each channel All channels and scan lists available in this option are factory programmed but can be changed with the Radio Service Software NOTE If MDC is enabled on the radio and priority scan is used DOS Muting will not work properly causing...

Page 83: ...per scan list The 13 entries include 2 priority channels 10 non priority channels and 1 optional entry for the designated transmit channel The two priority channels will be scanned more often than the non priority channels and will continue to be scanned even if a lower priority channel is currently being monitored If both priority channels are used the channel with priority 1 status will override...

Page 84: ...osition is disregarded the radio acts as if it is clear always If option H432 is selected a short beep will be heard upon power up H852 6D Master Option Selecting this option allows you access to 6D options Quik Call Single Tones via PTT or RATs or both Multiple Repeater Access Codes and Zero Audio Enable The standard SABER radios are equipped with the 5D version of the microcomputer The 6D is an ...

Page 85: ...se systems are listed below The available frequencies for each system are listed in Appendix 6 To select a system enter a number corresponding to that system for example to select the Plectron system enter 3 The default is set to the Motorola system You must select this option in order to select any of the Quik Call II options Even non standard frequencies can be used either independently or along...

Page 86: ...e Quik Call decode mode In addition transmitting while in the Quik Call decode mode resets the timer at the end of the transmission The valid range is 1 290 seconds a default of 5 seconds is set if this option is selected This option will be selected automatically if option H188 is selected If this option is not selected the radio will be in manual reset mode you can manually force a reset by mome...

Page 87: ...mpatible with the following options Singletone General PTT RATs H707 1 Tone Single tone via PTT Button Multiple Repeater Access Codes MDC 600 Multiple Repeater Access Codes MDC 1200 The following options are enabled if you select this option Singletone Non Std Pretime Singletone Time Duration H619 Omit MDC Side Tones Singletone Non Std Pretime To select this option you must select either Singleton...

Page 88: ... MDC Pretime Delay 700 ms H779 MDC Non standard Pretime Delay H549 8D Master Option Advanced STATALERT Selecting this option will give you access to MDC Decode Features that are available to Saber radios possessing a Pass 8D Core and using MDC 1200 signalling Options incompatible with this feature are Quik Call Single Tone and any MDC 600 feature Some Pass 6D options are also common to the Pass 8D...

Page 89: ...the Remote Monitor transmission will be canceled and the radio will enter the normal Emergency Cycle Call Alert Call Alert is a type of paging function initiated by the dispatcher to get the attention of a radio that is not responding to normal activity Upon receiving the Call Alert from the dispatcher the target radio will sound a series of Alert tones and display a flashing visual indicator MDC ...

Page 90: ...transmission that would otherwise be heard When selecting this option you will be prompted for a timer value between 100 and 1500 milliseconds in 5 millisecond steps Whenever an MDC data packet is detected by the radio it will use this timer value to determine how long to wait before unmuting the audio The default is 95ms greater than the MDC pretime This is the recommended value 84 Appendix 5 Opt...

Page 91: ...1395 0 198 0389 0 113 0716 1 KZ 1433 4 199 0398 1 DA 0726 8 155 1472 9 170 0399 8 144 0741 3 KA 1513 5 171 0410 8 114 0746 8 125 1550 0 CQ 0412 1 DB 0767 4 156 1555 2 172 0422 1 145 0767 4 KB 1598 0 173 0426 6 EZ 0788 5 126 1642 0 174 0433 7 115 0794 3 LZ 1650 0 DQ 0441 6 EA 0810 2 157 1687 2 175 0445 7 146 0822 2 LA 1733 7 176 0457 1 EB 0832 5 127 1781 5 177 0457 9 116 0851 1 LB 1830 5 178 0470 5...

Page 92: ...62 5 4 937 5 29 577 5 5 952 5 30 592 5 6 967 5 31 607 5 7 982 5 32 622 5 8 997 5 33 637 5 9 1012 5 34 652 5 10 1027 5 35 667 5 11 1042 5 36 682 5 12 1057 5 37 697 5 13 1077 5 38 712 5 14 1087 5 39 727 5 15 1102 5 40 742 5 16 1117 5 45 757 5 17 1132 5 46 772 5 18 1147 5 47 787 5 19 1162 5 48 802 5 20 1177 5 49 817 5 21 1192 5 50 1207 5 51 86 Appendix 6 Quik Call II Frequencies and Codes ...

Page 93: ...P47 1180 0 P15 435 3 P48 1232 0 P16 454 6 P49 1287 0 P17 474 8 P50 1344 0 P18 495 8 P51 1403 0 P19 517 8 P52 1465 0 P20 540 7 P53 1530 0 P21 564 7 P54 1598 0 P22 589 7 P55 1669 0 P23 615 8 P56 1743 0 P24 643 0 P1 1820 0 P25 672 0 P2 1901 0 P26 701 0 P3 1985 0 P27 732 0 P4 2073 0 P28 765 0 P5 2164 0 P29 799 0 P6 2260 0 P30 834 0 P7 2361 0 P31 2465 0 P32 Appendix 6 Quik Call II Frequencies and Codes...

Page 94: ...ODE 643 0 F1 692 0 F2 749 0 F3 810 0 F4 877 0 F5 949 0 F6 1026 0 F7 1110 0 F8 1201 0 F9 1299 0 F10 1405 0 F11 1520 0 F12 1695 0 F13 1780 0 F14 1926 0 F15 2084 0 F16 2255 0 F17 2440 0 F18 88 Appendix 6 Quik Call II Frequencies and Codes ...

Page 95: ...1 203 5 8Z 210 7 M3 218 1 M4 225 7 9Z 229 1 M5 233 6 M6 241 8 M7 250 3 OZ 254 1 023 025 073 074 156 162 261 263 365 371 503 506 654 662 026 031 114 115 165 172 265 271 411 412 516 532 664 703 032 043 116 125 174 205 306 311 413 423 546 565 712 723 047 051 131 132 223 226 315 331 431 432 606 612 731 732 054 065 134 143 243 244 343 346 445 464 624 627 734 743 071 072 152 155 245 251 351 364 465 466 ...

Page 96: ...ve on another floppy disk in case the original file is corrupted damaged or accidentally erased BOOT To load the computer s operating system BUS SIGNALLING The protocol used in communication between elements of a system either within a unit or between units This usually r e f e r s to a definable methodology which may or may not be proprietary to MOTOROLA Serial Bus Signalling is typically used to...

Page 97: ...age medium for microcomputers Also called a disk floppy disk or mini diskette 1 DOS An acronym for Disk Operating System DOS is a group of programs that control the way the computer interfaces with o t h e r programs tells the computer how to use read and return information to and from application programs and how to organize and use the information on disks 2 DOS DOS or Data Operated Squelch is t...

Page 98: ...y data parameter on the computer display The current selected field is always highlighted via inverse video FILE A collection of information typically stored by the computer on a magnetic medium FIRMWARE Executable code stored in solid state media ie ROM s PROM s and EPROM s FUNCTION KEYS The 10 keys at the left or top of the keyboard labeled F1 F10 The Radio Service Software uses these keys for m...

Page 99: ... over the telephone lines OPERATING The set of instructions that coordinates your microcomputers SYSTEM activities such as memory allocation file management input and output operations communications and interfacing to other application software packages such as the Radio Service Software PARAMETER Codeplug data information that performs a control PATH The description of the relationship of a sub ...

Page 100: ...control on the side of the radio that lets you access a repeater READ The transfer of information from the radio codeplug to the computer s temporary memory RAM via the RIB communication link RIB An acronym for Radio Interface Box The RIB is used to connect to a computer system to a radio for the purpose of communicating between the radio and the computer The RIB consists mainly of level shifting ...

Page 101: ...eping TOT An acronym for Time out Timer The TOT function limits the transmission period to a pre defined time The radio will automatically stop transmitting when the timer goes off after the pre defined time and will generate an alert tone to notify you that no transmission is taking place TPL Abbreviation of Tone Private Line Squelch The Private Line Squelch that uses sub audible tones to unmute ...

Page 102: ...ery Threshold 25 C Change Create View Codeplug Menu Fig 19 45 Change Create View Radio Personality 45 Channel Information 54 Channel Information Screen Fig 27 54 Channel Parameters 30 Computer Software Copyrights Inside Front Cover Codeplug Data 37 Configuration PC Fig 6 16 Configure Screen Colors Fig 7 17 Configuration Software 15 Connecting Radio to Computer 10 Connecting Radio to Computer Fig 4...

Page 103: ...o Disk Codeplug 37 Getting Started 3 Glossary 90 H Hard Disk Installation Procedure 13 Hardware Installation 9 Hardware Optional Requirements 10 HELP Screen 19 Host Computer and Options Required 9 How This Manual is Organized 3 How The Screens are Organized 3 I Installing Software 12 Dual Floppy Disk Drive System 12 Hard Disk Installation Procedure 13 Introduction 1 K Keyboard Commands Appendix 2 ...

Page 104: ...Plectron System Table 3 87 Power Level 24 Print Menu Fig 33 65 Print Radio Personality 65 Q Quik Call II Frequencies and Codes Appendix 6 83 Quik Call II System Selection Screen Fig 22 51 Quik Call II H701 Parameters Screen Fig 23 52 Quik Call II H702 Parameters Screen Fig 24 52 Quik Call II H703 Parameters Screen Fig 25 53 R Radio Alignment Data Extraction of Fig 16 41 Radio Feature Options 48 Ra...

Page 105: ...Offset 27 Service Alignment Menu Fig 9 21 Servicing the Radio 20 Setup Computer Configuration Fig 5 15 Sidetone Volume 26 Software How to Configure 15 Software Installation 12 Squelch 31 System Federal Table 4 88 System General Electric Table 2 84 System Motorola Table 1 83 System Plectron Table 3 87 T Test Setup for Alignment Procedure Fig 8 20 V VCO and Reference Modulation Alignment 32 View Rad...

Page 106: ...NOTES 100 ...

Page 107: ...NOTES 101 ...

Page 108: ...NOTES 102 ...

Reviews: