


27
Basics
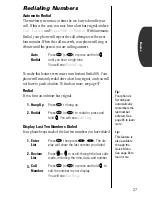
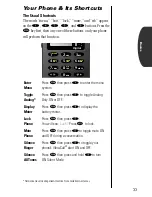
Redialing Numbers
Automatic Redial
The wireless system may at times be too busy to handle your
call. If this is the case, you may hear a fast busy signal and see
Call Failed
and
Press SND to Redial
. With Automatic
Redial, your phone will repeat the call attempt over the next
four minutes. When the call succeeds, your phone will ring or
vibrate until the person you are calling answers.
To make this feature even easier, turn Instant Redial ON. Your
phone will instantly redial after a fast busy signal, and you will
not have to push a button. To find out more, see page 97.
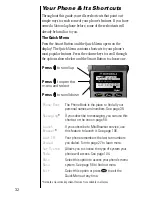
Redial
If you hear an ordinary busy signal:
Display Last Ten Numbers Dialed
Your phone keeps track of the last ten numbers you have dialed.
Auto
Redial
Press
æ
(or
ª
) or press and hold
A
A
A
A
until you hear a high tone.
You will see:
Redialing
.
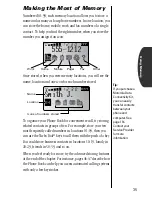
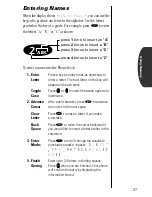
1.
Hang Up
Press
º
to hang up.
2.
Redial
Press
æ
(or
ª
)
to redial or press and
hold
A
A
A
A
. You will see:
Calling
.
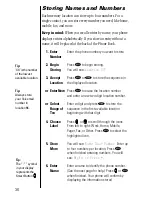
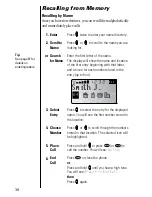
1.
Enter
List
Press
‰
then press
‚
,
‚
.
The dis-
play will show the last number you dialed.
2.
Review
List
Press
q
q
q
q
or
Z
Z
Z
Z
to scroll through the last calls
made, including the time, date, and number.
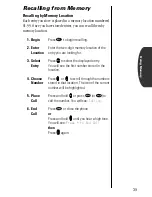
3.
Call
Number
Press
æ
(or
ª
) or press and hold
A
A
A
A
to
call the number in your display.
You will see:
Calling
.
Tip:
Your phone’s
Scratchpad
automatically
remembers the
last number
entered. See
page 45 to learn
more.
Tip:
This feature is
also available
through the
Quick Menu.
See page 32 to
learn more.


