R E D U C I N G M O N I T O R I N G L A T E N C Y
48
Lower latency versus higher CPU overhead
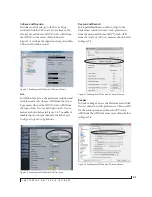
The buffer setting has a large impact on the
following things:
■
Patch thru latency
■
The load on your computer’s CPU
■
Possible distortion at the smallest settings
■
How responsive the transport controls are in
your audio software
The buffer setting presents you with a trade-off
between the processing power of your computer
and the delay of live audio as it is being patched
through your software. If you reduce the size, you
reduce patch thru latency, but significantly increase
the overall processing load on your computer,
leaving less CPU bandwidth for things like real-
time effects processing. On the other hand, if you
increase the buffer size, you reduce the load on
your computer, freeing up bandwidth for effects,
mixing and other real-time operations.
If you are at a point in your recording project where
you are not currently working with live, patched-
thru material (e.g. you’re not recording vocals), or
if you have a way of externally processing inputs,
choose a higher buffer size. Depending on your
computer’s CPU speed, you might find that settings
in the middle work best (256 to 1024).
Transport responsiveness
Buffer size also impacts how quickly your audio
software will respond when you begin playback,
although not by amounts that are very noticeable.
Lowering the buffer size will make your software
respond faster; raising the buffer size will make it a
little bit slower, but barely enough to notice.
Effects processing and automated mixing
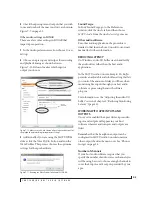
Reducing latency with the buffer size setting has
another benefit: it lets you route live inputs through
the real-time effects processing and mix
automation of your audio software.
CUEMIX HARDWARE MONITORING
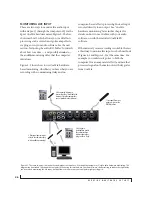
The 4pre has a more direct method of patching
audio through the system:
CueMix
. CueMix is a
digital mixer in the 4pre hardware itself. CueMix
has two important benefits:
■
First, it completely eliminates the patch thru
delay (reducing it to a small number of samples —
the same amount as any digital mixer).
■
Secondly, CueMix FX imposes no strain on the
computer.
The trade-off, however, is that CueMix FX
bypasses your host audio software. Instead, live
audio inputs are patched directly through to
outputs in the 4pre itself and are mixed with disk
tracks playing back from your audio software. This
means that you cannot apply plug-ins, mix
automation, or other real-time effects that your
audio software provides. But for inputs that don’t
need these types of features, CueMix is the way to
go.
On the other hand, if you really need to use the
mixing and processing provided by your audio
software, you should not use CueMix. Instead,
reduce latency with the buffer setting (as explained
earlier in this chapter).
THREE METHODS FOR CONTROLLING
CUEMIX
There are three ways to control CueMix:
■
With the knobs on the 4pre front panel
■
With the 4pre CueMix FX software
■
From within your host audio software (if it
supports direct hardware monitoring)
You can even use these methods simultaneously.
Controlling CueMix from the front panel
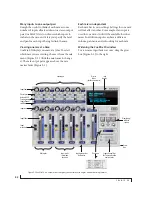
The knobs on the 4pre front panel give you direct
control over CueMix. For complete details, see
“Mixing with the front panel controls” on page 36.
Summary of Contents for 4pre
Page 4: ...4 ...
Page 5: ...Part1 GettingStarted ...
Page 6: ......
Page 10: ...10 ...
Page 16: ...P A C K I N G L I S T A N D S Y S T E M R E Q U I R E M E N T S 16 ...
Page 28: ...I N S T A L L I N G T H E 4 P R E H A R D W A R E 28 ...
Page 29: ...Part2 Usingthe4pre ...
Page 30: ......
Page 50: ...R E D U C I N G M O N I T O R I N G L A T E N C Y 50 ...


