9
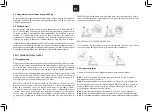
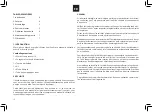
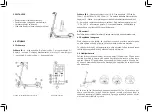
Scheme 1B:
A -Speed indicator in km/h; B – Gears – ECO up to 10km/h; D up to 18 km/h; S
up to 25 km/h – to change press the power button briefly; C – Lights – to turn
on, press the power button twice quickly; D – Warning about wrong tempe
-
raturę for the device – The recommended temperature is between -5°C
and
30
°C; E – Information about the fault; F – Battery charge status – each dot
accounts for about 20% of the battery capacity
4.2 Unfolding
Unfold the tube of the folding structure. Close the folding mechanism clamp.
4.3 Folding and transport
Before folding, make sure that the device is switched off, open the locking
lever, bend the footrest and connect it to the steering wheel part to the rear
fender hook. After folding, hold on to the belt to transport as shown. To avoid
the risk of damaging the rear fender, support the scooter chassis.
4.4 Battery charging
The device has a built-in lithium-ion battery. Before the first one vehicle use,
the battery should be fully charged. Please ensure clean and a dry room to
charge the battery. Connect one end vehicle power cable. Connect the other
end to a grounded power outlet. Do not disconnect the charger until it is
fully charged battery.
If charging is completed, be sure to close the lid. Avoid completely draining
the battery, it’s better to charge it while it’s still in them power supply. It is
forbidden to disassemble the battery compartment. Repair only at the ma
-
nufacturer’s official service center.
3. ASSEMBLY
4. START
4.1 Schemes
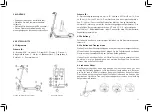
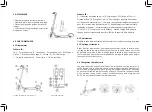
Scheme 1A:
A – Brake handle, B – Front light, C – throttle grip, D – Screen, E – Bell,
F – Folding mechanism, G – Motor, H – Charging socket, J – Hook,
K – Rear light, L – Drum brake
Scheme 1A: Electric Scooter Motus Scooty 10
• Unfold the tube of the folding structure.
• Close the folding mechanism clamp.
• Place the handlebar handle horizontally.
• Use a suitable wrench to tighten the
steering wheel bolts.
Scheme 1B: Display


