background image

81

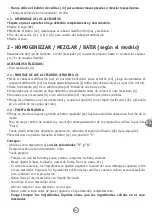
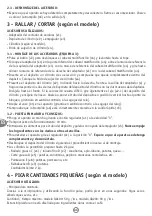
•Lea detenidamente las instrucciones de uso antes de utilizar el

aparato  por  primera  vez  :  un  uso  no  conforme  con  las
instrucciones eximirá al fabricante de cualquier responsabilidad.

•Este aparato no está previsto para ser utilizado por personas

(incluso niños) cuyas capacidades físicas, sensoriales o mentales
estén  reducidas,  o  personas  provistas  de  experiencia  o  de
conocimiento, excepto sin han podido beneficiarse a través de
una persona responsable de su seguridad, de una vigilancia o
instrucciones  previas  referentes  al  uso  del  aparato.  Hay  que
vigilar  a  los  niños  para  asegurarse  de  que  no  juegan  con  el
aparato.

•Este aparato está destinado únicamente a uso doméstico, siempre

en el interior del hogar y a altitudes inferiores a 2000 m.

•No utilice el aparato si no funciona correctamente o si se ha

estropeado. En este caso, diríjase a un centro de servicio oficial
(consulte la lista en el folleto de servicio).

•Cualquier tarea de mantenimiento, salvo las tareas de limpieza y

conservación habituales realizadas por el cliente, debe llevarse
a cabo en un centro de servicio oficial (consulte la lista en el
folleto de servicio).

•Desconecte siempre el aparato de la corriente eléctrica si se deja

sin supervisión o antes de montarlo/desmontarlo o limpiarlo.

•Riesgo de heridas en caso de mala utilización del aparato.
•No meta los accesorios en el microondas.
•Por  su  seguridad,  utilice  únicamente  accesorios  y  piezas  de

recambio adecuadas para el aparato, suministradas por un centro
de servicio oficial.

•Retire siempre el vaso mezclador (d) antes de pulsar el botón de

desbloqueo (a3) del cabezal multifunción (a4).

CONSIGNAS DE SEGURIDAD

ES

Summary of Contents for Masterchef Compact

Page 1: ...FR EN NL DE EL IT PT ES AR FA 4 14 15 25 26 36 37 47 48 58 59 69 70 80 81 91 92 102 103 113 Ref 8080014581 12 2014 ...

Page 2: ...masterchef compact FR EN NL DE EL IT PT ES AR FA ...

Page 3: ......

Page 4: ......

Page 5: ...3 a 1 a 3 b 3 c 1 b 1 c 1 d 2 a 2 b 3 f 2 c 3 e 3 d ...

Page 6: ...4 a 4 b 4 c ...

Page 7: ...érieur de la maison et à une altitude inférieure à 2000 m N utilisez pas votre appareil s il ne fonctionne pas correctement ou s il a été endommagé Dans ce cas adressez vous à un centre agréé voir liste dans le livret service Toute intervention autre que le nettoyage et l entretien usuel par le client doit être effectuée par un centre agréé voir liste dans le livret service Toujours déconnecter l ...

Page 8: ... bol d et du minihachoir lors du montage démontage du tambour A trancher e5 du mini hachoir et de la tête hachoir et lors du nettoyage de ces accessoires accessoires selon modèle N utilisez jamais cet appareil pour préparer d autres éléments que des ingrédients alimentaires Ne versez pas de liquide bouillant supérieur à 80 C 176 F dans les bols b1 et d1 selon modèle Versez toujours les ingrédients...

Page 9: ...e travail dans des fermes par les clients des hôtels motels et autres environnements à caractère résidentiel dans des environnements de type chambres d hôtes Reportez vous au mode d emploi pour le réglage des vitesses et le temps de fonctionnement de chaque accessoire Reportez vous au mode d emploi pour l assemblage et le montage des accessoires sur l appareil Reportez vous au mode d emploi pour l...

Page 10: ...s d au moins 8 ans et qu ils soient sous la surveillance d un adulte Conserver l appareil et son câble hors de portée des enfants âgés de moins de 8 ans Raccordement électrique Vérifiez que la tension d alimentation de votre appareil correspond bien à celle de votre installation électrique Toute erreur de branchement annule la garantie Débranchez toujours l appareil dès que vous cessez de l utilis...

Page 11: ...eurs possibilités Marche intermittente pulse Tournez le bouton variateur a1 sur la position pulse par impulsions successives pour un meilleur contrôle des préparations Marche continue Tournez le bouton variateur a1 sur la position désirée de 1 à 4 selon les préparations effectuées Vous pouvez la modifier en cours de préparation Pour arrêter l appareil ramenez le bouton a1 sur le 0 puis débranchez ...

Page 12: ...orifice du couvercle b2 au cours de la préparation Pour arrêter l appareil ramener le bouton a1 sur 0 Conseils Pétrir Utilisez le pétrin c1 à la vitesse 1 uniquement Vous pouvez pétrir jusqu à 500 g de farine pour les pâtes à pain ex pain blanc pain aux céréales 400 g de farine pour les pains spéciaux farine dont le type est supérieur à 55 T55 pain de seigle pain complet 250 g de farine pour les p...

Page 13: ...ns horaire 2 2 MISE EN MARCHE Démarrez en tournant le bouton variateur a1 sur la vitesse désirée selon la recette Pour un meilleur contrôle du mixage et une meilleure homogénéisation de la préparation utilisez la position Pulse Vous pouvez ajouter des aliments en retirant le bouchon doseur d3 du couvercle d2 en cours de préparation Pour arrêter l appareil ramener le bouton a1 sur 0 Conseils Utilis...

Page 14: ...erticale jusqu au blocage en tournant dans le sens anti horaire Verrouillez le bol b1 sens anti horaire sur l appareil Assurez vous que la trappe a6 soit bien en place sur la sortie rapide a5 3 2 MISE EN MARCHE ET CONSEILS Mettez en marche en tournant le variateur a1 sur la vitesse 3 Temps maximum de fonctionnement 10 min Introduisez les aliments dans la cheminée du magasin et guidez les à l aide ...

Page 15: ...ément aux dispositions de recyclage en vigueur Pour la mise au rebut de l appareil se renseigner auprès du service approprié de votre commune PRODUITS ELECTRONIQUES OU ELECTRIQUES EN FIN DE VIE NETTOYAGE Débranchez l appareil Ne plongez pas le bloc moteur a dans l eau ou sous l eau courante Essuyez le avec un chiffon sec ou à peine humide Pour un nettoyage plus facile rincez rapidement les accesso...

Page 16: ...trin et le couvercle Faites fonctionner en vitesse 1 pendant quelques secondes et ajoutez l eau tout en laissant fonctionner l appareil Continuez de pétrir jusqu à ce que la pâte forme une belle boule Mettez la dans un film alimentaire et laissez reposer au frais pendant environ heure avant de l étaler et la faire cuire Pain au lait Ingrédients 500 g de farine 1 œuf 80 g de beurre mou coupé en mor...

Page 17: ...rez en vitesse 1 puis augmentez en vitesse 3 Ajoutez l huile d olive et le lait tout en laissant fonctionner l appareil pendant 1 min 30 s Passez en vitesse 1 et ajoutez les tomates séchées la feta et les olives Salez et poivrez Versez la préparation dans le moule et faites cuire pendant 30 à 40 min Mayonnaise Ingrédients 1 jaune d œuf 1 cuillère à soupe de moutarde 1 cuillère à café de vinaigre 2...

Page 18: ... been designed for indoor and domestic use only and at an altitude below 2000 m Do not use the appliance if it is not working properly or if it has been damaged Contact an authorised service centre see list in the service booklet Any maintenance other than routine cleaning and upkeep by customers must be carried out by an approved service centre see list in the service booklet Always disconnect th...

Page 19: ...l b1 or into the feed tube of the drum body e2 Blades are very sharp to prevent injuries handle them with care when emptying the blender jug or the mini mincer assembling and dismantling the slicer drum A e5 the mini mincer and the mincer head depending on model and when cleaning all those accessories Do not use this appliance to blend or mix non food items Do not pour boiling liquids over 80 C 17...

Page 20: ...r staff kitchen areas in shops offices and otherworking environments farm houses by clients in hotels motels and other residentialtype environments bed and breakfast type environments Refer to the instructions to obtain the operating time and speed settings for each accessory Refer to the instructions for correct fitting and assembly of your accessories Refer to the instructions for initial and re...

Page 21: ...unless they are aged from 8 years and above and supervised Keep the appliance and its cord out of reach of children aged less than 8 years On connection to power supply Check that the power rating of your appliance corresponds to your electrical supply Any incorrect connection invalidates the guarantee Never pull the power cord to disconnect the appliance The appliance must be unplugged when no lo...

Page 22: ... appliance Intermittent operation pulse turn the speed selector a1 to the pulse position Using a succession of pulses can give you better control when preparing certain foods Continuous operation turn the speed selector a1 to the desired position from 1 to 4 depending on the food you are preparing You can change the speed required during preparation To stop the appliance turn the selector a1 to 0 ...

Page 23: ...top the appliance turn the selector a1 to 0 Tips Kneading Use the kneader c1 at speed 1 only You can knead up to 500 g strong bread flour for bread dough e g white bread whole grain bread etc 400 g flour for speciality types of bread French flour above type T55 rye bread whoelmeal bread 250 g flour for enriched yeast dough and pastry dough brioche kouglof pizza dough shortcrust pastry etc 750 g fl...

Page 24: ... with the measuring cap d3 by rotating it clockwise 2 2 USAGE Start by turning the selector a1 to the desired speed according to the recipe Use the Pulse position for better mixing control and for a better blending of your preparation You can add food after removing the measuring cap d3 from the lid d2 during preparation To stop the appliance turn the selector a1 to 0 Tips Use the blender jug d at...

Page 25: ...ntil it latches with the feed tube in the vertical position Lock the bowl b1 anti clockwise on the appliance Make sure that the cover a6 is correctly in place on the high speed outlet a5 3 2 USAGE AND TIPS Run the appliance by turning the selector a1 to speed 3 Maximum operating time 10 min Place the food in the feed tube on the body and press down with the pusher e3 Never push the ingredients wit...

Page 26: ...e disposed of in accordance with the recycling measures in force in your area For disposing of the appliance itself please contact the appropriate service of your local authority END OF LIFE ELECTRICAL OR ELECTRONIC PRODUCTS EN CLEANING Unplug the appliance Never immerse the motor unit a in water or put it under running water Wipe it with a dry or slightly damp cloth For easier cleaning rinse the ...

Page 27: ...in a preheated oven at 230 c for 15 minutes and then reduce to 190 C and bake for a further 15 minutes Butter shortcrust pastry Ingredients 200 g flour plain 100 g softened butter cut into pieces 50 ml cold water 1 pinch of salt Put the flour butter and salt in the bowl Fit the kneader and the lid Run for a few seconds at speed 1 and add water with the appliance running Continue to knead until the...

Page 28: ... powder or 4 level tsp baking powder 100 ml cold milk 50 ml olive oil 12 dried tomatoes 200 g feta cheese 15 destoned green olives cut into pieces salt pepper Preheat the oven to 180 C Butter and flour a loaf tin Put the flour eggs and baking powder in the bowl Fit the kneader and the lid Start at speed 1 and then increase to speed 3 Add the olive oil and milk with the appliance running for one an...

Page 29: ...chadigd is Richt u in dit geval tot een erkend servicecentrum zie lijst in het serviceboekje Met uitzondering van de gebruikelijke reinigings en onderhoudswerkzaamheden die de klant zelf kan uitvoeren dienen alle werkzaamheden door een erkend centrum te worden uitgevoerd zie lijst in het serviceboekje Trek altijd de stekker van het apparaat uit het stopcontact wanneer u het onbewaakt achterlaat en...

Page 30: ...en en de hakkop monteert demonteert alsook wanneer u deze accessoires reinigt afhankelijk van het model Gebruik dit apparaat nooit om andere bestanddelen te bereiden dan voedingsingrediënten Giet geen kokende vloeistof van meer dan 80 C 176 F in de kommen b1 en d1 afhankelijk van het model Giet altijd eerst de vloeibare ingrediënten in de mengbeker afhankelijk van het model en voeg dan pas de vast...

Page 31: ...toren en andere arbeidsomgevingen door gasten van hotels motels of andere verblijfsvormen Raadpleeg de gebruiksaanwijzing om de snelheden in te stellen en voor de werkingsduur van elk accessoire Raadpleeg de gebruiksaanwijzing voor het in elkaar zetten en om de accessoires op het apparaat te monteren Raadpleeg de gebruiksaanwijzing voor de eerste en periodieke reiniging van de onderdelen die in co...

Page 32: ...en het apparaat niet als speelgoed gebruiken Dit apparaat mag niet worden gebruikt door personen waarvan de lichamelijke zintuiglijke of geestelijke vermogens verminderd zijn of door personen zonder enige ervaring of kennis tenzij zij onder toezicht staan of van tevoren instructies hebben gekregen over het veilige gebruik van het apparaat en er de mogelijke gevaren van inzien Accessoires afhankeli...

Page 33: ...mogelijkheden Onderbroken werking pulse draai de snelheidsregelaar a1 met opeenvolgende impulsen naar de stand pulse voor een betere controle van de bereidingen Continu werking draai de snelheidsregelaar a1 naar de gewenste stand van 1 naar 4 afhankelijk van de gewenste bereiding U kunt deze wijzigen tijdens de bereiding Om het apparaat stop te zetten draait u de knop a1 weer naar 0 en trekt u de ...

Page 34: ...1 enkel op snelheid 1 De max hoeveelheden die u kunt kneden 500 g bloem voor brooddeeg bv wit brood granenbrood 400 g bloem voor speciaal brood bloem met een T nummer vanaf 55 T55 roggebrood volkorenbrood 250 g bloem voor gistdeeg brioche tulband pizzadeeg kruimeldeeg 750 g bloem voor melkbrood zie basisrecept Maximale werkingstijd 13 min Volg voor een geslaagd resultaat de instructies getoond in ...

Page 35: ...an de mixer en een gladdere bereiding U kunt tijdens de bereiding ingrediënten toevoegen door de doseerstop d3 van het deksel d2 te nemen Zet de knop a1 weer op 0 om het apparaat uit te schakelen Tips Gebruik de mixkom d van snelheid 3 tot 4 Maximale werkingstijd 3 min Wat u kunt bereiden Fijngemixte soepen roomsoepen stamppotten milkshakes cocktails Licht beslag pannenkoeken beignets wafels Als d...

Page 36: ...ntroleer of de klep a6 goed is bevestigd op de snelle uitgang a5 3 2 INSCHAKELEN EN TIPS Schakel in door de regelaar a1 op snelheid 3 te plaatsen Maximale werkingstijd 10 min Steek de ingrediënten in de trechter van het magazijn en duw ze erdoor met de drukstaaf e3 Duw de ingrediënten er nooit in met de vingers of keukengerei Zet de regelaar a1 weer op 0 om het apparaat uit te schakelen Wacht tot ...

Page 37: ...or recycling Vraag voor het wegwerpen van het apparaat om inlichtingen bij de bevoegde dienst in uw gemeente ELEKTRISCHE OF ELEKTRONISCHE PRODUCTEN AAN HET EINDE VAN DE LEVENSDUUR REINIGING Trek de stekker uit het stopcontact Dompel het motorblok a nooit onder in water en hou het niet onder de kraan Neem het af met een droge of enigszins vochtige doek Spoel de accessoires af snel na gebruik voor e...

Page 38: ...n de koelkast voor u hem uitrolt en bakt Melkbrood Ingrediënten 500 g bloem 1 ei 80 g zachte boter in stukken 80 g suiker 250 ml lauwe melk 5 g gedroogde bakkersgist 1 snufje zout Doe alle ingrediënten in de kom Plaats de kneedarm en het deksel Laat ongeveer 8 min werken op snelheid 1 Laat het deeg ongeveer 1 uur rusten op kamertemperatuur en kneed het dan met de hand Snij kleine stukken van het d...

Page 39: ...t de bereiding in de vorm en laat 30 tot 40 min bakken Mayonaise Ingrediënten 1 eidooier 1 eetlepel mosterd 1 theelepel azijn 250 ml olie peper en zout Opgelet alle ingrediënten moeten op kamertemperatuur zijn Doe alle ingrediënten met uitzondering van de olie in de kom Plaats de meerdradige garde en het deksel Start op snelheid 1 en begin de olie in een dun straaltje toe te voegen Ga na 10 sec na...

Page 40: ...sicherzustellen dass sie nicht mit dem Gerät spielen Dieses Gerät ist ausschließlich für den haushaltsüblichen Gebrauch in geschlossenen Räumen und in Höhenlagen unter 2000 m vorgesehen Benutzen Sie das Gerät nicht wenn es nicht richtig funktioniert oder wenn es beschädigt wurde Wenden Sie sich in diesem Fall an eine autorisierte Kundendienstwerkstatt siehe Liste im Serviceheft Alle Eingriffe die ...

Page 41: ... oder in den Einfüllstutzen des Trommellagers e2 ein Die Schneiden sind sehr scharf Seien Sie bei deren Handhabung beim Entleeren der Schüssel d und des Mini Zerkleinerers beim Anbringen Entfernen der Trommel A zum Schneiden e5 des Mini Zerkleinerers und des Fleischwolfs sowie während der Reinigung dieser Zubehörteile vorsichtig um Verletzungen zu vermeiden Zubehör je nach Modell Benutzen Sie das ...

Page 42: ...ie Rührschüssel und Krug b1 d1 nicht als Behälter zum Tiefgefrieren Kochen Sterilisieren Dieses Gerät ist ausschließlich für die Verwendung in privaten Haushalten bestimmt Die Garantie erstreckt sich nicht auf die Verwendungen in Umgebungen wie beispielsweise Kochecken für das Personal in Geschäften Büros oder sonstigen Arbeitsumfeldern landwirtschaftlichen Anwesen den Gebrauch durch Gäste in Hote...

Page 43: ...hrung mit sich drehenden Geräteteilen einer Wärmequelle oder einer scharfen Kante kommen Wenn Stromkabel oder Stecker beschädigt sind darf das Gerät keinesfalls verwendet werden Aus Sicherheitsgründen dürfen diese Teile nur in einer autorisierten Kundendienstwerkstatt ausgetauscht werden siehe Liste im Serviceheft NUR FÜR DEN EUROPÄISCHEN MARKT Mit allen Zubehörteilen je nach Modell außer dem Schn...

Page 44: ...n DE Anweisungen zur sicheren Handhabung des Gerätes erhalten und verstehen dessen mögliche Gefahren Zubehörteilen je nach Modell wie Schneebesen c3 oder Raspel e6 e7 e8 e9 Diese Geräte dürfen von Kindern benutzt werden die mindestens 8 Jahre alt sind sofern sie beaufsichtigt werden oder Anweisungen zur sicheren Benutzung des Geräts erhalten haben und wenn sie die sich daraus ergebenden Risiken ve...

Page 45: ...a1 zurück auf Position 0 Tipps Kneten Verwenden Sie den Teighaken c1 ausschließlich auf Rührstufe 1 Sie können folgende Höchstmengen kneten 500 g Mehl für Brotteige z B Weißbrot Vollkornbrot DE Die Nummerierung der Absätze entspricht der Nummerierung der eingerahmten Abbildungen Sie haben mehrere Betriebsarten zur Auswahl Intervallbetrieb Pulse Stellen Sie den Geschwindigkeitsregler a1 auf Pulse D...

Page 46: ...und heben Sie diesen an Ziehen Sie das Zubehör c1 c2 oder c3 aus dem Multifunktionskopf heraus Entfernen Sie die Rührschüssel 2 GLATT RÜHREN MISCHEN FEIN MIXEN JE NACH MODELL Je nach Art der Zutaten können im Mixaufsatz d bis zu 1 l dickflüssige Zubereitungen und 0 75 l flüssige Zubereitungen gemixt werden VERWENDETES ZUBEHÖR Mixkrug d 2 1 ANBRINGEN DES ZUBEHÖRS ABBILDUNGEN 2 Klappen Sie den Multi...

Page 47: ...ILDUNGEN 3 Drücken Sie die Taste a3 zum Entriegeln des Multifunktionskopfes a4 und heben Sie diesen bis zum Anschlag an Bringen Sie den Aufsatz e1 auf der Unterseite des Multifunktionskopfes a4 an Die linke Markierung des Aufsatzes e1 muss sich dabei gegenüber der Markierung des Multifunktionskopfes a4 befinden dann drehen Sie den Aufsatz e1 bis sich seine rechte Markierung gegenüber jener des Mul...

Page 48: ...l getränktem Tuch ab und reinigen Sie sie anschließend wie üblich Mixaufsatz d Gießen Sie heißes Wasser mit ein paar Tropfen Spülmittel in den Mixkrug Schließen Sie den Deckel Setzen Sie ihn auf das Gerät und schalten Sie es mehrmals auf Intervallbetrieb Nach Abnehmen des Mixkruges spülen Sie ihn unter fließendem Wasser dann auf den Kopf gestellt trocknen lassen DE Zum Ausschalten des Gerätes stel...

Page 49: ...ie das Mehl die Butter und das Salz in die Rührschüssel Setzen Sie den Teighaken und den Deckel ein Schalten Sie einige Sekunden auf Stufe 1 geben Sie dann bei laufendem Gerät das Wasser bei Lassen Sie das Gerät weiterkneten bis eine schöne Teigkugel entsteht Packen Sie diese in Frischhaltefolie und lassen Sie sie ca eine halbe Stunde im Kühlschrank ruhen bevor Sie sie ausrollen und backen Achtung...

Page 50: ...0ml kalte Milch 50ml Olivenöl 12 getrocknete Tomaten 200g Feta 15 entkernte und zerstückelte grüne Oliven Salz Pfeffer Den Backofen auf 180 C vorheizen Die Cake Form ausfetten und mit Mehl bestäuben Geben Sie das Mehl die Eier und das Backpulver in die Rührschüssel Setzen Sie den Flachrührer und den Deckel ein Beginnen Sie auf Stufe 1 und erhöhen Sie dann auf Stufe 3 Geben Sie das Olivenöl und die...

Page 51: ...σπιτιούκαισευψόμετροχαμηλότεροτων2000m Μη χρησιμοποιείτε τη συσκευή εάν δεν λειτουργεί σωστά ή έχει υποστεί ζημιά Σετέτοιαπερίπτωση επικοινωνήστεμεέναεξουσιοδοτημένοκέντρο σέρβις δείτετηλίσταστοφυλλάδιοσέρβις Εκτός από τις τακτικές εργασίες καθαρισμού και συντήρησης που εκτελούνται από τον χρήστη οποιαδήποτε άλλη επέμβαση πρέπει να ανατίθεται σε ένα εξουσιοδοτημένο κέντρο σέρβις δείτε τη λίστα στο...

Page 52: ... τη συναρμολόγηση αποσυναρμολόγηση του τύμπανου A κοπής σε φέτες e5 του μίνι εξαρτήματος άλεσης και της κεφαλής άλεσης καθώς και κατά τον καθαρισμό αυτών των εξαρτημάτων εξαρτημάτωντουανάλογαμετομοντέλο Μη χρησιμοποιείτε ποτέ αυτή τη συσκευή για να παρασκευάζετε άλλα στοιχείαεκτόςαπόείδηδιατροφής Μηρίχνετεβραστόυγρό μεθερμοκρασίαυψηλότερητων80 C 176 F στα δοχεία b1καιd1ανάλογαμετομοντέλο Ρίχνετεπά...

Page 53: ...η Σε χώρους κουζίνας που χρησιμοποιούνται από το προσεωπικό σε καταστήματα γραφείακαιάλλαεπαγγελματικά Σεαγροκτήματα Γα χρήση από πελάτες ξενοδοχείων πανδοχείων και άλλα οικιστκά περιβάλλοντα Σεπεριβάλλοντατύπουενοικιαζόμενωνδιαμερισμάτων Ανατρέξτε στις οδηγίες χρήσης για τη ρύθμιση της ταχύτητας και το χρόνο λειτουργίαςκάθεεξαρτήματος Ανατρέξτεστιςοδηγίεςχρήσηςγιατησυναρμολόγησηκαιτοποθέτησητων ε...

Page 54: ...τησυσκευήκαιτοκαλώδιότηςμακριάαιόπαδιά Ταπαιδιάδενπρέπειναχρησιμοποιούνσυσκευήωςπαιχνίδι Η παρούσα συσκευή μπορεί να χρησιμοποιηθεί από άτομα με μειωμένες σωματικές αισθητήριεςήδιανοητικέςικανότητεςήάτομαμεελλιπήεμπειρία ή γνώση ως προς τη χρήση υπό την προϋπόθεση η χρήση να γίνεται υπό επιτήρηση ή να έχουν λάβει οδηίες σχετικά με την ασφαλή χρήση της συσκευήςκαινακατανοούνπλήρωςτουςπιθανούςκινδύν...

Page 55: ...πουνάδα Ξεπλύνετε και στεγνώστε Τοποθετήστε τη συσκευή πάνω σε μια επίπεδη καθαρή και στεγνή επιφάνεια βεβαιωθείτε ότι ο διακόπτης a1 είναι στη θέση 0 και κατόπιν συνδέστε τη συσκευή στο ρεύμα Για να θέσετε τη συσκευή σε λειτουργία υπάρχουν διάφορες δυνατότητες Διακεκομμένηλειτουργία pulse Γυρίστε τον διακόπτη a1 στη θέση pulse για διακεκομμένη λειτουργία που επιτρέπει τον καλύτερο έλεγχο των μειγ...

Page 56: ...ετε τροφές μέσω του στομίου του καπακιού b2 κατά τη διάρκεια της επεξεργασίας Για να διακόψετε τη λειτουργία της συσκευής γυρίστε το κουμπί a1 στο 0 Συμβουλές Ζύμωμα Να χρησιμοποιείτε το άγκιστρο ζύμης c1 στην ταχύτητα 1 μόνο Μπορείτε να ζυμώσετε έως 500 γρ αλεύρι για ζύμη για ψωμί π χ Λευκό ψωμί ψωμί με δημητριακά 400g αλεύρι πολυτελείας ψωμί σίκαλης ψωμί ολικής άλεσης κ λπ 250 γρ αλεύρι για ζύμη...

Page 57: ...υργία τη συσκευή περιστρέφοντας τον διακόπτη a1 στην επιθυμητή ταχύτητα ανάλογα με τη συνταγή Για τον καλύτερο έλεγχο της ανάμειξης και καλύτερη ομογενοποίηση του μείγματος χρησιμοποιήστε τη θέση Pulse Μπορείτε να προσθέτετε τροφές μέσω του στομίου του πώματος δοσομέτρησης d3 αφού πρώτα το αφαιρέσετε του καπακιού d2 κατά τη διάρκεια της επεξεργασίας Για να διακόψετε τη λειτουργία της συσκευής γυρί...

Page 58: ... έως ότου να ασφαλίσει περιστρέφοντας αριστερόστροφα Ασφαλίστε το μπολ b1 περιστρέφοντας αριστερόστροφα στη συσκευή Βεβαιωθείτε ότι το κάλυμμα a6 είναι σωστά τοποθετημένο στην ταχεία έξοδο a5 3 2 ΈΝΑΡΞΗ ΛΕΙΤΟΥΡΓΙΑΣ ΚΑΙ ΣΥΜΒΟΥΛΕΣ Θέστε σε λειτουργία τη συσκευή γυρνώντας τον διακόπτη a1 στην ταχύτητα 3 Μέγιστος χρόνος λειτουργίας 10 λεπτά Εισαγάγετε τις τροφές μέσα στο στόμιο πλήρωσης του γεμιστήρα ...

Page 59: ...ια την απόρριψη της συσκευής ζητήστε πληροφορίες από την αρμόδια υπηρεσία του δήμου σας ΗΛΕΚΤΡΟΝΙΚΑ Ή ΗΛΕΚΤΡΙΚΑ ΠΡΟΪΟΝΤΑ ΣΤΟΤΕΛΟΣΤΗΣ ΖΩΗΣΤΟΥΣ ΚΑΘΑΡΙΣΜΟΣ Αποσυνδέστε τη συσκευή από το ρεύμα Μη βυθίζετε ποτέ την κεντρική μονάδα a σε νερό ή στον νεροχύτη Σκουπίστε την με ένα στεγνό ή ελαφρώς βρεγμένο πανί Για πιο εύκολο καθαρισμό να ξεπλένετε γρήγορα τα εξαρτήματα αμέσως μόλις τα χρησιμοποιήσετε Ναχε...

Page 60: ...μης και το καπάκι Θέστε τη συσκευή σε λειτουργία στην ταχύτητα 1 για μερικά δευτερόλεπτα και μετά προσθέστε το νερό αφήνοντας τη συσκευή να λειτουργεί Συνεχίστε το ζύμωμα έως ότου να δημιουργηθεί μια καλοσχηματισμένη μπάλα ζύμης Καλύψτε την μπάλα ζύμης με μεμβράνη τροφίμων και αφήστε την να ξεκουραστεί για μισή ώρα περίπου προτού την πλάσετε και την ψήσετε Τσουρέκια Συστατικά 500 γρ αλεύρι 1 αβγό ...

Page 61: ... 3 Προσθέστε το ελαιόλαδο και το γάλα και αφήστε τη συσκευή να λειτουργήσει για 1 λεπτό και 30 δευτ Επιστρέψτε στην ταχύτητα 1 και προσθέστε τις λιαστές ντομάτες τη φέτα και τις ελιές Αλατοπιπερώστε Προσθέστε το μείγμα σε μια φόρμα για κέικ και ψήστε το στον φούρνο για 30 έως 40 λεπτά περίπου Μαγιονέζα Συστατικά 1 κρόκος αβγού 1 κουταλιά της σούπας μουστάρδα 1 κουταλιά του γλυκού ξύδι 250 ml λάδι ...

Page 62: ... domestico all interno dell abitazione e a un altitudine inferiore ai 2000 m Non utilizzare l apparecchio nel caso non funzioni correttamente o sia stato danneggiato In tal caso rivolgersi a un centro assistenza autorizzato vedere l elenco nel libretto Eventuali interventi diversi dalla pulizia e dalle normali operazioni di manutenzione effettuate dal cliente devono essere svolti presso un centro ...

Page 63: ...e d e del mini tritatutto durante il montaggio smontaggio del rullo A per affettare e5 del mini tritatutto e della testa tritatutto e durante la pulizia di questi accessori accessori secondo il modello Non utilizzare mai l apparecchio per preparare ingredienti non alimentari Non versare liquido bollente di temperatura superiore a 80 C 176 F nei recipienti b1 e d1 secondo il modello Per primi versa...

Page 64: ...fici e in altri ambienti professionali nelle fabbriche dai clienti di alberghi motel e altre strutture ricettive residenziali in ambienti tipo camere per vacanze Consultare le istruzioni d uso per la regolazione delle velocità e il tempo di funzionamento di ogni accessorio Consultare le istruzioni d uso per l assemblaggio e il montaggio degli accessori dell apparecchio Consultare le istruzioni d u...

Page 65: ... l apparecchio come un giocattolo Questo apparecchio può essere utilizzato da persone le cui abilità fisiche sensoriali o mentali risultino ridotte o che abbiano insufficienti esperienze e conoscenze a condizione che una persona provveda alla loro sorveglianza o le abbia precedentemente istruite su un uso sicuro dell apparecchio e a condizione che ne abbiano compreso i potenziali rischi I accessor...

Page 66: ...posizione 0 quindi collegare l apparecchio Per avviare l apparecchio vi sono diverse possibilità Funzionamento intermittente Pulse ruotare la manopola di regolazione a1 sulla posizione Pulse per un funzionamento a intermittenza che consente di controllare meglio alcune preparazioni Funzionamento continuo ruotare la manopola di regolazione a1 sulla posizione desiderata da 1 a 4 a seconda della prep...

Page 67: ...ti attraverso l apertura del coperchio b2 Per arrestare l apparecchio riportare la manopola a1 sullo 0 Consigli Impastare Utilizzare l impastatore c1 esclusivamente alla velocità 1 È possibile impastare fino a 500 g di farina per la pasta per il pane es pane bianco pane ai cereali 400 g de farine pour les pain spéciaux farine dont le type est supérieur à 55 T55 pain de seigle pain complet 250 g di...

Page 68: ...occare il coperchio d2 munito di tappo dosatore d3 ruotando in senso orario 2 2 ACCENSIONE Avviare l apparecchio ruotando la manopola di regolazione a1 sulla velocità desiderata a seconda della ricetta Per frullare e omogeneizzare al meglio la preparazione selezionare la modalità Pulse In corso di preparazione è possibile aggiungere degli alimenti rimuovendo il tappo dosatore d3 dal coperchio d2 P...

Page 69: ...llo e spingere nuovamente Riportare l imboccatura del caricatore in posizione verticale fino all arresto girando in senso antiorario Fissare il contenitore b1 senso antiorario sull apparecchio Accertarsi che il coperchietto a6 sia correttamente fissato sull attacco rapido a5 3 2 ACCENSIONE E CONSIGLI Azionare l apparecchio ruotando la manopola di regolazione a1 sulla velocità 3 Tempo massimo di fu...

Page 70: ...formità alle vigenti norme in materia di riciclaggio Per lo smaltimento dell apparecchio rivolgersi al servizio competente della propria zona PRODOTTI ELETTRONICI O ELETTRICI NON PIÙ UTILIZZABILI PULIZIA Scollegare l apparecchio Non immergere né mettere sotto l acqua corrente il blocco motore a Pulirlo con un panno asciutto o leggermente umido Per una pulizia più agevole sciacquare velocemente gli...

Page 71: ...ionare l apparecchio alla velocità 1 per qualche secondo quindi versare l acqua lasciando in funzione l apparecchio Lasciare che l apparecchio continui a impastare fino alla formazione di una palla omogenea Avvolgerla nella pellicola per alimenti e lasciarla riposare al fresco per circa mezz ora prima di stenderla e farla cuocere Pane al latte Ingredienti 500 g di farina 1 uovo 80 g di burro morbi...

Page 72: ...Azionare l apparecchio alla velocità 1 poi aumentare fino alla velocità 3 Quindi aggiungere l olio d oliva e il latte Lasciar l apparecchio lavorare per 1 minuto e 30 secondi Passare alla velocità 1 e aggiungere i pomodori secchi la feta e le olive Aggiungere sale e pepe Versare il preparato nello stampo e cuocere per 30 40 min Maionese Ingredienti 1 tuorlo d uovo 1 cucchiaio di senape 1 cucchiain...

Page 73: ...méstico no interior de sua casa e a uma altitude inferior a 2000 m Não utilize o aparelho se este não funcionar correctamente ou se se encontrar de alguma forma danificado Neste caso contacte um Serviço de Assistência Técnica autorizado consulte a lista no folheto de Serviços de Assistência Técnica Qualquer intervenção para além da limpeza e manutenção habituais pelos clientes deve ser executada p...

Page 74: ...iar o copo d ao montar desmontar o tambor A cortar em fatias e5 da mini picadora e da cabeça picadora e aquando da limpeza destes acessórios acessórios consoante o modelo Nunca utilize este aparelho para preparar outras substâncias que não produtos alimentares Não deite líquido a ferver temperatura superior a 80 C 176 F na taça nem no copo b1 e d1 consoante o modelo Deite sempre os ingredientes lí...

Page 75: ...s nas lojas escritórios e outros ambientes profissionais em quintas pelos clientes de hotéis motéis e outros ambientes de carácter residencial em ambientes do tipo quartos de hóspedes Consulte as indicações de ajuste das velocidades e tempos de funcionamento de cada acessório nas Instruções de Utilização Consulte as indicações de montagem e instalação dos acessórios nas Instruções de Utilização Co...

Page 76: ... crianças As crianças não devem utilizar o aparelho como um brinquedo Este aparelho pode ser utilizado por pessoas com capacidades físicas sensoriais ou mentais reduzidas ou cuja experiência ou conhecimentos não sejam suficientes desde que o façam com supervisão ou instruções prévias quanto à utilização segura do aparelho e compreendam bem os potenciais perigos Os acessórios consoante o modelo bat...

Page 77: ...o à corrente Para o colocar em funcionamento dispõe de várias possibilidades Funcionamento intermitente pulse rode o selector a1 para a posição pulse através de impulsos sucessivos para um melhor controlo das preparações Funcionamento contínuo rode o selector a1 para a posição desejada de 1 a 4 consoante as preparações a realizar Pode modificar a selecção durante a preparação Para parar o aparelho...

Page 78: ... aparelho volte a colocar o botão a1 na posição 0 Conselhos Amassar Utilize o gancho c1 apenas na velocidade 1 Pode amassar até 500 g de farinha para massa de pão por ex pão branco pão com cereais etc 400 g de farinha para pães especiais farinha cujo tipo é superior a 55 T55 pão de centeio pão integral 250 g de farinha para massa levedada brioche kouglof massa para pizza massa quebrada etc 750 g d...

Page 79: ...ONAMENTO Comece por rodar o selector a1 para a velocidade desejada consoante a receita Para um melhor controlo da mistura e uma melhor homogeneização da preparação utilize a posição Pulse Pode adicionar os alimentos retirando a tampa doseadora d3 da tampa d2 durante a preparação Para parar o aparelho volte a colocar o botão a1 na posição 0 Conselhos Utilize o copo liquidificador d da velocidade 3 ...

Page 80: ...ra a esquerda Bloqueie a taça b1 para a esquerda no aparelho Certifique se de que a tampa a6 está bem colocada na saída rápida a5 3 2 COLOCAÇÃO EM FUNCIONAMENTO E CONSELHOS Coloque o aparelho em funcionamento rodando o selector a1 para a velocidade 3 Tempo de funcionamento máximo 10 min Introduza os alimentos na chaminé do suporte e oriente os com a ajuda do calcador e3 Nunca empurre os ingredient...

Page 81: ...e com as regras de reciclagem em vigor na sua região Relativamente à eliminação do aparelho contacte o serviço apropriado das autoridades da sua região PRODUTOS ELÉCTRICOS OU ELECTRÓNICOS EM FIM DE VIDA LIMPEZA Desligue o aparelho Nunca mergulhe o bloco motor a em água nem o passe por água corrente Limpe o com um pano seco ou ligeiramente húmido Para limpar mais facilmente enxagúe rapidamente os a...

Page 82: ...velocidade 1 durante alguns segundos e depois deite a água mantendo o aparelho a funcionar Continue a amassar até que a massa forme uma grande bola Coloque a em película alimentar e deixe a repousar no frio durante cerca de hora antes de a estender e cozer Pão de leite Ingredientes 500 g de farinha 1 ovo 80 g de manteiga amolecida 80 g de açúcar 250 ml de leite morno 5 g de fermento de padeiro des...

Page 83: ...oloque o batedor para massa ligeira e a tampa Comece na velocidade 1 e depois aumente para a velocidade 3 Adicione o azeite e o leite mantendo o aparelho a funcionar durante 1 min e 30 s Passe para a velocidade 1 e adicione os tomates secos o queijo feta e as azeitonas Tempere com sal e pimenta Deite a preparação na forma e deixe cozer durante 30 a 40 min Maionese Ingredientes 1 gema de ovo 1 colh...

Page 84: ...ltitudes inferiores a 2000 m No utilice el aparato si no funciona correctamente o si se ha estropeado En este caso diríjase a un centro de servicio oficial consulte la lista en el folleto de servicio Cualquier tarea de mantenimiento salvo las tareas de limpieza y conservación habituales realizadas por el cliente debe llevarse a cabo en un centro de servicio oficial consulte la lista en el folleto ...

Page 85: ...r e5 de la minipicadora y del cabezal picador y durante la limpieza de estos accesorios accesorios según el modelo Nunca utilice este aparato para preparar elementos que no sean alimentos No vierta líquido hirviendo superior a 80 ºC 176 ºF en los recipientes b1 y d1 según el modelo Vierta siempre los ingredientes líquidos en primer lugar en el vaso mezclador según el modelo antes de añadir los ing...

Page 86: ... profesionales en granjas por los clientes de hoteles moteles y demás entornos de tipo residencial en entornos de tipo casas de turismo rural Consulte el manual de instrucciones para ajustar la velocidad y el tiempo de funcionamiento de cada accesorio Consulte el manual de instrucciones para saber cómo montar y desmontar los accesorios en el aparato Consulte el manual de instrucciones para saber c...

Page 87: ...ble de alimentación fuera del alcance de los niños Los niños no deberen jugar con el aparato Este aparato podre ser utilizado por personas con algun tipo de discapacidad fìsica sensorial o mental o sin suficiente conocimiento o experiencia siempre que se las supervise o se les faciliten instrucciones sobre cómo usarlo con total seguridad y entiendan bien los posibles riesgos Los accesorios según e...

Page 88: ...termitente pulse gire el botón regulador a1 hacia la posición pulse impulsos sucesivos para conseguir un mejor control de las preparaciones Marcha continua gire el botón regulador a1 hacia la posición deseada de 1 a 4 en función de las preparaciones que realice Puede modificar esta posición durante la preparación Para detener el aparato vuelva a poner el botón a1 en 0 y a continuación desconecte e...

Page 89: ... receta Puede añadir los alimentos por el orificio de la tapa b2 durante la preparación Para detener el aparato devuelva el botón a1 a la posición 0 Consejos Amasar Utilice el amasador c1 únicamente con la velocidad 1 Puede amasar hasta 500 g de harina para masas de pan ej pan blanco pan con cereales etc 400 g de harina para panes especiales harina con un tipo superior a 55 T55 pan de centeno pan ...

Page 90: ... alimentos en el vaso mezclador y acople la tapa d2 con el tapón dosificador d3 girándola en el sentido de las agujas del reloj 2 2 PUESTA EN MARCHA Ponga en marcha el aparato girando el botón regulador a1 hasta la velocidad deseada en función de la receta Para un mejor control de la mezcla y una mejor homogeneización de la preparación utilice la posición Pulse Puede añadir alimentos durante la pr...

Page 91: ...indro y encájelo de nuevo Vuelva a poner el tubo del depósito en posición vertical hasta el punto de bloqueo girándolo en sentido contrario a las agujas del reloj Acople el vaso b1 en el aparato girando en sentido contrario a las agujas del reloj Compruebe que la trampilla a6 esté correctamente colocada en la salida rápida a5 3 2 PUESTA EN MARCHA Y CONSEJOS Ponga el aparato en marcha girando el bo...

Page 92: ...tiva de reciclaje vigente Para deshacerse del aparato contacte con el servicio correspondiente de su municipio PRODUCTOS ELECTRÓNICOS O ELÉCTRICOS AL FINAL DE SU VIDA ÚTIL LIMPIEZA Desenchufe el aparato No sumerja el bloque motor a en agua ni lo ponga bajo el agua corriente Límpielo con un trapo seco o un poco húmedo Para facilitar la limpieza aclare rápidamente los accesorios después de su uso Ma...

Page 93: ...a Ponga el aparato en funcionamiento durante unos segundos a la velocidad 1 y añada agua mientras lo mantiene funcionando Continúe amasando hasta que la masa forme una gran bola Póngala en plástico transparente para envolver alimentos y deje que repose en frío durante aproximadamente hora antes de extenderla y cocerla Pan de leche Ingredientes 500 g de harina 1 huevo 80 g de mantequilla blanda cor...

Page 94: ...el aparato en funcionamiento a la velocidad 1 y a continuación aumente hasta la velocidad 3 Añada el aceite de oliva y la leche mientras mantiene el aparato funcionando durante 1 min 30 s Cambie a la velocidad 1 y añada los tomates secos el queso feta y las aceitunas Salpimiente Vierta la preparación en el molde y cocine durante un tiempo entre 30 y 40 min Mayonesa Ingredientes 1 yema de huevo 1 c...

Page 95: ... e b Ë D O s u l D O s i U Ø O M Z U Ë œ w u U Ô d Ø V F π U W Ë G D U Ô A G Ò q L M Z K v º d W 1 r Ô d l º d W v 3 Ô C U X e u Ê Ë K O V M U A G O q L M Z L b œ Æ O I W Ë B n î H n º d W v 1 r n D L U r L Ô π H H W M W O U Ë e u Ê n L K Ë H K H q ß J V L e Z w I U V L F b w Ë î e Á L b 0 3 0 4 œ Æ O I W L U u O e L J u U Å H U O C W Ë b K F I W Å G O d s ª d œ K F I W Å G O d s ª q 0 5 2 K K d s...

Page 96: ...K u l D O s L K Ë e b w u U Ô d Ø V F π U W Ë G D U Ô A G Ò q L M Z C l u Ê K v º d W 1 r Ô C U L U M U A G O q U l v Ê b Ø d F π O s U J u Ò Ê r Ô G D v F π O M W U u A H U Ë Ô d d U Õ w J U Ê U œ L b B n ß U W Æ q Ê Ô K n Ë Ô ª e î e U K O V L J u U 0 0 5 d  O s O C W Ë b 0 8 d  b Ô ª H Ò H W Ô I D F Ò W Æ D F U Î Å G O d 0 5 2 K K d K O V œ v 5 d  s î L O d H d Ê π U W W K u l L O l L J u U ...

Page 97: ...d v ù B U L d Ø e î b W Ô F L b Ë º K O L t K I º r L ª h w K b W L K O W w K b ª K h s L M π U J N d U z O W M E O n B q L M Z s O U J N d U z w ô G L d b Î Ë b L d a w L U Ë ô w Í ß U z q î d Ë ô C F N U X L O U Á π U W Ô M E n u ß D W Æ D F W Æ L U W K º N u W w M E O n Ô d v M E O n Ë º q L K I U Ô U d F b ù ß F L U Ô d v F U q l A H d J q d π M U Î û Å U W U π d Ë Õ º q Ë E Ò n L O l L Ô I U ...

Page 98: ... L M Z Ô d v Q Ø b Q Ê G D U 6 a w u F t B O K v ª d à º d W F U O W 5 a 2 3 ß F L U Ë B U z G Ò q L M Z u l L M I w 1 a K v º d W 3 u Æ X _ Æ B v K A G O q 0 1 œ Æ U z o l D F U  w u K I O r K v º r L M Z Ë G j u ß D W b U 3 e ô º F L q Å U F p Ë Í œ w u O t D F U  J w u Æ n L M Z s A G O q l L M I w 1 a K v L u Æ l 0 E d v Ê u Æ n L M Z L U U Î s d Ø W r B K t s O U J N d U z w d º r L M Z F J...

Page 99: ... t ß b œ I O U 3 d b Ë d Á J f π U Á I U º U W 2 2 ù ß F L U b u l L M I w 1 a K v º d W w d b U º V Ë Å H W D N w ß F L q u Æ l A G O q L I D l e s l u p J r C q w L e à C O d p L J M p U W D F U  s î ö H W L u u œ w G D U 2 b M U A G O q J w u Æ n L M Z s A G O q l L M I w 1 a K v L u Æ l 0 B U z ß F L q d o ª ö d K v º d W s 3 v 4 u Æ X _ Æ B v K A G O q 3 œ Æ U z o L J M p C O d u W L e Ë W U...

Page 100: ...w 1 a K v L u Æ l 0 B U z F π s ß F L q F π Ò U Ê 1 c K v º d W 1 I j L J M p F π s º V J L O U U O W 0 0 5 d  s O s ª e ö Î î e O i î e u J U K W a 0 0 4 d  s D O s _ u Ÿ î U Å W s ª e O s K v s u Ÿ 5 5 5 5 T î e π U Ë œ î e s D O s J U q 0 5 2 d  s π O M W ª L O d d u π U u π O M W O e π O M W K u U a 0 5 7 d  O s K ª e U K O V E d u Å H W _ ß U ß O W u Æ X _ Æ B v K A G O q 3 1 œ Æ O I W K ...

Page 101: ...M Z U O U J N d U z w M U p b î O U b A G O q L M Z A G O q L Ô I D l e s l u p l M I w º d W 1 a K v L u Æ l e s l u p ß F L U c M u Ÿ s A G O q L I D l Ô O p J L U Î C q w C O d F i u Ÿ D F U Â A G O q L Ô º L d l M I w º d W 1 a K v L u Æ l s 1 v 4 º V u Ÿ D F U Â Æ O b C O d Ô L J M p G O O d u O W A G O q M U C O d J w u Æ n L M Z s A G O q l L M I w 1 a K v L u Æ l 0 r B q L M Z s O U J N d ...

Page 102: ... L M Z u ß D W _ ª U c s ô L F u Ê I b b O W Ë I K O W Ø U K W Ë L s b N r I h w ª d Ë L F d W d Ê Ò ª C F u K L d Æ W Ë D O u F K O L U Ë ù U œ u W s Ø O H O W ß F L U L M Z D d I W M W Ë œ Ø u _ î D U w Æ b M Z s ù ß F L U ª U v L K I U º V L u œ q L ª H I W 3 c Ë L U d 9 e 8 e 7 e 3 e L J s ß F L U N r u ß D W _ H U c s e b L U r s U M W u d N r L d Æ W Ë Ë Ò œ Ë U ù U œ ö W w ß F L U L M Z D d...

Page 103: ...O q ù ß F L U L F d W d Ø O V Ë H J O p L K I U w π N U Ô d v d F W œ O q ù ß F L U L F d W d I W M E O n K L d _ Ë v Ë L d ù E U O W _ e w N U B U U d U D F U Â Ë Ø O H O W M E O H N U Ë Å O U W π N U u Å O q U O U J N d U z w Ô d v Q Ø b Ê u d J W J N d U M b M U ß V l U u O s w u W F d n L M Z Í u Å O q î U v U O U J N d U z w Ô º I j C L U W s L M Z π V B q L M Z s O U J N d U z w Ê r J s Æ O ...

Page 104: ... I j Ô d v b Â ß F L U t C O d u œ î d È O d D F U  ô º J V º u z q b W G K O U Ê u 0 8 œ W µ u W 6 7 1 œ W N d N U X w u U 1 b Ë 1 d º V L u œ q Ô d v Ê Ô º J V L J u U º U z K W w Ë U ª ö Ë ô Î º V L u œ q Æ q U W L J u U π U b J w π M Ò V U W L J u U î U à u U ô ª D v ö W b _ Æ B v w u U O d O N U ô C l Å U F p Ë Í w î d w Ë U ª ö º V L u œ q M b U J u Ê π N U Æ O b A G O q ô d l G D U Ë ô Ë ...

Page 105: ... d u ß D d ô º F L q L M Z Ê r F b R œ Í L K W A J q Å O Ë Ô D V w c Á U W Ô d v d L M Z K v d Ø e î b W Ô F L b E d I U z L W w Ø O V ª b U I B d b î K p U L M Z K v M E O n Ë B O U W ù O U œ W U ª b U _ î d È ö I u  N U ô d Ø e î b W Ô F L b B q π N U s O U J N d U z w M b d Ø O V Ë M b M E O n Ë M L U Ô d π N U b Ë Ê d Æ W Æ b R œ Í ß F L U π N U D d I W î U µ W û Å U W U π d Ë Õ ô C l L ÔK I ...

Page 106: ...u œ œ Ø U ß t Æ d œ O b î L O d Ö O d Ë œ B V Ø M O b U ß d X 1 d Ë Ÿ Ø M b Ë ß á f t ß d X 3 e g œ b Ë s u Ê Ë d t œ ß U Á œ U Ø U Ø d œ Ê L b J ß U X Ë O r U t Ø M O b ß d X 1 Ø r Ø d œ Á Ë Ö u t d v î A J Ë Ä M d U Ë Ë s u Ê U t Ø M b L J Ë K H q e U t Ø M b ª K u œ Æ u v K v d e b Ë d È 0 3 U 0 4 œ Æ I t á e b U u e u œ 1 ª r d 1 Æ U o c î u È î d œ 1 Æ U o Ç U ª u È ß d Ø t 0 5 2 K v d Ë s L ...

Page 107: ...t Æ d œ O b î L O d Ö O d Ë œ B V Ø M O b d È Ç M b U t œ ß d X 1 Ø U Ø M b t œ ß X Ø d œ Ê î L d U œ ß X b Ê d M v Ö d œ œ t œ b Ê œ Ë Æ t á u U b Ë c b œ j ß d œ d È J ß U X Æ q Ö d œ Ø d œ Ê Ë Ä ª X L U b U Ê d È u œ 0 0 5 Ö d  œ 1 ª r d 0 8 Ö d Â Ø d Á d  b Á œ Æ D F U Ø u Ç J 0 8 Ö d  J d 0 5 2 O K v d d Ö d  5 Ö d  ª L d î A J U Ê Ø L v L J u œ œ Ø U ß t Æ d œ b î L d Ö d Ë œ B V Ø M O ...

Page 108: ...U È U U X Ë M D I t L U œ Ë ª t u œ d È œ Ë ª s œ ß U Á D H U U d Ø e î b U π U K v L U U Å q d U z b Ä U U Ê L d B u ô J d J v Ë J d Ë O J v L e Ø d œ Ê œ ß U Á î U u Ø M b d Ë d œ Ê u u a œ U Æ d œ œ Ê œ d Ë Ê î u œ œ È Ø M O b Ê U Ä U Ç t î A J U Ø L v d u Ä U Ø Ø M O b d È L e Ø d œ Ê ß U Ê d u  U v ß d F U Ä f ß H U œ Á A u z b d È K u Ö d È ß V U œ Æ X t G t U œ ß X e b u  U v A u z b Ë î ...

Page 109: ... u œ Ø U ß t 1 b î ö I d t ß U X œ œ ß U Á Æ H q Ø M O b L M U Ê U Å q Ø M b Ø t Ä u g 6 a D u Å œ q î d Ë v ß d X U ô 5 a Æ d Ö d t ß X 2 3 ß H U œ Á Ë J U M L U œ ß U Á U Ç d î U b Ê Ö e M t 1 a t ß d X 3 Á b b b Ø d U Ê Ø U Ø d œ Ê 0 1 œ Æ I t c œ u t G c t Æ d œ œ Á Ë U Ë ß K t d u t 3 e t Ä U z s A U œ b A U œ œ Ê u œ U A X U d Ë ß K t œ d È Ø O b î u œ œ È Ø M b d È u Æ n Ø d œ Ê œ ß U v Ö e...

Page 110: ... U Ç d î g œ N X I d t ß U X Æ H q Ø M b 2 2 ß H U œ Á U Ç d î U b Ê Ö e M t 1 a t d ß d X u œ E d U u t t œ ß u c È Ø U d Ë Ÿ Ø M b Ë F X e s l u p d È Ø M d î ö N d Ë d Ø V U œ Á ß U v ß H U œ Á Ø M b L U v u b u œ c z v Ä f d œ s œ Ä u b Á Ö d È 3 d œ 2 d œ u U œ Á ß U È U t Ø M b d È u Æ n Ø d œ Ê œ ß U v Ö e M t 1 a D d 0 â d î U b J U Ø u Á ª K u Ø s d œ ß d X 3 t 4 ß H U œ Á Ø M b b Ø d U Ê...

Page 111: ... n œ ß U Á Ö e M t 1 a t d 0 â d î U b J U î L d Ö d È î L d Ö d 1 c I j œ ß d X 1 ß H U œ Á Ø M b L U v u b L q î L d Ø d œ Ê A d Õ q π U  œ b 0 0 5 Ö d  œ d È î L d U Ê ö U Ê ß H b È U Ê Ö M b  î U h d Á 0 0 4 Ö d  œ d È u Ÿ î U U Ê œ U ô d u Ÿ 5 5 5 5 T U Ê Ç U Ë œ U Ê Ø q c 0 5 2 Ö d  œ d È î L d ª L d U Ê M â J Ø u Ö K u î L O d Ä O e î L O d d M v î A p d Á 0 5 7 Ö d  œ d È U Ê d È œ ß...

Page 112: ... Å q Ø M b L U Ç M b Ö e M t d È Á b È œ ß U Á î u œ œ b Á b È M U Ë Ä U f Ö e M t ß d X 1 a º L X Ë F X Ä U f â d î U b U ß H U œ Á Ä U f U È u v v u b Ø M d N d È N M U  U œ Á Ø d œ Ê c U È î U œ t U b Á b È º L d Ö e M t ß d X 1 a D d Ë F X œ ª u Á 1 t 4 d ß U c z v Ø t N t v Ø M b â d î U b L U v u b Ê œ Å u e Ë Â œ s U œ Á ß U È G d œ b d È u Æ n œ ß U v Ö e M t 1 a D d 0 â d î U b Ë ß á f œ...

Page 113: ...ß H U œ Á Ø M M b s œ ß U Á d È ß H U œ Á u ß j d œ  U U u v U È º L v º v U Ë v Ë U u ß j d œ È b Ë Ê π d t Ë U œ g ô  œ E d Ö d t b Á ß X M N U œ Å u v Ø t œ U ß H U œ Á Ê X E U U M b Ë U œ ß u F L q U È d u t u Á ß H U œ Á Ê t J u Á s t N U œ œ Á b Á U b Ë î D d U I u Á œ ß X b Ø U œ Ø Ø M M b u  U v º t t b L e Ê 3 c Ë î d œ Ø s U 9 e 8 e 7 e 6 e Æ U q ß H U œ Á u ß j Ø u œ Ø U Ê 8 ß U Ë U ...

Page 114: ...ß d X Ë U Ê L K J d œ d œ ß U Á d ß v Ø M b M L U È œ ß u F L q œ u œ Ç u v u U Ë B U u  U v t œ ß U Á d ß v Ø M b M L U È œ ß u F L q œ u œ Ç u v L e Ø d œ Ê d È Ë s U Ë t u M E r Æ D F U œ L U U u œ c v Ë u Á L e Ø d œ Ê Ë N b È œ ß U Á d ß v Ø M b B U J d J v D U o Æ b œ ß U Á U U s d î u œ d ß v Ø M b d Ö u t î D U œ B U U œ ß X u V D U L U X î u b b œ ß U Á M U Â ß H U œ Á A b Ê œ s Ä U Ø Ø ...

Page 115: ... Ê d È U œ Á ß U È u œ œ d ß H U œ Á J M b U l u b Á U ô d F 6 7 1 C 0 8 œ Ø U ß t d e b 1 b Ë 1 d º t t b L A t b u œ U l œ Ø U ß t ª K u Ø s d e b º t t b Æ q J t u œ U b U t Ø M b d È K u Ö d È ª s u œ t d Ë Ê ß D b Ø d œ Ø U ß t π U Ë J M b U v Ø t t Ê U Á b Á ß X U v Ø t œ ß U Á Ë s ß X A U Ê œ ß X î u œ U d º r œ d œ Ø U ß t ª K u Ø d œ Ê Æ d b b º t t b œ Ë U Ø U ß t ª K u Ø d œ Ê º t t b K...

Page 116: ...d Ø e î b U π U L U U Å q d U z b º X u u œ œ œ d Ç t î b U Ë X u œ d Ö u t F L d Ë N b È G d L e Ø d œ Ê Ë N b È u ß j A d È U b u ß j d Ø e î b U π U π U  u œ º X u u œ œ œ d Ç t î b U Ë X u œ L A t œ ß U Á œ M U  u U b ß U È Æ D F U Ë L e Ø d œ Ê Ë U Ö d L U Ê v d Æ V d Ø Ø d œ Á b Ä d e d J A b î D d ß V œ b Ö v œ Å u v Ø t œ ß U Á t œ ß v ß H U œ Á A u œ Æ d œ œ Ê u  U v œ U U J d Ë Ë u î ...

Reviews: