- 3 -
Step 4: Use the web-based manager to configure AWK-5222
Open your computer’s web browser and then type
http://192.168.127.253 in the address field to access the homepage of
the web-based management. Before the homepage opens, you will need
to enter the user name and password. For first-time configuration, enter
the default user name and password and then click on the
Login
button:
User name:
admin
Password:
root
ATTENTION
For security reasons, we strongly recommend changing the
password. To do so, select
Maintenance
Password
, and then
follow the on-screen instructions.
Step 5: Select the operation mode for the AWK-5222
By default, the AWK-5222’s operation mode is set to Wireless
Redundancy. You can change the setting in
Wireless Settings
Operation mode
if you would like to use the Wireless Bridge or AP-Client
mode.
NOTE
To make the change effective, you must click
Save
Configuration
to save the change or
Restart
Save
and
Restart
button to apply all changes).
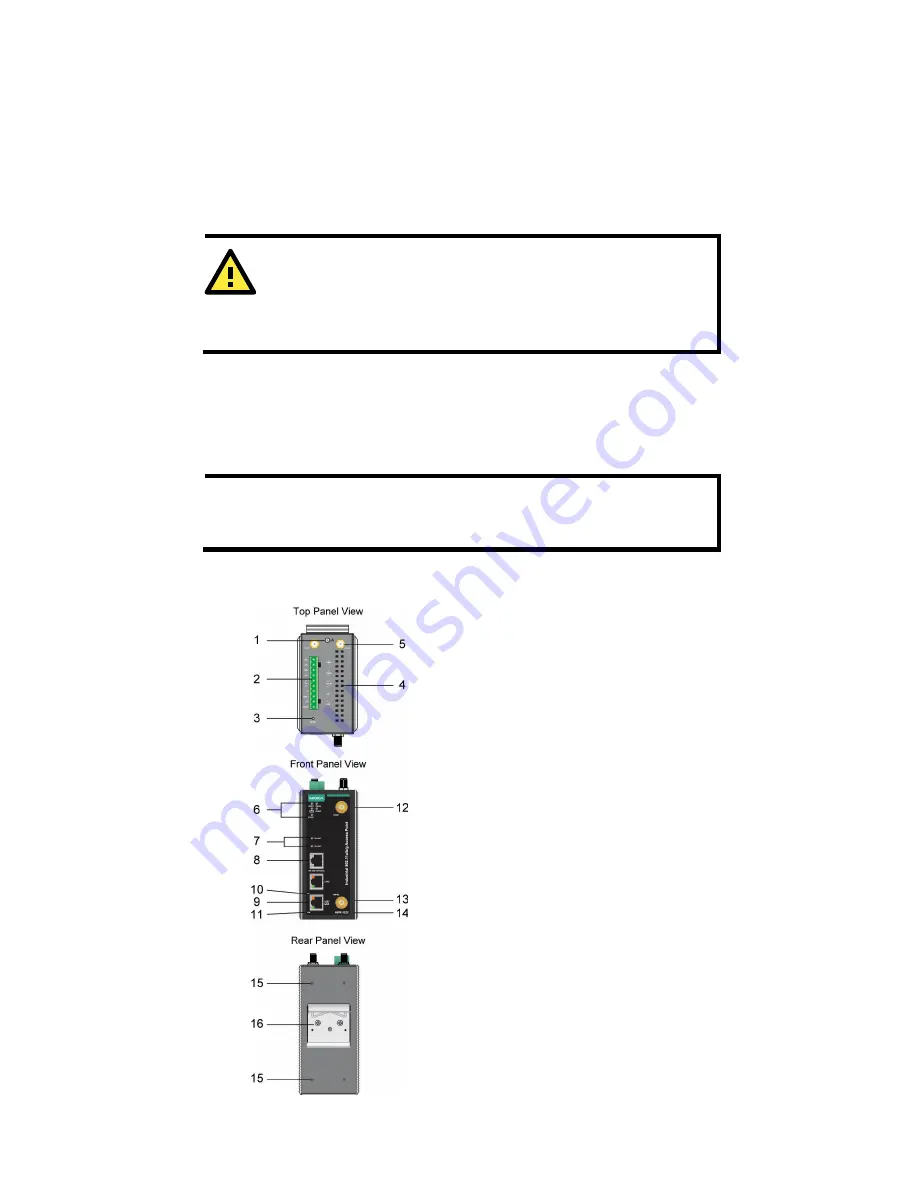
Panel Layout of the AWK-5222
1.
Grounding screw
2.
Terminal block for PWR1, PWR2,
relay, DI1, and DI2
3.
Reset button
4.
Heat dissipation orifices
5.
AUX1 and AUX2 antenna ports
6.
System LEDs: PWR1, PWR2,
PoE, FAULT, and STATE LEDs
7.
WLAN LEDs: WLAN 1 and
WLAN2 LEDs
8.
RS-232 console port
9.
10/100BaseT(X) RJ45 Port :
LAN1 and LAN2
10.
10M LED
11.
100M LED
12.
MAIN 1 antenna port
13.
MAIN 2 antenna port
14.
Model name
15.
Screw hole for wall-mounting kit
16.
DIN-rail mounting kit


