- 9 -
Wiring the Relay Contact
The AWK-5222 has one relay output, which consists of the two contacts of
the terminal block on the AWK-5222’s top panel. Refer to the previous
section for detailed instructions on how to connect the wires to the
terminal block connector, and how to attach the terminal block connector
to the terminal block receptor. These relay contacts are used to indicate
user-configured events. The two wires attached to the Relay contacts
form an open circuit when a user-configured event is triggered. If a
user-configured event does not occur, the Relay circuit will be closed.
Wiring the Digital Inputs
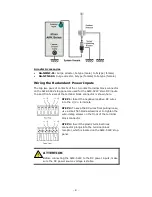
The AWK-5222 has two sets of digital input—DI1 and DI2. Each DI
comprises two contacts of the 10-pin terminal block connector on the
AWK-5222’s top panel. You can refer to the “Wiring the Redundant Power
Inputs” section for detailed instructions on how to connect the wires to
the terminal block connector, and how to attach the terminal block
connector to the terminal block receptor.
Cable Holder Installation (Optional)
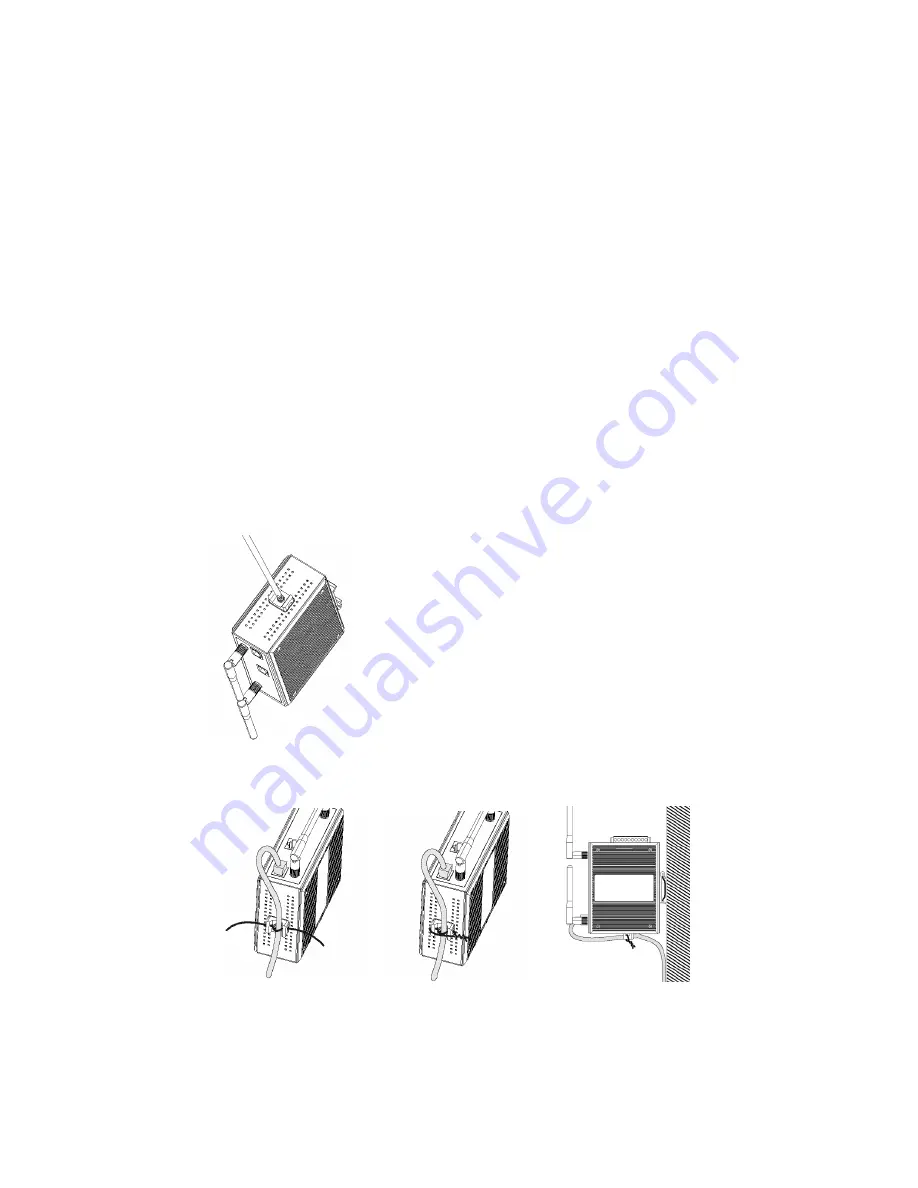
You can attach the cable holder to the bottom of the AWK-5222. This
helps to keep cabling neat and avoid accidents that result from untidy
cables.
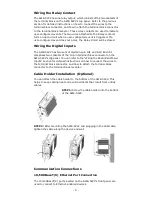
STEP 1:
Screw the cable holder onto the bottom
of the AWK-5222.
STEP 2:
After mounting the AWK-5222 and plugging in the LAN cable,
tighten the cable along the device and wall.
Communication Connections
10/100BaseT(X) Ethernet Port Connection
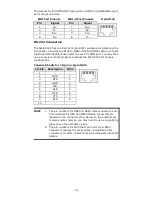
The 10/100BaseT(X) ports located on the AWK-5222’s front panel are
used to connect to Ethernet-enabled devices.


