background image

Troubleshooting

Industio

 CI-134 Series User’s Manual

  6-3


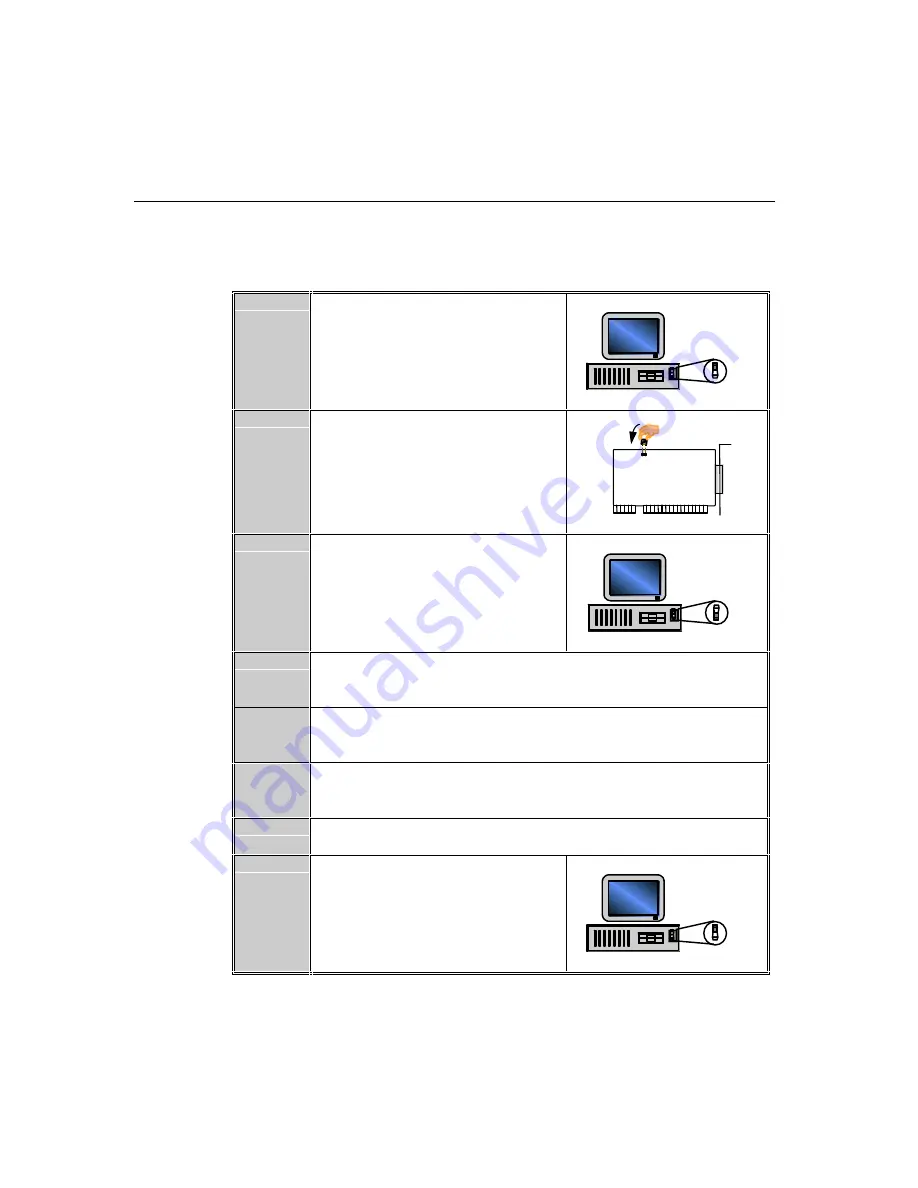
The following procedure instructs user to recover once the CAP is unknown.

Step 1.

 Power off the PC.

OFF

Step 2.

 Install jumper onto the JP1 of the board.

jumper

JP1

Install

Step 3.

 Power on the PC.
 Now the CAP address of the board will be

0xA700.

ON

Step 4.

 Execute Io-irq under DOS environment.

      A:>

 Io-ir q

Step 5.

Enter CAP address 0xA700 to access the board.

      Enter the “Configuration Access Port” in HEX:


A700

Step 6.

The previous hardware configuration will be shown.


Modify them if necessary. Remember the CAP address this time.

Step 7.

 Exit the IO-IRQ.

Step 8.

 Power off the PC.

OFF

Summary of Contents for Industio CI-134 Series

Page 1: ...anual Industrial 4 Port RS 422 RS 485 Serial Board Mar 1999 1st Edition The content of this manual is also available at Moxa Web Site Moxa Technologies Co Ltd Tel 866 2 8665 6373 Fax 886 2 8665 6372 w...

Page 2: ...notice and does not represent a commitment on the part of Moxa Moxa provides this document as is without warrantyof anykind either expressed or implied including but not limited to the particular purp...

Page 3: ...ilt for technical support product inquiry new driver update user s manual update etc The followings are the services we provide E mail for technical support address support moxa com tw FTP site for fr...

Page 4: ...rall installation guide Chapter 2 Hardware Installation Hardware installation for the Industio CI 134 Series boards and connection cable Hardware configuration utility Io irq exe is detailed Chapter 3...

Page 5: ...ardware Configuration 2 5 Software Installation 3 1 Windows NT 3 1 Installing Driver 3 2 Configuring Board and Port 3 7 Updating Driver 3 9 Removing Driver 3 9 Windows 95 98 3 10 Installing Driver 3 1...

Page 6: ...RS 485 Programming 4 10 Automatic Data Direction Control Mode Recommended 4 10 By RTS Mode For back compatibility 4 10 Connection Cable and Cable Wiring 5 1 RS 422 Cable Wiring 5 1 RS 485 Cable Wiring...

Page 7: ...longer distance 4000ft It is best suitable for industrial environment Connections with point to point full duplex or multidrop half duplex are available to meet your needs Each port can connect up to...

Page 8: ...l to harsh environment such as factory ASIC Design Compact Size The Industio CI 134 Series is equipped with MOXA customer designed ASIC chip which replaces lots of conventional IC and hence reduces th...

Page 9: ...Windows NT Windows 95 98 DOS SCO UNIX XENIX OpenServer Linux QNX FreeBSD etc However MOXA device drivers for Windows NT Windows 95 98 DOS and Windows 3 x are provided for better installation configura...

Page 10: ...andard COM port compatible v High circuit integration with state of the art ASIC design compact half size v No I O switch no IRQ jumper easily configured by software v Independent I O address IRQ sett...

Page 11: ...R Driver shipped by request C Driver supported by OS Note Download the newest drivers from the MOXA FTP service Check List Upon unpacking the Industio CI 134 Series package you can find the following...

Page 12: ...ter 2 Install the CI 134 Series board Install the software from the diskette See respective O S Section Configure the driver for the board and ports in chapter 3 Connect the devices with the cable See...

Page 13: ...hes to what you want The default factory settings are set to RS 485 Auto Data Direction Control mode indicated as l CAP Jumper JP1 Open Not forcing the CAP address to 0xA700 Short Force the CAP addres...

Page 14: ...go directly to the next chapter Software Installation Otherwise follow the instructions below 2 After you set all the jumpers and switches you should do either the normal hardware installation detail...

Page 15: ...ftware driver installation detailed in the next chapter This is to specify the desired I O address IRQ and INT Vector in the software configuration panel no matter what hardware settings are on the bo...

Page 16: ...ASIC designed Industio CI 134 Series has no switch and no jumper for manually configuring the I O address IRQ INT Vector etc of the boards you must run the software utility Io irq exe in the driver di...

Page 17: ...Utility and Hardware Configuration Note that the CAP address e g 0x180 is identical to the first port s I O address except in one case that the JP1 jumper is installed before powering on the PC In thi...

Page 18: ...ries User s Manual 2 Enter the CAP address of the Industio CI 134 Series board to be configured in the following dialog box and press Enter 3 In the configuration dialog box configure the following pa...

Page 19: ...pecifies the use of normal or high speed capability Normal speed ranges from 50 bps to 115 2 Kbps High speed ranges from 50 bps to 921 6 Kbps Industio CI 134 Series supported both normal and high spee...

Page 20: ...um High Speed Spectrum 50 bps 400 bps 75 600 110 880 134 5 1076 150 1200 300 2400 600 4800 1200 9600 1800 14 4K 2400 19 2K 4800 38 4K 7200 57 6K 9600 76 8K 19 2K 153 6K 38 4K 307 2K 57 6K 460 8K 115 2...

Page 21: ...Hardware Installation Industio CI 134 Series User s Manual 2 9 4 Press F10 to save the configuration and exit the utility...

Page 22: ...2 10 Industio CI 134 Series User s Manual...

Page 23: ...ramming Tools for programming issues Windows NT Windows NT supports up to 256 serial ports from COM1 to COM256 To fully integrate the advanced features of Windows NT multi process and multi thread pur...

Page 24: ...Note Make sure the board has already been plugged in the system slot if you are doing quick installation 1 Please log in NT as Administrator 2 Open the Control Panel click on the Network icon and sel...

Page 25: ...tion Panel dialog box click Add to enter Property dialog box to add the Industio CI 134 Series board Select the CI 134 Series in the Board Type field If necessary type the desired interrupt vector add...

Page 26: ...go directly to the step 8 if you need not change anysetting 7 In the Property dialog box select the desired port in the port list and click Port Setting to enter the individual Port setting dialog bo...

Page 27: ...cond port is mapped to COM4 sequentially If Auto Enumerating COM Number is not checked specify the COM number for individual port For instance the second port can be out of sequence say COM10 while th...

Page 28: ...m restarts 11 Once the system restarts you may check the event log issued bythe MOXA driver to see if the ports of the board are initialized successfully l Enter the Administrative group click on the...

Page 29: ...nyready made applications such as PComm utility Terminal emulator See Serial Programming Tools chapter or HyperTerminal to transmit receive data as well as Remote Access Service to provide dial up net...

Page 30: ...Interrupt No and Base I O Port Address Please see steps 6 to 8 in the previous section Installing Driver for more details except that the Board Type field is not supposed to be changed l Click Add to...

Page 31: ...reinstall it as detailed in section Installing Driver Removing Driver To remove the driver for the Industio CI 134 Series board 1 Open the Control Panel click on the Network icon and select the Adapte...

Page 32: ...oard and port add more boards or delete boards please refer to the section Configuring Board and Port l To upgrade or remove driver please go to the sections Updating Driver and Removing Driver Instal...

Page 33: ...ies board Select the CI 134 Series in the Board Type field If necessary type the desired interrupt vector address in the INT Vector field Select the desired interrupt number in the Interrupt No field...

Page 34: ...with other COM number in use In this Individual Port Setting dialog box you may have two ways to map the physical ports to COM numbers depending on the check box Auto Enumerating COM Number If Auto E...

Page 35: ...16 bytes are available and the default value is 16 bytes 7 Click OK in the Port and the Property dialog boxes to go back to the MOXA Configuration Panel dialog box Note If you need to install more th...

Page 36: ...ools chapter or the Microsoft Win32 API You can also execute any ready made applications such as PComm utility Terminal emulator See Serial Programming Tools chapter or HyperTerminal to transmit recei...

Page 37: ...board that is not yet configured in the system Please see steps 5 to 7 in the previous section Installing Driver for more details l Click Remove to remove the board currently selected from the configu...

Page 38: ...User s Manual Removing Driver Open Control Panel icon and then Add Remove Programs icon and then select Install Uninstall tab Then select and open the MOXA Smartio Industio Driver option and then ent...

Page 39: ...stall the package how to setup up the driver and how to load or unload driver For details of the serial programming API 232 Library and utilities please refer to the next chapter Serial Programming To...

Page 40: ...are steps for setting up the Industio CI 134 Series driver Note that it is not intended to illustrate all the convenient functions of the setup programs when configuring the boards Please refer to th...

Page 41: ...io CI 134 Series User s Manual 3 19 2 Press Enter to pop up the SETUP dialog box In the SETUP dialog box Press F8 to specify the CAP Address and press ENTER and then type Y YES to load the configurati...

Page 42: ...134 Series board will be shown along with other default settings such as port number buffer size etc Note Up to now you have completed the setup for Industio CI 134 Series board You may skip this step...

Page 43: ...ial port is referred to as port number in terms of serial programming You may map the port number range to the one you prefer between 0 and 255 as long as no port number overlapping condition or port...

Page 44: ...et interrupt vector for each port You can set this feature to Yes default and gain best performance for the board 4 To setup more boards please follow the same instructions 2 to 3 described above 5 Pr...

Page 45: ...talled properly At this point you are ready to execute application that supports API 232 functions or start developing applications using API 232 library If something went wrong for instance the board...

Page 46: ...s such as driver removal baud rate settings programming and existing applications are also stated Installing Driver 1 Run WININST EXE in the DOS Windows 3 x driver diskette click OK in the Driver Inst...

Page 47: ...ettings click Modify and type in the desired I O address in the Address field select the desired IRQ and COM number Then click OK and Save to save the new configuration and exit 3 When configuration c...

Page 48: ...m COM1 to COM4 from COM2 to COM5 from COM3 to COM6 from COM4 to COM7 from COM5 to COM8 or from COM6 to COM9 depending on user s need Normally COM1 is used by mouse and to fully use the 4 MOXA ports th...

Page 49: ...tandard COMM Driver program group is provided to remove the installed driver from the Windows Baud Rate Settings For those Industio CI 134 boards configured as High Speed Spectrum the real working spe...

Page 50: ...3 28 Industio CI 134 Series User s Manual...

Page 51: ...tion library for easy programming in most popular languages useful utilities such as diagnostic monitor and terminal emulator illustrative example programs and comprehensive on line documents The seri...

Page 52: ...r a complete library function description and sample programs for Visual C Visual Basic and Delphi please check the help file and the sample programs in the PComm directory Utilities Following are sho...

Page 53: ...ring program that allows you to watch the selected MOXA COM ports data transmitting receiving throughput and communication line status which are updated and displayed on the screen at time intervals Y...

Page 54: ...Terminal Emulator The Terminal Emulator features multi windows and supports terminal types of VT100 and ANSI You can transfer data interactively send pattern periodically or transfer file using ASCII...

Page 55: ...ded and placed in the sub directory EXAMPLE language of the API 232 directory In addition for DOS C language only there are also Modem Control and File Transfer library available supporting Hayes comp...

Page 56: ...o disk storage for later analysis 2 The TTY terminal emulation utility allows user to view the signal status and transfer data interactively or files using ASCII XMODEM YMODEM ZMODEM and KERMIT protoc...

Page 57: ...ools Industio CI 134 Series User s Manual 4 7 Diagnose The Diagnose BIN DIAGNOSE EXE is a utilitythat can help users to diagnose the hardware condition of each port of the selected board See on line h...

Page 58: ...grams please refer to the language provided communication example programs Utility The utility TTY in the MOXA Standard COMM Driver program group is intended to help users monitor and debug serial com...

Page 59: ...s Manual 4 9 Existing Applications Many Windows software packages such as pcANYWHERE LabView FIX WinFax Pro Fax Server PROCOMM PLUS LapLink etc can access Industio CI 134 COM ports directly since thes...

Page 60: ...de Under this mode no extra code is required to control the data transferring data transmitting and receiving which is automatically managed with the intelligent hardware mechanism That is RS 485 prog...

Page 61: ...e function blocks until last character transmitted sio_RTS port 0 Turn off RTS signal The RS 485 port is ready for receiving data sio_read port buff 10 Read 10 bytes Solution 2 There is a dedicated RS...

Page 62: ...4 12 Industio CI 134 Series User s Manual...

Page 63: ...ion Equipment like modems RS 422 Cable Wiring The RS 422 standard uses a balanced voltage digital interface to allow communications of 10M bps on cable length of 4000 feet Ten receivers can be connect...

Page 64: ...RxD B 2 TxD B RxD B 1 TxD A RxD A 3 RxD B TxD B 3 RxD B TxD B 1 TxD A RxD A 4 RxD A TxD A 4 RxD A TxD A 5 GND GND 5 GND GND RS 422 Device N RxD B TxD B RxD A TxD A GND RS 422 with Handshaking CI 134 R...

Page 65: ...ystem The CI 134 Series supports only 2 wire half duplex RS 485 communication Data pins are served for both data transmitting and receiving depending on the RTS signal RS 485 pin outs for CI 134 CI 13...

Page 66: ...stio CI 134 already installs the resistors on board for your convenience indicated as follows The value of the termination resistor should equal the characteristic impedance of the transmission line R...

Page 67: ...6 CTS3 A 25 TxD3 A 7 RxD3 A 26 GND VEE3 8 RTS3 A 27 CTS3 B 9 RTS3 B 28 TxD3 B 10 RxD3 B 29 CTS1 A 11 TxD1 A 30 RxD1 A 12 GND VEE1 31 RTS1 A 13 CTS1 B 32 RTS1 B 14 TxD1 B 33 RxD1 B 15 CTS0 A 34 TxD0 A...

Page 68: ...5 6 Industio CI 134 Series User s Manual...

Page 69: ...plugged in the system If that is the case re install the board and make sure that it fits well in a 32 bit slot this time Sometimes the slot for plugging the board is bad In this case try other slots...

Page 70: ...r how to solve this problem b The CAP of the board conflicts with other add on boards I O address Please change other add on boards I O address to avoid the conflict c The Industio CI 134 board is not...

Page 71: ...per JP1 Install Step 3 Power on the PC Now the CAP address of the board will be 0xA700 ON Step 4 Execute Io irq under DOS environment A Io irq Step 5 Enter CAP address 0xA700 to access the board Enter...

Page 72: ...adapter Please make sure there is no conflict with other adapter s IRQ Check the BIOS IRQ settings first Make sure that an IRQ is available 2 After the system reboots the error message Cannot find any...

Page 73: ...under Windows 95 98 For general problems and solutions please see the previous section General Troubleshooting 1 The system fails to find the Industio CI 134 Series board After system reboot error me...

Page 74: ...ons please see previous Section General Troubleshooting 1 After executing SER DRV EXE error message None serial port found appears a Make sure you re using the right driver b Check if the board is pro...

Page 75: ...s 5 6 7 8 v Stop bits 1 1 5 2 v Parity none even odd space mark v Data signals RS 422 TxD RxD RTS CTS GND RS 485 Data GND v Connectors DB9 male 4 v Surge protection max 2000V CI 134IS v Opto isolation...

Page 76: ...r shipped by request C Driver supported by OS UART TI550C The UART chip TI550C is an intelligent asynchronous controller capable of supporting one full duplex channel that simultaneously transfers dat...

Page 77: ...pt controller 040 05F Timer 060 06F Keyboard 070 07F Real time clock 080 09F DMA page register 0A0 0BF Interrupt controller 2 0C0 0DF DMA controller 0F0 0FF Math coprocessor 100 1EF not usable 1F0 1F8...

Page 78: ...5 RS 485 Data Mode AUTO RTS Interrupt Vector ________ 3 2 CAP Jumper JP1 on the board o open o short 4 Operating System o Windows 95 o Windows 98 o Windows NT 3 51 o Windows NT 4 0 o DOS o Windows 3 x...

Page 79: ...oduct repair time v Obtain a Return Merchandise Authorization RMA number from the sales representative or dealer v Carefully pack the product in an anti static package and send it pre paid to the deal...

Reviews: