182
6
Restore The Printer To Operation
LCD message display is
illuminated and the printer
appears to be working, but
nothing prints and “Invalid
Data” displays.
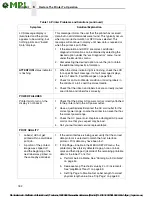
This message informs the user that the printer has received
data, but no valid commands were found. This typically occurs
when an incorrect emulation or SFCC was selected. This
message will continue to display until new data is received or
when the printer is put offline.
1.
If the emulation and SFCC are correct, additional
diagnostic information can be obtained by selecting the
desired option under the “xxx Diagnostics” menu, found
under the Emulations menu.
2.
Afer selecting the desired option, rerun the job to obtain
the additional diagnostic information.
ATTENTION!
status indicator
is flashing.
1.
When the status indicator light is flashing, check the LCD
for a specific fault message. If a fault message displays,
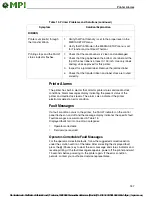
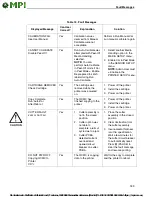
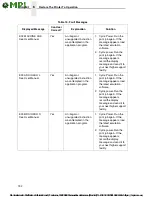
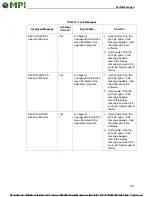
refer to Table 15, Fault Messages on page 188.
2.
Check for an Out-of-Media condition or missing labels in
the middle of a roll. Load the correct media.
3.
Check that the ribbon and label stock are correctly routed.
Load ribbon and label stock correctly.
POWER FAILURES
Printer fails to turn on, the
display is not backlit.
1.
Check that the printer AC power cord is correctly attached
to the printer and to the AC power outlet.
2.
Have a qualified electrician test the AC wall outlet for the
correct power range. Locate the printer in an area that has
the correct power range.
3.
Check the AC power cord. Replace a damaged AC power
cord or one that you suspect may be bad.
4.
Call your authorized service representative.
PRINT QUALITY
•
Label(s) did not get
printed within a multi label
print job.
•
A portion of the printed
image was clipped off
and the beginning of the
next label was printed on
the same physical label.
1.
If the serial interface is being used, verify that the correct
data protocol is selected to match the host interface
protocol. Print data may have been lost.
2.
If Clip Page = Enable in the MEDIA SETUP menu, the
printer may have falsely detected a gap, hole, or black
mark and then clipped (discarded) the remaining printable
data for the label. To fix this:
a.
Perform Auto Calibrate. See “Running Auto Calibrate”
on page 50.
b.
Decrease Gap Threshold value by 2 or 3 increments.
See “Gap/Mark Thresh” on page 89.
c.
Set Clip Page to Disable. Set Label Length to correct
physical length value. See “Clip Page” on page 83.
Table 14. Printer Problems and Solutions (continued)
Symptom
Solution/Explanation

