background image

1 4

MCDISK-E

High-Tech  Made in Switzerland

This page is intentionally left blank

Summary of Contents for MCDISK-E

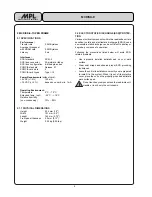
Page 1: ...ution to demands for data storage in harsh environment This makes the MCDISK E ideal for use in many industrial and business applications with SCSI data input and or output MEH 10000 003 Rev H Referen...

Page 2: ...OCATIONS 7 2 4 SCSI ID AND OPTIONAL FEATURES 8 2 4 1 SCSI ID 8 2 4 2 DUAL SCSI ID FEATURE 8 2 4 3 OPTIONAL FEATURES 8 2 5 TERMINATION 8 2 5 1 SCSI BUS TERMINATION 8 2 5 2 TERMINATOR POWER TERMPWR 8 2...

Page 3: ...om the computer system before installing or removing the MCDISK E reader writer to prevent the possibility of personal injury electrical shock and or damage to the unit Handle the unit carefully i e d...

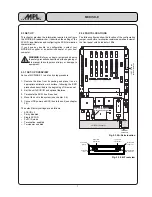
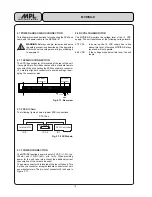
Page 4: ...locate indicated items 1 4 1 INSERTING A CARD WheninsertingacardintooneofthecardslotsoftheMCDISK E care must be taken to ensure that the card is inserted correctly Follow these steps to insert the ca...

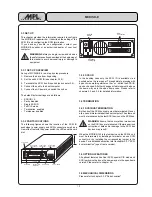
Page 5: ...start up power up or SCSI bus reset the MCDISK E performs some internal self tests When everything is okay the red and both yellow indicators will flash twice simultane ously to indicate proper start...

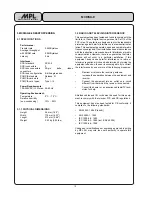
Page 6: ...Front panel thickness 3 0 mm 0 12 Weight 0 25 kg 0 55 lbs 2 MCDISK E 1 OPEN FRAME 2 2 ELECTROSTATIC DISCHARGE ESD PROTEC TION Various electrical components within the read write unit are sensitive to...

Page 7: ...2 Set the unit s SCSI ID and optional features 3 Terminate the SCSI bus if required 4 Mount the unit in the system see chapter 2 6 5 Connect DC power and SCSI bus to the unit see chapter 2 5 The defau...

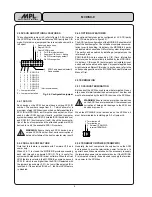
Page 8: ...0 0 0 SCSI ID 0 1 0 0 SCSI ID 1 0 1 0 SCSI ID 2 1 1 0 SCSI ID 3 0 0 1 SCSI ID 4 1 0 1 SCSI ID 5 0 1 1 SCSI ID 6 1 1 1 SCSI ID 7 Not recommended 1 Jumper installed 0 Jumper not installed 2 4 3OPTIONAL...

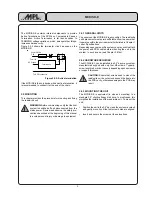
Page 9: ...m but can vary depending upon enclosure or support thickness CAUTION Ensure that screws used to mount the read write unit do not extend beyond the frame into the PCB cavity otherwise damage to the PCB...

Page 10: ...2 7 1 Rear view 2 7 2 SCSI Chain The following figure shows a typical SCSI connections 2 7 3POWERCONNECTION The MCDISK requires a power input of 5 VDC 5 typ 120mA and 12VDC 5 min 1mA When providing po...

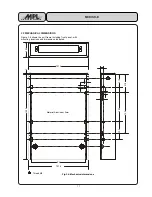
Page 11: ...HANICALDIMENSIONS Figure 3 4 shows the unit frame including front panel with mounting locations and dimensions indicated Fig 3 4 Mechanical dimensions 101 6 94 4 4 101 6 25 4 145 0 21 0 31 0 60 0 30 0...

Page 12: ...frequency energy and if not installed and used in accordance with the instructions may cause harmful interference to radio communications However there is no guarantee that inter ference will not occ...

Page 13: ...s LED lower slot Power LED Power switch Power LED Access LED upper slot Lower card eject button 90 264VAC Power plug SCSI ID Switch SCSI Connectors 3 3 3 SCSI ID In the desktop case only the SCSI ID i...

Page 14: ...1 4 MCDISK E High Tech Made in Switzerland This page is intentionally left blank...

Page 15: ...1 5 High Tech Made in Switzerland MCDISK E This page is intentionally left blank...

Page 16: ...this product MPL has fully tested the MCDISK and reviewed the documen tation However MPL makes no warranty or representation either expressed or implied with respect to this product its quality perfor...

Reviews: