HDA SERIES WALK-BEHIND TROWEL • OPERATION MANUAL — REV. #0 (12/1/17) — PAGE 19
SETUP
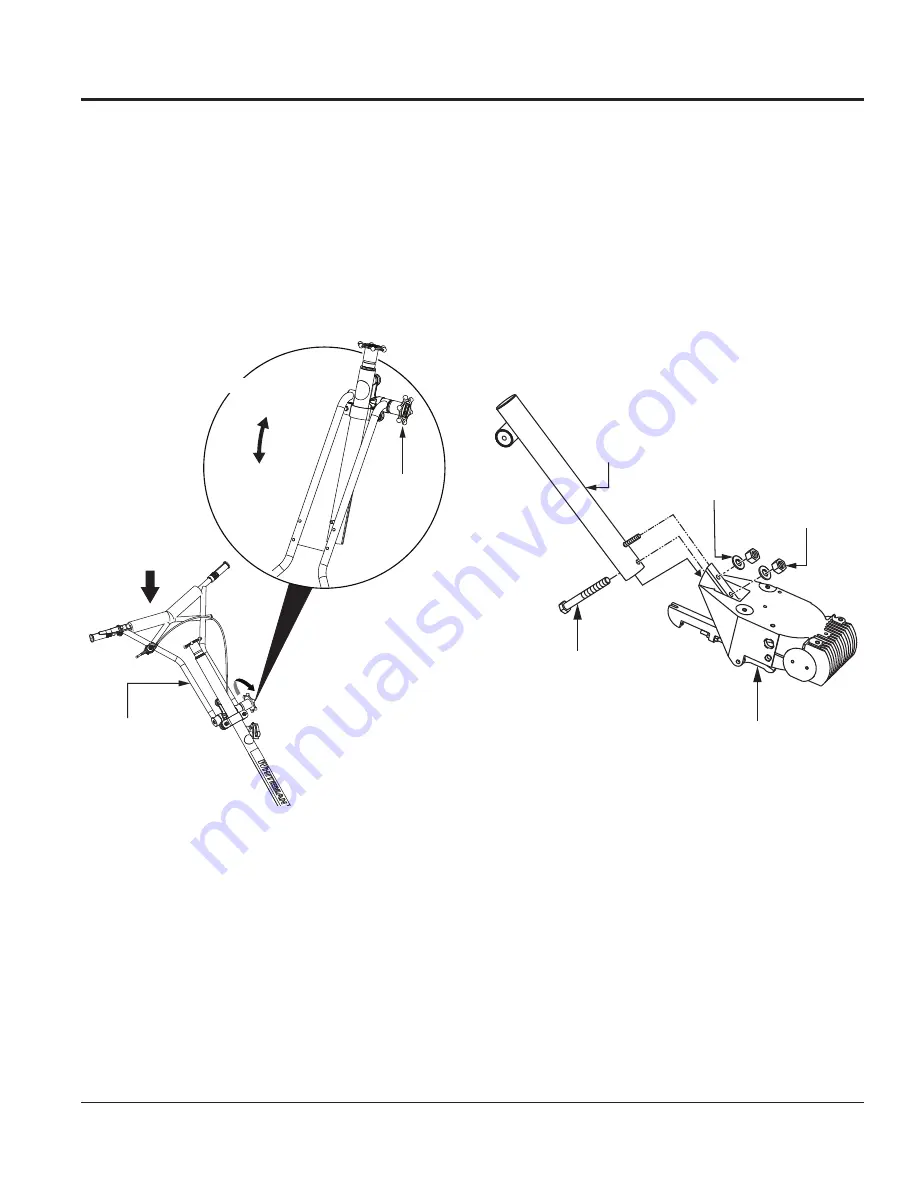
UNPACKING THE HANDLE
The trowel handle (Figure 5) is shipped in the folded, or
stowed, position.
1. To place the folding upper handle in the operational
position, turn the star wheel
counterclockwise to
release it from its folded/stowed position.
2. Pull back on the upper handle to place the handle in
the operational position. Turn the star wheel
clockwise
to secure the handle firmly in place.
Figure 5. Unpacking the Handle
FOLDED
POSITION
OPERATIONAL
POSITION
STAR
WHEEL
UPPER
HANDLE
OPERATIONAL
POSITION
ASSEMBLY AND INSTALLATION
Some assembly and installation is required before the
trowel can be operated. This section provides general
assembly instructions.
For detailed handle assembly instructions, contact
Multiquip and request the Walk-Behind Trowel Handle
Installation Instructions (P/N 20485).
Handle Tube Installation
Attach the main handle tube to the gearbox using the
mounting hardware contained in the shipping container
(Figure 6).
Figure 6. Handle Tube Installation
GEARBOX
3/8 FLAT
WASHER
3/8-16 X 3.25
HHC SCREW
MAIN HANDLE
TUBE
3/8-16
NYLOC NUT


