background image

Need help? 1.800.762.1142

Do not return to place of purchase.

Recipes

BlueRhino.com/recipes

Replacement Parts

parts.BlueRhino.com

1.800.762.1142


W

CAUTION: Never use charcoal that has been pre-treated with lighter 

fluid. Use only a high grade plain charcoal, charcoal/wood mixture, 

lump charcoal or cooking wood.

First Use 

1.  Make sure all labels, packaging and protective films have been removed from the grill. 
2.  Remove manufacturing oils before cooking on this grill for the first time, by operating the 

grill for at least 15 minutes with the lid closed. This will “heat clean” the internal parts and 
dissipate odors. 

Lighting Instructions


W

CAUTION: Keep outdoor cooking appliance area clear and free from 

combustible materials, gasoline and other flammable vapors and 

liquids. 


W

CAUTION: Check to make sure the air vents are free of debris and ash 

before using the grill.


W

CAUTION: Attempting to light the grill with the lid closed may cause an 

explosion.


W

CAUTION: When using a liquid starter, always check bottom bowl 

before lighting. Fluid can collect in the bottom bowl and could ignite, 

resulting in a fire. 


W

 CAUTION: Never add lighting fluid to hot 

or warm coals as flashback may occur, 

causing serious injury or damage to 

property.

1.  Open lid and vents. 
2.  Make sure bottom bowl is empty.
3.  Remove cooking grid.
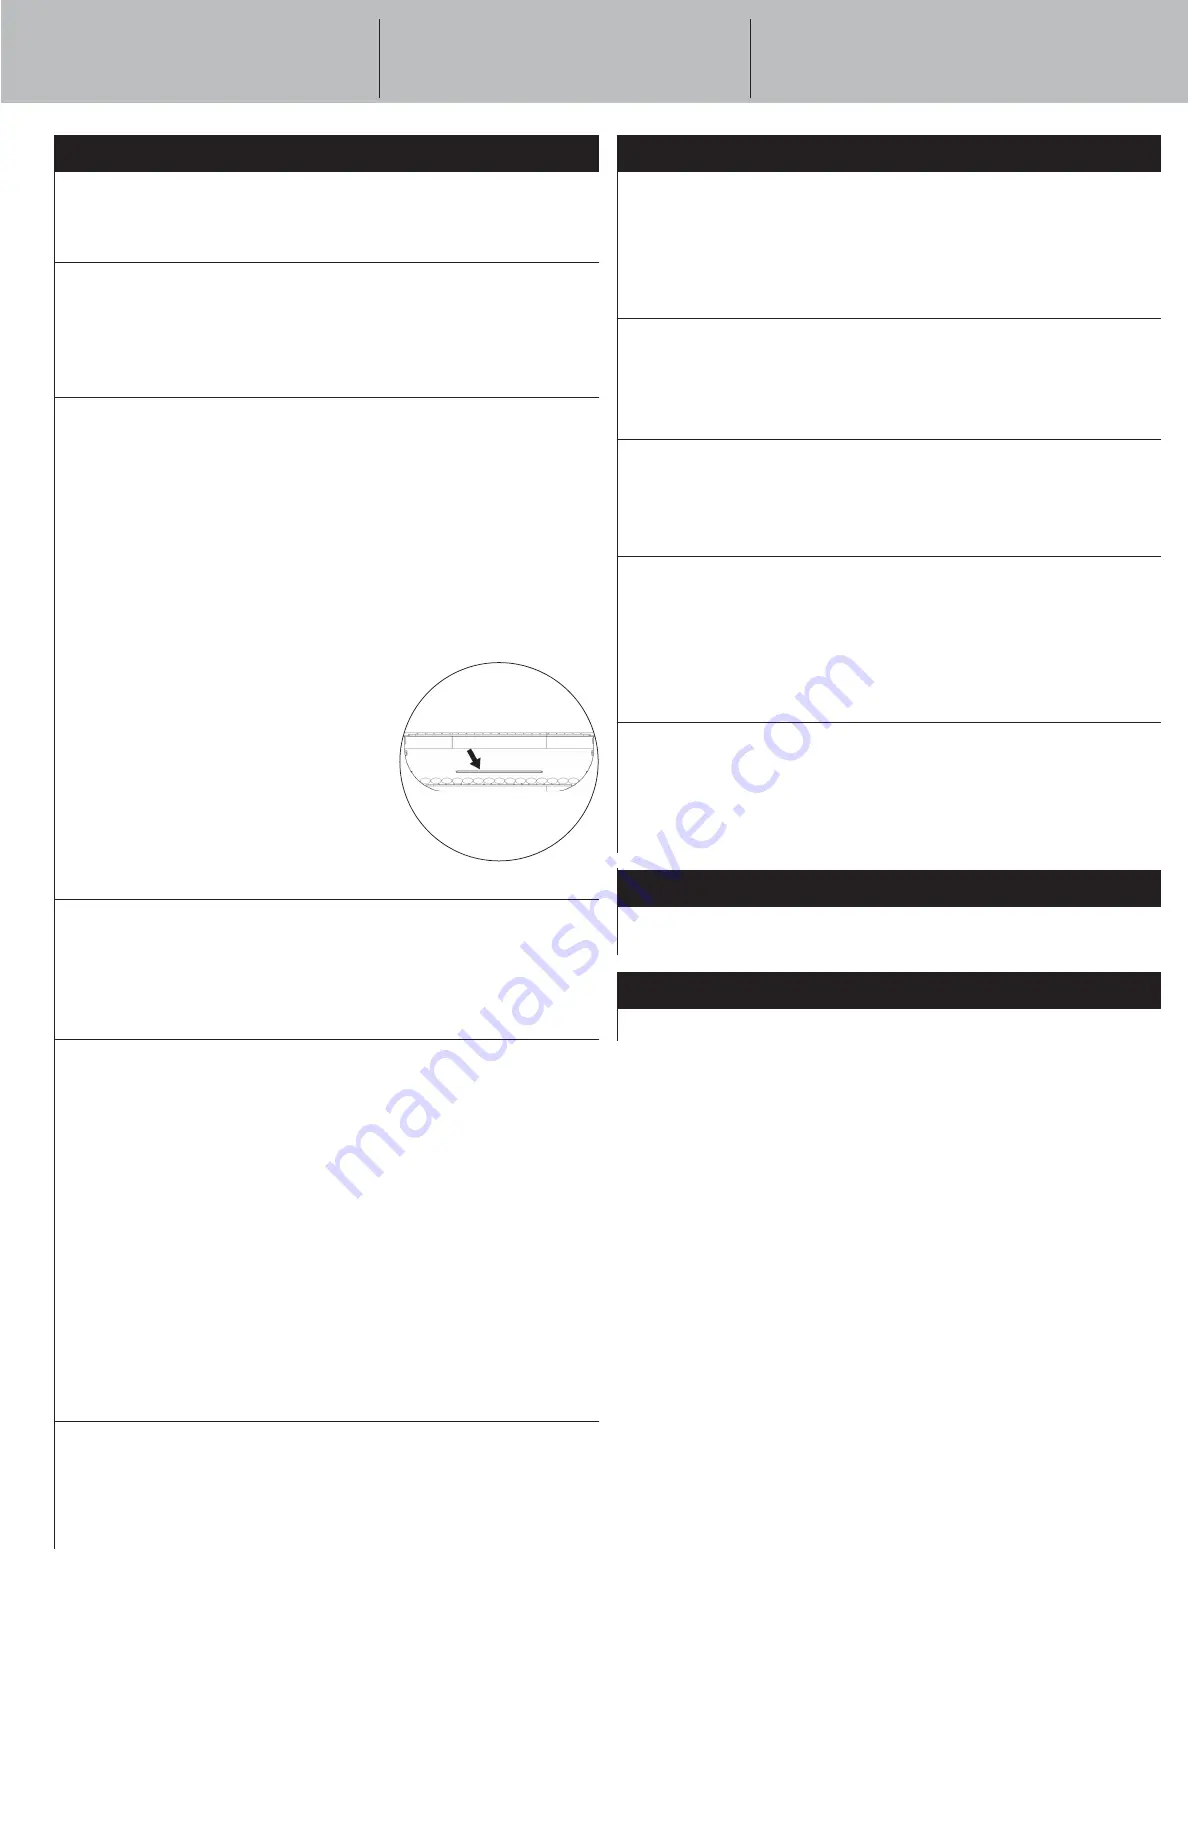
4.  Arrange charcoal briquettes or other fuel on the 

charcoal grid to the “Fill Line” (Figure 1).

5.  Light per instructions on fuel package.
6.  Allow fuel time to ash into glowing coals before 

cooking.

Turning Off

1.  Allow charcoal to completely extinguish itself.


W

WARNING: Do NOT use water to extinguish.  This can be dangerous 

and cause damage.

2.  Dispose of the ashes in a proper location.

Controlling Flare-ups:


W

CAUTION: Do NOT use water on a grease fire. This can cause the 

grease to splatter and could result in serious burns, bodily harm or 

other damage. 


W

CAUTION: Do NOT leave grill unattended while preheating or burning 

off food residue. If grill has not been cleaned, a grease fire can occur 

that may damage the product.


W

WARNING: When cooking, fire extinguishing materials should be 

readily accessible. In the event of an oil/grease fire, use a type BC dry 

chemical fire extinguisher or smother with dirt, sand or baking soda. 

Do NOT attempt to extinguish with water.

Flare-ups are a part of cooking meats on a grill and add to the unique flavor of grilling.

Excessive flare-ups can over-cook your food and be dangerous.

Important:


Excessive flare-ups result from the build-up of grease in the bottom of your grill. 

If a grease fire occurs, close the lid until the grease burns out. Use caution when opening the lid 
as sudden flare-ups may occur.
If excessive flare-ups occur, do

 NOT

 pour water onto the flames.

Minimize Flare-ups:

1.  Trim excess fat from meats prior to cooking.
2.  Cook high fat content meats indirectly.
3.  Ensure that your grill is on a hard, level, non-combustible surface.

Operating Instructions

Figure 1

Cleaning and Care


W

CAUTION:  
1.  All cleaning and maintenance should be done when grill is cool 

and with the ashes properly disposed of.

2.  Do NOT clean any grill part in a self-cleaning oven. The extreme 

heat will damage the finish.

Notices

1.  This grill should be thoroughly cleaned and inspected on a regular basis. 
2.  Abrasive cleaners will damage this product. 
3.  Never use oven cleaner to clean any part of grill.

Before Each Use

1.  Keep the grill area free and clear from any combustible materials, gasoline, and other 

flammable vapors and liquids.

2.  See below for proper cleaning instructions.

Cleaning Surfaces

1.  Wait for grill to fully cool.
2.  Wipe surfaces clean with a mild dishwashing detergent or baking soda mixed with water. 
3.  For stubborn stains, use a citrus-based degreaser and a nylon scrubbing brush.
4.  Rinse clean with water. 
5.  Allow to air dry.

Before Storing

1.  Wait for grill to fully cool.
2.  Clean all surfaces.
3.  If storing the grill indoors, cover the grill and store in a cool dry place.
4.  If storing the grill outdoors, cover the grill with a grill cover for protection from the weather.

Product Registration

For faster warranty service, register your product immediately at BlueRhino.com/warranty or by 
calling 1.800.762.1142.

Replacement Parts

Replacement parts can be found at parts.BlueRhino.com or by calling 1.800.762.1142.

Summary of Contents for CBC1601C

Page 1: ... WARNING FOR YOUR SAFETY For Outdoor Use Only outside any enclosure WARNING FOR YOUR SAFETY 1 Improper installation adjustment alteration service or maintenance can cause injury or property damage 2 Read the installation operation and maintenance instructions thoroughly before installing or servicing this equipment 3 Failure to follow these instructions could result in fire or explosion which coul...

Page 2: ...oals to see if they are hot W W Do NOT use on wooden decks wooden furniture or other combustible surfaces W W This grill is NOT to be used in or on boats or recreational vehicles W W Position grill so wind cannot carry ashes to combustible surfaces W W Do NOT use in high winds W W Never lean over the grill when lighting W W Do NOT leave a lit grill unattended Keep children and pets away from grill...

Page 3: ... Rear Top Leg 55 08 226 12 Front Top Leg 55 08 217 13 Grill Slide 55 08 218 14 Rear Bottom Leg 2 55 08 225 15 Wheel 2 55 08 233 16 Axle 55 08 039 17 Front Bottom Leg 2 55 08 216 Expanded View 5 12 11 2 13 14 1 4 3 15 15 17 8 Hardware A Screw M4x10 Nickel Plated Phillips Truss Head 3 pcs B Screw M5x12 Nickel Plated Step Phillips Head 6 pcs C Screw M5x12 Nickel Plated Phillips Truss Head 4 pcs D Scr...

Page 4: ...s 3 Tighten all hardware connections by hand first Then before completing each step go back and fully tighten all hardware Be careful not to overtighten That could damage surfaces or strip threads 4 For best results complete each step in the order presented To complete assembly you will need One bag of charcoal not included Typical assembly is approximately 45 minutes Assembly Instructions 4 Assem...

Page 5: ...ce of purchase Recipes BlueRhino com recipes Replacement Parts parts BlueRhino com 1 800 762 1142 5 6 Attach Lid B x 4 H x 4 7 Insert Warming Rack 8 Insert Charcoal Grid and Cooking Grid 5 Attach Bottom Bowl and Grill Slide C x 2 D x 4 H x 6 J x 2 ...

Page 6: ...e Lid must be locked before folding grill Unfold Grill Note Lid must be locked before unfolding grill Always open legs completely and are secured in place before lighting grill 9 Lock Lid Note Lid must be locked before transporting grill Unlock Lid Note Always unlock and open lid before lighting grill ...

Page 7: ...oduct W W WARNING When cooking fire extinguishing materials should be readily accessible In the event of an oil grease fire use a type BC dry chemical fire extinguisher or smother with dirt sand or baking soda Do NOT attempt to extinguish with water Flare ups are a part of cooking meats on a grill and add to the unique flavor of grilling Excessive flare ups can over cook your food and be dangerous...

Page 8: ...you or any third party or failure to perform normal and routine maintenance on the product as set out in this owner s manual In addition the Limited Warranty does not cover damage to the finish such as scratches dents discoloration rust or other weather damage after purchase This Limited Warranty is in lieu of all other express warranties Blue Rhino disclaims all warranties for products that are p...

Page 9: ...io como se prescribe en este manual del usuario Además la garantía limitada no cubre daños al terminado de la unidad tales como rasguños abolladuras descoloridos oxidaciones y otros daños causados por la intemperie después de la compra de la unidad Esta garantía limitada reemplaza cualquier otra garantía Blue Rhino no asume ninguna responsabilidad por garantías de productos vendidos por quienes no...

Page 10: ...ENCIA Cuando esté usando la parrilla debe tener fácilmente a su alcance materiales para extinguir el fuego En caso de una llamarada de aceite o de grasa no trate de extinguirla con agua Use un extinguidor de incendio de sustancias químicas secas tipo BC o asfixie el fuego con tierra arena o soda de hornear NO intente extinguir con agua La llamarada es parte de la cocción de carne en una parrilla y...

Page 11: ... la parrilla Nota Siempre cierre el seguro de la tapa antes de desdoblar las patas Abra siempre las patas completamente y verifique que han quedado aseguradas en su lugar antes de conectar el tanque de gas y de encender la unidad 9 Para cerrar la tapa con el seguro Nota Cierre la tapa con seguro antes de transportar la parrilla Para abrir el seguro de la tapa Nota Siempre abra el seguro de la tapa...

Page 12: ...site BlueRhino com recipes Para piezas de repuesto visite parts BlueRhino com 1 800 762 1142 5 6 Fije la tapa B x 4 H x 4 7 Coloque la rejilla de calentamiento 8 Coloque la rejilla para el carbón y la rejilla de cocción 5 Fije la carcasa inferior de la parrilla C x 2 D x 4 H x 6 J x 2 ...

Page 13: ...o en forma manual Luego después de completar cada paso ajústelos por completo Tenga cuidado de no ajustar demasiado Se podrían dañar las superficies o forzar las roscas 4 Para obtener mejores resultados siga todos los pasos en el orden indicado Para terminar el armado de la unidad necesitará una 1 bolsa de carbón de leña o carbón vegetal no incluidas Tiempo de armado estimado 30 minutos Instruccio...

Page 14: ...sa Niquelada M4 3 pzs H Tuerca de mariposa Niquelada M5 16 pzs I Tuerca de mariposa Niquelada M6 2 pzs J Arandela Resistente al calor ø6 4 pzs Herramientas necesarias para el armado incluidas Lista de piezas 1 Manija de la tapa 55 08 219 2 Regulador de aire de la tapa 55 08 222 3 Tapa 55 22 301 4 Rejilla de calentamiento 55 08 231 5 Rejilla de cocción 55 08 215 6 Rejilla para el carbón 55 08 042 7...

Page 15: ... está encendiendo WW NO deje una parrilla encendida sin vigilancia Mantenga los niños y las mascotas lejos de la parrilla en todo momento WW NO intente mover la parrilla mientras esté encendida Deje que la parrilla se enfríe antes de moverla o guardarla WW NO deje la parrilla sin supervisión al precalentar o quemar residuos de alimentos con la perilla en la graduación más alta WW Cuando esté cocin...

Page 16: ...fornia Lavarse las manos después de manipular este producto ADVERTENCIA PARA SU SEGURIDAD Solamente para uso en exteriores fuera de cualquier recinto WARNING FOR YOUR SAFETY 1 Una instalación ajuste alteración reparación o mantenimiento inadecuados pueden causar lesiones o daños a la propiedad 2 Lea atentamente las instrucciones de instalación funcionamiento y mantenimiento del equipo antes de ins...

Reviews: