Outdoor Patio Heater
8
Operating Instructions and Owner’s Manual
HEATER MOUNTING INSTRUCTIONS
After selecting the heater installation location and after verifying and
ensuring that all of the above placement requirements are fulfilled,
mount the heater as follows:
1.
The wall mounting must be carried out using anchors adapted to
the wall on which the heater will be installed. The use of dowels
with 3/8 “diameter is recommended. The surface on which it is
installed must be solid and suitable to support the weight of the
unit.
2.
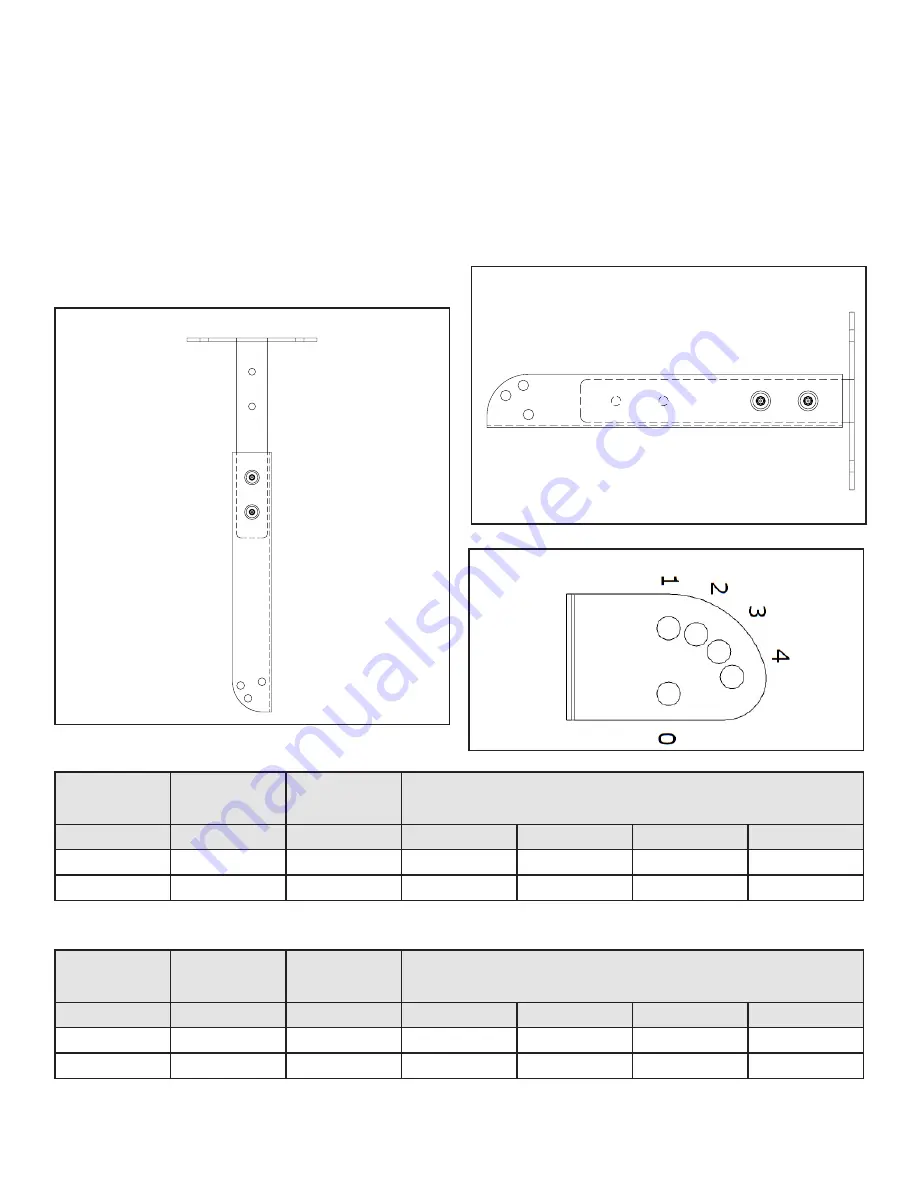
Position the heater as shown in Figure 7 and Figure 8 and slide
the heater mounting clip over the bracket and install the bolt
through the clip and bracket.
3.
Thread the hex nut onto the bolt and tighten securely.
MOUNTING POSITIONS
•
After following the instructions for mounting your Patio Heater
in the Owner’s Manual, refer to Figures 9,10, and 11 and Tables 3
and 4 for the specific allowable angles for positioning your heater.
•
The Glass Front heaters are certified from the angles of 0-40.
•
The angles included in the tables are when mounted
perpendicularly to the wall and ceiling. If mounted to a wall or
ceiling that is already at an angle, contact tech service for other
possible mounting angles.
Mount Bracket
FIGURE 11
A
B
0
Mounting Arm (From Sidewall)
FIGURE 10
A
B
0
Mounting Arm (From Ceiling)
FIGURE 9
MODEL
Mounting
Angle
Bracket
Combination
MINIMUM CLEARANCES TO COMBUSTIBLE SURFACES
TOP
SIDES
BACK*
BELOW
MHRP37GL
40�
A-1
13”
16”
8”
48”
MHRP37GL
30�
B-3
13”
16”
8”
48”
MODEL
Mounting
Angle
Bracket
Combination
MINIMUM CLEARANCES TO COMBUSTIBLE SURFACES
TOP
SIDES
BACK*
BELOW
MHRP37GL
35�
B-2
13”
16”
8”
48”
MHRP37GL
10�
B-1
13”
16”
16”
48”
TABLE 3 Mounting to a Wall (*Achieved by bracket length)
TABLE 4 Mounting to a Ceiling (*Achieved by bracket length)


