Studiobot TX90 Quick Start Guide
22
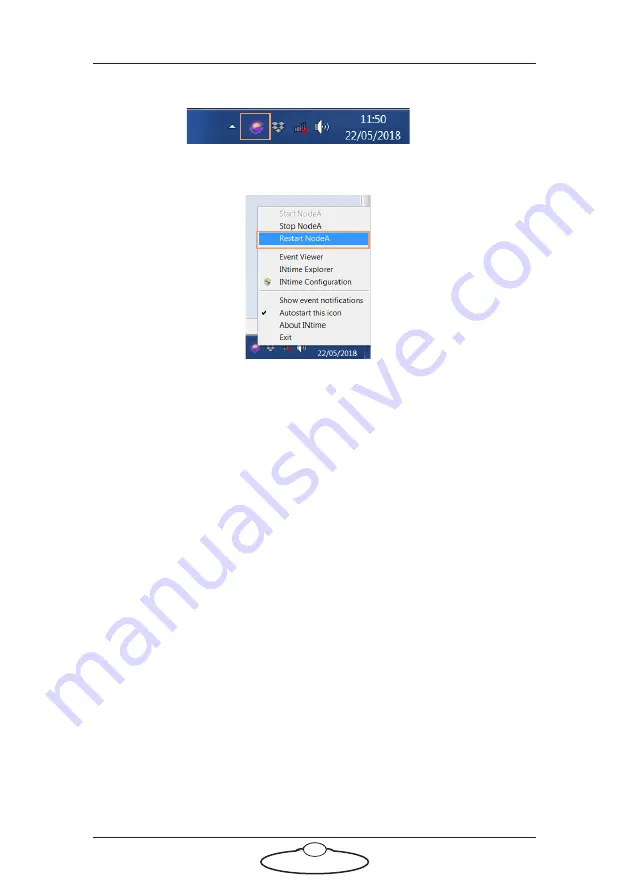
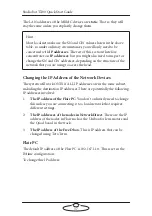
5.1 In the Windows Taskbar, right-click the INtime icon.
5.2 Select
Restart NodeA
.
6.
On the Flair PC, start the Flair application by double-clicking on the
Flair icon on the Desktop.
Flair automatically loads the relevant firmware into all attached axis
boards, including any additional interface boxes that are attached to
the computer stack
7.
Release the E-stop that is plugged into the computer stack, by
turning the button clockwise until the red button pops up and then
pressing the Reset button.
Once all E-stop buttons on the system are up, the Stäubli CS8 display
shows “
U
”.
8.
Zero the axes as required in Flair. The robot arm itself does not
require zeroing but you need to zero other axes such as:
The track: To do this you use the
Zero
>
Home Axis
>
Track
menu option.
Any external Lens Control Motors (LCMs) that you are using.
To zero these you first set the
focus to infinity
(
),
zoom to
wide-angle
(zoomed out all the way),
iris/aperture to wide
open
and then use the relevant
Zero
>
Direct Zero Axis
menu
option to set those lens positions as the zero points in Flair.
Summary of Contents for MRMC-2000-00-JB-0053
Page 19: ...Studiobot TX90 Quick Start Guide 15 Notes...
Page 35: ...Studiobot TX90 Quick Start Guide 31 9 Type AT to get a menu of commands...
Page 38: ...Studiobot TX90 Quick Start Guide 34 2 AT Debug 2 command gives you the following information...
Page 53: ...Studiobot TX90 Quick Start Guide 49 Notes...
Page 57: ...Studiobot TX90 Quick Start Guide 53 4 The Cabinet Temperature is shown on the pendant screen...
Page 58: ...Studiobot TX90 Quick Start Guide 54 Notes...
Page 62: ...Studiobot TX90 Quick Start Guide 58 Notes...


