Studiobot XL Quick Start Guide
16
while the Studiobot XL is powering up (step 3).
Do not start the
Robocam Atelier application yet
.
5.
After Studiobot has finished powering up (step 3) and the Stäubli
CS8 is displaying an “
A
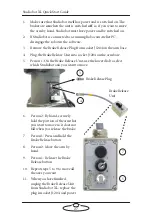
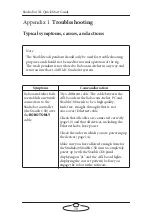
”, check that the cifX boards in both the
Stäubli CS8 and the Robocam Atelier PC display two steady lights
and one blinking light (see previous diagram). Look through the
window in the Studiobot base to check the lights. This pattern
indicates that the dedicated Ethernet connection running over the
ROBOT ONLY
cable is now working.
6.
On the Robocam Atelier PC, start the Robocam Atelier application.
Robocam Atelier automatically loads the relevant firmware into all
attached axis boards, including any additional interface boxes that
are attached to the computer stack
7.
Release the E-stop that is plugged
into the computer stack, by turning
the button clockwise until the red
button pops up.
Once all E-stop buttons on the
system are up, the Stäubli CS8 display shows “
U
”.
8.
Zero the axes as required in Robocam Atelier. The Studiobot arm
itself does not require zeroing but you need to zero other axes.
9.
Engage the robot in Robocam Atelier.
Summary of Contents for MRMC-2011-01
Page 1: ...Studiobot XL Quick Start Guide QSG Product Code MRMC 2139 01 Product Covered MRMC 2011 01...
Page 4: ...Studiobot XL Quick Start Guide iv...
Page 14: ...Studiobot XL Quick Start Guide 10 5 Once firmly secure attach the pan and tilt connections...
Page 15: ...Studiobot XL Quick Start Guide 11 Notes...
Page 32: ...Studiobot XL Quick Start Guide 28 Notes...
Page 33: ...Studiobot XL Quick Start Guide 29 Notes...
Page 37: ...Studiobot XL Quick Start Guide 33 Notes...
Page 39: ...Studiobot XL Quick Start Guide 35 Notes...
Page 42: ...Studiobot XL Quick Start Guide 38 Notes...


