background image

3-1

MODULE 3 – WIRELESS HVAC THERMOSTATS

SALUS ST898ZB OPTIMA S THERMOSTAT

SECTION 3

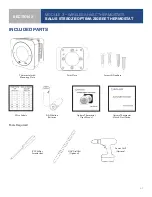
INCLUDED PARTS

#1 Phillips 

Screwdriver

1/16” Drill Bit 

(Optional)

Power Drill 

(Optional)

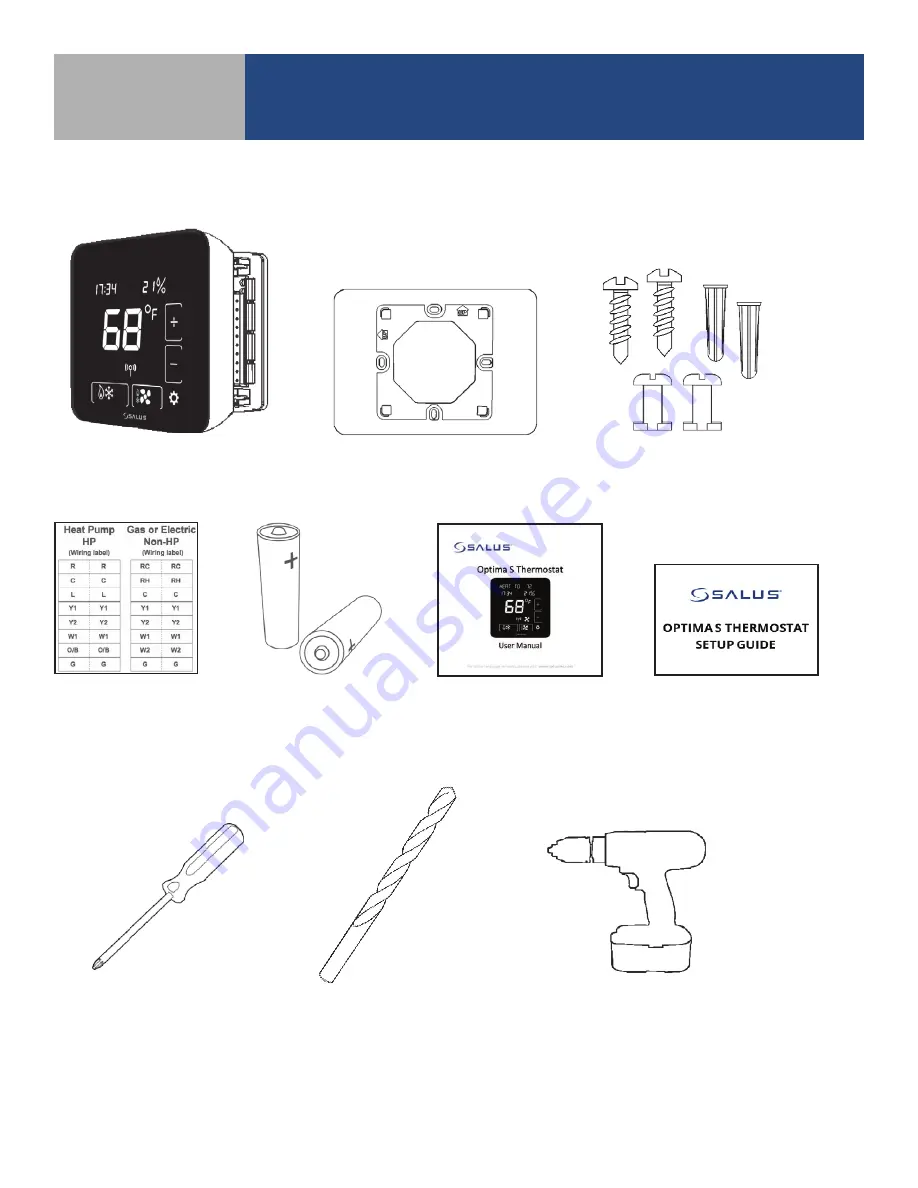
Thermostat with 

Mounting Plate

Trim Plate

Screws & Anchors

Wire Labels

AA Alkaline 

Batteries

Optima S Thermostat 

User Manual

Optima  S Thermostat

Quick Start Guide

TOOLS REQUIRED

Summary of Contents for SALUS ST880ZB Optima Zigbee

Page 1: ...SMC GM WCSG M4 2019 10v1_2019 11 10 CONNECTED WIRELESS SYSTEM GUIDE MODULE 3 Wireless HVAC Thermostats...

Page 2: ...ma S Thermostat Included Parts Installation Tools 3 1 Installation Mounting Wiring 3 2 Display Boot Sequence 3 4 Pairing Instructions 3 4 Initial Configuration 3 6 Home Screen Controls 3 8 Operation 3...

Page 3: ...s Below is a description of several icons used to direct the reader s attention Special Attention Boxes This manual uses special attention icons to alert the reader of important safety concerns inform...

Page 4: ...connection is interrupted or dis connected the HVAC component will continue to operate together MODULE 3 WIRELESS HVAC THERMOSTATS INTRODUCTION SECTION 1 By connecting the Gateway to your home networ...

Page 5: ...Drill Optional MODULE 3 WIRELESS HVAC THERMOSTATS SALUS ST880ZB OPTIMA ZIGBEE THERMOSTAT SECTION 2 Thermostat with Mounting Plate Trim Plate Screws Anchors Wire Labels AA Alkaline Batteries Optima Th...

Page 6: ...24 VAC Common Return Reserved L System Monitor Y1 Single 1st Stage Cooling Y1 Single 1st Stage Compressor Y2 2nd Stage Cooling Y2 2nd Stage Compressor W1 Single 1st Stage Heating W1 Emergency Heat W2...

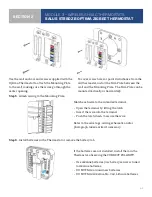
Page 7: ...ire tags wiring schematic and or photograph taken earlier if necessary If the batteries are not installed install them in the Thermostat observing the CORRECT POLARITY Use alkaline batteries low batte...

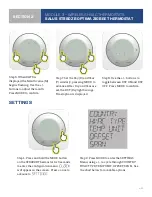
Page 8: ...to the desired country USA Canada Then press MODE to move to HVAC Type When prompted use to toggle the blinking characters to the desired HVAC Type Heat Pump Electric Gas or Oil Heat Then press MODE...

Page 9: ...n on the power to the HVAC System CONTROL REGULAR MODE INSTALLATION MODE Slider Ring Clockwise Increment Value Counter clockwise Decrement Value Clockwise Next OptionCounter clockwise Previous Option...

Page 10: ...Mode Manual Fan Override Auto Fan based on Heat Cool activity On Fan is always On Day of the Week Displays the day of the week M Tu W Th F Sa Su Time Displays the current time in 12 or 24 hour format...

Page 11: ...B for input Step 2 Press and hold the MODE button on the ST880ZB Thermostat for 3 seconds to enter the configuration menu will appear on the screen Step 3 Press the button twice until is displayed PAI...

Page 12: ...e MrPEX Smart Home application select the drop down menu from the upper right of the screen and select All Devices Add New Device Step 6 Press Scan Devices After pressing Scan Devices the MrPEX Smart...

Page 13: ...evice Press Next Step 9 Press Please click here to setup Step 10 Choose from setup options specific to the device Press Complete set up Step 11 Press Finish to complete pairing MODULE 3 WIRELESS HVAC...

Page 14: ...nput Press and hold the MODE button for 3 seconds to enter the configuration menu will appear on the screen Step 2 Release and press the MODE button again to adjust the time zone The default is can be...

Page 15: ...After Day and Year are set the DST Daylight Savings Time option is displayed Step 8 Use the buttons to toggle between DST ON and DST OFF Press MODE to confirm Step 1 Press and hold the MODE button on...

Page 16: ...F 4 C to 4 C Calibration offset Value is added to the sensed temperature Span 0 5 F to 2 0 F 0 25 C to1 00 C Thermostat dead band ex Setpoint of 70 F with Span of 1 F Temperature will fall to 69 F wit...

Page 17: ...lication Step 4 Press the MODE button to illuminate the screen preparing the ST880ZB for input Then press and hold MODE for 3 seconds When appears on the screen press the button 1 times or the button...

Page 18: ...T SECTION 3 INCLUDED PARTS 1 Phillips Screwdriver 1 16 Drill Bit Optional Power Drill Optional Thermostat with Mounting Plate Trim Plate Screws Anchors Wire Labels AA Alkaline Batteries Optima S Therm...

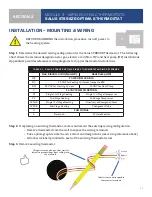
Page 19: ...C COMMON RETURN Y1 Single 1st Stage Cooling Single 1st Stage Compressor Y2 2nd Stage Cooling 2nd Stage Compressor W1AX Single 1st Stage Heating Auxiliary or Emergency Heat W2OB 2nd Stage Heating Chang...

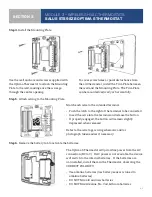
Page 20: ...earlier if necessary The Optima S Thermostat will prioritize power from the AC connection RC to C If AC power is not available the device will switch to the internal batteries If the batteries are not...

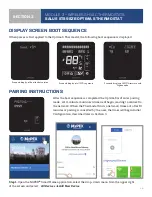
Page 21: ...firmware and Zigbee code Step 1 Open the MrPEX Smart Home application select the drop down menu from the upper right of the screen and select All Devices Add New Device PAIRING INSTRUCTIONS After the...

Page 22: ...Scan Devices the MrPEX Smart Home application scans for devices Step 3 Choose the check box that corresponds to the device to pair Step 4 Enter a unique descriptive name to identify each device Press...

Page 23: ...the thermostat is installed USA Canada Then press to advance to EQPT TYP When prompted the following options are available by pressing or Heat Pump Heat Pump with Electrical Heat Electric Gas or Oil H...

Page 24: ...ing Press to complete setup After the initial configuration is complete the Thermostat will display the Home Screen The Thermostat is now ready to be attached to the Mounting Plate Align connector pin...

Page 25: ...nace or Heating Mode EmHeat Emergency Heat Mode Heat Pump Only Fan Icons Auto Fan is ON while heating or cooling Simple Full On Fan is always ON Permanent Hold Icon Indicates when Permanent Hold is ac...

Page 26: ...d returns to the Home screen Permanent Hold To hold the temperature at a specific target ignoring automated changes from the MrPEX Smart Home application discussed in Section 4 change the setpoint as...

Page 27: ...rightness Level Range 1 to 10 3 Display Mode Full Display Default Shows the network icon humidity button outlines and time display if available 4 Display On Time Duration of screen display with no act...

Page 28: ...culation fan TSTAT The Optima S controls the circulation fan 11 Reversing Valve Term Function Range O B rev valve terminal energized for cooling O B rev valve terminal energized for heating 12 Clock F...

Page 29: ...e application from your computer or smart device Step 1 Press On the MrPEX Smart Home dashboard click the tile that represents the desired thermostat Step 2 When the tile flips choose the device descr...

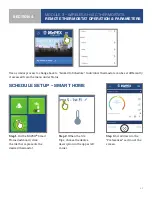
Page 30: ...tima S Thermostat The following shows how to change between Schedule the default value and Status Step 1 On the MrPEX Smart Home dashboard click the tile that represents the desired thermostat Step 2...

Page 31: ...t represents the desired thermostat Step 2 When the tile flips choose the device description in the upper left corner Step 3 Scroll down to the Preferences section of the screen Use a similar process...

Page 32: ...Start Time along with the target set point for both Heating and Cooling Step 7 Choose Add Interval to enter then next temperture change time and set point temperatures Up to 6 intervals can be added...

Page 33: ...le is complete Then choose another tab depending on the type of schedule Step 9 Repeat adding intervals for each available tab Step 10 When all desired schedules have been entered press Save Step 1 On...

Page 34: ...RAMETERS SECTION 4 Step 4 Choose Thermostats from the House Check tab Step 5 Choose the desired Thermostat Step 6 Change the Heating and Cooling setpoints to the desired value Step 7 Select Back to re...

Page 35: ...OSTAT OPERATION PARAMETERS SECTION 4 To change current status simply click status on the MrPEX Smart Home dashboard Choose your new status from the choices shown The corresponding temperature values a...

Page 36: ...t pump check that the O B Configuration under SETTINGS is correct Check that the wiring is correct especially the Y and W wires If used with a Heat Pump check that the O B wire is correct 3 The fan do...

Reviews: