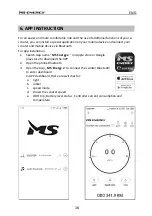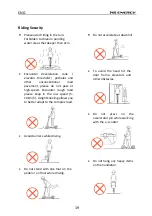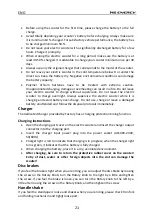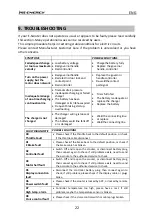
background image


ENG


18


7.


RIDING


OPERATIONAL


INSTRUCTIONS


Before


Riding


Choose


a


suitable


venue


for


riding.


Unfold


the


electric


scooter


according


to


the


instructions


The


folding


spanner


must


be


in


proper


position


and


the


lock


mechanism


must


be


tightened!


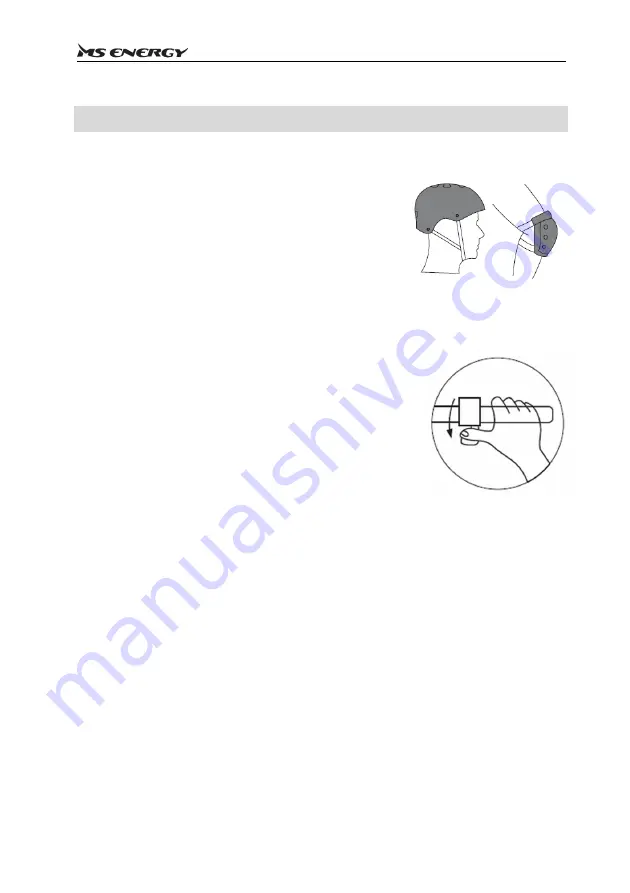
When


riding


the


electric


scooter,


always


use


a


helmet,


shoes


and


safety


gear


such


as


knee


and


elbow


pads


to


avoid


injury


Riding


Short


Press


the


power


button


to


turn


on


the


power.


The


speed


is


set


by


default


to


gear


level


1.


For


safety


purposes,


Electric


scooter


has


a


safe


start


design


which


means


the


motor


can


start


only


when


the


speed


of


the


vehicle


is


above


0.


It


prevents


motor


start


when


the


acceleration


handle


is


pressed


by


mistake.


To


start


the


riding


operations,


put


one


foot


on


the


standing


board


and


the


other


foot


on


the


ground


and


kick


scoot


it


like


a


classic


kick


scooter.


When


the


scooter


is


in


motion


and


its


speed


is


above


0,


smoothly


use


the


acceleration


handle


to


start


the


motor.


Once


the


motor


starts,


put


the


other


foot


on


the


standing


board


and


continue


riding.


If


you


want,


you


can


change


Non


zero


(Slide)


Start


to


Zero


Start


.


For


more


info,


check


Chepter


4


HOW


TO


START


or


Settings


Menu


in


APP

.


When


riding,


adjust


the


gear


level


from


1


to


3


circularly


(

2x


Short


press


button),


use


lights


(

1x


short


button


press)


and


Horn,


according


to


the


road


conditions


and


according


to


the


situation.


Release


the


throttle


can


slow


down


the


speed,


and


automatic


energy


recovery


system


can


help


to


slow


down.


Emergent


brakes


need


to


pull


the


handle


brake


on


the


left


side.


WARNING

:


Be


aware


of


the


possibility


of


unpredictable


sudden


obstacles


on


your


way


and


control


the


speed


level.


Braking


The


unit


has


a


rear


electric


brake


(engine


brake


with


return


breaking


power


back


to


the


Battery)


and


a


front


and


rear


disc


brake.


Use


the


left


and


right


Brake


handles


for


braking


front


and


rear


brake


on


the


same


time,


under


normal


circumstances.


Please,


adjust


your


speed


according


to


driving


conditions


and


take


care


that


you


can


stop


safely


in


any


situation.


The


greater


pressure


you


put,


the


greater


braking


force


will


be


applied.


Be


aware


that


hard


braking


may


result


in


an


accident


due


to


slipping


of


the


wheels,


lost


of


balance


and


fall


of


the


vehicle.


Hard


braking


might


also


cause


damage


to


the


tire.


Summary of Contents for e-scooter e10

Page 1: ...RO Instruc iuni de utilizare Card de garantie 035 21...

Page 2: ...RO 1...

Page 3: ...odusului care poate fi suficient de puternic pentru a constitui un risc de electrocutare Semnul exclam rii n interiorul unui triunghi echilateral avertizeaz utilizatorul despre prezen a n documentul i...

Page 4: ...ineta electric Utilizatorul ar trebui s aib peste 120 cm n l ime i s aib o greutate mai mare de 20 kg Greutatea maxim este de 120 kg Trebuie s respecta i legile locale i s oferi i prioritate pietonilo...

Page 5: ...ovoca deteriorarea cablului de alimentare a nc rc torului bateriei i sau a portului de nc rcare 2 Nu folosi i trotineta electric dac exist o defec iune a bateriei sau a oric rei componente a sistemulu...

Page 6: ...ta 10 Dac bateria nu este folosit o lung perioad de timp asigura i v c o nc rca i suficient i trebuie nc rcat nc o dat dac nc rcarea a fost efectuat n urm cu mai bine de o lun 11 Asigura i v c acorda...

Page 7: ...ec ie a portului de nc rcare a trotinetei trebuie s fie ntotdeauna nchis corect n cazul n care portul de nc rcare este umed sau murdar nu conecta i mufa adaptorului CC n primul r nd cur a i corect fi...

Page 8: ...eoarece acumulatorul i nc rc torul ating temperaturi de 40 70 C n timpul nc rc rii atingerea acestora poate duce la arsuri de gradul I 35 Dac carcasa bateriei este deteriorat cr pat sau observa i miro...

Page 9: ...i sursa de alimentare sau nt lni i o pant abrupt ajuta i pe c t posibil s reduce i curentul de pornire i s prelungi i durata de via a bateriei i autonomia 3 n zilele ploioase v rug m s re ine i urm t...

Page 10: ...la sau impurit ile pot provoca scurtcircuite sau defec iuni ale unit ii Defectele cauzate de neglijen a utilizatorului nu sunt acoperite de garan ie nainte de fiecare c l torie verifica i ntotdeauna d...

Page 11: ...g manet pentru prindere bar ghidon 4 3 7 9 10 11 12 13 14 15 16 17 19 8 6 20 5 2 1 18 3 4 7 8 9 11 12 13 14 15 16 17 18 19 21 22 10 6 5 2 1 20 1 Manet de fr n disc spate 2 Afi aj LCD cu controler 3 Fa...

Page 12: ...m nerului m nerul trebuie s fie n pozi ie deschis la cap t i apoi str nge i m nerul Dac sim i i c maneta nu a str ns complet mecanismul repeta i procedura 5 Din nou asigura i v c ghidonul este ferm i...

Page 13: ...i n l imea ghidonului Aten ie Ad ncimea de introducere a ghidonului nu trebuie s fie mai mic de 2 5 ori diametrul evii ghidonului 10 Bloca i bine catarama Not Cu m nerele pliabile este normal ca m ner...

Page 14: ...nt i nc rc torul de la priza de alimentare apoi deconecta i fi a de nc rcare de la trotineta electric 3 nchide i capacul de cauciuc IMPORTANT Capacul de protec ie al portului nc rc torului trotinetei...

Page 15: ...unc ia de control al vitezei de croazier indicatorul de croazier se va aprinde pe afi aj C nd cruise control este activat ap sa i 1x clic scurt pe butonul de cruise control 4 trotineta va men ine vite...

Page 16: ...itez Set rile aplica iei Accelerate mode Throttle 2x face i clic scurt pe butonul Pornire Multifunc ional pentru a schimba modul de vitez Lumina verde este modul ECO Mod Slide Set rile aplica iei Acce...

Page 17: ...iei 1 C uta i aplica ia cu numele MS Energy e n magazinul Aplica iele sau Google Play Store pentru a desc rca aplica ia 2 Deschide i bluetooth ul telefonului 3 Deschide i aplica ia MS Energy e pentru...

Page 18: ...a Set ri din col ul din dreapta sus al tabloului de bord pentru a seta Cruise Control modul de Vitez Modul de pornire modul de accelerare VITEZ D Face i clic pe butonul mod de vitez pentru a schimba m...

Page 19: ...za i Dac dori i pute i schimba Start Non zero la Start zero Pentru mai multe informa ii verifica i capitolul 5 CUM S PORNI I sau meniul Set ri din APLICA IE C nd o utiliza i regla i nivelul de vitez d...

Page 20: ...itez mare Dac nt lni i un drum prost v rug m s p stra i o viteza mic 5 10 km h ngenuncherea u oar v permite s v adapta i mai bine la un drum complex Nu accelera i la cobor re A se evita lovirea capulu...

Page 21: ...sau la fiecare 3000 km Baterie Trotineta electric este echipat cu o baterie litiu polimer Durata medie de via a bateriei este de 400 de cicluri n condi ii normale de utilizare i ntre inere durata de v...

Page 22: ...eliminare nc rc torul nc rc torul dedicat furnizat de fabric are o func ie de sincronizare de protec iei nc rc rii Instruc iuni de nc rcare Deschide i capacul portului de nc rcare de pe trotineta elec...

Page 23: ...e a bateriei cade sau este deteriorat Suda i linia de conectare Sau nlocui i linia DIAGNOSTIC EROARE POSIBILE SOLU II 00 Eroare accelera ie V rug m s verifica i dac accelera ia revine la pozi ia impli...

Page 24: ...e Bat nivel putere Distan c l torie i total Far On Off App MS ENERGY e Jant Aliaj de o el Suspensie fa spate Aliaj de Aluminiu Suspensie fa spate M rime roat cauciuc 10 10 Fr ne fa spate Fr ne mecanic...

Page 25: ...ilor V rug m s contacta i autoritatea local pentru detalii suplimentare despre cel mai apropiat punct de colectare desemnat S ar putea aplica sanc iuni pentru eliminarea incorect a acestor de euri n c...

Page 26: ......

Page 27: ...035 21 6 M 0 K...

Page 28: ...ENG 1...

Page 29: ...be sufficiently powerful to constitute a risk of electrocution The point of exclamation inside an equilateral triangle alerts the user about the presence of important operating instructions and mainte...

Page 30: ...6 are not allowed to ride the e scooter The rider should be over 120cm tall and must weight more than 20kg The maximum weight is 120kg You must comply with local laws and give way to pedestrians Whene...

Page 31: ...e 2 Do not ride the E Scooter if there is a fault with the battery or any component of the power system Otherwise you may lose control and suffer serious injury 3 Be sure to check the remaining batter...

Page 32: ...t enough and it need be additionally charged once if its storage is more than a month 11 Make sure to pay attention the Electric scooter can not wade for a long time because if water enters into the c...

Page 33: ...t plug DC Adapter plug Firstly properlly clean the adapter plug and scooter socket dry all the parts and then plug charge adapter plug 22 Never dismantle or modify the battery charger You may cause a...

Page 34: ...lead to first degree burns 35 If the battery case is damaged cracked or you notice unusual smells do not use it The leakage of fluid from the battery may cause serious injury Contact an authorized dis...

Page 35: ...ed timely 2 When starting the power supply or meeting a steep slope assist as far as possible to reduce the starting current and extend the battery life and continuation line mileage 3 In rainy days p...

Page 36: ...t water or dust entering Otherwise moisture or impurities may cause short circuits or unit malfunction Defects caused by user negligence are not covered by the warranty Before each ride always check t...

Page 37: ...light 20 Lever lock for Handle bar 4 3 7 9 10 11 12 13 14 15 16 17 19 8 6 20 5 2 1 18 3 4 7 8 9 11 12 13 14 15 16 17 18 19 21 22 10 6 5 2 1 20 1 Rear Disc brake Handle 2 LCD Display with controller 3...

Page 38: ...the handle If you feel that the lever has not fully tightened the mechanism repeat the procedure 5 Once again make sure that the steering handle is firm and tight If not repeat steps 3 and 4 Handleba...

Page 39: ...be no less than 2 5 times the diameter of the riser pipe 10 Lock the buckle tightly Note With folding handles it is normal for the handles to move slightly in the open position This is normal with suc...

Page 40: ...leted disconnect Charger from Power socket firstlly then disconnect charging plug from e scooter 3 Close the rubber cap IMPORTANT The protective cover of the e scooter charger socket must always be pr...

Page 41: ...signal will light up on display When Cruise control is anabled press 1x short click the Cruise control button 4 the scooter will maintain cruising speed 6x short click Change the Speed unit KM H to M...

Page 42: ...ode Throttle 2x short click the Power Multifunction button to change speed mode 1 3 Green light is ECO mode Slide mode App settings Accelerate mode Slide Switch On the slide mode on the APP you can co...

Page 43: ...le device via Bluetooth For App installation 1 Search App name MS Energy e on Apple store or Google play store to download the APP 2 Open the phone Bluetooth 3 Open the App MS Energy e to connect the...

Page 44: ...oter SETTINGS Click the Setting icon on the right top corner of dashboard to set the Cruise controll Speed mode Start mode Accelarate mode SPEED Click the Speed mode button to change Speed mode LIGHT...

Page 45: ...riding If you want you can change Non zero Slide Start to Zero Start For more info check Chepter 4 HOW TO START or Settings Menu in APP When riding adjust the gear level from 1 to 3 circularly 2x Shor...

Page 46: ...h speed Encounter rough road please keep in the low speed 5 10km h Aslight kneeling allows you to better adapt to the complex road Do not accelerate at downhill To avoid the head hit the door frame el...

Page 47: ...re loose tighten them It is recommended to perform regular periodic service of scooters once a year or every 3000km Battery Electric scooter is equipped with a lithium polymer battery The average life...

Page 48: ...arging and avoid battery over charge Do not use charge or leave a damaged battery unattended and follow the disposal protocols immediately Charger The dedicated charger provided by Factory has a charg...

Page 49: ...The charger wiring is loose or damaged The battery weld line falls off or is damaged Weld the connecting line or replace Weldthe connecting line FAULT DIAGNOSTIC POSSIBLE SOLUTIONS 00 Throttle Fault...

Page 50: ...Bat Status Power level Trip and Total distance Headlight On Off MS ENERGY e App Rim Aluminum Alloy Front Rear Suspension Steel Alloy Front Rear Suspension Wheel size Tires 10 10 Brakes Front Rear Mec...

Reviews: