INSTALLATION INSTRUCTIONS
3
CONFIRM INSTALLATION
With the power On, engine running, activate the clutch or On/Off switch. If connected correct, the
LED will illuminate when the clutch is activated. To verify the rpm, set the limit at a lower rpm, such
as 3,000, and test the system.
If the engine has trouble starting or running, check the following:
• Ground or switched 12 volts connection
• Coil connections
• The two 8-pin connectors may be in the wrong position and should be swapped and tested again.
OR
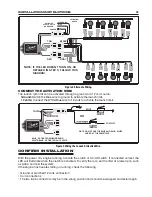
NOTE: DO NOT USE THE BLUE AND BLUE/WHITE
WIRES AT THE SAME TIME.
BLUE - ACTIVATED WHEN GROUND
WHITE/BLUE - ACTIVATED W/12 VOLTS
GROUND
ACTIVATION
WIRES
WHITE BLUE
BLUE
ACTIVATES
WITH 12 VOLTS
OR GROUND
TAN
RED
BLACK
GRAY
Figure 3 Wiring the Launch Activation Wire.
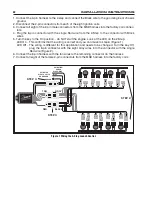
NOTE: IF THE LED DOESN'T TURN ON, AS
DETAILED IN STEP 5, FOLLOW THIS
DIAGRAM.
Figure 2 Alternate Wiring.
CONNECT THE ACTIVATION WIRE
The launch rpm limit can be activated through a ground or a 12 volt source.
Ground: Switch the Blue wire to ground to activate the launch limit.
12 volts: Connect the White/Blue wire to 12 volts to activate the launch limit.


