INSTALLATION INSTRUCTIONS
M S D I G N I T I O N
• w w w . m s d i g n i t i o n . c o m • ( 9 1 5 ) 8 5 7 - 5 2 0 0 • FA X ( 9 1 5 ) 8 5 7 - 3 3 4 4
Vacuum Advance: This adjustment allows you to advance the ignition timing just like a vacuum
advance canister on a distributor except you get to set the total amount of advance. You will have to
physically move the distributor to take advantage of this feature. It is a good idea to set the advance
timing knob to zero until you have finished wiring to the ignition system and BTM.
In order to get the most out of your Boost Timing Master, testing and tuning is required. To set the
adjustment, it is recommended to use a hand held Mighty-Vac or similar tool to simulate a boost
signal. By watching the timing with a timing light and simulating the boost signal you will be able to
get a good starting point to tune from.
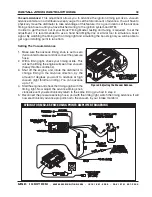
Setting The Vacuum Advance
1. Make sure the advance timing knob is set to zero
(full counterclockwise) and disconnect the pressure
hose.
2. With a timing light, check your timing at idle. This
will be the timing the engine will see at low vacuum
(heavy throttle conditions).
3. Shut off the engine, and rotate the distributor to
change timing in the advance direction, by the
amount of degrees you want to advance at high
vacuum (light throttle or idling). You can advance
up to 15°.
4. Start the engine and check the timing again with the
timing light. Now adjust the advance timing knob
clockwise until you electronically return to the same timing you had in step 2.
5. Reconnect the pressure sensing hose, and with the timing light, watch the timing advance. It will
now electronically advance proportional to the vacuum in your intake manifold.
Figure 4 Adjusting the Vacuum Advance.
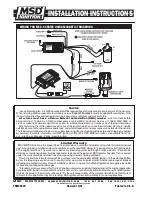
WIRING FOR MSD-6 SERIES USING POINTS AMPLIFIER TRIGGERING


