background image

BIOS Setup

MS-7638

3-23

BIOS Setup

MS-7638

command. Allows sense amplfiers to restore data to cells.

CH1/ CH2 tWTR

Mnmum tme nterval between the end of wrte data burst and the start of a col-

umn-read command. It allows I/O gatng to overdrve sense amplfiers before read 

command starts.

CH1/ CH2 tRRD

Specfies the actve-to-actve delay of dfferent banks.

CH1/ CH2 tRTP

Tme nterval between a read and a precharge command.

CH1/ CH2 tFAW

Ths tem s used to set the tFAW tmng.

Current  CH1/  CH2  tdrRdTRd/  tddRdTRd/  tsrRdTWr/  tdrRdTWr/  tddRdTWr/ 

tsrWrTRd/ tddWrTWr/ tsrRDTRd/ tsrWrTWr

These tem show the advanced DRAM tmngs.

Channel 1/ Channel2 Advanced Memory Settng

Settng to [Auto] enables the advance memory tmng automatcally to be determned 

by BIOS. Settng to [Manual] allows you to set the followng advanced memory tm-

ngs.

Extreme Memory Profile(X.M.P.)

Ths tem s used to enable/dsable the Intel Extreme Memory Profile (XMP). For further 

nformaton please refer to Intel’s offical webste.

Memory Rato

Ths tem allows you to set the memory multpler.

Adjusted DRAM Frequency (MHz)

It shows the adjusted DRAM frequency. Read-only.

QPI Rato

Ths tem allows you to set the QPI multpler.

Adjusted QPI Frequency (MHz)

It shows the adjusted QPI frequency. Read-only.

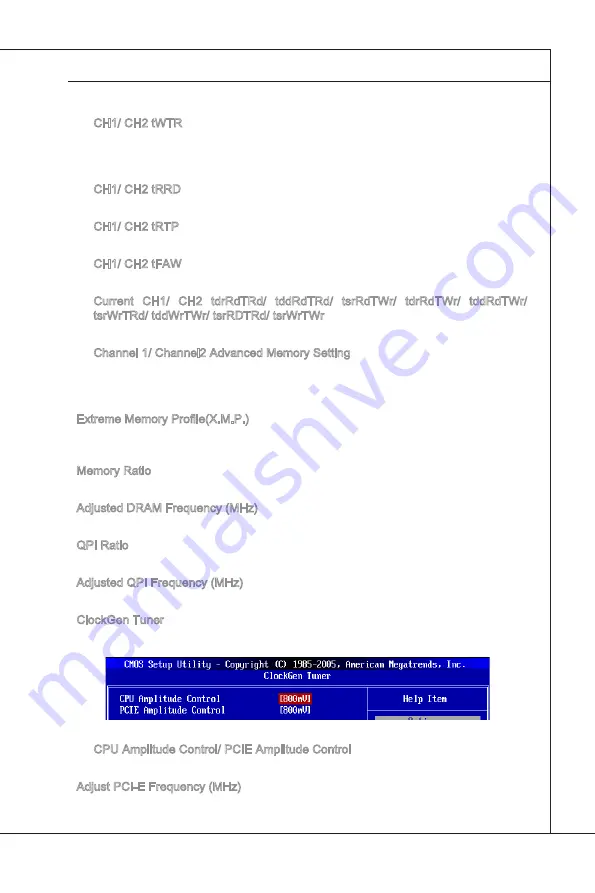
ClockGen Tuner

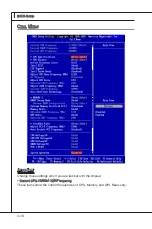
Press <Enter> to enter the sub-menu and the followng screen appears.

CPU Ampltude Control/ PCIE Ampltude Control

These tems are used to select the CPU/ PCI Express clock ampltude.

Adjust PCI-E Frequency (MHz)

Ths field allows you to select the PCIE frequency (n MHz). 

Summary of Contents for H55-G33 Series

Page 1: ...H55 G33 H55 G43 series MS 7638 v1 x Mainboard G52 76381X7...

Page 2: ...osoft Corporation AMI is registered trademark of American Megatrends Inc Award is a registered trademark of Phoenix Technologies Ltd Sound Blaster is registered trademark of Creative Technology Ltd Re...

Page 3: ...rnings on the equipment should be noted Never pour any liquid into the opening that could damage or cause electrical shock If any of the following situations arises get the equipment checked by servic...

Page 4: ...ct the interference by one or more of the measures listed below Reorient or relocate the receiving antenna Increase the separation between the equipment and receiver Connect the equipment into an outl...

Page 5: ...nik Altger te nicht mehr als kommunale Abf lle entsorgt werden MSI hat europaweit verschiedene Sammel und Recyclingunternehmen beauftragt die in die Europ ische Union in Verkehr gebrachten Produkte am...

Page 6: ...e producten die de merknaam MSI dragen en verkocht zijn in de EU Deze goederen kunnen geretourneerd worden op lokale inzamelingspunten SRPSKI Da bi za titili prirodnu sredinu i kao preduze e koje vodi...

Page 7: ...h sb rn ch MAGYAR Annak rdek ben hogy k rnyezet nket megv dj k illetve k rnyezetv d k nt fell pve az MSI eml kezteti nt hogy Az Eur pai Uni EU 2005 augusztus 13 n hat lyba l p az elektromos s elek tro...

Page 8: ...er 2 Hardware Setup 2 1 Quick Components Guide 2 2 CPU Central Processing Unit 2 3 Memory 2 7 Power Supply 2 9 Back Panel 2 10 Connectors 2 12 Switch 2 18 Jumpers 2 19 Button 2 20 Slots 2 21 LED Statu...

Page 9: ...MS 7638 ix MS 7638 Appendix A Realtek Audio A 1 Installing the Realtek HD Audio Driver A 2 Software Configuration A 3 Hardware Default Setting A 5...

Page 10: ......

Page 11: ...ard The H55 G33 H55 G43 Series mainboards are based on Intel H55 chipsets for optimal system efficiency Designed to fit the advanced Intel LGA1156 processor the H55 G33 H55 G43 Series deliver a high p...

Page 12: ...ase visit http www msi com index php func testreport LAN Supports LAN 10 100 1000 by Realtek RTL8111DL Audio Chip integrated by Realtek ALC888S VC2 ALC889 True Blu ray Audio Flexible 8 channel audio w...

Page 13: ...C switch Slots 2 PCI Express 2 0 x16 slots PCIE_1 is a x16 lane slot and PCIE_4 is a x4 lane slot 2 PCI Express 2 0 x1 slots 3 PCI slots support 3 3V 5V PCI bus Interface Form Factor ATX 30 5cm x 23 0...

Page 14: ...JPWR2 JSP1 JCD1 JAUD1 SATA1_2 SATA3_4 SATA6 SATA5 IDE1 JBAT1 OC_SW1 JCI1 JUSB1 JUSB2 JUSB3 JCOM1 JFP1 JFP2 SYSFAN2 SYSFAN1 JPWR1 JTPM1 JLPT1 CPUFAN BATT Top LAN Jack Bottom USB ports T M B Line In Lin...

Page 15: ...ity DVD SATA Cable Optional Power Cable Standard Cable for IDE Devices CrossFireX Video Link Cable Packing Checklist The pictures are for reference only and may vary from the packing contents of the p...

Page 16: ......

Page 17: ...ion be careful in holding the components and follow the installation procedures For some components if you install in the wrong orientation the components will not work properly Use a grounded wrist s...

Page 18: ...7 JPWR2 p 2 9 JPWR1 p 2 9 CPUFAN p 2 15 SYSFAN1 p 2 15 SYSFAN2 p 2 15 PCIE p 2 21 PCI p 2 26 JAUD1 p 2 14 JCD1 p 2 17 JSP1 p 2 16 FDD1 p 2 12 JTPM1 p 2 17 JLPT1 p 2 15 JCOM1 p 2 14 JFP1 JFP2 p 2 13 P...

Page 19: ...tion Replacing the CPU While replacing the CPU always turn off the ATX power supply or unplug the power supply s power cord from the grounded outlet first to ensure the safety of CPU Overclocking This...

Page 20: ...CPU cooler correctly Wrong installation will cause the damage of your CPU mainboard Open the load level 1 Lift the load lever up to fully open position 2 The CPU socket has a plastic cap on it to pro...

Page 21: ...load lever while pressing down lightly onto the load plate 6 Secure the lever near the hook end under the retention tab 7 Make sure the four hooks are in proper position before you install the cooler...

Page 22: ...arance of your mainboard may vary depending on the model you purchase Please refer to the documentation in the CPU fan package for more details about the CPU fan installation Align the holes on the ma...

Page 23: ...performance The following illustrations explain the population rules for Dual Channel mode 1 DIMM2 DIMM1 DIMM4 DIMM3 2 DIMM2 DIMM1 DIMM4 DIMM3 Important DDR3 memory modules are not interchangeable wi...

Page 24: ...t in until the golden finger on the memory module is deeply inserted in the DIMM slot The plastic clip at each side of the DIMM slot will automatically close when the memory module is properly seated...

Page 25: ...3 V 1 4 1 2 V 2 3 3 V 1 5 G r o u n d 3 G r o u n d 1 6 P S O N 4 5 V 1 7 G r o u n d 5 G r o u n d 1 8 G r o u n d 6 5 V 1 9 G r o u n d 7 G r o u n d 2 2 5 V 1 0 1 2 V 2 0 R e s 8 P W R O K 2 3 5 V...

Page 26: ...stablished On brighter pulsing The computer is communicating with another computer on the LAN Right Green Off 10 Mbits sec data rate is selected On 100 Mbits sec data rate is selected Orange On 1000 M...

Page 27: ...tors are used for audio devices It is easy to differentiate between audio effects according to the color of audio jacks Line In Blue Line In is used for external CD player tape player or other audio d...

Page 28: ...ce only IDE Connector IDE1 This connector supports IDE hard disk drives optical disk drives and other IDE de vices The MB layout in this figure is for reference only Important If you install two IDE d...

Page 29: ...egree angle Otherwise data loss may occur during transmission Front Panel Connector JFP1 JFP2 This connector is for electrical connection to the front panel switches and LEDs The JFP1 is compliant wit...

Page 30: ...rt Connector JCOM1 This connector is a 16550A high speed communication port that sends receives 16 bytes FIFOs You can attach a serial device 1 D C D 3 S O U T 1 0 N o P i n 5 G r o u n d 7 R T S 9 R...

Page 31: ...t the vendors for proper CPU cooling fan CPUFAN support Smart fan control You can install Control Center utility that will automatically control the CPUFAN speeds according to the actual CPUFAN tem pe...

Page 32: ...ems and the like The MB layout in this figure is for reference only USB 2 0 Bracket optional Important Note that the pins of VCC and GND must be connected correctly to avoid possible damage S PDIF Out...

Page 33: ...tional Please refer to the TPM security platform manual for more details and usages 1 0 N o P i n 1 4 G r o u n d 8 5 V P o w e r 1 2 G r o u n d 6 S e r i a l I R Q 4 3 3 V P o w e r 2 3 V S t a n d...

Page 34: ...ncy by changing the switch Follow the instructions below to set the FSB Default Increase 10 speed of FSB Increase 15 speed of FSB Increase 20 speed of FSB Important Make sure that you power off the sy...

Page 35: ...With the CMOS RAM the system can automatically boot OS every time it is turned on If you want to clear the system configuration set the jumper to clear data Important You can clear CMOS by shorting 2...

Page 36: ...2 20 Hardware Setup Hardware Setup Button Power On Button POWER This button is used to turn on or turn off the system Press the button to turn on or turn off the system...

Page 37: ...pansion card PCI Express x16 Slot PCI Express x1 Slot Important When adding or removing expansion cards make sure that you unplug the power sup ply first Meanwhile read the documentation for the expan...

Page 38: ...system performance ATI CrossFireXTM technol ogy allows you to expand your system s graphics capabilities It allows you the ability to scale your system s graphics horsepower as you need it supporting...

Page 39: ...ng in the CatalystTM Control Center that needs to be enabled for CrossFireXTM to operate The following aspect appears in CatalystTM Control Center 3 Select the Advanced View from the view drop menu Im...

Page 40: ...d is required to connect the golden fingers on the top of these two graphics cards refer to the picture below Please note that although you have installed two graphics cards only the video outputs on...

Page 41: ...e Enable multi GPU box to enable it for the onboard graphics cards concerning the details of multi GPU settings please refer to your graphics card manual Restart your system and a pop up message will...

Page 42: ...n for the expansion card to configure any necessary hardware or software settings for the expansion card such as jumpers switches or BIOS configuration PCI Interrupt Request Routing The IRQ acronym of...

Page 43: ...LED The APS Active Phase Switching LED indicate the current CPU power phase mode Follow the instructions below to read ON OFF The LED will light when CPU is in 2 or 3 phase power mode The LED will tur...

Page 44: ......
Page 45: ...ws you to configure the system for op timum use You may need to run the Setup program when An error message appears on the screen during the system booting up and requests you to run SETUP You want to...

Page 46: ...s under each BIOS category described in this chapter are under continuous update for better system performance Therefore the description may be slightly dif ferent from the latest BIOS and should be h...

Page 47: ...an make changes to You can use the arrow keys to select the item The on line description of the highlighted setup function is displayed at the bottom of the screen Sub Menu If you find a right pointer...

Page 48: ...ated Peripherals Use this menu to specify your settings for integrated peripherals Power Management Setup Use this menu to specify your settings for power management H W Monitor This entry shows your...

Page 49: ...BIOS Load Fail Safe Defaults Use this menu to load the default values set by the BIOS vendor for stable system performance Load Optimized Defaults Use this menu to load the default values set by the...

Page 50: ...his allows you to set the system to the date that you want usually the current date The format is day month date year day Day of the week from Sun to Sat determined by BIOS Read only month The month f...

Page 51: ...on the mainboard Hold on The setting determines whether the system will stop of an error is detected at boot When the system stops of the errors preset it will halt on for 15 seconds and then au toma...

Page 52: ...rized users or computer viruses When enabled the BIOS data cannot be changed when attempt ing to update the BIOS with a Flash utility To successfully update the BIOS you will need to disable this Flas...

Page 53: ...her takes over When set to higher values every PCI device can conduct transactions for a longer time and thus improve the effective PCI bandwidth For better PCI performance you should set the item to...

Page 54: ...Setup BIOS Setup DVMT FIXED Memory only for IGP Specify the size of DVMT FIXED memory to allocate for video memory TCG TPM SUPPORT Setting the option to Yes enables TPM Trusted Platform Module for th...

Page 55: ...This setting allows you to enable disable the onboard LAN controller LAN Option ROM This item is used to decide whether to invoke the Boot ROM of the onboard LAN Extra RAID IDE Controller for IDE and...

Page 56: ...el port on the on board Super I O chipset that provides Standard ECP and EPP features It has the following options Disabled 3BC Line Printer port 0 278 Line Printer port 2 378 Line Printer port 1 Para...

Page 57: ...h as Windows 2000 XP you can choose to enter the Standby mode in S1 POS or S3 STR fashion through the setting of this field Settings are S1 The S1 sleep mode is a low power state In this state no syst...

Page 58: ...of the USB device to wake up the system from S3 Sus pend to RAM sleep state Resume From S3 By PS 2 Keyboard Mouse These items determine whether the system will be awakened from what power sav ing mod...

Page 59: ...lly depending on the current temperature to keep it with in a specific range You can enable a fan target value here If the current CPU fan temperature reaches to the target value the smart fan functio...

Page 60: ...en set to Auto the hardware will auto adjust the CPU VTT PCH DDR power phase according to the loading of CPU VTT PCH DDR to reach the best power sav ing function Motherboard LED Control This item is u...

Page 61: ...ear on the screen U Key This item is used to enable disable USB driver device as a key Make U Key at This item is used to specify the USB driver device as a key Change Supervisor Password This item is...

Page 62: ...OS Setup BIOS Setup Cell Menu Important Change these settings only if you are familiar with the chipset Current CPU DRAM QPI Frequency These items show the current frequencies of CPU Memory and QPI Re...

Page 63: ...The Enhanced Intel SpeedStep technology allows you to set the performance level of the microprocessor whether the computer is running on battery or AC power This field will appear after you installed...

Page 64: ...Processor with HT Technology Chipset An Intel Chipset that supports HT Technology BIOS A BIOS that supports HT Technology and has it enabled OS An operating system that supports HT Technology For more...

Page 65: ...nd the following items will appear This items will help the system to overclock step by step after system booting up Start OC Stepping From MHz This item is used to set the initial base clock The syst...

Page 66: ...l controller run at 2N rate CH1 CH2 CAS Latency CL This controls the CAS latency which determines the timing delay in clock cycles before SDRAM starts a read command after receiving it CH1 CH2 tRCD Wh...

Page 67: ...les the advance memory timing automatically to be determined by BIOS Setting to Manual allows you to set the following advanced memory tim ings Extreme Memory Profile X M P This item is used to enable...

Page 68: ...the EMI generated by modulating the pulses so that the spikes of the pulses are reduced to flatter curves Important If you do not have any EMI problem leave the setting at Disabled for optimal system...

Page 69: ...the Power button to reboot the system three times Please note that to avoid electric current to affect other devices or components we suggest an interval of more than 10 seconds among the reboot acti...

Page 70: ...BIOS via the USB Storage drive directly Update BIOS ROM chip data from selected file which was be download from official website and must be saved in the root directory of the USB Stor age drive It o...

Page 71: ...efer to the block diagram below about the M Flash function Due to the special design of some graphics cards will cause dark screen during M flash operation and you may refer the beeps from the system...

Page 72: ...ific USB drive storage drive to save BIOS file from BIOS ROM chip data Note it only supports FAT FAT32 file system drive Save File Name as Please setup a specific name for the BIOS file which will be...

Page 73: ...erclocking Profile 1 2 3 4 5 6 These items are used to save the currect settings to selected profile and they are also used to load the settings from the selected profile OC Retry Count These items is...

Page 74: ...timal performance of the mainboard The Fail Safe Defaults are the default values set by the BIOS vendor for stable system performance When you select Load Fail Safe Defaults a message as below appears...

Page 75: ...provides 10 channel DAC that simul taneously supports 7 1 sound playback and 2 channels of independent stereo sound output multiple streaming through the Front Out Left and Front Out Right chan nels A...

Page 76: ...ok slightly different if you install the drivers in different operating systems Insert the application DVD into the DVD ROM drive The setup screen will automati cally appear Click Driver tab Click Aud...

Page 77: ...en You may double click the icon and the GUI will pop up accordingly It is also available to enable the audio driver by clicking the Realtek HD Audio Manager from the Control Panel Software panel over...

Page 78: ...ptions will provide you a complete guidance of anticipated sound effect for both output and input device Jack status panel This panel depicts all render and capture devices currently connected with yo...

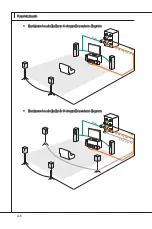
Page 79: ...38 Hardware Default Setting The following diagrams are audio back panel default setting Backpanel audio jacks to 2 channel speakers diagram Front Backpanel audio jacks to 4 channel speakers diagram Re...

Page 80: ...A 6 Realtek Audio Backpanel audio jacks to 6 channel speakers diagram Rear Front Center Subwoofer Backpanel audio jacks to 8 channel speakers diagram Rear Front Center Subwoofer Side Surround...

Reviews: