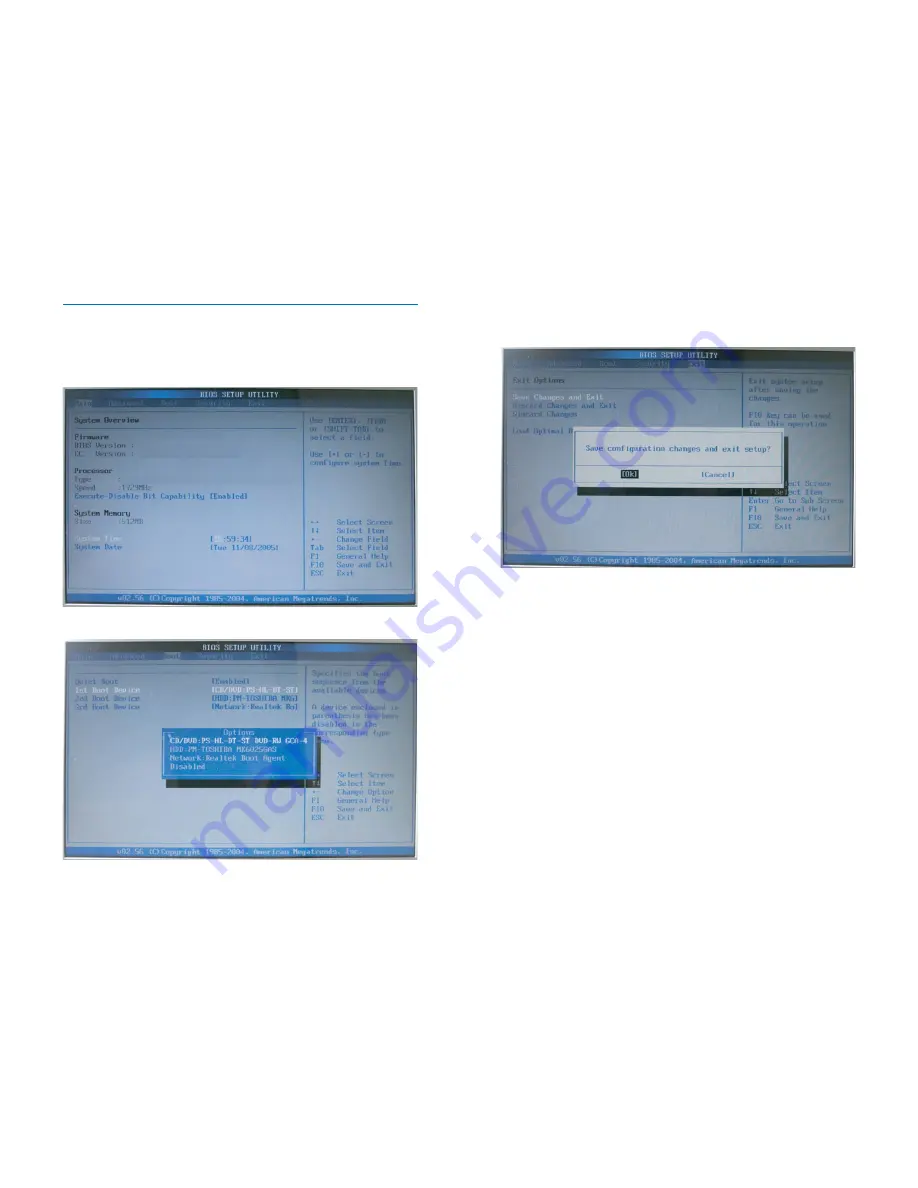
Step 8 : Entering BIOS
Before powering on the notebook, plug in notebook power adapter into the notebook.
After pressing the power button, press <Del> immediately which will take you to the
BIOS CMOS Setup Screen.
8-1
Adjust proper TIME by pressing <Enter>. Use <+> or <-> to configure System
Time.
8-2
Under “BOOT” menu in the BIOS Setup Utility, press <Enter> to select the first
boot device. Have the first boot device as “CD/DVD.”
p. 11
p. 12
8-3
Insert a Bootable OS CD into the OSD tray.
8-4
To save/exit the BIOS Setup Screen, go under the “Exit” menu press <Enter>
under “Save Changes and Exit.” Press <Enter> under the window that pops up to
save/exit.
8-5
After seeing the Intel Logo, immediately press “Enter” in order to install OS and
follow the given setup messages.
8-6
After installing OS, insert the given Driver CD to install the appropriate drivers in
order.
Hint: If you have any questions related to the BIOS Setup procedure or if
there are any other issues, please contact your local retailers or national
distributors for further support.


