background image


Getting Started 

3-18 

„

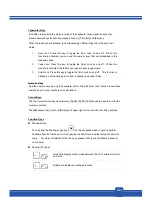
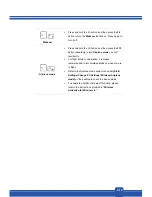
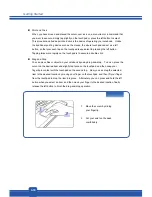
  Point and Click 

When you have moved and placed the cursor over an icon, a menu item or a command that 

you want to execute, simply tap slightly on the touchpad or press the left button to select.   

This procedure, called as point and click is the basics of operating your notebook.    Unlike 

the traditional pointing device such as the mouse, the whole touchpad can act as a left 

button, so that your each tap on the touchpad is equivalent to pressing the left button.   

Tapping twice more rapidly on the touchpad is to execute a double-click.   

„

  Drag and Drop 

You can move files or objects in your notebook by using drag-and-drop.    To do so, place the 

cursor on the desired item and slightly tap twice on the touchpad, and then keep your 

fingertip in contact with the touchpad on the second tap.    Now, you can drag the selected 

item to the desired location by moving your finger on the touchpad, and then lift your finger 

from the touchpad to drop the item into place.    Alternately, you can press and hold the left 

button when you select an item, and then move your finger to the desired location; finally, 

release the left button to finish the drag-and-drop operation. 


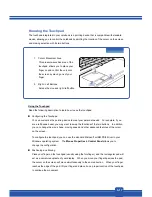
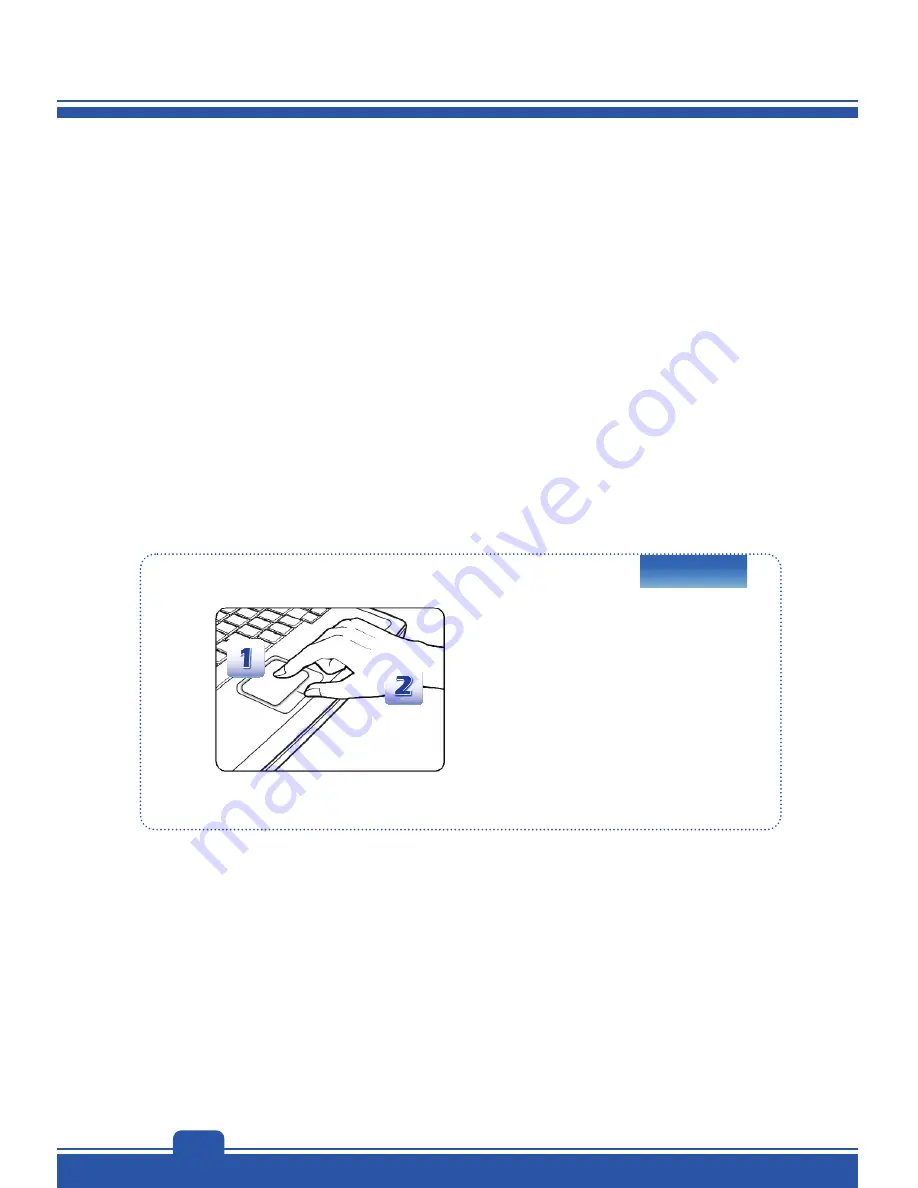
1. 

Move the cursor by sliding 

your fingertip. 


2. 

Put your wrist on the desk 

comfortably. 


Summary of Contents for MS1763

Page 1: ...Preface 1 Notebook User s Manual...

Page 2: ...ions 1 6 Trademarks 1 8 Reversion History 1 8 Chapter 2 Introductions Manual Map 2 2 Unpacking 2 2 Product Overview 2 3 Top Open View 2 3 Front Side View 2 8 Right Side View 2 10 Left Side View 2 11 R...

Page 3: ...yboard 3 12 Wireless Activation for Windows 8 3 16 Knowing the Touchpad 3 17 About Hard Disk Drive 3 19 Using the Optical Storage Device 3 19 Connecting the External Devices 3 21 Peripheral Devices 3...

Page 4: ...terference by one or more of the following measures Reorient or relocate the receiving antenna Increase the separation between the equipment and receiver Connect the equipment into an outlet on a circ...

Page 5: ...a For further information please visit http www dtsc ca gov hazardouswaste perchlorate Safety Guideline for Using Lithium Battery Danger of explosion if battery is incorrectly replaced Replace only wi...

Page 6: ...mage the equipment This unit should be operated under maximum ambient temperature of 40O C 120O F Make sure the power voltage is within safety range and has been adjusted properly to the value of 100...

Page 7: ...cked by a service personnel The power cord or plug is damaged Liquid has penetrated into the equipment The equipment has been exposed to moisture The equipment has not worked well or you can not get i...

Page 8: ...S and the symbol are trademarks of SRS Labs Inc THX and THX TruStudio Pro are trademarks of THX Ltd which may be registered in some jurisdictions All rights reserved Sound Blaster is registered tradem...

Page 9: ...2 Introductions...

Page 10: ...these accessories is damaged or missing please contact the vendor where you purchased this notebook Also this chapter provides the specification of this notebook and introduces the function buttons qu...

Page 11: ...appearance of this notebook before using it Please be aware that the notebook shown in this section may vary from the actual one that users purchased Top open View The figure of top open view and des...

Page 12: ...tall the SCM application P1 User Defined Touch this button once to bring up the User Define Key dialogue Touch this button again to launch the user defined application In the User Define Key dialogue...

Page 13: ...sensor will not be functional In such a case users can right click the ODD in My Computer and select Eject to eject the ODD tray 4 Status LED Caps Lock Glowing amber when the Caps Lock function is ac...

Page 14: ...d then press the F4 button to launch the Windows Search function ECO Engine Power Saving Press and hold the Fn button and then press the F5 button repeatedly to switch among various power saving modes...

Page 15: ...2 7 General Fn Keys Increase the Keyboard LED brightness Decrease the Keyboard LED brightness...

Page 16: ...es out when this function is disabled Note Functions listed above may be optionally supported depending on the model users purchased Warning For flight safety consideration make sure the WLAN and Blue...

Page 17: ...p state LED goes out when the system is turned off Battery Status Glowing amber when the battery is being charged Blinking amber if the battery fails and it is recommended to replace a new battery Con...

Page 18: ...to connect USB interface peripheral devices such as the mouse keyboard modem portable hard disk module printer and more 2 Optical Drive Device This notebook is equipped with an optical drive device Th...

Page 19: ...emory Stick or MS Pro Memory Stick Pro cards depending on the model users purchase Contact the local dealer for further and correct information and be noted that the supported memory cards may vary wi...

Page 20: ...audio device Connect the Rear speakers here Line Out A connector for speakers Connect the Surround speakers here 4 USB 3 0 Ports USB 3 0 the SuperSpeed USB delivers the higher interface speeds for con...

Page 21: ...a miniaturized version of the DisplayPort with a suitable adapter the Mini DisplayPort may be used to drive displays with a VGA DVI or HDMI interface 4 Power Connector To connect the AC DC adapter and...

Page 22: ...Battery Pack This notebook will be powered by the battery pack when the AC DC adapter is disconnected 4 Battery Release Button It is a bounce back device as a preparation for releasing the battery pa...

Page 23: ...or Type Intel Shark Bay Haswell Supported Processor Intel Quad Dual Core processor L3 Cache UP to 8MB Based on CPU Core Chip North Bridge Intel Shark Bay Haswell South Bridge Intel Lynx Point HM87 Mem...

Page 24: ...isplayPort x 1 Side Out x 1 RJ45 x 1 HDMI x 1 Card Reader x 1 SD MMC The supported memory cards may vary without notice Communication Port LAN 10 100 1000Mb Ethernet Wireless LAN Optionally supported...

Page 25: ...orted Multi Display Function Supported Audio Internal Speaker 2 speakers 1 sub woofer Sound Volume Adjusted by keyboard hot key and switches Software BIOS USB Flash Boot USB floppy boot up DOS only BI...

Page 26: ...Introductions 2 18...

Page 27: ...3 Getting Started...

Page 28: ...Getting Started 3 2 Begin to Use the Notebook For a new user of this notebook we would like to suggest you follow the illustrations below to begin to use the notebook...

Page 29: ...Li ion battery pack The rechargeable Li ion battery pack is an internal power source of the notebook Be aware of that this battery pack may be damaged if users try to disassemble the battery pack on...

Page 30: ...lign and place the battery to the battery tray with correct orientation 2 Press down the battery pack to fasten the battery pack in the battery tray 3 Press the lock unlock button to the Lock position...

Page 31: ...to the unlocked position 3 Locate the battery release button on the bottom side 4 Push and hold the release button to the battery releasing direction as shown on the bottom side 5 Dig the edge of bat...

Page 32: ...time period Turn off the system if you won t be using it for a period of time Disable unnecessary settings or remove idle peripherals Connect an AC DC adapter to the system whenever possible Charging...

Page 33: ...ibernate mode after a period of user inactivity Follow the instructions below to adjust the power management settings in Windows OS Power Options in Windows OS allows you to control the power manageme...

Page 34: ...d 3 8 Then select a power plan that meets your personal needs The Power icon will present various and relative options as following You can wake up your computer from power saving mode by pressing the...

Page 35: ...ero energy consumption The power management feature allows the computer to initiate a lower power or Sleep mode after a period of user inactivity When used with an external ENERGY STAR qualified monit...

Page 36: ...ng instructions to assure your own safety and make yourself comfortable during the operations Safety and Comfort Tips The notebook is a portable platform that allows you to work anywhere However choos...

Page 37: ...flat and naturally on the floor so that your knees and elbows have the proper position about 90 degree when operating 5 Put your hands on the desk naturally to support your wrists 6 Adjust the angle...

Page 38: ...e Keyboard This notebook provides a full functioned keyboard This keyboard can be divided into four categories Typewriter keys Cursor keys Numeric keys and Function keys 1 Typewriter keys 2 Numeric ke...

Page 39: ...off This function is defined by individual programs and is usually used under DOS Numeric Keys Find the numeric keys among the keyboard and activate the Num Lock function to use these numeric keys to...

Page 40: ...he keyboard to activate the specific applications or tools With the help of these quick launch buttons users will be able to do work more efficiently User Defined or Windows Search optional Press and...

Page 41: ...to turn Airplane mode on or off recurrently For flight safety consideration it is always recommended to turn Airplane Mode on when you are in flight Refer to the Airplane mode switch icon under Start...

Page 42: ...ireless devices selections under Wireless 4 Make sure Airplane mode is set to OFF here 5 Turn the WLAN or Bluetooth function on off by sliding the function switch bar Refer to the Status LED to check...

Page 43: ...meet your personal needs For example if you are a left handed user you may want to swap the functions of the two buttons In addition you can change the size shape moving speed and other advanced feat...

Page 44: ...to execute a double click Drag and Drop You can move files or objects in your notebook by using drag and drop To do so place the cursor on the desired item and slightly tap twice on the touchpad and...

Page 45: ...hen the notebook is turned on The replacement of hard disk drive should be done by an authorized retailer or service representative Using the Optical Storage Device Your notebook is equipped with an o...

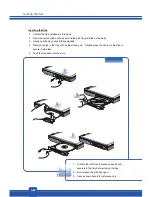
Page 46: ...ntly pull the tray out until fully extended 4 Place your disk in the tray with its label facing up Slightly press the center of the disk to secure it into place 5 Push the tray back into the drive 1 C...

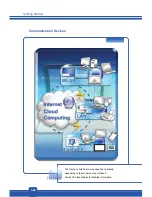
Page 47: ...ng the External Devices The I O input output ports on the notebook allow you to connect peripheral devices and communication devices All functions and devices listed here are for reference only Periph...

Page 48: ...Getting Started 3 22 Communication Devices The functions listed here are supported optionally depending on the model users purchased Contact the local dealer for detailed information...

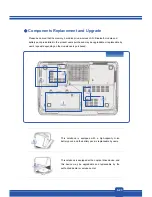
Page 49: ...sers purchased may be upgradable or replaceable by user s request depending on the models users purchased This notebook is equipped with a high capacity Li ion battery pack and the battery pack is rep...

Page 50: ...nding on the specification limitation To learn more about upgrade limitation please refer to the specification in the User s Manual provided For any further information about the product users purchas...

Reviews: