background image

3-18

BIOS Setup

MS-7511

BIOS Setup

MS-7511

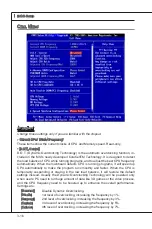
DRAM Tmng Mode

Ths field has the capacty to automatcally detect all of the DRAM tmng. If you set 

ths field to [DCT 0], [DCT 1] or [Both], some fields wll appear and selectable. DCT 

0 controls channel A and DCT1 controls channel B.

CAS# Latency (TCL)

When the DRAM Tmng Mode sets to [DCT 0], [DCT1] or [Both], the field s adjust-

able.  Ths  controls  the  CAS  latency,  whch  determnes  the  tmng  delay  (n  clock 

cycles) before SDRAM starts a read command after recevng t.

RAS#to CAS#Delay(TRCD)

When the DRAM Tmng Mode sets to [DCT 0], [DCT1] or [Both], the field s adjust-

able. When DRAM s refreshed, both rows and columns are addressed separately. 

Ths setup tem allows you to determne the tmng of the transton from RAS (row 

address  strobe)  to  CAS  (column  address  strobe).  The  less  the  clock  cycles,  the 

faster the DRAM performance.

RAS# Percharge Tme (TRP)

When the DRAM Tmng Mode sets to [DCT 0], [DCT1] or [Both], ths field s adjust-

able. Ths settng controls the number of cycles for Row Address Strobe (RAS) to 

be allowed to precharge. If nsufficent tme s allowed for the RAS to accumulate 

ts charge before DRAM refresh, refresh may be ncomplete and DRAM may fal 

to retan data. Ths tem apples only when synchronous DRAM s nstalled n the 

system.

tRTP

When the DRAM Tmng Mode sets to [DCT 0], [DCT1] or [Both], the field s adjust-

able. Tme nterval between a read and a precharge command.

 Mn RAS# Actve Tme (TRAS)

When the DRAM Tmng Mode sets to [DCT 0], [DCT1] or [Both], ths field s adjust-

able. Ths settng determnes the tme RAS takes to read from and wrte to memory 

cell.

ROW Cycle Tme (TRC)

When the DRAM Tmng Mode sets to [DCT 0], [DCT1] or [Both], the field s adjust-

able. The rowcycle tme determnes the mnmum number of clock cycles a memory 

row takesto complete a full cycle, from row actvaton up to the prechargng of the 

actverow.

tWR

When the DRAM Tmng Mode sets to [DCT 0], [DCT1] or [Both], the field s adjust-

able. Mnmum tme nterval between end of wrte data burst and the start of a pre-

charge command. Allows sense amplfiers to restore data to cells.

ROW to ROW Delay (TRRD)

When the DRAM Tmng Mode sets to [DCT 0], [DCT1] or [Both], the field s adjust-

able. Specfies the actve-to-actve delay of dfferent banks. Tme nterval between a 

read and a precharge command.

tWTR

When the DRAM Tmng Mode sets to [DCT 0], [DCT1] or [Both], the field s adjust-

able. Mnmum tme nterval between the end of wrte data burst and the start of a 

column-read command. It allows I/O gatng to overdrve sense amplfiers before read 

Summary of Contents for NF720DT-C43 Series

Page 1: ... NF720DT C43 series MS 7511 v1 x Mainboard G52 75111X7 ...

Page 2: ...egistered trademark of Advanced Micro Devices Inc Award is a registered trademark of Phoenix Technologies Ltd Sound Blaster is registered trademark of Creative Technology Ltd Realtek is registered trademark of Realtek Semiconductor Corporation JMicron is registered trademark of JMicron Technology Corporation Netware is a registered trademark of Novell Inc Revision History Revision Revision History...

Page 3: ...ted Never pour any liquid into the opening that could damage or cause electrical shock If any of the following situations arises get the equipment checked by service personnel The power cord or plug is damaged Liquid has penetrated into the equipment The equipment has been exposed to moisture The equipment does not work well or you can not get it work according to User s Manual The equipment has d...

Page 4: ... the interference by one or more of the measures listed below Reorient or relocate the receiving antenna Increase the separation between the equipment and receiver Connect the equipment into an outlet on a circuit different from that to which the receiver is connected Consult the dealer or an experienced radio television technician for help Notice 1 The changes or modifications not expressly appro...

Page 5: ...NÇAIS En tant qu écologiste et afin de protéger l environnement MSI tient à rappeler ceci Au sujet de la directive européenne EU relative aux déchets des équipement élec triques et électroniques directive 2002 96 EC prenant effet le 13 août 2005 que les produits électriques et électroniques ne peuvent être déposés dans les décharges ou tout simplement mis à la poubelle Les fabricants de ces équipe...

Page 6: ...en die de merknaam MSI dragen en verkocht zijn in de EU Deze goederen kunnen geretourneerd worden op lokale inzamelingspunten SRPSKI Da bi zaštitili prirodnu sredinu i kao preduzeće koje vodi računa o okolini i prirodnoj sredini MSI mora da vas podesti da Po Direktivi Evropske unije EU o odbačenoj ekektronskoj i električnoj opremi Di rektiva 2002 96 EC koja stupa na snagu od 13 Avgusta 2005 proizv...

Page 7: ...místních sběrnách MAGYAR Annak érdekében hogy környezetünket megvédjük illetve környezetvédőként fellépve az MSI emlékezteti Önt hogy Az Európai Unió EU 2005 augusztus 13 án hatályba lépő az elektromos és elek tronikus berendezések hulladékairól szóló 2002 96 EK irányelve szerint az elektromos és elektronikus berendezések többé nem kezelhetőek lakossági hulladékként és az ilyen elektronikus berend...

Page 8: ... Quick Components Guide 2 2 CPU Central Processing Unit 2 3 Memory 2 6 Power Supply 2 8 Back Panel 2 9 Connectors 2 10 Jumpers 2 15 Slots 2 16 Chapter 3 BIOS Setup 3 1 Entering Setup 3 2 The Main Menu 3 4 Standard CMOS Features 3 6 Advanced BIOS Features 3 8 Integrated Peripherals 3 10 Power Management Setup 3 12 PnP PCI Configurations 3 14 H W Monitor 3 15 Cell Menu 3 16 Load Fail Safe Optimized ...

Page 9: ... B 25 Installing Driver B 29 NVIDIA RAID Utility Installation B 30 Using the NVMediaShield Software B 33 Appendix C Dual Core Center C 1 Activating Dual Core Center C 2 Main C 3 DOT Dynamic OverClocking C 5 Clock C 6 Voltage C 7 FAN Speed C 8 Temperature C 9 User Profile C 10 ...

Page 10: ......

Page 11: ...he NF720DT C43 Series mainboards are based on NVIDIA nForce 720D chip set for optimal system efficiency Designed to fit the advanced AMD Athlon 64 Phenom processor the NF720DT C43 Series deliver a high performance and professional desktop platform solution Chapter 1 Getting Started ...

Page 12: ...pports PCIE LAN 10 100 1000 Fast Ethermet by RTL8211BL Audio Chip integrated by Realtek ALC888 Flexible 8 channel audio with jack sensing Compliant with Azalia 1 0 Spec IDE 1 IDE port by NVIDIA nForce 720D Supports Ultra DMA 33 66 100 133 mode SATA 6 SATA II ports by NVIDIA nForce 720D Supports storage and data transfers at up to 3 Gb s Floppy 1 floppy port Supports 1 FDD with 360KB 720KB 1 2MB 1 ...

Page 13: ...3 MS 7511 1 SPDIF out connector 1 TPM connector optional Slots 1 PCI Express x16 slot 2 PCI Express x1 slots 3 PCI slots Support 3 3V 5V PCI bus Interface Form Factor ATX 30 5cm X 22 0cm Mounting 9 mounting holes ...

Page 14: ...JSPD1 FDD1 SLOT2 SLOT1 SLOT3 JUSB2 JUSB3 JVBAT1 JCI1 SYSFAN1 SYSFAN2 JCOM1 JFP1 JFP2 SATA5 SATA6 SATA2 SATA1 SATA3 SATA4 JSPI1 JUSB1 PCIE_1X2 PCIE_1X1 PCIE_X1 IDE 1 ATX 1 DIMM1 DIMM3 DIMM2 DIMM4 T Line In M Line Out B Mic T RS Out M CS Out B SS Out T LAN jack B USB ports Top mouse Bottom keyboard Parallel Port USB ports NVIDIA nForce 720D SOCKET AM2 Fintek F71882FG ...

Page 15: ...E Devices Back IO Shield User s Guide Packing Checklist The pictures are for reference only and may vary from the packing contents of the product you purchased If you need to purchase accessories and request the part numbers you could search the product web page and find details on our web address below http www msi com index php ...

Page 16: ......

Page 17: ...tion be careful in holding the components and follow the installation procedures For some components if you install in the wrong orientation the components will not work properly Use a grounded wrist strap before handling computer components Static electricity may damage the compo nents Chapter 2 Hardware Setup ...

Page 18: ...p 2 6 SYSFAN1 2 p 2 11 IDE1 p 2 10 ATX1 p 2 8 JCI1 p 2 13 JBAT1 p 2 15 JFP1 JFP2 p 2 12 SATA1 6 p 2 11 JUSB1 3 p 2 12 JTPM1 p 2 14 FDD1 p 2 10 JSPD1 p 2 14 CD_IN1 p 2 13 JAUD1 p 2 13 PCI slots p 2 16 JCOM1 p 2 13 PCIE slots p 2 16 CPUFAN1 p 2 11 Back Panel p 2 9 PWR1 p 2 8 ...

Page 19: ...ating Make sure that you apply an even layer of thermal paste or thermal tape between the CPU and the heatsink to enhance heat dissipation Replacing the CPU While replacing the CPU always turn off the ATX power supply or unplug the power supply s power cord from the grounded outlet first to ensure the safety of CPU Overclocking This mainboard is designed to support overclocking However please make...

Page 20: ...se the lever up to a 90 degree angle 1 Look for the gold arrow of the CPU The gold arrow should point as shown in the picture The CPU can only fit in the correct orientation 2 If the CPU is correctly installed the pins should be completely embedded into the socket and can not be seen Please note that any violation of the correct installation procedures may cause permanent damages to your mainboard...

Page 21: ...7 Attach the CPU Fan cable to the CPU fan connector on the mainboard 8 Important Mainboard photos shown in this section are for demonstration of the cooler instal lation for Socket AM2 CPUs only The appearance of your mainboard may vary depending on the model you purchase While disconnecting the Safety Hook from the fixed bolt it is necessary to keep an eye on your fingers because once the Safety ...

Page 22: ...opulation rules for Dual Channel mode 1 DIMM1 DIMM2 DIMM3 DIMM4 2 DIMM1 DIMM2 DIMM3 DIMM4 Important DDR2 memory modules are not interchangeable with DDR and the DDR2 standard is not backwards compatible You should always install DDR2 memory modules in the DDR2 DIMM slots In Dual Channel mode make sure that you install memory modules of the same type and density in different channel DIMM slots To e...

Page 23: ...ntil the golden finger on the memory module is deeply inserted in the DIMM slot The plastic clip at each side of the DIMM slot will automatically close when the memory module is properly seated Manually check if the memory module has been locked in place by the DIMM slot clips at the sides Important You can barely see the golden finger if the memory module is properly inserted in the DIMM slot Not...

Page 24: ...y along with pin 1 pin 13 refer to the image at the right hand 1 3 3 3 V 1 3 3 V 1 4 1 2 V 2 3 3 V 1 5 G r o u n d 3 G r o u n d 1 6 P S O N 4 5 V 1 7 G r o u n d 5 G r o u n d 1 8 G r o u n d 6 5 V 1 9 G r o u n d 7 G r o u n d 2 2 5 V 1 0 1 2 V 2 0 R e s 8 P W R O K 2 3 5 V 1 1 1 2 V 2 1 5 V 9 5 V S B 2 4 G r o u n d 1 2 3 3 V ATX 4 pin Power Connector PWR1 This power connector is used to provid...

Page 25: ...ted On 100 Mbits sec data rate is selected Orange On 1000 Mbits sec data rate is selected USB Ports The USB Universal Serial Bus port is for attaching USB devices such as keyboard mouse or other USB compatible devices Audio Ports These audio connectors are used for audio devices It is easy to differentiate between audio effects according to the color of audio jacks Line In Blue Line In is used for...

Page 26: ... f a sd dd f f as df dd dd dd df da sf da sa sd f as d as d as dd dd dd df as as df sd ff sd f ad f f f a sd f f f d f F l o p p y D M S I F l o p p y D M S I K dk l kd kf k kk f d kk l dd f k kk sd df dd f as dk a df d df dd ad df df dd dd df ad f ad kj as j d kd f d f a sd dd f f as df dd dd dd df da sf da sa sd f as d as d as dd dd dd df as as df sd ff sd f ad ff fa sd ff fd f F l o p p y D M S...

Page 27: ... do not fold the Serial ATA cable into 90 degree angle Otherwise data loss may occur during transmission Fan Power Connectors CPUFAN1 SYSFAN1 2 The fan power connectors support system cooling fan with 12V When connecting the wire to the connectors always note that the red wire is the positive and should be con nected to the 12V the black wire is Ground and should be connected to GND If the mainboa...

Page 28: ...G r o u n d 3 S u s p e n d L E D 5 P o w e r L E D 7 N o P i n 8 6 4 2 Buzzer Speaker JFP2 Front USB Connector JUSB1 3 This connector compliant with Intel I O Connectivity Design Guide is ideal for con necting high speed USB interface peripherals such as USB HDD digital cameras MP3 players printers modems and the like USB 2 0 Bracket optional 1 V C C 3 U S B D 1 0 U S B O C 5 U S B D 7 G r o u n ...

Page 29: ... the record 1 C I N T R U 2 G r o u n d Front Panel Audio Connector JAUD1 This connector allows you to connect the front panel audio and is compliant with Intel Front Panel I O Connectivity Design Guide 1 M I C L 3 M I C R 1 0 H e a d P h o n e D e t e c t i o n 5 H e a d P h o n e R 7 S E N S E _ S E N D 9 H e a d P h o n e L 8 N o P i n 6 M I C D e t e c t i o n 4 P R E S E N C E 2 G r o u n d S...

Page 30: ... I R Q 4 3 3 V P o w e r 2 3 V S t a n d b y p o w e r 1 L P C C l o c k 3 L P C R e s e t 5 L P C a d d r e s s d a t a p i n 0 7 L P C a d d r e s s d a t a p i n 1 9 L P C a d d r e s s d a t a p i n 2 1 1 L P C a d d r e s s d a t a p i n 3 1 3 L P C F r a m e S PDIF Out Connector JSPD1 This connector is used to connect S PDIF Sony Philips Digital Interconnect Format interface for digital audi...

Page 31: ...With the CMOS RAM the system can automati cally boot OS every time it is turned on If you want to clear the system configuration set the jumper to clear data Important You can clear CMOS by shorting 2 3 pin while the system is off Then return to 1 2 pin position Avoid clearing the CMOS while the system is on it will damage the main board JBAT1 Keep Data Clear Data 1 1 1 ...

Page 32: ...e sure that you unplug the power sup ply first Meanwhile read the documentation for the expansion card to configure any necessary hardware or software settings for the expansion card such as jumpers switches or BIOS configuration PCI Interrupt Request Routing The IRQ acronym of interrupt request line and pronounced I R Q are hardware lines over which devices can send interrupt signals to the micro...

Page 33: ...ows you to configure the system for op timum use You may need to run the Setup program when An error message appears on the screen during the system booting up and requests you to run SETUP You want to change the default settings for cus tomized features Chapter 3 BIOS Setup ...

Page 34: ...ms under each BIOS category described in this chapter are under continuous update for better system performance Therefore the description may be slightly dif ferent from the latest BIOS and should be held for reference only Upon boot up the 1st line appearing after the memory count is the BIOS version It is usually in the format A7511IMS V1 X 032509 where 1st digit refers to BIOS maker as A AMI W ...

Page 35: ...n use the arrow keys to select the item The on line description of the highlighted setup function is displayed at the bottom of the screen Sub Menu If you find a right pointer symbol as shown in the right view ap pears to the left of certain fields that means a sub menu can be launched from this field A sub menu contains additional options for a field parameter You can use arrow keys to highlight ...

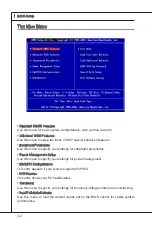
Page 36: ...ify your settings for integrated peripherals Power Management Setup Use this menu to specify your settings for power management PNP PCI Configurations This entry appears if your system supports PnP PCI H W Monitor This entry shows your PC health status Cell Menu Use this menu to specify your settings for frequency voltage control and overclocking Load Fail Safe Defaults Use this menu to load the d...

Page 37: ...efault values set by the mainboard manufacturer specifically for optimal performance of the mainboard BIOS Setting Password Use this menu to set the password for BIOS Save Exit Setup Save changes to CMOS and exit setup Exit Without Saving Abandon all changes and exit setup ...

Page 38: ...t you want usually the current date The format is day month date year day Day of the week from Sun to Sat determined by BIOS Read only month The month from Jan through Dec date The date from 1 to 31 can be keyed by numeric function keys year The year can be adjusted by users Time HH MM SS This allows you to set the system time that you want usually the current time The time format is hour minute s...

Page 39: ...nitoring Analysis Reporting Technology capability for the hard disks S M A R T is a utility that monitors your disk status to predict hard disk failure This gives you an opportunity to move data from a hard disk that is going to fail to a safe place before the hard disk becomes offline Important IDE Primary Master Slave SATA1 4 are appearing when you connect the HD de vices to the IDE SATA connect...

Page 40: ...the system to boot within 10 seconds since it will skip some check items Boot Up Num Lock LED This setting is to set the Num Lock status when the system is powered on Setting to On will turn on the Num Lock key when the system is powered on Setting to Off will allow users to use the arrow keys on the numeric keypad IOAPIC Function This field is used to enable or disable the APIC Advanced Programma...

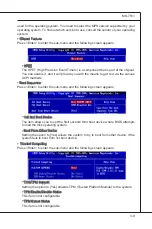
Page 41: ...I methods Boot Sequence Press Enter to enter the sub menu and the following screen appears 1st 2nd Boot Device The item allows you to set the first second third boot device where BIOS attempts to load the disk operating system Boot From Other Device Setting the option to Yes allows the system to try to boot from other device if the system fails to boot from 1st boot device Trusted Computing Press ...

Page 42: ...ROM This item is used to decide whether to invoke the Boot ROM of the LAN controller HD Audio Controller This setting is used to enable disable the onboard audio controller On Chip ATA Devices Press Enter to enter the sub menu and the following screen appears On Chip IDE Controller The integrated peripheral controller contains a IDE interface with support for two IDE channels Select Enabled to act...

Page 43: ... dard ECP and EPP features It has the following options Disabled 3BC Line Printer port 0 278 Line Printer port 2 378 Line Printer port 1 Parallel Port Mode Normal Standard Parallel Port EPP Enhanced Parallel Port ECP Extended Capability Port ECP EPP Extended Capability Port Enhanced Parallel Port Bi Directional To operate the onboard parallel port as Standard Parallel Port only choose Nor mal To o...

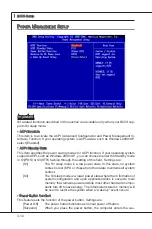
Page 44: ...POS or S3 STR fashion through the setting of this field Settings are S1 The S1 sleep mode is a low power state In this state no system context is lost CPU or chipset and hardware maintains all system context S3 The S3 sleep mode is a lower power state where the in formation of system configuration and open applications files is saved to main memory that remains powered while most other hardware co...

Page 45: ...e PS 2 keyboard is detected Resume From S3 By PS 2 Mouse This setting determines whether the system will be awakened from what power sav ing modes when input signal of the PS 2 mouse is detected Resume By PCI Device PME When set to Enabled the feature allows your system to be awakened from the power saving modes through any event on PME Power Management Event Resume By PCI E Device When set to Ena...

Page 46: ...ur primary graphics adapter PCI Latency Timer This item controls how long each PCI device can hold the bus before another takes over When set to higher values every PCI device can conduct transactions for a longer time and thus improve the effective PCI bandwidth For better PCI performance you should set the item to higher values PCI Slot 1 2 3 IRQ This setting specifies IRQ for PCI devices IRQ Re...

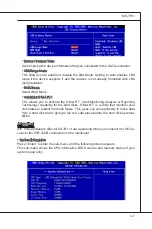
Page 47: ... depending on the current temperature to keep it with in a specific range You can enable a fan target value here If the current CPU fan temperature reaches to the target value the smart fan function will be activated It provides several sections to speed up for cooling down automatically CPU Min FAN speed This item allows users to select how percentage of minimum speed limit for the CPU fan PC Hea...

Page 48: ...ms it will speed up CPU automatically to make the program run smoothly and faster When the CPU is temporarily suspending or staying in the low load balance it will restore the default settings instead Usually the Dynamic Overclocking Technology will be powered only when users PC need to run huge amount of data like 3D games or the video process and the CPU frequency need to be boosted up to enhanc...

Page 49: ... n Quiet technology can effectively and dynamically lower CPU speed and power consumption Important To ensure that Cool n Quiet function is activated and will be working properly it is required to double confirm that Run BIOS Setup and select Cell Menu Under Cell Menu find AMD Cool n Quiet and set this item to Enabled Enter Windows and select Start Settings Con trol Panel Power Options Enter Power...

Page 50: ...RAM may fail to retain data This item applies only when synchronous DRAM is installed in the system tRTP When the DRAM Timing Mode sets to DCT 0 DCT1 or Both the field is adjust able Time interval between a read and a precharge command Min RAS Active Time TRAS When the DRAM Timing Mode sets to DCT 0 DCT1 or Both this field is adjust able This setting determines the time RAS takes to read from and ...

Page 51: ...e HT width from CPU to chipset Auto Disable DIMM PCI Frequency When set to Enabled the system will remove turn off clocks from empty DRAM PCI slots to minimize the electromagnetic interference EMI CPU Voltage This item allows you to increase the CPU voltage Memory Voltage Adjusting the memory voltage can increase the memory speed NB Voltage Adjust the North Bridge chipset voltage VTT FSB Voltage A...

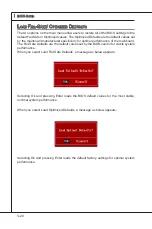
Page 52: ... for optimal performance of the mainboard The Fail Safe Defaults are the default values set by the BIOS vendor for stable system performance When you select Load Fail Safe Defaults a message as below appears Selecting Ok and pressing Enter loads the BIOS default values for the most stable minimal system performance When you select Load Optimized Defaults a message as below appears Selecting Ok and...

Page 53: ... and press Enter You may also press Esc to abort the selection and not enter a password To clear a set password just press Enter when you are prompted to enter the pass word A message will show up confirming the password will be disabled Once the password is disabled the system will boot and you can enter Setup without entering any password When a password has been set you will be prompted to ente...

Page 54: ......

Page 55: ... provides 10 channel DAC that simul taneously supports 7 1 sound playback and 2 channels of independent stereo sound output multiple streaming through the Front Out Left and Front Out Right chan nels Appendix A Realtek Audio ...

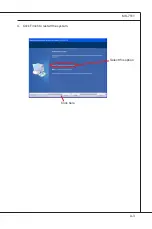
Page 56: ...driver The following illustrations are based on Windows XP environment and could look slightly different if you install the drivers in different operating systems Insert the application CD into the CD ROM drive The setup screen will automati cally appear Click Realtek HD Audio Drivers button 1 2 Important The HD Audio Configuration software utility is under continuous update to enhance au dio appl...

Page 57: ...A 3 MS 7511 Click Finish to restart the system 4 Click here Select this option Click here ...

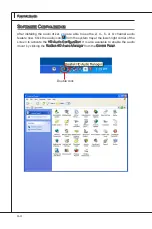
Page 58: ... use the 2 4 6 or 8 channel audio feature now Click the audio icon from the system tray at the lower right corner of the screen to activate the HD Audio Configuration It is also available to enable the audio driver by clicking the Realtek HD Audio Manager from the Control Panel Double click ...

Page 59: ...idor Bathroom Sewer pipe Arena and Auditorium for quick enjoyment You may choose the provided sound effects and the equalizer will adjust automatically If you like you may also load an equalizer setting or make an new equalizer setting to save as an new one by using the Load EQ Setting and Save Preset button click Reset EQ Setting button to use the default value or click Delete EQ Setting button t...

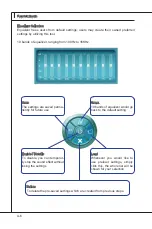
Page 60: ...The settings are saved perma nently for future use Load Whenever you would like to use preload settings simply click this the whole list will be shown for your selection Enable Disable To disable you can temporar ily stop the sound effect without losing the settings Reset 10 bands of equalizer would go back to the default setting Delete To delete the pre saved settings which are created from previ...

Page 61: ...w in Others you will find more optimized settings available to you Karaoke Mode Karaoke mode brings Karaoke fun back home Simply using the music you usually play Karaoke mode can help you eliminate the vocal of the song or adjust the key to accom modate your range Vocal Cancellation Single click on Voice Cancellation the vocal of the song would be eliminated while the background music is still in ...

Page 62: ...fter you pluging the speakers into the jacks on the front panel Multi Stream Function Realtek audio supports an outstanding feature called Multi Stream which means you may play different audio sources simultaneously and let them output respectively from the indicated real panel or front panel This feature is very helpful when 2 people are using the same computer together for different purposes Cli...

Page 63: ...m the rear panel which is the default setting Then you must to select the Realtek HD Audio 2nd output from the scroll list first and use a different program to play the second audio source for example use Winamp to play MP3 files You will find that the second audio source MP3 music will come out from the Line Out audio jack of Front Panel ...

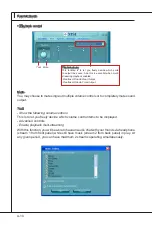
Page 64: ... single or multiple volume controls or to completely mute sound output Tool Show the following volume controls This is to let you freely decide which volume control items to be displayed Advanced controls Enable playback multi streaming With this function you will be able to have an audio chat with your friends via headphone stream 1 from front panel while still have music stream 2 from back panel...

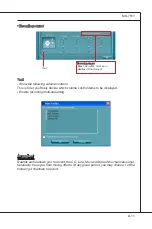
Page 65: ... volume controls This is to let you freely decide which volume control items to be displayed Enable recording multi streaming Important Realtek audio allows you to record the CD Line Mic and Stereo Mix channels simul taneously frees you from mixing efforts At any given period you may choose 1 of the following 4 channels to record ...

Page 66: ...eaker for 5 1 Speaker Output 8CH Speaker for 7 1 Speaker Output Speaker Configuration Plug the speakers in the corresponding jack Dialogue connected device will pop up for your selection Please select the device you have plugged in If the device is being plugged into the correct jack you will be able to find the icon beside the jack changed to the one that is same as your device If not correct Rea...

Page 67: ...front panel Please check if front jacks on your system are so called AC 97 jacks If so please check this item to disable front panel jack detection Mute rear panel output when front headphone plugged in Enable auto popup dialogue when device has been plugged in Once this item checked the dialog Connected device would automatically pop up when device plugged in ...

Page 68: ...the signal from degrading when it is converted to analog Output Sampling Rate 44 1KHz This is recommend while playing CD 48KHz This is recommended while playing DVD or Dolby 96KHz This is recommended while playing DVD Audio 192KHz This is recommended while playing High quality Audio Output Source Output digital audio source The digital audio format such as wav mp3 midi etc will come out through S ...

Page 69: ...d make testing sound If any speaker fails to make sound then check whether the cable is inserted firmly to the connector or replace the bad speakers with good ones Or you may click the auto test button to test the sounds of each speaker automatically Center Front Right Side Right Subwoofer Rear Right Front Left Side Left Rear Left ...

Page 70: ...om being recorded by micro phone together with your sound For example you might have chance to use VOIP function through Internet with your friends The voice of your friend will come out from speakers playback However the voice of your friend might also be recorded into your microphone then go back to your friend through Internet In that case your friend will hear his her own voice again With AEC ...

Page 71: ...7511 3D Audio Demo In this tab you may adjust your 3D positional audio before playing 3D audio applications like gaming You may also select different environment to choose the most suitable environment you like ...

Page 72: ...Audio Controller Audio Codec You may also select the language of this utility by choosing from the Language list Also there is a selection Show icon in system tray Switch it on and an icon will show in the system tray Right click on the icon and the Audio Accessories dialogue box will appear which provides several multimedia features for you to take advantage of ...

Page 73: ...annel Audio Function mode properly in the software utility connect your speakers to the correct phone jacks in accordance with the setting in software utility 2 Channel Mode for Stereo Speaker Output Line In Line Out Front channels MIC No function No function No function 1 2 3 4 5 6 ...

Page 74: ...A 20 Realtek Audio 4 Channel Mode for Stereo Speaker Output Line In Line Out Front channels MIC Line Out Rear channels No function No function 1 2 3 4 5 6 ...

Page 75: ...A 21 MS 7511 6 Channel Mode for Stereo Speaker Output Line In Line Out Front channels MIC Line Out Rear channels Line Out Center and Subwoofer channel No function 1 2 3 4 5 6 ...

Page 76: ...hannels MIC Line Out Rear channels Line Out Center and Subwoofer channel Line Out Side channels Important To enable 7 1 channel audio out function on Vista operating system you have to install the Realtek Audio Driver Or the mainboard will support 5 1 channel audio out only 1 2 3 4 5 6 ...

Page 77: ...ng businesses to the common PC desktop This technology uses multiple drives to either increase total disk space or to offer data protection For all levels RAID tech niques optimize storage solutions by using multiple disks grouped together and treating them as a single storage resource Appendix B NVIDIA RAID ...

Page 78: ...ce RAID 0 Non critical data requiring high per formance High data through put No fault tolerance multiple None RAID 1 Small databases or any other small capacity environ ment requiring fault tolerance 100 data redun dancy Requires 2 drives for the storage space of 1 drive 2 Yes RAID 0 1 Critical data requir ing high perfor mance Optimized for both 100 data redun dancy and perfor mance Allow spare ...

Page 79: ...desired RAID array 3 Boot from the Windows CD use the floppy disk that has the RAID driver to copy and install the nForce RAID software Check p B 7 for details 4 Initialize the NVRAID Array Disks Setting Up the NVRAID BIOS Be sure to enable the RAID function in BIOS before configuring the NVRAID BIOS After that press F10 to save the configuration and exit The PC will reboot right away Then enter t...

Page 80: ...er that the port is associated with The 2nd digit defines the channel Adapter 0 1 Channel In the example above 1 0 means the hard drive is attached to Adapter 0 Channel 1 The following is a list of all possible combinations Serial ATA 0 0 Adapter 0 Channel 0 SATA1 0 1 Adapter 0 Channel 1 SATA2 0 2 Adapter 0 Channel 3 SATA3 0 3 Adapter 0 Channel 4 SATA4 There is no such thing as Slave drive in Seri...

Page 81: ... which is 32KB but the values can be between 4 KB and 128 KB Assigning the Disks The disks that you enabled from the RAID Config BIOS setup page appear in the Free Disks block These are the drives that are available for use as RAID array disks To designate a free disk to be used as a RAID array disk Tab to the Free Disks section The first disk in the list is selected Move it from the Free Disks bl...

Page 82: ...t up 2 Use the arrow keys to select the array that you want to set up then press Enter The Array Detail window appears 3 If you want to mark this disk as empty and wipe out all its contents then press C At the prompt press Y to wipe out all the data otherwise press N Press Enter again to go back to the previous window and then press Ctrl X to exit the RAID setup Now that the RAID setup has been co...

Page 83: ...ontaining the NVIDIA RAID driver into the A drive and then press ENTER 1 2 3 You should be shown a list of available NVRAID Adapaters Select the NVIDIA RAID Driver and press ENTER Press S again at the Specify Devices screen then press ENTER Select NVIDIA NForce Storage Controller and then press ENTER Press Enter to continue with Windows XP Installation Be sure to leave the floppy disk inserted in ...

Page 84: ...ction describes how to run the setup application and install the RAID software which will upgrade the Windows SATA driver and install the RAID software Start the NVIDIA nForce Drivers installation program to open the NVIDIA Windows nForce Drivers page 1 Select the NVIDIA MediaShield Click Next and then follow the instructions After the installation is completed be sure to reboot the PC After the r...

Page 85: ...Control Panel then open the Administrative Tools folder and double click on Computer Manage ment Click Disk Management under the Storage section The Initialize and Convert Disk Wizards appears 1 2 Click Next The Select Disks to Initialize window appears The disks listed depend on how many arrays you have configured 3 Click Next The Select Disks to Convert window appears 4 ...

Page 86: ...ish The Computer Management window appears 6 The actual disks listed will depend on your system and the unallocated partition is the total combined storage of two hard disks You must format the unallocated disk space in order to use it Format the unallocated disk space Right click Unallocated space select New Partition and follow the wizard After the drive has been formatted it is ready for use 7 ...

Page 87: ...sing the NVMediaShield Software Accessing the Storage Page To access the NVIDIA Control Panel Storage page Click Star Programs NVIDIA Corporation NVIDIA Control Panel Storage 1 The NVIDIA Control Panel Storage page appears 2 ...

Page 88: ... an Array About Rebuilding Rebuilding is the process of restoring data to a hard drive from other drives in the array For example if you have a three disk RAID 5 array and one of the drives fails you will need to replace the failed drive with a new one and rebuild the array to re generate the lost data on the newly added drive Rebuilding applies only to fault tolerant arrays such as RAID 1 RAID 0 ...

Page 89: ...r ray The dedicated disk is used by that array only when needed for example during a sys tem crash where a RAID mirrored drive is broken The dedicated disk can be used only by the array that it is assigned to and not by any other array unlike a free disk which can be used by any available RAID 1 RAID 0 1 or RAID 5 array To mark a disk as dedicated reserve it for use by a specific array you must ha...

Page 90: ...ID array type to another General Migrating Requirements The new array capacity must be equal to or greater than the previous array For example it is possible to migrate from a RAID 1 array to a RAID 0 array as long as the RAID 0 array is the same size as or larger than the RAID 1 array The number of disks in the new array cannot be less than the number of disks in the original array You cannot mig...

Page 91: ...mber of RAID 0 disks RAID 5 m n 1 RAID 1 RAID 0 No additional restrictions RAID 1 Not a valid combination RAID 0 1 No additional restrictions RAID 5 m 3 RAID 0 1 RAID 0 m n2 Number of RAID 0 disks must be equal to or greater than half the number of RAID 0 1 disks RAID 1 Not a valid combination RAID 0 1 Not a valid combination RAID 5 m n 2 1 RAID 5 RAID 0 m n 1 RAID 1 Not a valid combination RAID 0...

Page 92: ...ray and Migrate Array Wizard from the list of links in the Related tasks section of the side menu Instructions Click View Storage Configuration to open the associated page The View Storage Configuration page provides the following information Name Indicates the RAID array type and drive model information Status Indicates the process state of the array For example Healthy Rebuilding Initializing Sy...

Page 93: ...card in win dows such as CPU GPU clock voltage fan speed and temperature Before you install the Dual CoreCenter please make sure the system has meet the following requirements Intel Pentium4 Celeron AMD Athlon XP Sempron or compatible CPU with PCI Express slot 256MB system memory CD ROM drive for software installation Operation system Windows XP Net Frame Work 2 0 1 2 3 4 5 Appendix C Dual Core Ce...

Page 94: ...h Utility MSI Utility Dual Core Center it will have an icon in the system tray a short cut icon on the desktop and a short cut path in your Start up menu You may double click on each icon to enable Dual Core short cut icon in the system tray short cut path in the start up menu Path Start Programs MSI DualCoreCenter DualCoreCenter Important Dual Core Center is for reference only ...

Page 95: ...and only hardware status of the MSI mainboard would be available Introduction Click each button appearing above to enter sub menu to make further configuration or to execute the function MB Click MB button to read current CPU temperature FSB and CPU clock of mainboard will show below VGA Click VGA button to read current GPU temperature GPU clock and memory clock of graphics card will show below DO...

Page 96: ...Smooth mode Clock In this sub menu you can adjust and monitor the clocks of MB and graphics card Voltage In this sub menu you can adjust and monitor the voltages of MB and graphics card FAN Speed In this sub menu you can adjust and monitor the fan speeds of MB and graphics card Temperature In this sub menu you can monitor the temperatures of MB and graphics card User Profile In this sub menu you c...

Page 97: ...will restore the default settings instead Usually the Dynamic Overclocking Technology will be powered only when users PC runs huge amount of data like 3D games or video process and the motherboard graphicd card need to be boosted up to enhance the overall performance There will be several selections when you click the DOT rate button include increase rate and decrease rate buttons to select the DO...

Page 98: ...increase the clock or click the minus sign button to decrease the clock And finally click the Apply button to apply the values adjusted If you do not want to apply the ad justments click the Cancel button to cancel Or click the Default button to restore the default values On the underside it shows the graphs of the clocks Only the curves of the item which the button is lit up with red color will b...

Page 99: ...e or click the minus sign button to decrease And finally click the Apply button to apply the adjustments If you do not want to apply the adjustments click the Cancel button to cancel Or click the Default button to restore the default values On the underside it shows the graphs of the voltages Only the curves of the item which the button is lit up with red color will be shown Important In the user ...

Page 100: ...o a section or click the minus sign button to decrease Or click the Default button to restore the default values On the underside it shows the graphs of the fan speed Only the curves of the item which the button is lit up with red color will be shown Important When you set the fan speed manually please make sure to disabled the CPU Smart FAN Target item in the BIOS In the user profile clicking the...

Page 101: ...ature In the Temperature sub menu you can see temperature status of your system On the underside it shows the graphs of the temperatures Only the curves of the item which the button is lit up with red color will be shown ...

Page 102: ...nu click the setting button that besides the user profile bar and the next screen will appear Here you can define the clock fan speed voltage by your need click the but ton to choose a value quickly or click the plus minus sign button to increase decrease the value ...

Page 103: ...w bar to set the minimal fan speed When the fan speed is lower than the threshold you defined the system will pop up a warning message After setting all values you need you can change the user profile name in the box then click the save button to save all changes in a profile Finally you can choose the user profile by click the button in the left side and click the Apply button to load the user pr...

Page 104: ......

Reviews: