ASSEMBLY OF THE UNIT
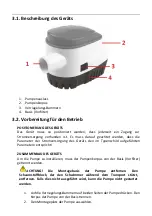
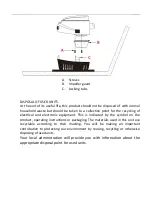
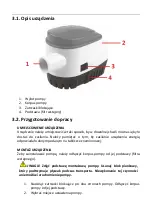
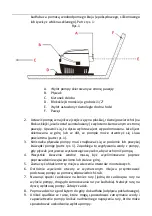
To install the pump, disconnect the pump body from its base (prefilter).
CAUTION!
Remove the mounting base of the pump. Remove the foam
block that supports the float during transport. Failure to do so will prevent the
pump from starting.
1.
Press the locking tabs on both sides of the pump. Disconnect the pump
body from the pump base.
2.
Select a location to set the pump.
If only one pump is used, it is usually placed where the water in the bilge is
deepest when the boat is at rest. The installation must allow for complete
draining of the hose.
CAUTION! The base (pre-filter) must always be properly installed before
connecting and starting the pump.
CAUTION! Disconnecting the base (filter) while the pump is running is
prohibited.
CAUTION!
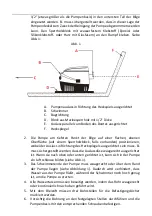
Position the pump base so that the pump discharge nozzle is in
the correct position.
A.
When attaching the pump base to wood, attach it with suitable
stainless steel self-tapping screws.
B.
When attaching the pump base to metal or fiberglass, install the
wooden block first and then attach the pump base to the wooden
block.
3.
Install the pump on the base so that both locks snap into place.
4.
Connect 3/4"/1-1/8 "inside diameter pipe to the discharge nozzle and
secure it with a stainless steel clamp. The use of standard tubing is
recommended as it will not be twisted by sudden bending.
CAUTION! Reducing the flow from the pump by using a smaller hose will
not damage the pump. It will, however, cause a reduction in flow.
5.
To prevent electrolysis and corrosion of hose connections, be sure to seal
all hose ends and terminals with a heavy-duty marine grade sealant and
place them above the highest possible water level.
6.
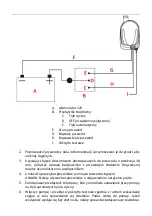
Use 18 AWG wire when installing the pump. Using too small a wire will
cause unwanted heating of the wires and result in voltage drop and poorer
pump performance.
7.
To protect the electrical wires and circuit breaker from possible overload,
install a fuse on the positive (+) lead of the battery. Verify that the fuse
installed is the proper size.
ADDITIONAL INFORMATION:
Summary of Contents for MSW-M-ABP-1100
Page 15: ......

