11.
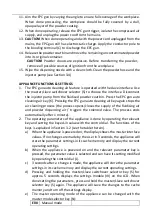
Aim the EPC gun by varying the angle to ensure full coverage of the workpiece.
When done processing, the workpiece should be fully covered by a dull,
opaque layer of the powder coating.
12.
When done operating, release the EPC gun trigger, isolate the compressed air
supply, and unplug the power cord from the mains.
13.
CAUTION!
When done operating and with the power cord unplugged from the
mains, the EPC gun still has electrostatic charge. Apply the conductor pole to
the bonding terminal (C) to discharge the EPC gun.
14.
Release the powder coat bin and move the remaining uncontaminated powder
into its original container.
CAUTION!
Powder clouds are explosive. Before transferring the powder,
remove all possible sources of ignition from the workplace.
15.
Wipe the dispersing nozzle with a clean cloth. Clean the powder hose and the
injector pump (see Section 3.4)
APPLIANCE FUNCTIONS & SETTINGS
1.
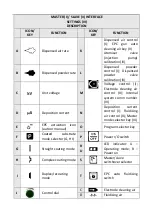
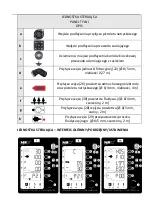
The EPC gun auto cleaning air feature is operated with the slave interface. Use
the master/slave switchover selector (S) to choose the interface. Disconnect
the injector pump from the fluidised powder coat bin. Press the EPC gun auto
cleaning air key (K). Pressing the EPC gun auto cleaning air key again stops the
air cleaning process (the process opens/closes the supply of the fluidising air
and powder dispensing air / triggers the solenoid valve. The process ends
automatically after 1 minute).
2.
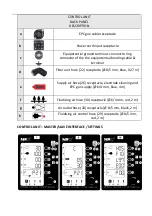
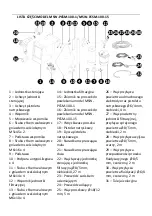
The operating parameters of the appliance is done by operating the relevant
key and setting the keyed-in value with the control dial. The functions of the
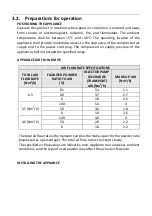
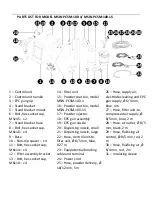
keys is explained in Section 3.2 (see the table therein).
a)
When the appliance is powered on, the display shows the master interface
values. If no changes are made by the user in 3 seconds, the appliance will
store the parameter settings in its cache memory and display the current
operating settings.
b)
When the appliance is powered on and the relevant parameter key is
pressed, the parameter value is selected and can have its setting modified
by operating the control dial (J).
c)
3 seconds after a change is made, the appliance will store the parameter
settings in its cache memory and display the current operating settings.
d)
Pressing and holding the master/slave switchover selector key (S) for
approx. 5 seconds displays the settings module (III) on the LCD. When
done setting the parameters, press and hold the master/slave switchover
selector key (S) again. The appliance will save the changes to the cache
memory and turn off the settings display.
e)
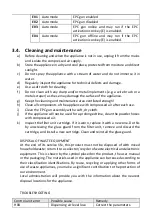
The master operating mode of the appliance can be changed with the
master mode selector key (N):
E00
Manual mode
Summary of Contents for MSW-PCSM-100-1
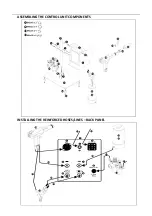
Page 31: ...ASSEMBLING THE CONTROL UNIT COMPONENTS INSTALLING THE REINFORCED HOSES LINES BACK PANEL ...
Page 49: ...MONTAŻ ELEMENTÓW JEDNOSTKI STERUJĄCEJ INSTALACJA WĘŻY ZBROJONYCH PRZEWODÓW PANEL TYLNI ...
Page 68: ...MONTÁŽ PRVKŮ ŘÍDICÍ JEDNOTKY INSTALACE HADIC VODIČŮ ZADNÍ PANEL ...
Page 76: ......
Page 144: ...VEZÉRLŐEGYSÉG ELEMEINEK ÖSSZESZERELÉSE MEGERŐSÍTETT TÖMLŐ VEZETÉK TELEPÍTÉSE HÁTSÓ PANEL ...
Page 152: ......
Page 162: ...MONTERING AF STYREENHEDENS KOMPONENTER MONTERING AF SLANGER LEDNINGER BAGPANEL ...
Page 170: ......

