8
s
ectiOn
3 — a
sseMbly
& s
et
-u
p
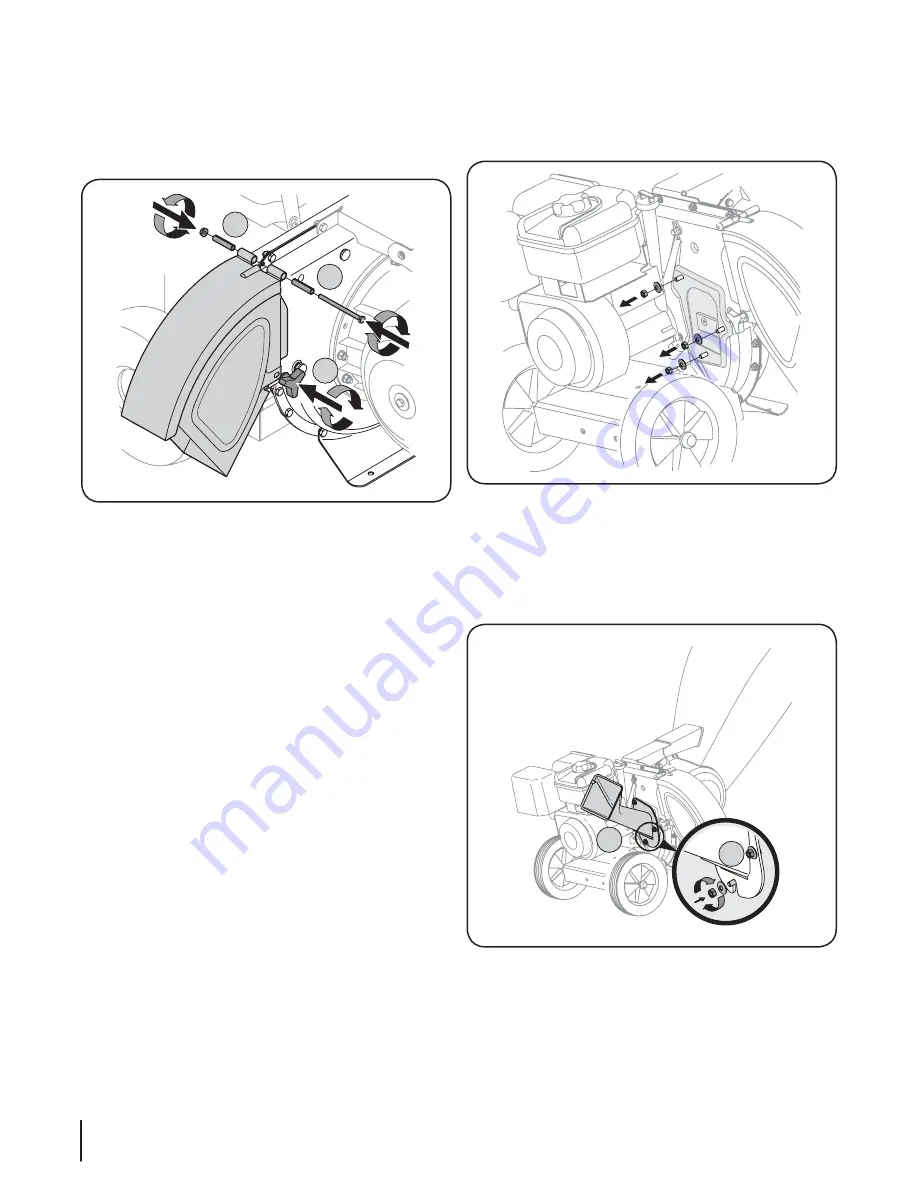
Chipper Chute
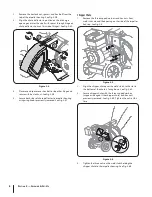
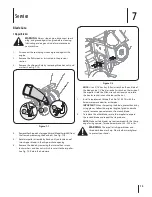
Remove the three cupped washers and hex nuts from
1.
weld studs around the opening on the side of the impeller
housing. See Fig. 3-5.
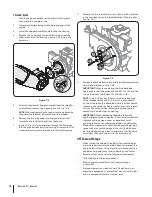
Align the chipper chute over the weld studs, so the slot in
2.
the bottom of the chute is facing down. See Fig. 3-6A.
Secure chipper chute with the three cupped washers
3.
(cupped side against the chipper chute) and hex nuts
previously removed. See Fig. 3-6B. Tighten the nuts at this
time.
Tighten the three nuts on the weld studs holding the
4.
chipper chute to the impeller housing. See Fig. 3-6B.
B
A
Remove the hex lock nut, spacers, and hex bolt from the
2.
top of the impeller housing. See Fig. 3-3B.
Align the chute deflector in position on the discharge
3.
opening and insert hex bolt with spacer through hinge on
chute deflector (spacers fit inside of hinges). See Fig. 3-4A.
Place second spacer over hex bolt inside other hinge and
4.
secure with hex lock nut. See Fig. 3-4B.
Secure both sides of chute deflector to impeller housing
5.
using wing knobs previously removed. See Fig. 3-4C.
Figure 3-5
Figure 3-6
Figure 3-4
A
B
C
Summary of Contents for 24A-45M3000
Page 19: ...Notes 10 19...


